Prerequisites:
| Node | OS | IP |
| k8s-master | CentOS7 | 192.168.137.161 |
| k8s-node1 | CentOS7 | 192.168.137.162 |
We now have Docker running on both master and node1, it's time to provision Kubernetes on them. There are 3 ways to provision Kubenetes cluster: binary installation, kubeadm initialization, and minikube. We go with kubeadm.
Provision Kubernetes:
-
Installing kubeadm, kubelet and kubectl (On both master and node)
kubeadm: the command to bootstrap the cluster.
kubelet: the component that runs on all of the machines in your cluster and does things like starting pods and containers.
kubectl: the command line util to talk to your cluster.
Execute below command to get those 3 tools installed (We install the latest version of k8s, just as we did to install latest Docker):yum install -y kubelet kubeadm kubectl

- Start kubelet and set as auto launch (On both master and node)
systemctl enable kubelet && systemctl start kubelet
You have now successfully installed Kubenetes with it's basic tools and packages
- Deploy Kubernetes Master Node
Run below command on Master terminal:
kubeadm init
--apiserver-advertise-address=192.168.137.161
--image-repository registry.aliyuncs.com/google_containers
--kubernetes-version v1.21.0
--service-cidr=10.1.0.0/16
--pod-network-cidr=10.244.0.0/16
Note: you can find Kubernetes versions on official site https://kubernetes.io/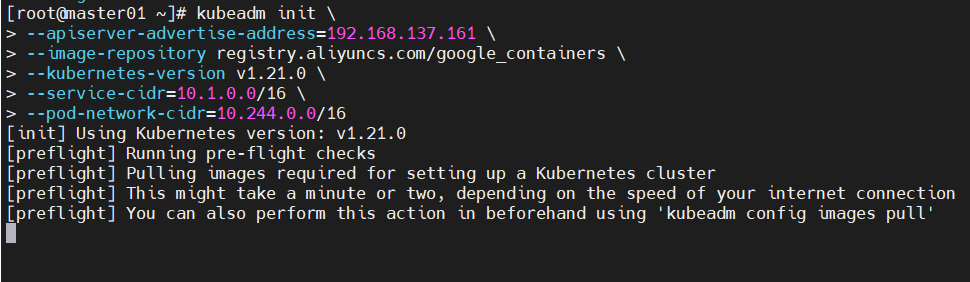
If you facing below issue to pull coredns, then you need to pull coredns manually: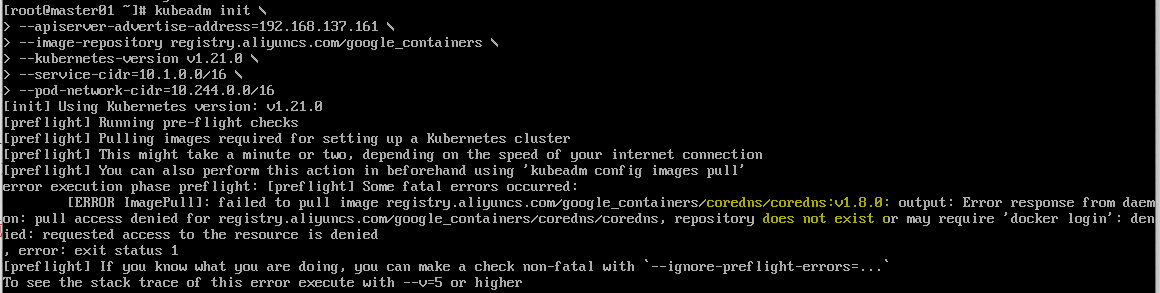
Manually pull coredns:v1.8.0 (Since we install the latest version of K8S which has dependancy on coredns:v1.8.0 and Aliyun don't have it):
docker pull coredns/coredns:1.8.0
docker tag coredns/coredns:1.8.0 registry.aliyuncs.com/google_containers/coredns/coredns:v1.8.0
docker rmi -f coredns/coredns:1.8.0
And then run the previous kubeadm init command again, waiting the cluster initialize to complete:
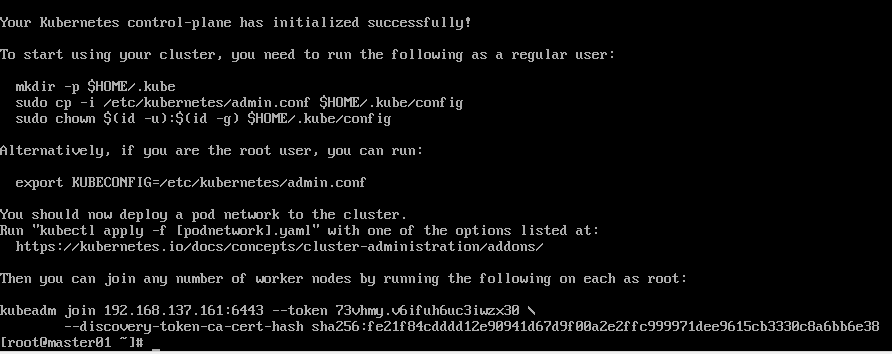
- Start cluster
By following above console output, run below command to start our k8s cluster:
[root@master01 ~]# mkdir -p $HOME/.kube
[root@master01 ~]# sudo cp -i /etc/kubernetes/admin.conf $HOME/.kube/config
[root@master01 ~]# sudo chown $(id -u):$(id -g) $HOME/.kube/config
[root@master01 ~]# kubectl get nodes
You will find the working node we have is just the master node, and it's showing status NotReady:

- We have now running the master node, next let's introduce k8s network, to make our cluster READY, and adding node into it !