- Environment preparation
Get ready with 2 CentOS virtual machine, and configure the network to able connect internet and internal communication.
Please reference to below posts for VM provision and configuration with Hyper-V on Windows 10
1 - Enable and launch Hyper-V
2 - Provision Virtual machine with Hyper-V
3 - Install CentOS with Virtual Machine
4 - Configure network connectivity for Virtual machine
One more step before we go further, need to configure these two node to recognize each other, execute below command for both nodes:
[root@shell-master ~]# cat >> /etc/hosts << _EOF_
> 192.168.137.163 shell-master
> 192.168.137.164 shell-node1
> _EOF_
Once done Virtual machine setup, we'll have below CentOS machine ready to go:
Node System Comments shell-master CentOS 7 Managing maching, will install Ansible here to manage other machines shell-node1 CentOS 7 Managed maching, will be managed by shell-master 
Note: For the whole practice post, we will be using root user for all the activities/operations. - epel yum repository installation
Since Ansible is belong to epel (Extra Packages for Enterprise Linux ) repository, so we need to have epel repo first, otherwise CentOS won't find the package for installation.
Running below command to get epel repo, once done the installation, you will find the epel repo configure file been introduced to the system:
yum install epel-release -y
yum repolist

ls /etc/yum.repos.d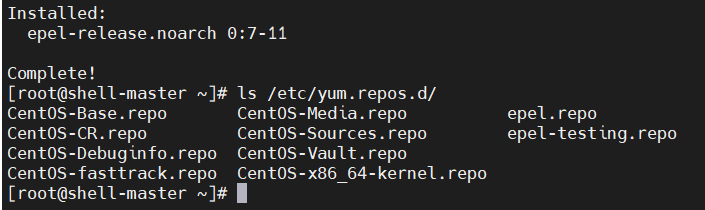
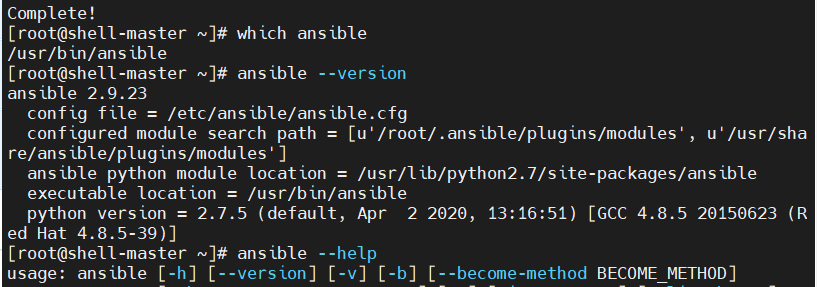
- Ansible will be installed only for managing node shell-master. running below command on shell-master node:
yum install ansible -y
If everything goes well, you will get Ansible installed successfully, congratulations !
-
Setup Authentication between master and node
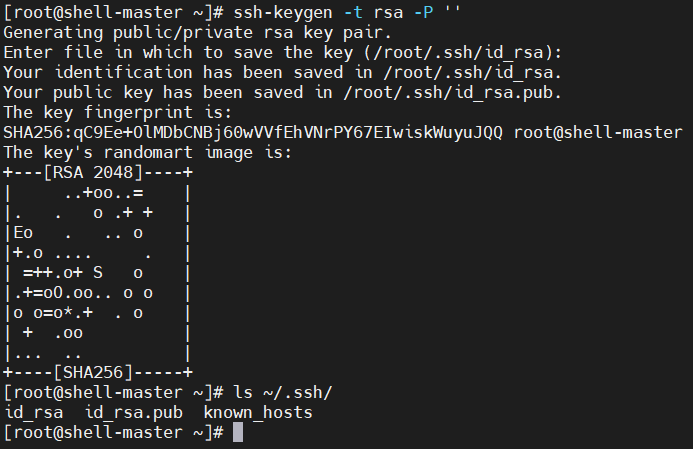
Ansible manage nodes via SSH, it's not required to install any agent to managed node. However we need to setup Authentication from master to node, to enable SSH authorization.
Run below command to generate RSA key pairs (Private and Public key) from shell-master:ssh-keygen -t rsa -P ''
- Publish RSA public key to managed node
Now we can publish the authenticate public key to our managed node shell-node1, by running below command from shell-master:
ssh-copy-id -i ~/.ssh/id_rsa.pub shell-node1

Now we've published the authenticated key to shell-node1, you can try login into shell-node1 from shell-master by running below command, you will find there is a file authorized_keys introduced on shell-node1:

- Alright, all good to GO now, we've master and node connected, they able to do the communicate !
Next let's play with Ansible