创建一个Android Studio普通项目
导入module
选择 File → New → Import Module
选择解压好的opencv-android-sdk下的sdk下的java,点OK
然后选择 Next , Finish
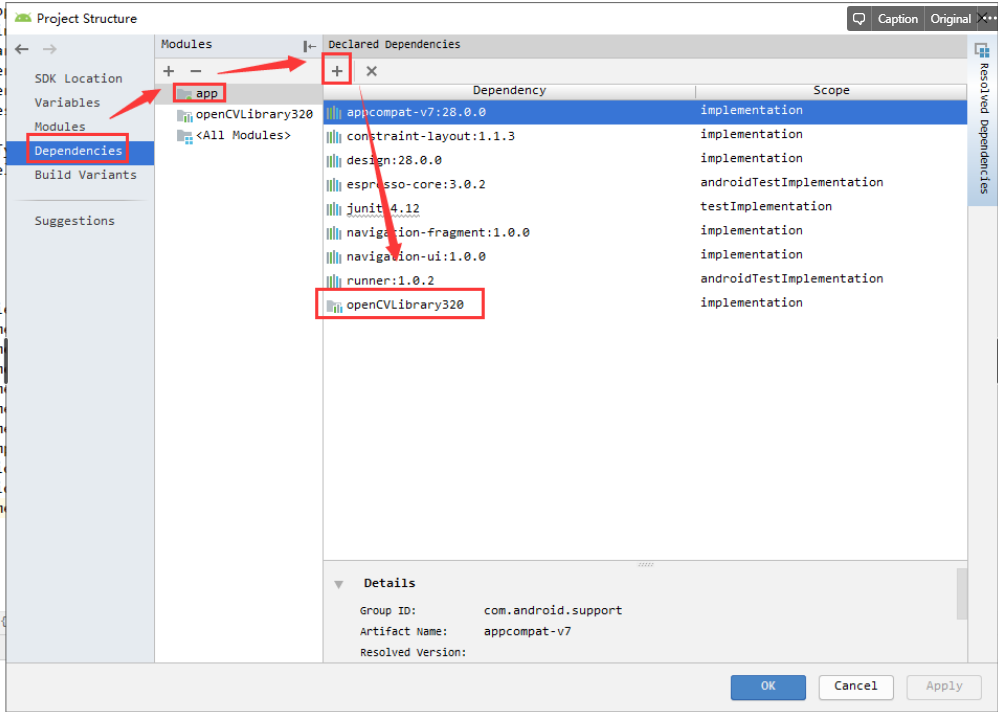
依赖Module
依照下面步骤添加module依赖
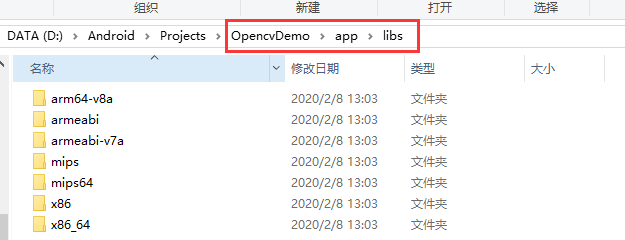
添加JNI依赖库
在app的main下面创建一个jniLibs文件夹,将sdk的native下的libs下的东西全部拷贝进去
或者放到app下的libs里
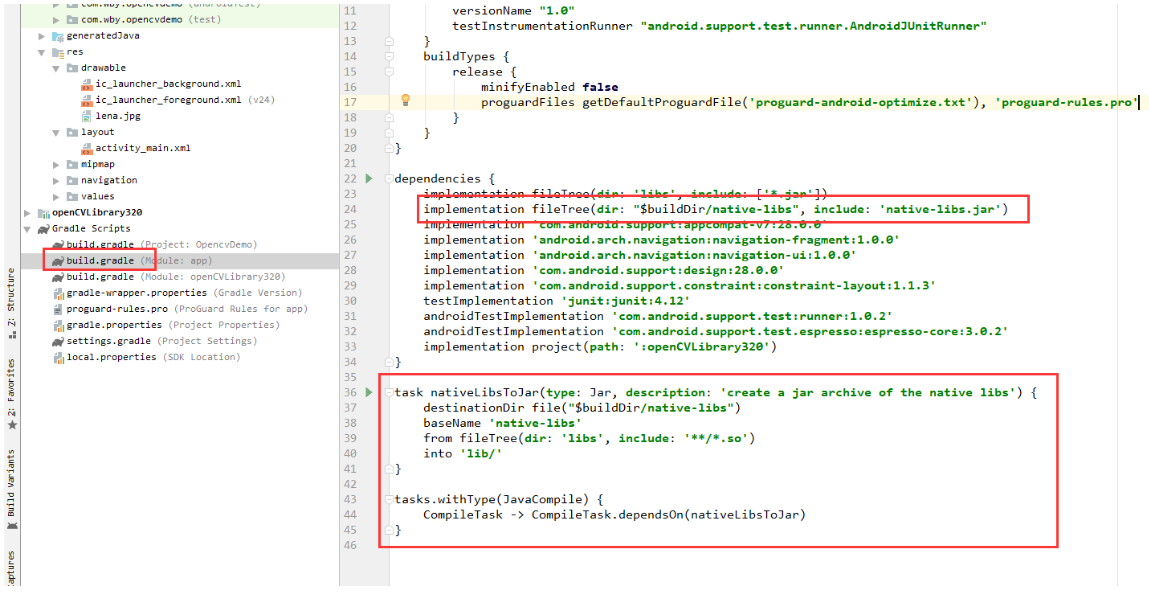
修改gradle配置文件
添加以下内容:
task nativeLibsToJar(type: Jar, description: 'create a jar archive of the native libs') {
    destinationDir file("$buildDir/native-libs")
    baseName 'native-libs'
    from fileTree(dir: 'libs', include: '**/*.so')
    into 'lib/'
}

tasks.withType(JavaCompile) {
    CompileTask -> CompileTask.dependsOn(nativeLibsToJar)
}
然后再项目以来里再加一句:
implementation fileTree(dir: "$buildDir/native-libs", include: 'native-libs.jar')
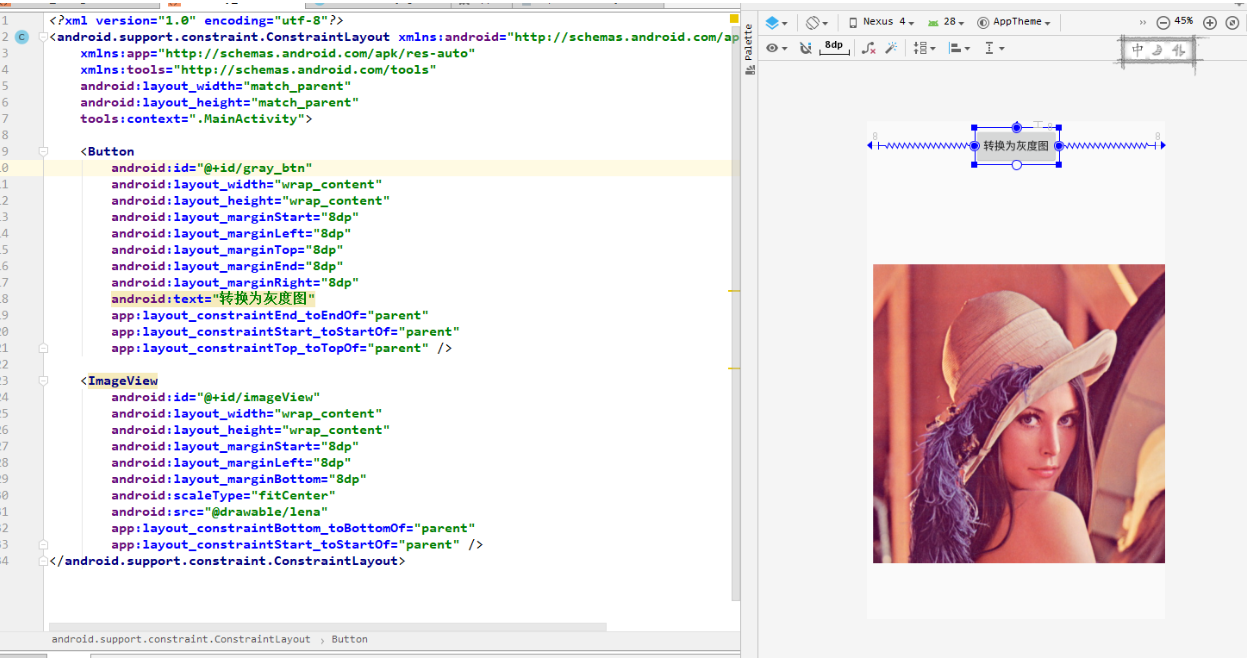
代码测试
先拉一个按钮和一个ImageView上去
测试代码:
package com.wby.opencvdemo;

import android.graphics.Bitmap;
import android.graphics.BitmapFactory;
import android.support.v7.app.AppCompatActivity;
import android.os.Bundle;
import android.util.Log;
import android.view.View;
import android.widget.Button;
import android.widget.ImageView;

import org.opencv.android.OpenCVLoader;
import org.opencv.android.Utils;
import org.opencv.core.CvType;
import org.opencv.core.Mat;
import org.opencv.imgproc.Imgproc;

public class MainActivity extends AppCompatActivity {

    @Override
    protected void onCreate(Bundle savedInstanceState) {
        super.onCreate(savedInstanceState);
        setContentView(R.layout.activity_main);

        staticLoadCVLibraries();

        Button gray_btn = findViewById(R.id.gray_btn);
        // 点击按钮,将图片转换为灰度图
        gray_btn.setOnClickListener(new View.OnClickListener() {
            @Override
            public void onClick(View view) {
                convert2Gray();
            }
        });

    }

    // OpenCV库静态加载及初始化
    private void staticLoadCVLibraries() {
        boolean load = OpenCVLoader.initDebug();
        if(load) {
            Log.i("CV", "Open CV Libraries loaded !");
        }
    }

    public void convert2Gray() {
        Mat src  = new Mat();
        Mat temp = new Mat();
        Mat dst = new Mat();
        // 读取图像
        Bitmap image = BitmapFactory.decodeResource(this.getResources(), R.drawable.lena);
        // 将c++的mat对象转换为android的bitmap对象
        Utils.bitmapToMat(image, src);
        // 因为安卓一般是RGB色彩空间,而opencv一般是bgr色彩空间,所以这里做一个转换
        Imgproc.cvtColor(src, temp, Imgproc.COLOR_RGB2BGR);
        Log.i("CV", "image type: " + (temp.type() == CvType.CV_8UC3));
        // 再次转换为灰度色彩空间
        Imgproc.cvtColor(temp, dst, Imgproc.COLOR_BGR2GRAY);
        // 将转换结果变为bitmap类型
        Utils.matToBitmap(dst, image);

        ImageView imageView = findViewById(R.id.imageView);
        // 设置ImageView的图像为转换完的灰度图像
        imageView.setImageBitmap(image);

        // 释放
        src.release();
        temp.release();
        dst.release();
    }
}