先来看看制作效果:
前置知识--StatefulWidget
StatefulWidget具有可变状态(state)的窗口组件(widget)。使用时要根据变化状态,调整State值,
能够快速初始化,在VSCode中直接使用快捷方式生成代码(直接在VSCode中输入stful后回车自动生成结构),如下:
class name extends StatefulWidget {
  _nameState createState() => _nameState();
}
class _nameState extends State<name> {
  @override
  Widget build(BuildContext context) {
    return Container(
       child: child,
    );
  }
}
上面的代码可以清楚的看到,使用StatefulWidget分为两个部分,第一个部分是继承与StatefullWidget,第二个部分是继承于State.其实State部分才是重点,主要的代码都会写在State中。
1.主入口文件的编写
这里先搭建一个APP通用结构,其核心为引入自定义的BottomNavigationWidget组件。
代码如下:
import 'package:flutter/material.dart';
import 'bottom_navigation_widget.dart';
void main()=> runApp(new MyApp());
class MyApp extends StatelessWidget {
  @override
  Widget build(BuildContext context) {
    return MaterialApp(
      title:'Flutter bottomNavigationBar',
      theme:ThemeData.light(),
      home:BottomNavigationWidget()
    );
  }.
}
2.BottomNaivgationWidget组件编写
(1)在lib目录下,新建一个bottom_navigation_widget.dart文件
使用快捷方式生成基本结构代码把name修改为BottomNavigationWidget,然后开始编写底部导航栏,相关代码如下:
import 'package:flutter/material.dart';
class BottomNavigationWidget extends StatefulWidget {
  _BottomNavigationWidgetState createState() => _BottomNavigationWidgetState();
}
class _BottomNavigationWidgetState extends State<BottomNavigationWidget> {
  final _BottomNavigationColor = Colors.blue;//定义颜色值
  @override
  Widget build(BuildContext context) {
     return Scaffold(
       bottomNavigationBar: BottomNavigationBar(
         items: [
           BottomNavigationBarItem(
             icon:Icon(
               Icons.home,
               color:_BottomNavigationColor,
             ),
             title:Text(
               'Home',
               style:TextStyle(color:_BottomNavigationColor)
             )
           ),
           BottomNavigationBarItem(
             icon:Icon(
               Icons.email,
               color:_BottomNavigationColor,
             ),
             title:Text(
               'Email',
               style:TextStyle(color:_BottomNavigationColor)
             )
           ),
           BottomNavigationBarItem(
             icon:Icon(
               Icons.pages,
               color:_BottomNavigationColor,
             ),
             title:Text(
               'Pages',
               style:TextStyle(color:_BottomNavigationColor)
             )
           ),
           BottomNavigationBarItem(
             icon:Icon(
               Icons.airplay,
               color:_BottomNavigationColor,
             ),
             title:Text(
               'AipPlay',
               style:TextStyle(color:_BottomNavigationColor)
             )
           ),
         ],
         type:BottomNavigationBarType.fixed
       ),
     );
  }
}
上面代码中我们直接返回一个Scaffold(脚手架),然后使用BottomNavigationBar组件进行填充。
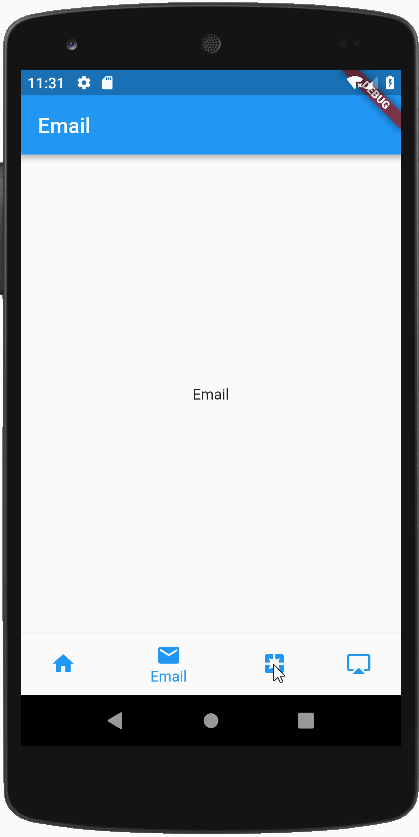
此时使用flutter run 来进行查看代码了,效果已经出现,在APP的页面上已经出现了一个底部导航栏,只不过现在还点击还没有什么效果。接下来开始制作切换页面。
3.子页面的编写
3.1新建一个pages目录,装文件
,然后在目录下面新建home_screen.dart文件,在里面写一个HomeScreen组件,只放入一个AppBar和一个Center,然后用Text Widget表明即可
import 'package:flutter/material.dart';
class HomeScreen extends StatelessWidget {
  @override
  Widget build(BuildContext context) {
    return Scaffold(
      appBar:AppBar(
        title: Text('HOME'),
      ),
      body:Center(
        child: Text('HOME'),
      )
    );
  }
}
同样地建立如下文件:
(1)email_screen.dart
(2)pages_screen.dart
(2)airplay_screen.dart
参照home_screen.dart文件然后修改少量的代码来完成了。这些是导航要用的子页面,有了这些页面,才能继续编写代码。
3.2 重写initState()方法
我们要重写initState()方法,把刚才做好的页面进行初始化到一个Widget数组中。有了数组就可以根据数组的索引来切换不同的页面了。
代码如下:
 List<Widget> list = List();
 @override
 void initState(){
    list
      ..add(HomeScreen())
      ..add(EmailScreen())
      ..add(PagesScreen())
      ..add(AirplayScreen());
    super.initState();
  }
这里的..add()是Dart语言的..语法,简单来说就是返回调用者本身。这里list后用了..add(),还会返回list,然后就一直使用..语法,能一直想list里增加widget元素。 最后我们调用了一些父类的initState()方法。
4.BottomNavigationBar里的响应事件
BottomNavigationBar组件里提供了一个相应事件onTap,这个事件自带一个索引值index,通过索引值我们就可以和我们list里的索引值相对应了,currentIndex属性实现选中当前索引。
currentIndex:_currentIndex,
onTap:(int index){
           setState((){
             _currentIndex= index;
           });
         },
最后给出bottom_navigation_widget.dart的全部代码:


import 'package:flutter/material.dart';
import 'pages/home_screen.dart';
import 'pages/email_screen.dart';
import 'pages/pages_screen.dart';
import 'pages/airplay_screen.dart';
class BottomNavigationWidget extends StatefulWidget {
  _BottomNavigationWidgetState createState() => _BottomNavigationWidgetState();
}
class _BottomNavigationWidgetState extends State<BottomNavigationWidget> {
  final _BottomNavigationColor = Colors.blue;
  int _currentIndex = 0;
  List<Widget> list = List();
  @override
  void initState(){
    list
      ..add(HomeScreen())
      ..add(EmailScreen())
      ..add(PagesScreen())
      ..add(AirplayScreen());
    super.initState();
  }
  @override
  Widget build(BuildContext context) {
     return Scaffold(
       body: list[_currentIndex],
       bottomNavigationBar: BottomNavigationBar(
         items: [
           BottomNavigationBarItem(
             icon:Icon(
               Icons.home,
               color:_BottomNavigationColor,
             ),
             title:Text(
               'Home',
               style:TextStyle(color:_BottomNavigationColor)
             )
           ),
           BottomNavigationBarItem(
             icon:Icon(
               Icons.email,
               color:_BottomNavigationColor,
             ),
             title:Text(
               'Email',
               style:TextStyle(color:_BottomNavigationColor)
             )
           ),
           BottomNavigationBarItem(
             icon:Icon(
               Icons.pages,
               color:_BottomNavigationColor,
             ),
             title:Text(
               'Pages',
               style:TextStyle(color:_BottomNavigationColor)
             )
           ),
           BottomNavigationBarItem(
             icon:Icon(
               Icons.airplay,
               color:_BottomNavigationColor,
             ),
             title:Text(
               'AipPlay',
               style:TextStyle(color:_BottomNavigationColor)
             )
           ),
         ],
         currentIndex:_currentIndex,
         onTap:(int index){
           setState((){
             _currentIndex= index;
           });
         },
         type:BottomNavigationBarType.fixed
       ),
     );
  }
}
此处只是作为学习梳理思路所用,文章参考此链接