1.背景
大纲
Spring Boot Admin 是一个管理和监控Spring Boot 应用程序的开源软件。每个应用都认为是一个客户端,通过HTTP或者使用 Eureka注册到admin server中进行展示,Spring Boot Admin UI部分使用AngularJs将数据展示在前端。
Spring Boot Admin 是一个针对spring-boot的actuator接口进行UI美化封装的监控工具。他可以:在列表中浏览所有被监控spring-boot项目的基本信息,详细的Health信息、内存信息、JVM信息、垃圾回收信息、各种配置信息(比如数据源、缓存列表和命中率)等,还可以直接修改logger的level。
因此初学者首先要清楚的区分客户端和服务端的概念
服务端:是指springboot admin这个应用(通常就是指监控服务器),一个服务端可以监控多个客户端
客户端是:被服务端监控的对象(通常就是指你的业务系统)
2.服务端准备
步骤一:搭建springboot maven项目
步骤二:配置pom.xml文件
主要是添加依赖
     <dependency>
            <groupId>de.codecentric</groupId>
            <artifactId>spring-boot-admin-starter-server</artifactId>
            <version>2.3.1</version>
      </dependency>
步骤三:application.properties中配置端口号
server.port=8000
步骤四:启动类上加注解@EnableAdminServer
@SpringBootApplication
@EnableAdminServer
public class SpringbootAdminApplication {
    public static void main(String[] args) {
        SpringApplication.run(SpringbootAdminApplication.class, args);
    }
}
步骤五:启动项目,访问http://localhost:8000/applications ,显示如下
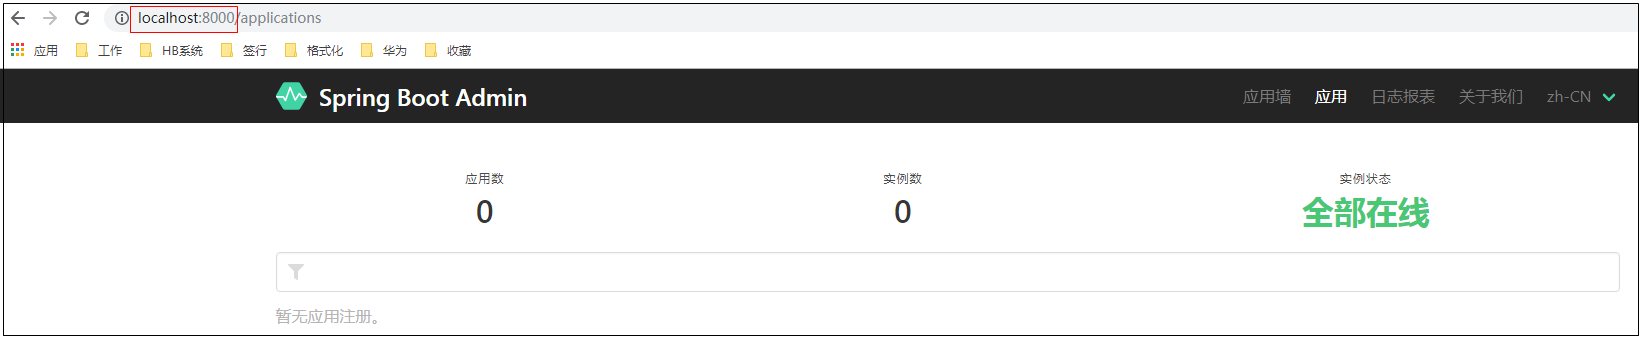
服务端搞定,够简单吧!
3.客户端准备
步骤一:在需要监控的springboot项目中添加jar包
       <dependency>
            <groupId>org.springframework.boot</groupId>
            <artifactId>spring-boot-starter-security</artifactId>
        </dependency>
   <!--admin server 监控-->
        <dependency>
            <groupId>de.codecentric</groupId>
            <artifactId>spring-boot-admin-starter-client</artifactId>
            <version>2.3.1</version>
        </dependency>
步骤二:在启动配置文件中配置如下
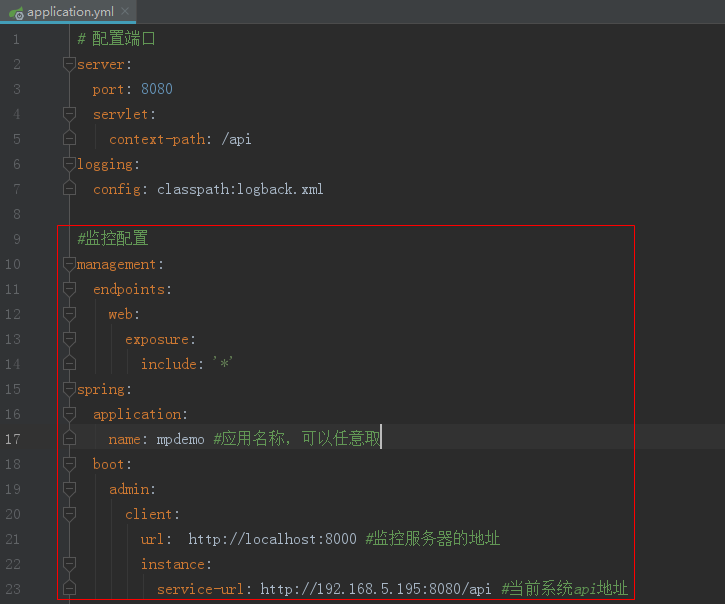


#监控配置
management:
  endpoints:
    web:
      exposure:
        include: '*'
spring:
  application:
    name: mpdemo #应用名称,可以任意取
  boot:
    admin:
      client:
        url:  http://localhost:8000 #监控服务器的地址
        instance:
          service-url: http://192.168.5.195:8080/api #当前系统api地址
步骤三:安全配置 SecurityPermitAllConfig
package com.ldp.mp.common.config;

import org.springframework.context.annotation.Configuration;
import org.springframework.security.config.annotation.web.builders.HttpSecurity;
import org.springframework.security.config.annotation.web.configuration.WebSecurityConfigurerAdapter;


@Configuration
public class SecurityPermitAllConfig extends WebSecurityConfigurerAdapter {
    @Override
    protected void configure(HttpSecurity http) throws Exception {
        http.authorizeRequests().anyRequest().permitAll()
                .and().csrf().disable();
    }
}
步骤四:启动项目,客户端搞定!
4.测试效果
刷新监控服务端: http://localhost:8000/applications ,界面如下,可以看到如下信息
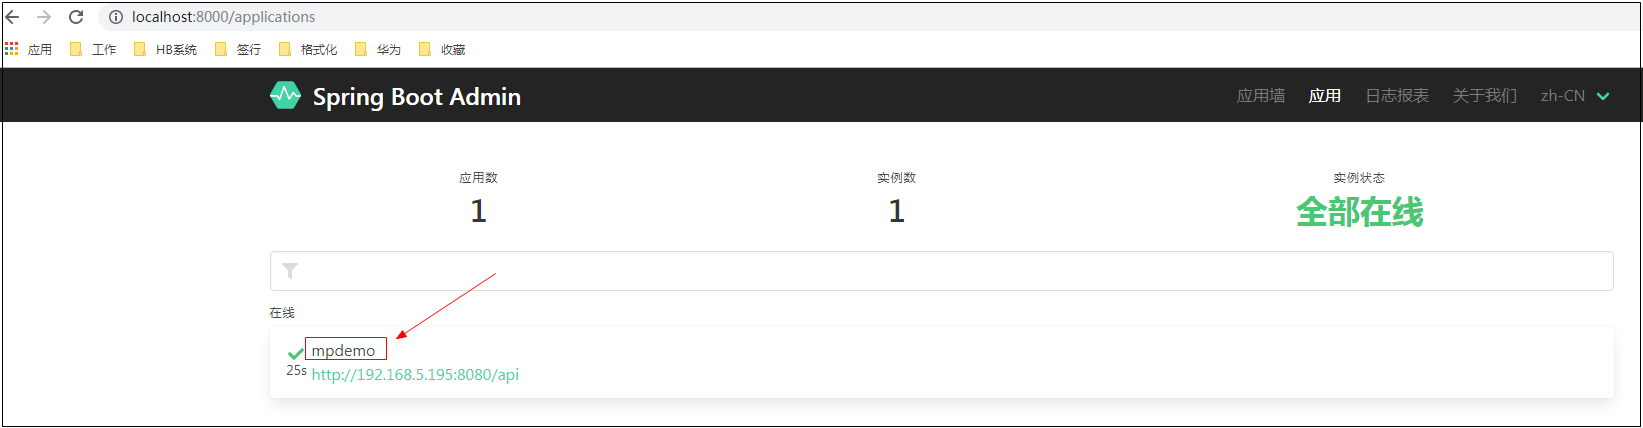
如果监控了多个项目,在这里都可以看到,
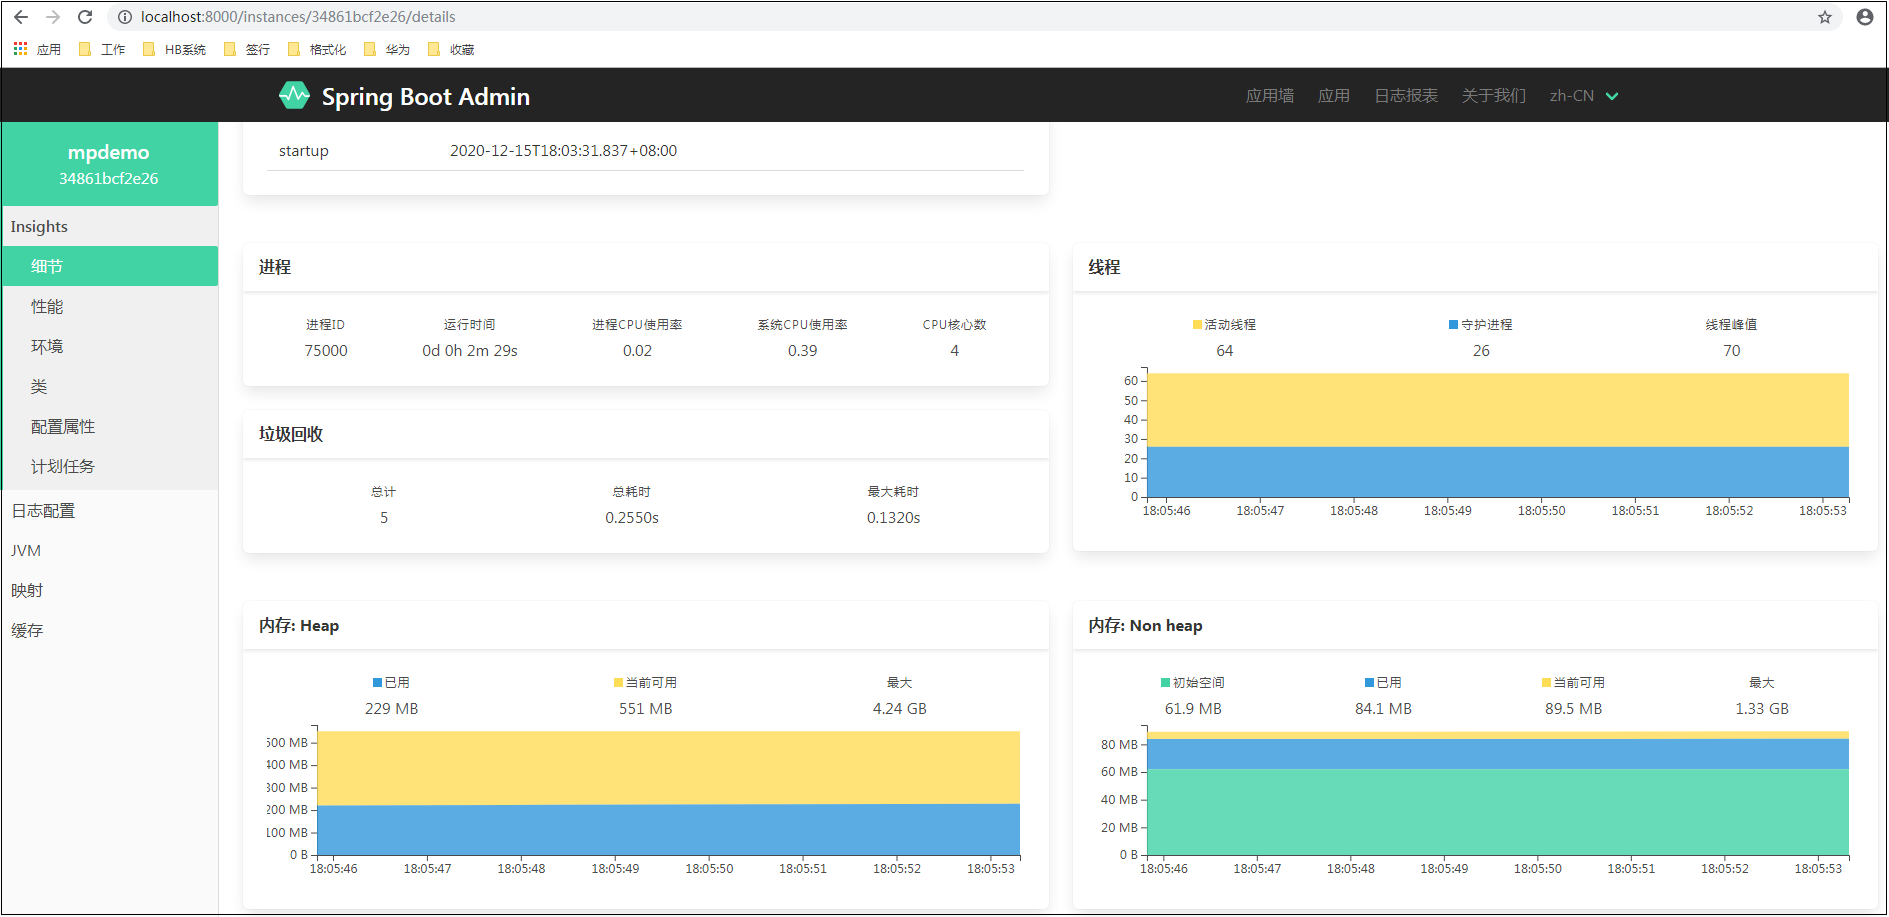
点击看监控详情
5.课程演示代码与视频学习资料获取
1.博客对应的视频教程

2.视频资料领取,课程代码下载,加微信851298348,发送“admin”。
3.如果这篇博客帮助到了您,希望您可以请作者喝杯咖啡,表示鼓励!
