最近需要将项目中的编辑器从 CKeditor 4 升级到 CKeditor 5
原以为只是换个内核,然后稍微调整一下自定义插件的代码,没想到进了一个大坑
在经过一个月的摸爬滚打之后,终于完成升级内核的工作,同时也算摸清了 CK5 的基本玩法
为方便后面的同学来接手,打算新起一个项目,记录一下 CK5 的定制化开发过程
PS. 结合官方文档食用更香
一、我想做一个这样的编辑器
CK5 提供了五种类型的编辑器,可以根据自己的需求选择
如果没有定制化开发的需求,可以直接引用,或者通过在线生成器删减不必要的插件
但如果不满足既有功能,想结合自己的需求做一些调整,哪怕只是改个图标,都需要自己打包
FAQ: How to customize the CKEditor 5 icons?
而我需要的正是一个高度定制的编辑器,它需要在 CK5 Classic Editor 的基础上做以下扩展:
1. 替换所有图标;
2. 简化插入超链接的交互;
3. 自定义上传图片、视频、音频的弹窗,以及响应的 DOM 结构;
4. 添加新功能,如选中内容统计字数。
5. 不依赖 JQuery、Vue、React 等第三方库,可在所有 JS 项目中使用。
明确以上需求之后,可以看出最终的编辑器只会引入 CK5 的内核,其他的插件都需要自己开发
千里之行,始于足下,那就开始吧!
二、搭建基本结构
先创建一个空的项目目录,然后创建 package.json
经过上面的分析之后,这个项目需要做成多包项目,即游戏本体加DLC基础编辑器和插件分别打包
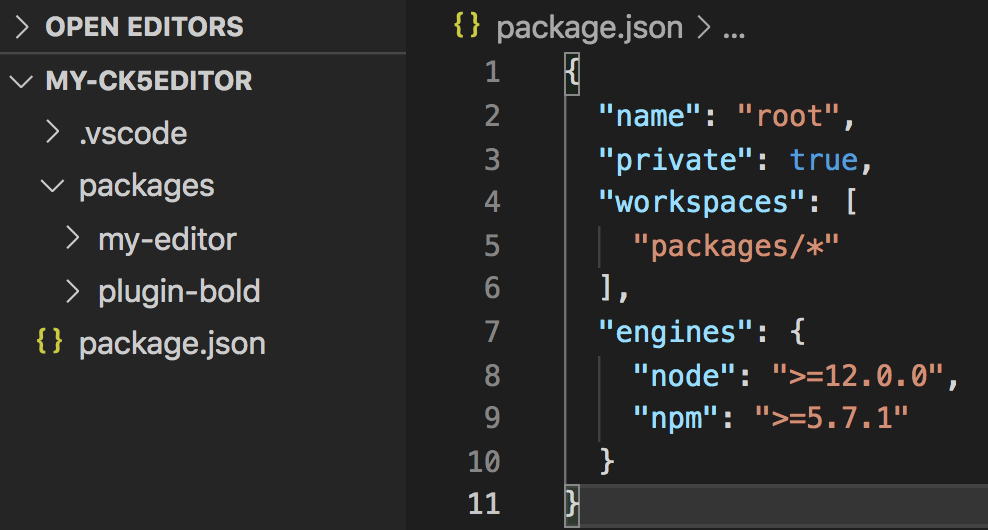
所以项目的 package.json 是这样的:
{
  "name": "root",
  "private": true,
  "workspaces": [
    "packages/*"
  ],
  "engines": {
    "node": ">=12.0.0",
    "npm": ">=5.7.1"
  }
}
// CKEditor 5 需要 Node.js 12.0.0+
然后创建 packages 目录,需要开发的包都放在这个目录下
比如马上要开发的编辑器 my-editor
还可以根据自己的需要添加 .gitignore、.editorconfig 等文件,这里就先略过
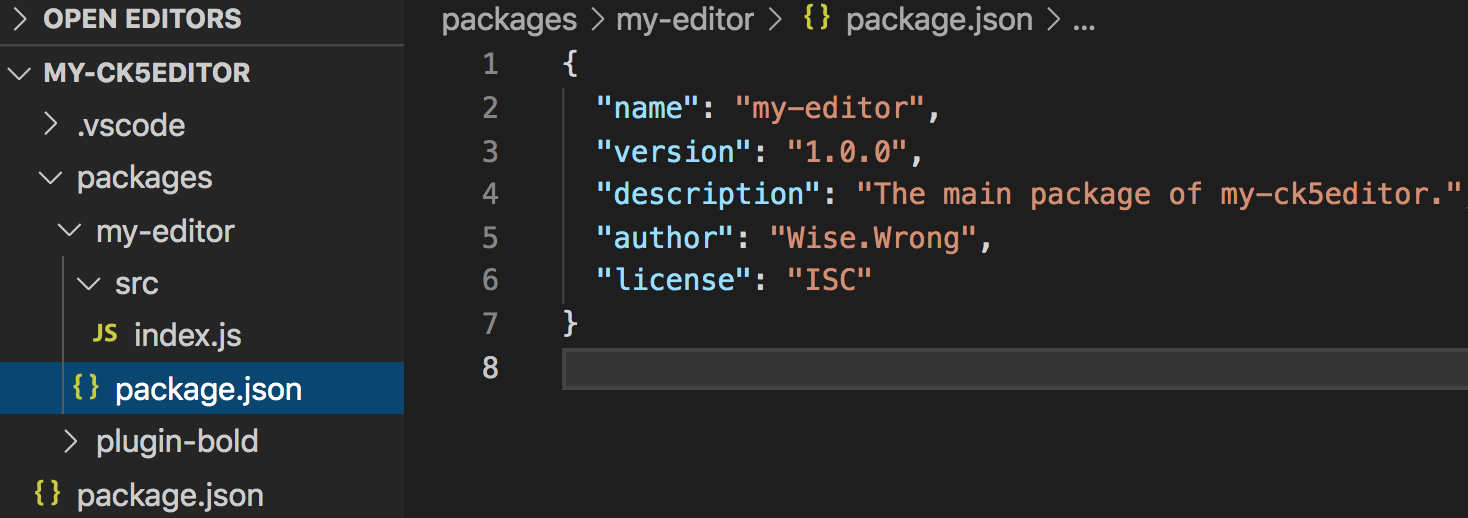
接下来先不管根目录,进到编辑器目录 /packages/my-editor
创建编辑器的 package.json 以及源码目录 src
my-editor 需要在一个页面上运行,所以在根目录下创建一个不参与打包的 example 目录,作为开发页面
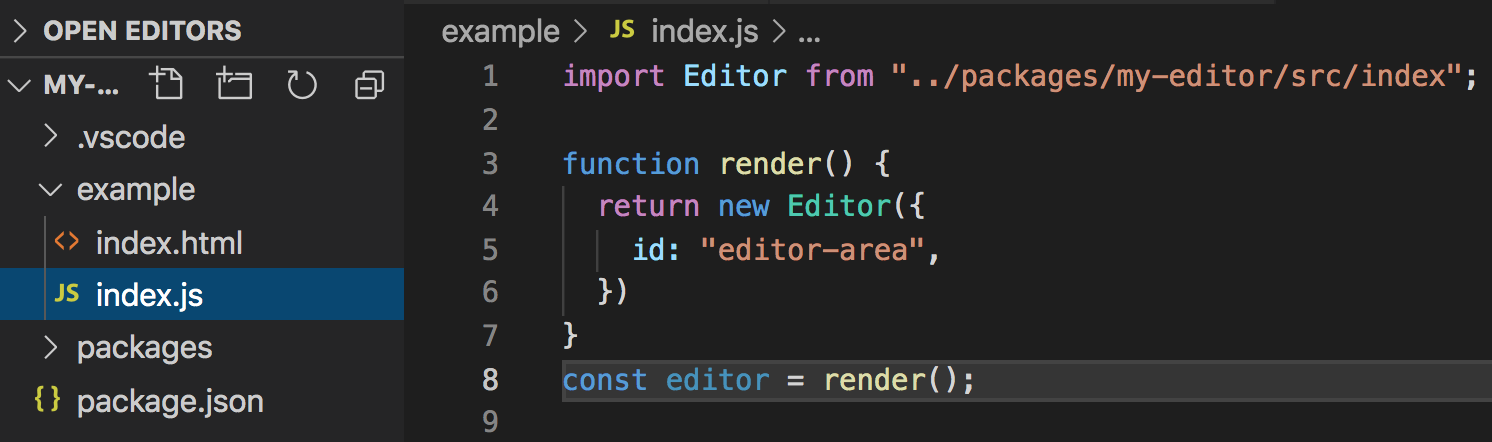
在 example 目录下的 index.js 是这个测试页面的入口文件,主要功能是引入 my-editor 并实例化
而 index.html 是开发页面的基础模板,可以根据自己的需要开发,贴一下我自己的代码:
<!DOCTYPE html>
<html>
  <head>
    <meta charset="UTF-8" />
    <meta name="viewport" content="width=device-width, initial-scale=1.0" />
    <meta http-equiv="X-UA-Compatible" content="ie=edge" />
    <title>My CKEditor 5</title>
  </head>

  <style>
    * {
      padding: 0;
      margin: 0;
    }

    html,
    body,
    .container {
      width: 100%;
      height: 100%;
      background: rgba(247, 247, 247, 1);
    }

    header {
      height: 60px;
      text-align: center;
      line-height: 60px;
      background-color: #3c9ef3;
      font-size: 20px;
      color: white;
      font-weight: 700;
    }
    main {
      padding: 24px;
    }
    .editor-container {
      width: 800px;
      margin: 0 auto;
    }
  </style>

  <body>
    <header>My CKEditor 5</header>
    <main>
      <div class="editor-container">
        <textarea id="editor-area"></textarea>
      </div>
    </main>
  </body>
</html>
项目的基本结构就是这样,接下来安装必要依赖并完善 webpack 打包
三、完善打包配置
这个多包项目基于 yarn workspace 实现,所以必须使用 yarn 安装依赖
首先在 my-editor 目录下安装编辑器插件
yarn add
    @ckeditor/ckeditor5-editor-classic
    @ckeditor/ckeditor5-essentials
    @ckeditor/ckeditor5-paragraph
    @ckeditor/ckeditor5-basic-styles
    @ckeditor/ckeditor5-theme-lark
    @ckeditor/ckeditor5-list
    @ckeditor/ckeditor5-link
    @ckeditor/ckeditor5-heading
    @ckeditor/ckeditor5-block-quote
然后回到根目录安装开发需要的基本软件包
yarn add -D -W
    @ckeditor/ckeditor5-dev-utils
    clean-webpack-plugin@3
    css-loader@1
    html-webpack-plugin
    less@3
    less-loader@4
    postcss-loader@3
    raw-loader@3
    style-loader@1
    webpack@4
    webpack-cli@3
    webpack-dev-server@3
接下来在根目录创建 webpack 的配置文件 webpack.config.js
// webpack.config.js
"use strict";

const HtmlWebpackPlugin = require("html-webpack-plugin");

const path = require("path");
const { styles } = require("@ckeditor/ckeditor5-dev-utils");
const port = 8000;

module.exports = {
  entry: "./example/index.js",
  output: {
    path: path.resolve(__dirname, "dist"),
    filename: "bundle.js",
  },
  devtool: "source-map",
  performance: { hints: false },
  devServer: {
    clientLogLevel: 'warning',
    hot: true,
    compress: true,
    host: 'localhost',
    port: port,
    publicPath: '/',
    after (app) {
      console.log(`Your application is running here: http://localhost:${port}`)
    },
    quiet: true // necessary for FriendlyErrorsPlugin
  },
  module: {
    rules: [
      {
        test: /.less$/,
        use: [
          {
            loader: "style-loader",
          },
          {
            loader: "css-loader",
          },
          {
            loader: "less-loader",
          },
        ],
      },
      {
        test: /.svg$/,
        use: ["raw-loader"],
      },
      {
        test: /.css$/,
        use: [
          {
            loader: "style-loader",
            options: {
              injectType: "singletonStyleTag",
              attributes: {
                "data-cke": true,
              },
            },
          },
          {
            loader: "postcss-loader",
            options: styles.getPostCssConfig({
              themeImporter: {
                themePath: require.resolve("@ckeditor/ckeditor5-theme-lark"),
              },
              minify: true,
            }),
          },
        ],
      },
    ],
  },
  plugins: [
    new HtmlWebpackPlugin({
      title: "Example",
      template: "example/index.html",
    }),
  ],

};
这里将项目的入口指向了 /example/index.js
最后在根目录的 package.json 中添加启动指令 dev
{
    ...
    "scripts": {
        "dev": "webpack-dev-server --mode development --config webpack.config.js"
  }
    ...
}
万事俱备,只欠一个编辑器了
四、启动编辑器
回到 my-editor 目录下,先写一个简单的 CKEditor 编辑器:
// packages/my-editor/src/index.js

import ClassicEditor from "@ckeditor/ckeditor5-editor-classic/src/classiceditor";
import Essentials from "@ckeditor/ckeditor5-essentials/src/essentials";
import Paragraph from "@ckeditor/ckeditor5-paragraph/src/paragraph";
import Bold from "@ckeditor/ckeditor5-basic-styles/src/bold";
import Italic from "@ckeditor/ckeditor5-basic-styles/src/italic";
import BlockQuote from "@ckeditor/ckeditor5-block-quote/src/blockquote";
import Heading from "@ckeditor/ckeditor5-heading/src/heading";
import Link from "@ckeditor/ckeditor5-link/src/link";
import List from "@ckeditor/ckeditor5-list/src/list";

export default class MyEditor {
  constructor(props) {
    Object.assign(
      this,
      {
        id: "editor",
      },
      props
    );
    this.render();
  }

  render() {
    ClassicEditor.create(document.querySelector(`#${this.id}`), {
      plugins: [
        Essentials,
        Paragraph,
        Bold,
        Italic,
        BlockQuote,
        Heading,
        Link,
        List,
      ],
      toolbar: [
        "heading",
        "|",
        "bold",
        "italic",
        "link",
        "bulletedList",
        "numberedList",
        "|",
        "blockQuote",
        "undo",
        "redo",
      ],
    })
      .then((editor) => {
        console.log("Editor was initialized", editor);
      })
      .catch((error) => {
        console.error(error.stack);
      });
  }
}
这里用到 ClassicEditor.create() 函数,这是一个 Promise,用于创建 CKEditor 编辑器
它可以接收两个参数,分别是:用于渲染编辑器的 DOM 元素和配置项 Config
其中完整的 Config 可以查看官网的说明,我这里只用到了 plugins 和 toolbar
plugins: 加载插件,由插件对象构成的数组。
toolbar: 配置工具栏,由工具栏名称组成的字符串数组,工具栏的名称需要在插件中定义。
全都准备好了,回到根目录,yarn run dev 启动项目吧!
如果启动失败,根据错误提示,对照上文,看下是哪一步出错
启动成功之后,打开浏览器访问 localhost:8000,应该能看到这个页面:
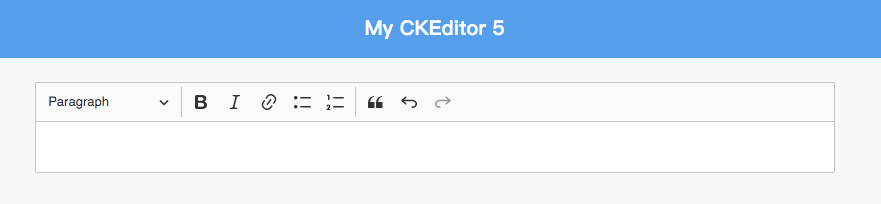
如果页面能访问,但编辑器没有渲染,检查一下控制台的报错,根据错误信息进行修复
五、调试与打包
CKEditor 提供了一个用于调试编辑器的插件 CKEditor 5 inspector
在 my-editor 目录下安装它:
yarn add --dev @ckeditor/ckeditor5-inspector
然后在 index.js 中引入,在 create 函数的 then 回调中启用调试器
import CKEditorInspector from '@ckeditor/ckeditor5-inspector';

export default class MyEditor {
  ...
  ClassicEditor.create()
    .then((editor) => {
      CKEditorInspector.attach(editor);
      this.editor = editor;
    })
   .catch();
  ...
}
重新启动项目,就能在页面底部看到调试器了
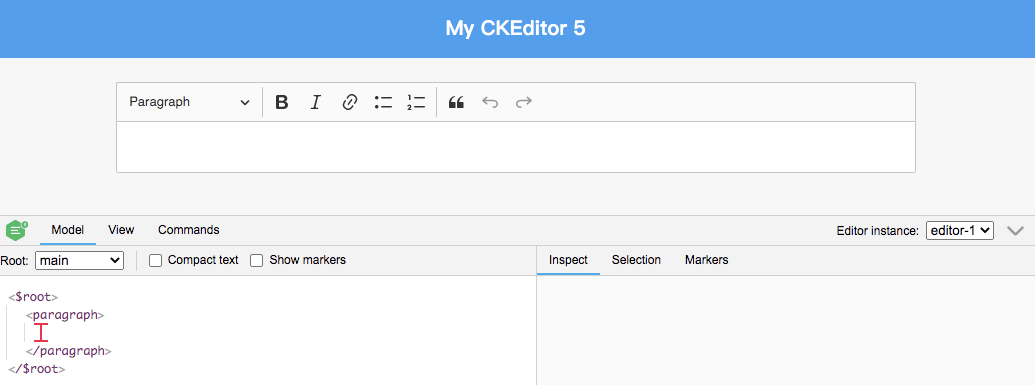
PS. 这个调试器其实是以 DOM 的形式插到页面中的
好了,只剩下打包编辑器了
在 my-editor 目录下新增 webpack.config.js 文件
"use strict";

const path = require("path");
const { styles } = require("@ckeditor/ckeditor5-dev-utils");
const { CleanWebpackPlugin } = require("clean-webpack-plugin");
const TerserPlugin = require("terser-webpack-plugin");

module.exports = {
  mode: "production",
  entry: "./src/index.js",
  output: {
    path: path.resolve(__dirname, "dist"),
    filename: "my-editor.min.js",
    libraryTarget: "umd",
  },
  optimization: {
    minimizer: [
      new TerserPlugin({
        terserOptions: {
          output: {
            // Preserve CKEditor 5 license comments.
            comments: /^!/,
          },
        },
        extractComments: false,
      }),
    ],
  },
  module: {
    rules: [
      {
        test: /.less$/,
        use: [
          {
            loader: "style-loader",
          },
          {
            loader: "css-loader",
          },
          {
            loader: "less-loader",
          },
        ],
      },
      {
        test: /.svg$/,
        use: ["raw-loader"],
      },
      {
        test: /.css$/,
        use: [
          {
            loader: "style-loader",
            options: {
              injectType: "singletonStyleTag",
              attributes: {
                "data-cke": true,
              },
            },
          },
          {
            loader: "postcss-loader",
            options: styles.getPostCssConfig({
              themeImporter: {
                themePath: require.resolve("@ckeditor/ckeditor5-theme-lark"),
              },
              minify: true,
            }),
          },
        ],
      },
    ],
  },
  plugins: [
    new CleanWebpackPlugin()
  ],
  performance: { hints: false },
};
然后在 package.json 文件中添加打包命令 build
{
  ...
  "scripts": {
    "build": "webpack --mode production --config webpack.config.js"
  },
  ...
}
这样在当前目录下就能 yarn run build 打包代码
如果希望在根目录也能通过 build 命令打包,就在 package.json 中添加这样一行命令:
{
  ...
  "scripts": {
    "build": "yarn workspace my-editor run build"
  },
  ...
}
执行该命令的时候,会找到当前工作空间 packages 下的 my-editor 目录,并执行 run build 命令
打包完成后,还可以在开发页面 example/index.js 中,将编辑器的路径改为打包后的路径(my-editor/dist/my-editor.min),以此来验证打包后的代码是否正确
yarn 目前还不支持在根目录批量构建 workspace 中的项目,如果有这个需求,可以借助 lerna 来实现
lerna run --stream --sort build
也可以通过 lerna 来批量发布
lerna publish from-package
编辑器的项目已经搭建好了,万里长征迈出了第一步

接下来会用一个简单的加粗插件来介绍 CKEditor 5 的设计和插件开发,to be continue