UIVisuaEffectView :继承自UIView,可以看成是专门用于处理毛玻璃效果的视图,只要我们将这个特殊的View添加到其他视图(eg. ImageView )上面,被该UIVisuaEffectView遮盖的部分看起来就有了毛玻璃效果。使用UIVisuaEffectView有一点需要特别注意,不要在UIVisuaEffectView实例化View上面直接添加subViews,应该将需要添加的子视图添加到其contentView上。同时,尽量避免将UIVisualEffectView对象的alpha值设置为小于1.0的值,因为创建半透明的视图会导致系统在离屏渲染时去对UIVisualEffectView对象及所有的相关的子视图做混合操作,比较消耗性能。
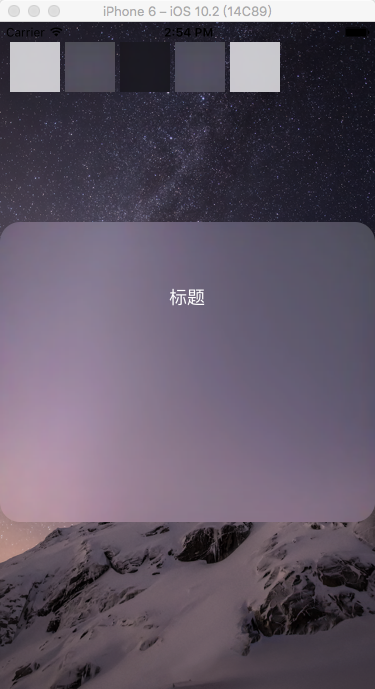
效果截图:
实现代码:
ViewController.h
#import <UIKit/UIKit.h>

@interface ViewController : UIViewController

@property (nonatomic, strong) UIImageView *imageView;
@property (nonatomic, strong) UIVisualEffectView *effectView;
@property (nonatomic, strong) UIVisualEffect *effect;

@end
ViewController.m
#import "ViewController.h"

static int blurTag = 2000;

@interface ViewController ()

@end

@implementation ViewController

- (void)viewDidLoad {
    [super viewDidLoad];
    // Do any additional setup after loading the view, typically from a nib.

    //添加ImageView
    self.imageView = [[UIImageView alloc] initWithFrame:[[UIScreen mainScreen] bounds]];

    [self.imageView setImage:[[UIImage alloc] initWithContentsOfFile:[[NSBundle mainBundle] pathForResource:@"1" ofType:@"png"]]];
    [self.view addSubview:self.imageView];


    //显示所有可用的模糊效果

    CGFloat startX = 10;
    CGFloat startY = 20;
    CGFloat startW = 50;
    CGFloat startH = 50;

    {//UIBlurEffectStyleExtraLight
        UIVisualEffect *effect = [UIBlurEffect effectWithStyle:UIBlurEffectStyleExtraLight];
        UIVisualEffectView *effectView = [[UIVisualEffectView alloc] initWithEffect:effect];
        [effectView setFrame:CGRectMake(startX, startY, startW, startH)];
        effectView.tag = blurTag;
        [self.view addSubview:effectView];

        UITapGestureRecognizer *gesture = [[UITapGestureRecognizer alloc] initWithTarget:self action:@selector(tapAction:)];
        effectView.userInteractionEnabled = YES;
        [effectView addGestureRecognizer:gesture];
    }

    {//UIBlurEffectStyleLight
        UIVisualEffect *effect = [UIBlurEffect effectWithStyle:UIBlurEffectStyleLight];
        UIVisualEffectView *effectView = [[UIVisualEffectView alloc] initWithEffect:effect];
        [effectView setFrame:CGRectMake(startX + (startW + 5), startY, startW, startH)];
        effectView.tag = blurTag + 1;
        [self.view addSubview:effectView];

        UITapGestureRecognizer *gesture = [[UITapGestureRecognizer alloc] initWithTarget:self action:@selector(tapAction:)];
        effectView.userInteractionEnabled = YES;
        [effectView addGestureRecognizer:gesture];
    }

    {//UIBlurEffectStyleDark
        UIVisualEffect *effect = [UIBlurEffect effectWithStyle:UIBlurEffectStyleDark];
        UIVisualEffectView *effectView = [[UIVisualEffectView alloc] initWithEffect:effect];
        [effectView setFrame:CGRectMake(startX + (startW + 5)*2, startY, startW, startH)];
        effectView.tag = blurTag + 2;
        [self.view addSubview:effectView];

        UITapGestureRecognizer *gesture = [[UITapGestureRecognizer alloc] initWithTarget:self action:@selector(tapAction:)];
        effectView.userInteractionEnabled = YES;
        [effectView addGestureRecognizer:gesture];
    }

//    {//UIBlurEffectStyleExtraDark
//        UIVisualEffect *effect = [UIBlurEffect effectWithStyle:UIBlurEffectStyleExtraDark];
//        UIVisualEffectView *effectView = [[UIVisualEffectView alloc] initWithEffect:effect];
//        [effectView setFrame:CGRectMake(startX + (startW + 5)*3, startY, startW, startH)];
//        [self.view addSubview:effectView];
//    }

    {//UIBlurEffectStyleRegular
        UIVisualEffect *effect = [UIBlurEffect effectWithStyle:UIBlurEffectStyleRegular];
        UIVisualEffectView *effectView = [[UIVisualEffectView alloc] initWithEffect:effect];
        [effectView setFrame:CGRectMake(startX + (startW + 5)*3, startY, startW, startH)];
        effectView.tag = blurTag + 3;
        [self.view addSubview:effectView];

        UITapGestureRecognizer *gesture = [[UITapGestureRecognizer alloc] initWithTarget:self action:@selector(tapAction:)];
        effectView.userInteractionEnabled = YES;
        [effectView addGestureRecognizer:gesture];
    }

    {//UIBlurEffectStyleProminent
        UIVisualEffect *effect = [UIBlurEffect effectWithStyle:UIBlurEffectStyleProminent];
        UIVisualEffectView *effectView = [[UIVisualEffectView alloc] initWithEffect:effect];
        [effectView setFrame:CGRectMake(startX + (startW + 5)*4, startY, startW, startH)];
        effectView.tag = blurTag + 4;
        [self.view addSubview:effectView];

        UITapGestureRecognizer *gesture = [[UITapGestureRecognizer alloc] initWithTarget:self action:@selector(tapAction:)];
        effectView.userInteractionEnabled = YES;
        [effectView addGestureRecognizer:gesture];
    }

    //添加UIVisualEffectView
    self.effect = [UIBlurEffect effectWithStyle:UIBlurEffectStyleExtraLight ];
    self.effectView = [[UIVisualEffectView alloc] initWithEffect:self.effect];
    self.effectView.layer.cornerRadius = 20;
    self.effectView.layer.masksToBounds = YES;
    [self.effectView setFrame:CGRectMake(0, 200, 375, 300)];
    [self.view addSubview:self.effectView];

    UIButton *btn = [[UIButton alloc] initWithFrame:CGRectMake(0, 0, 375, 150)];
    [btn setTitle:@"标题" forState:UIControlStateNormal];
    [self.effectView.contentView addSubview:btn];

}

- (void)tapAction:(UITapGestureRecognizer *)gesture{

    NSInteger tag = gesture.view.tag - blurTag;

    switch (tag) {
        case 0:
            [self.effectView setEffect:[UIBlurEffect effectWithStyle:UIBlurEffectStyleExtraLight]];
            break;
        case 1:
            [self.effectView setEffect:[UIBlurEffect effectWithStyle:UIBlurEffectStyleLight]];
            break;
        case 2:
            [self.effectView setEffect:[UIBlurEffect effectWithStyle:UIBlurEffectStyleDark]];
            break;
        case 3:
            [self.effectView setEffect:[UIBlurEffect effectWithStyle:UIBlurEffectStyleRegular]];
            break;
        case 4:
            [self.effectView setEffect:[UIBlurEffect effectWithStyle:UIBlurEffectStyleProminent]];
            break;
        default:
            break;
    }


}


- (void)didReceiveMemoryWarning {
    [super didReceiveMemoryWarning];
    // Dispose of any resources that can be recreated.
}


@end
参考链接: