http://www.cnblogs.com/kenshincui/p/4168532.html
概述
在多数移动应用中任何时候都只能有一个应用程序处于活跃状态,如果其他应用此刻发生了一些用户感兴趣的那么通过通知机制就可以告诉用户此时发生的事情。iOS中通知机制又叫消息机制,其包括两类:一类是本地通知;另一类是推送通知,也叫远程通知。两种通知在iOS中的表现一致,可以通过横幅或者弹出提醒两种形式告诉用户,并且点击通知可以会打开应用程序,但是实现原理却完全不同。今天就和大家一块去看一下如何在iOS中实现这两种机制,并且在文章后面会补充通知中心的内容避免初学者对两种概念的混淆。
本地通知
推送通知
补充--iOS开发证书、秘钥
补充--通知中心
本地通知
本地通知是由本地应用触发的,它是基于时间行为的一种通知形式,例如闹钟定时、待办事项提醒,又或者一个应用在一段时候后不使用通常会提示用户使用此应用等都是本地通知。创建一个本地通知通常分为以下几个步骤:
创建UILocalNotification。
设置处理通知的时间fireDate。
配置通知的内容:通知主体、通知声音、图标数字等。
配置通知传递的自定义数据参数userInfo(这一步可选)。
调用通知,可以使用
scheduleLocalNotification:按计划调度一个通知,也可以使用
presentLocalNotificationNow立即调用通知。
下面就以一个程序更新后用户长期没有使用的提醒为例对本地通知做一个简单的了解。在这个过程中并没有牵扯太多的界面操作,所有的逻辑都在AppDelegate中:进入应用后如果没有注册通知,需要首先注册通知请求用户允许通知;一旦调用完注册方法,无论用户是否选择允许通知此刻都会调用应用程序的
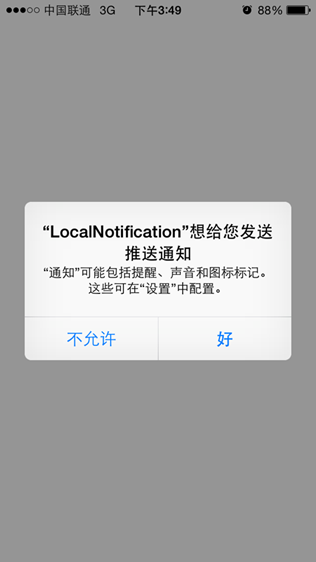
- (void)application:(UIApplication *)application didRegisterUserNotificationSettings:(UIUserNotificationSettings *)notificationSettings代理方法,在这个方法中根据用户的选择:如果是允许通知则会按照前面的步骤创建通知并在一定时间后执行。
AppDelegate.m
<span style="background: white; color: green">//
// AppDelegate.m
// LocalNotification
//
// Created by Kenshin Cui on 14/03/28.
// Copyright (c) 2014年 Kenshin Cui. All rights reserved.
//
</span><span style="background: white; color: blue">#import </span><span style="background: white; color: #a31515">"AppDelegate.h"
</span><span style="background: white; color: blue">#import </span><span style="background: white; color: #a31515">"KCMainViewController.h"
</span><span style="background: white; color: black">@</span><span style="background: white; color: blue">interface </span><span style="background: white; color: black">AppDelegate ()
@end
@implementation AppDelegate
</span><span style="background: white; color: blue">#pragma </span><span style="background: white; color: black">mark - 应用代理方法
- (BOOL)application:(UIApplication *)application didFinishLaunchingWithOptions:(NSDictionary *)launchOptions {
_window=[[UIWindow alloc]initWithFrame:[UIScreen mainScreen].bounds];
_window.backgroundColor =[UIColor colorWithRed:249/255.0 green:249/255.0 blue:249/255.0 alpha:1];
</span><span style="background: white; color: green">//设置全局导航条风格和颜色
</span><span style="background: white; color: black">[[UINavigationBar appearance] setBarTintColor:[UIColor colorWithRed:23/255.0 green:180/255.0 blue:237/255.0 alpha:1]];
[[UINavigationBar appearance] setBarStyle:UIBarStyleBlack];
KCMainViewController *mainController=[[KCMainViewController alloc]init];
_window.rootViewController=mainController;
[_window makeKeyAndVisible];
</span><span style="background: white; color: green">//如果已经获得发送通知的授权则创建本地通知,否则请求授权(注意:如果不请求授权在设置中是没有对应的通知设置项的,也就是说如果从来没有发送过请求,即使通过设置也打不开消息允许设置)
</span><span style="background: white; color: blue">if </span><span style="background: white; color: black">([[UIApplication sharedApplication]currentUserNotificationSettings].types!=UIUserNotificationTypeNone) {
[self addLocalNotification];
}</span><span style="background: white; color: blue">else</span><span style="background: white; color: black">{
[[UIApplication sharedApplication]registerUserNotificationSettings:[UIUserNotificationSettings settingsForTypes:UIUserNotificationTypeAlert|UIUserNotificationTypeBadge|UIUserNotificationTypeSound categories:nil]];
}
</span><span style="background: white; color: blue">return </span><span style="background: white; color: black">YES;
}
</span><span style="background: white; color: blue">#pragma </span><span style="background: white; color: black">mark 调用过用户注册通知方法之后执行(也就是调用完registerUserNotificationSettings:方法之后执行)
-(</span><span style="background: white; color: blue">void</span><span style="background: white; color: black">)application:(UIApplication *)application didRegisterUserNotificationSettings:(UIUserNotificationSettings *)notificationSettings{
</span><span style="background: white; color: blue">if </span><span style="background: white; color: black">(notificationSettings.types!=UIUserNotificationTypeNone) {
[self addLocalNotification];
}
}
</span><span style="background: white; color: blue">#pragma </span><span style="background: white; color: black">mark 进入前台后设置消息信息
-(</span><span style="background: white; color: blue">void</span><span style="background: white; color: black">)applicationWillEnterForeground:(UIApplication *)application{
[[UIApplication sharedApplication]setApplicationIconBadgeNumber:0];</span><span style="background: white; color: green">//进入前台取消应用消息图标
</span><span style="background: white; color: black">}
</span><span style="background: white; color: blue">#pragma </span><span style="background: white; color: black">mark - 私有方法
</span><span style="background: white; color: blue">#pragma </span><span style="background: white; color: black">mark 添加本地通知
-(</span><span style="background: white; color: blue">void</span><span style="background: white; color: black">)addLocalNotification{
</span><span style="background: white; color: green">//定义本地通知对象
</span><span style="background: white; color: black">UILocalNotification *notification=[[UILocalNotification alloc]init];
</span><span style="background: white; color: green">//设置调用时间
</span><span style="background: white; color: black">notification.fireDate=[NSDate dateWithTimeIntervalSinceNow:10.0];</span><span style="background: white; color: green">//通知触发的时间,10s以后
</span><span style="background: white; color: black">notification.repeatInterval=2;</span><span style="background: white; color: green">//通知重复次数
//notification.repeatCalendar=[NSCalendar currentCalendar];//当前日历,使用前最好设置时区等信息以便能够自动同步时间
//设置通知属性
</span><span style="background: white; color: black">notification.alertBody=@</span><span style="background: white; color: #a31515">"最近添加了诸多有趣的特性,是否立即体验?"</span><span style="background: white; color: black">; </span><span style="background: white; color: green">//通知主体
</span><span style="background: white; color: black">notification.applicationIconBadgeNumber=1;</span><span style="background: white; color: green">//应用程序图标右上角显示的消息数
</span><span style="background: white; color: black">notification.alertAction=@</span><span style="background: white; color: #a31515">"打开应用"</span><span style="background: white; color: black">; </span><span style="background: white; color: green">//待机界面的滑动动作提示
</span><span style="background: white; color: black">notification.alertLaunchImage=@</span><span style="background: white; color: #a31515">"Default"</span><span style="background: white; color: black">;</span><span style="background: white; color: green">//通过点击通知打开应用时的启动图片,这里使用程序启动图片
//notification.soundName=UILocalNotificationDefaultSoundName;//收到通知时播放的声音,默认消息声音
</span><span style="background: white; color: black"><a href="mailto:notification.soundName=@"msg.caf";//">notification.soundName=@</span><span style="background: white; color: #a31515">"msg.caf"</span><span style="background: white; color: black">;</span><span style="background: white; color: green">//</a>通知声音(需要真机才能听到声音)
//设置用户信息
</span><span style="background: white; color: black">notification.userInfo=@{@</span><span style="background: white; color: #a31515">"id"</span><span style="background: white; color: black">:@1,@</span><span style="background: white; color: #a31515">"user"</span><span style="background: white; color: black">:@</span><span style="background: white; color: #a31515">"Kenshin Cui"</span><span style="background: white; color: black">};</span><span style="background: white; color: green">//绑定到通知上的其他附加信息
//调用通知
</span><span style="background: white; color: black">[[UIApplication sharedApplication] scheduleLocalNotification:notification];
}
</span><span style="background: white; color: blue">#pragma </span><span style="background: white; color: black">mark 移除本地通知,在不需要此通知时记得移除
-(</span><span style="background: white; color: blue">void</span><span style="background: white; color: black">)removeNotification{
[[UIApplication sharedApplication] cancelAllLocalNotifications];
}
@end</span>请求获得用户允许通知的效果:

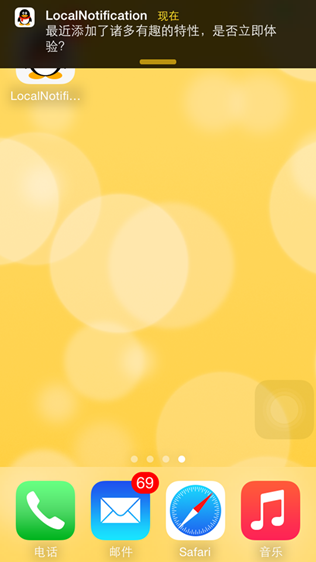
应用退出到后弹出通知的效果:

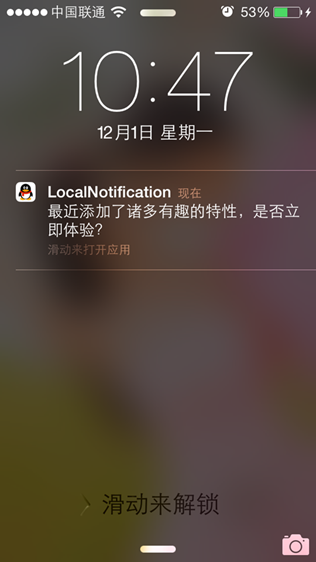
锁屏状态下的通知效果(从这个界面可以看到alertAction配置为“打开应用”):

注意:
在使用通知之前必须注册通知类型,如果用户不允许应用程序发送通知,则以后就无法发送通知,除非用户手动到iOS设置中打开通知。
本地通知是有操作系统统一调度的,只有在应用退出到后台或者关闭才能收到通知。(注意:这一点对于后面的推送通知也是完全适用的。 )
通知的声音是由iOS系统播放的,格式必须是Linear PCM、MA4(IMA/ADPCM)、µLaw、aLaw中的一种,并且播放时间必须在30s内,否则将被系统声音替换,同时自定义声音文件必须放到main boundle中。
本地通知的数量是有限制的,最近的本地通知最多只能有64个,超过这个数量将被系统忽略。
如果想要移除本地通知可以调用
UIApplication的cancelLocalNotification:或
cancelAllLocalNotifications移除指定通知或所有通知。
从上面的程序可以看到userInfo这个属性我们设置了参数,那么这个参数如何接收呢?
在iOS中如果点击一个弹出通知(或者锁屏界面滑动查看通知),默认会自动打开当前应用。由于通知由系统调度那么此时进入应用有两种情况:如果应用程序已经完全退出那么此时会调用
- (BOOL)application:(UIApplication *)application didFinishLaunchingWithOptions:(NSDictionary *)launchOptions方法;如果此时应用程序还在运行(无论是在前台还是在后台)则会调用

-(void)application:(UIApplication *)application didReceiveLocalNotification:(UILocalNotification *)notification方法接收消息参数。当然如果是后者自然不必多说,因为参数中已经可以拿到notification对象,只要读取userInfo属性即可。如果是前者的话则可以访问launchOptions中键为UIApplicationLaunchOptionsLocalNotificationKey的对象,这个对象就是发送的通知,由此对象再去访问userInfo。为了演示这个过程在下面的程序中将userInfo的内容写入文件以便模拟关闭程序后再通过点击通知打开应用获取userInfo的过程。
AppDelegate.m
<span style="background: white; color: green">//
// AppDelegate.m
// LocalNotification
//
// Created by Kenshin Cui on 14/03/28.
// Copyright (c) 2014年 Kenshin Cui. All rights reserved.
//
</span><span style="background: white; color: blue">#import </span><span style="background: white; color: #a31515">"AppDelegate.h"
</span><span style="background: white; color: blue">#import </span><span style="background: white; color: #a31515">"KCMainViewController.h"
</span><span style="background: white; color: black">@</span><span style="background: white; color: blue">interface </span><span style="background: white; color: black">AppDelegate ()
@end
@implementation AppDelegate
</span><span style="background: white; color: blue">#pragma </span><span style="background: white; color: black">mark - 应用代理方法
- (BOOL)application:(UIApplication *)application didFinishLaunchingWithOptions:(NSDictionary *)launchOptions {
_window=[[UIWindow alloc]initWithFrame:[UIScreen mainScreen].bounds];
_window.backgroundColor =[UIColor colorWithRed:249/255.0 green:249/255.0 blue:249/255.0 alpha:1];
</span><span style="background: white; color: green">//设置全局导航条风格和颜色
</span><span style="background: white; color: black">[[UINavigationBar appearance] setBarTintColor:[UIColor colorWithRed:23/255.0 green:180/255.0 blue:237/255.0 alpha:1]];
[[UINavigationBar appearance] setBarStyle:UIBarStyleBlack];
KCMainViewController *mainController=[[KCMainViewController alloc]init];
_window.rootViewController=mainController;
[_window makeKeyAndVisible];
</span><span style="background: white; color: green">//添加通知
</span><span style="background: white; color: black">[self addLocalNotification];
</span><span style="background: white; color: green">//接收通知参数
</span><span style="background: white; color: black">UILocalNotification *notification=[launchOptions valueForKey:UIApplicationLaunchOptionsLocalNotificationKey];
NSDictionary *userInfo= notification.userInfo;
[userInfo writeToFile:@</span><span style="background: white; color: #a31515">"/Users/kenshincui/Desktop/didFinishLaunchingWithOptions.txt" </span><span style="background: white; color: black">atomically:YES];
NSLog(@</span><span style="background: white; color: #a31515">"didFinishLaunchingWithOptions:The userInfo is %@."</span><span style="background: white; color: black">,userInfo);
</span><span style="background: white; color: blue">return </span><span style="background: white; color: black">YES;
}
</span><span style="background: white; color: blue">#pragma </span><span style="background: white; color: black">mark 接收本地通知时触发
-(</span><span style="background: white; color: blue">void</span><span style="background: white; color: black">)application:(UIApplication *)application didReceiveLocalNotification:(UILocalNotification *)notification{
NSDictionary *userInfo=notification.userInfo;
[userInfo writeToFile:@</span><span style="background: white; color: #a31515">"/Users/kenshincui/Desktop/didReceiveLocalNotification.txt" </span><span style="background: white; color: black">atomically:YES];
NSLog(@</span><span style="background: white; color: #a31515">"didReceiveLocalNotification:The userInfo is %@"</span><span style="background: white; color: black">,userInfo);
}
</span><span style="background: white; color: blue">#pragma </span><span style="background: white; color: black">mark 调用过用户注册通知方法之后执行(也就是调用完registerUserNotificationSettings:方法之后执行)
-(</span><span style="background: white; color: blue">void</span><span style="background: white; color: black">)application:(UIApplication *)application didRegisterUserNotificationSettings:(UIUserNotificationSettings *)notificationSettings{
</span><span style="background: white; color: blue">if </span><span style="background: white; color: black">(notificationSettings.types!=UIUserNotificationTypeNone) {
[self addLocalNotification];
}
}
</span><span style="background: white; color: blue">#pragma </span><span style="background: white; color: black">mark 进入前台后设置消息信息
-(</span><span style="background: white; color: blue">void</span><span style="background: white; color: black">)applicationWillEnterForeground:(UIApplication *)application{
[[UIApplication sharedApplication]setApplicationIconBadgeNumber:0];</span><span style="background: white; color: green">//进入前台取消应用消息图标
</span><span style="background: white; color: black">}
</span><span style="background: white; color: blue">#pragma </span><span style="background: white; color: black">mark - 私有方法
</span><span style="background: white; color: blue">#pragma </span><span style="background: white; color: black">mark 添加本地通知
-(</span><span style="background: white; color: blue">void</span><span style="background: white; color: black">)addLocalNotification{
</span><span style="background: white; color: green">//定义本地通知对象
</span><span style="background: white; color: black">UILocalNotification *notification=[[UILocalNotification alloc]init];
</span><span style="background: white; color: green">//设置调用时间
</span><span style="background: white; color: black">notification.fireDate=[NSDate dateWithTimeIntervalSinceNow:10.0];</span><span style="background: white; color: green">//通知触发的时间,10s以后
</span><span style="background: white; color: black">notification.repeatInterval=2;</span><span style="background: white; color: green">//通知重复次数
//notification.repeatCalendar=[NSCalendar currentCalendar];//当前日历,使用前最好设置时区等信息以便能够自动同步时间
//设置通知属性
</span><span style="background: white; color: black">notification.alertBody=@</span><span style="background: white; color: #a31515">"最近添加了诸多有趣的特性,是否立即体验?"</span><span style="background: white; color: black">; </span><span style="background: white; color: green">//通知主体
</span><span style="background: white; color: black">notification.applicationIconBadgeNumber=1;</span><span style="background: white; color: green">//应用程序图标右上角显示的消息数
</span><span style="background: white; color: black">notification.alertAction=@</span><span style="background: white; color: #a31515">"打开应用"</span><span style="background: white; color: black">; </span><span style="background: white; color: green">//待机界面的滑动动作提示
</span><span style="background: white; color: black">notification.alertLaunchImage=@</span><span style="background: white; color: #a31515">"Default"</span><span style="background: white; color: black">;</span><span style="background: white; color: green">//通过点击通知打开应用时的启动图片
//notification.soundName=UILocalNotificationDefaultSoundName;//收到通知时播放的声音,默认消息声音
</span><span style="background: white; color: black">notification.soundName=@</span><span style="background: white; color: #a31515">"msg.caf"</span><span style="background: white; color: black">;</span><span style="background: white; color: green">//通知声音(需要真机)
//设置用户信息
</span><span style="background: white; color: black">notification.userInfo=@{@</span><span style="background: white; color: #a31515">"id"</span><span style="background: white; color: black">:@1,@</span><span style="background: white; color: #a31515">"user"</span><span style="background: white; color: black">:@</span><span style="background: white; color: #a31515">"Kenshin Cui"</span><span style="background: white; color: black">};</span><span style="background: white; color: green">//绑定到通知上的其他额外信息
//调用通知
</span><span style="background: white; color: black">[[UIApplication sharedApplication] scheduleLocalNotification:notification];
}
@end</span>上面的程序可以分为两种情况去运行:一种是启动程序关闭程序,等到接收到通知之后点击通知重新进入程序;另一种是启动程序后,进入后台(其实在前台也可以,但是为了明显的体验这个过程建议进入后台),接收到通知后点击通知进入应用。另种情况会分别按照前面说的情况调用不同的方法接收到userInfo写入本地文件系统。有了userInfo一般来说就可以根据这个信息进行一些处理,例如可以根据不同的参数信息导航到不同的界面,假设是更新的通知则可以导航到更新内容界面等。
推送通知
和本地通知不同,推送通知是由应用服务提供商发起的,通过苹果的APNs(Apple Push Notification Server)发送到应用客户端。下面是苹果官方关于推送通知的过程示意图:

推送通知的过程可以分为以下几步:
应用服务提供商从服务器端把要发送的消息和设备令牌(device token)发送给苹果的消息推送服务器APNs。
APNs根据设备令牌在已注册的设备(iPhone、iPad、iTouch、mac等)查找对应的设备,将消息发送给相应的设备。
客户端设备接将接收到的消息传递给相应的应用程序,应用程序根据用户设置弹出通知消息。
当然,这只是一个简单的流程,有了这个流程我们还无从下手编写程序,将上面的流程细化可以得到如下流程图(图片来自互联网),在这个过程中会也会提到如何在程序中完成这些步骤:
1.应用程序注册APNs推送消息。
说明:
a.只有注册过的应用才有可能接收到消息,程序中通常通过UIApplication的
registerUserNotificationSettings:方法注册,iOS8中通知注册的方法发生了改变,如果是iOS7及之前版本的iOS请参考其他代码。
b.注册之前有两个前提条件必须准备好:开发配置文件(provisioning profile,也就是
.mobileprovision后缀的文件)的App ID不能使用通配ID必须使用指定APP ID并且生成配置文件中选择Push Notifications服务,一般的开发配置文件无法完成注册;应用程序的Bundle Identifier必须和生成配置文件使用的APP ID完全一致。
2.iOS从APNs接收device token,在应用程序获取device token。
说明:
a.在UIApplication的
-(void)application:(UIApplication *)application didRegisterForRemoteNotificationsWithDeviceToken:(NSData *)deviceToken代理方法中获取令牌,此方法发生在注册之后。
b.如果无法正确获得device token可以在UIApplication的
-(void)application:(UIApplication *)application didFailToRegisterForRemoteNotificationsWithError:(NSError *)error代理方法中查看详细错误信息,此方法发生在获取device token失败之后。
c.必须真机调试,模拟器无法获取device token。
3.iOS应用将device token发送给应用程序提供商,告诉服务器端当前设备允许接收消息。
说明:
a.device token的生成算法只有Apple掌握,为了确保算法发生变化后仍然能够正常接收服务器端发送的通知,每次应用程序启动都重新获得device token(注意:device token的获取不会造成性能问题,苹果官方已经做过优化)。
b.通常可以创建一个网络连接发送给应用程序提供商的服务器端, 在这个过程中最好将上一次获得的device token存储起来,避免重复发送,一旦发现device token发生了变化最好将原有的device token一块发送给服务器端,服务器端删除原有令牌存储新令牌避免服务器端发送无效消息。
4.应用程序提供商在服务器端根据前面发送过来的device token组织信息发送给APNs。
说明:
a.发送时指定device token和消息内容,并且完全按照苹果官方的消息格式组织消息内容,通常情况下可以借助其他第三方消息推送框架来完成。
5.APNs根据消息中的device token查找已注册的设备推送消息。
说明:
a.正常情况下可以根据device token将消息成功推送到客户端设备中,但是也不排除用户卸载程序的情况,此时推送消息失败,APNs会将这个错误消息通知服务器端以避免资源浪费(服务器端此时可以根据错误删除已经存储的device token,下次不再发送)。
下面将简单演示一下推送通知的简单流程:
首先,看一下iOS客户端代码:
<span style="background: white; color: green">//
// AppDelegate.m
// pushnotification
//
// Created by Kenshin Cui on 14/03/27.
// Copyright (c) 2014年 Kenshin Cui. All rights reserved.
//
</span><span style="background: white; color: blue">#import </span><span style="background: white; color: #a31515">"AppDelegate.h"
</span><span style="background: white; color: blue">#import </span><span style="background: white; color: #a31515">"KCMainViewController.h"
</span><span style="background: white; color: black">@</span><span style="background: white; color: blue">interface </span><span style="background: white; color: black">AppDelegate ()
@end
@implementation AppDelegate
</span><span style="background: white; color: blue">#pragma </span><span style="background: white; color: black">mark - 应用程序代理方法
</span><span style="background: white; color: blue">#pragma </span><span style="background: white; color: black">mark 应用程序启动之后
- (BOOL)application:(UIApplication *)application didFinishLaunchingWithOptions:(NSDictionary *)launchOptions {
_window=[[UIWindow alloc]initWithFrame:[UIScreen mainScreen].bounds];
_window.backgroundColor =[UIColor colorWithRed:249/255.0 green:249/255.0 blue:249/255.0 alpha:1];
</span><span style="background: white; color: green">//设置全局导航条风格和颜色
</span><span style="background: white; color: black">[[UINavigationBar appearance] setBarTintColor:[UIColor colorWithRed:23/255.0 green:180/255.0 blue:237/255.0 alpha:1]];
[[UINavigationBar appearance] setBarStyle:UIBarStyleBlack];
KCMainViewController *mainController=[[KCMainViewController alloc]init];
_window.rootViewController=mainController;
[_window makeKeyAndVisible];
</span><span style="background: white; color: green">//注册推送通知(注意iOS8注册方法发生了变化)
</span><span style="background: white; color: black">[application registerUserNotificationSettings:[UIUserNotificationSettings settingsForTypes:UIUserNotificationTypeAlert|UIUserNotificationTypeBadge|UIUserNotificationTypeSound categories:nil]];
[application registerForRemoteNotifications];
</span><span style="background: white; color: blue">return </span><span style="background: white; color: black">YES;
}
</span><span style="background: white; color: blue">#pragma </span><span style="background: white; color: black">mark 注册推送通知之后
</span><span style="background: white; color: green">//在此接收设备令牌
</span><span style="background: white; color: black">-(</span><span style="background: white; color: blue">void</span><span style="background: white; color: black">)application:(UIApplication *)application didRegisterForRemoteNotificationsWithDeviceToken:(NSData *)deviceToken{
[self addDeviceToken:deviceToken];
NSLog(@</span><span style="background: white; color: #a31515">"device token:%@"</span><span style="background: white; color: black">,deviceToken);
}
</span><span style="background: white; color: blue">#pragma </span><span style="background: white; color: black">mark 获取device token失败后
-(</span><span style="background: white; color: blue">void</span><span style="background: white; color: black">)application:(UIApplication *)application didFailToRegisterForRemoteNotificationsWithError:(NSError *)error{
NSLog(@</span><span style="background: white; color: #a31515">"didFailToRegisterForRemoteNotificationsWithError:%@"</span><span style="background: white; color: black">,error.localizedDescription);
[self addDeviceToken:nil];
}
</span><span style="background: white; color: blue">#pragma </span><span style="background: white; color: black">mark 接收到推送通知之后
-(</span><span style="background: white; color: blue">void</span><span style="background: white; color: black">)application:(UIApplication *)application didReceiveRemoteNotification:(NSDictionary *)userInfo{
NSLog(@</span><span style="background: white; color: #a31515">"receiveRemoteNotification,userInfo is %@"</span><span style="background: white; color: black">,userInfo);
}
</span><span style="background: white; color: blue">#pragma </span><span style="background: white; color: black">mark - 私有方法
</span><span style="background: white; color: green">/**
* 添加设备令牌到服务器端
*
* @param deviceToken 设备令牌
*/
</span><span style="background: white; color: black">-(</span><span style="background: white; color: blue">void</span><span style="background: white; color: black">)addDeviceToken:(NSData *)deviceToken{
NSString *key=@</span><span style="background: white; color: #a31515">"DeviceToken"</span><span style="background: white; color: black">;
NSData *oldToken= [[NSUserDefaults standardUserDefaults]objectForKey:key];
</span><span style="background: white; color: green">//如果偏好设置中的已存储设备令牌和新获取的令牌不同则存储新令牌并且发送给服务器端
</span><span style="background: white; color: blue">if </span><span style="background: white; color: black">(![oldToken isEqualToData:deviceToken]) {
[[NSUserDefaults standardUserDefaults] setObject:deviceToken forKey:key];
[self sendDeviceTokenWidthOldDeviceToken:oldToken newDeviceToken:deviceToken];
}
}
-(</span><span style="background: white; color: blue">void</span><span style="background: white; color: black">)sendDeviceTokenWidthOldDeviceToken:(NSData *)oldToken newDeviceToken:(NSData *)newToken{
</span><span style="background: white; color: green">//注意一定确保真机可以正常访问下面的地址
</span><span style="background: white; color: black">NSString *urlStr=@</span><span style="background: white; color: #a31515">"http://192.168.1.101/RegisterDeviceToken.aspx"</span><span style="background: white; color: black">;
urlStr=[urlStr stringByAddingPercentEscapesUsingEncoding:NSUTF8StringEncoding];
NSURL *url=[NSURL URLWithString:urlStr];
NSMutableURLRequest *requestM=[NSMutableURLRequest requestWithURL:url cachePolicy:0 timeoutInterval:10.0];
[requestM setHTTPMethod:@</span><span style="background: white; color: #a31515">"POST"</span><span style="background: white; color: black">];
NSString *bodyStr=[NSString stringWithFormat:@</span><span style="background: white; color: #a31515">"oldToken=%@&newToken=%@"</span><span style="background: white; color: black">,oldToken,newToken];
NSData *body=[bodyStr dataUsingEncoding:NSUTF8StringEncoding];
[requestM setHTTPBody:body];
NSURLSession *session=[NSURLSession sharedSession];
NSURLSessionDataTask *dataTask= [session dataTaskWithRequest:requestM completionHandler:^(NSData *data, NSURLResponse *response, NSError *error) {
</span><span style="background: white; color: blue">if </span><span style="background: white; color: black">(error) {
NSLog(@</span><span style="background: white; color: #a31515">"Send failure,error is :%@"</span><span style="background: white; color: black">,error.localizedDescription);
}</span><span style="background: white; color: blue">else</span><span style="background: white; color: black">{
NSLog(@</span><span style="background: white; color: #a31515">"Send Success!"</span><span style="background: white; color: black">);
}
}];
[dataTask resume];
}
@end</span>iOS客户端代码的代码比较简单,注册推送通知,获取device token存储到偏好设置中,并且如果新获取的device token不同于偏好设置中存储的数据则发送给服务器端,更新服务器端device token列表。
其次,由于device token需要发送给服务器端,这里使用一个Web应用作为服务器端接收device token,这里使用了ASP.NET程序来处理令牌接收注册工作,当然你使用其他技术同样没有问题。下面是对应的后台代码:
<span style="background: white; color: blue">using </span><span style="background: white; color: black">System;
</span><span style="background: white; color: blue">using </span><span style="background: white; color: black">System.Collections.Generic;
</span><span style="background: white; color: blue">using </span><span style="background: white; color: black">System.Web;
</span><span style="background: white; color: blue">using </span><span style="background: white; color: black">System.Web.UI;
</span><span style="background: white; color: blue">using </span><span style="background: white; color: black">System.Web.UI.WebControls;
</span><span style="background: white; color: blue">using </span><span style="background: white; color: black">CMJ.Framework.Data;
</span><span style="background: white; color: blue">namespace </span><span style="background: white; color: black">WebServer
{
</span><span style="background: white; color: blue">public partial class </span><span style="background: white; color: #2b91af">RegisterDeviceToken </span><span style="background: white; color: black">: System.Web.UI.</span><span style="background: white; color: #2b91af">Page
</span><span style="background: white; color: black">{
</span><span style="background: white; color: blue">private string </span><span style="background: white; color: black">_appID = </span><span style="background: white; color: #a31515">@"com.cmjstudio.pushnotification"</span><span style="background: white; color: black">;
</span><span style="background: white; color: blue">private </span><span style="background: white; color: black">SqlHelper _helper = </span><span style="background: white; color: blue">new </span><span style="background: white; color: black">SqlHelper();
</span><span style="background: white; color: blue">protected void </span><span style="background: white; color: black">Page_Load(</span><span style="background: white; color: blue">object </span><span style="background: white; color: black">sender, </span><span style="background: white; color: #2b91af">EventArgs </span><span style="background: white; color: black">e)
{
</span><span style="background: white; color: blue">try
</span><span style="background: white; color: black">{
</span><span style="background: white; color: blue">string </span><span style="background: white; color: black">oldToken = Request[</span><span style="background: white; color: #a31515">"oldToken"</span><span style="background: white; color: black">] + </span><span style="background: white; color: #a31515">""</span><span style="background: white; color: black">;
</span><span style="background: white; color: blue">string </span><span style="background: white; color: black">newToken = Request[</span><span style="background: white; color: #a31515">"newToken"</span><span style="background: white; color: black">] + </span><span style="background: white; color: #a31515">""</span><span style="background: white; color: black">;
</span><span style="background: white; color: blue">string </span><span style="background: white; color: black">sql = </span><span style="background: white; color: #a31515">""</span><span style="background: white; color: black">;
</span><span style="background: white; color: green">//如果传递旧的设备令牌则删除旧令牌添加新令牌
</span><span style="background: white; color: blue">if </span><span style="background: white; color: black">(oldToken != </span><span style="background: white; color: #a31515">""</span><span style="background: white; color: black">)
{
sql = </span><span style="background: white; color: blue">string</span><span style="background: white; color: black">.Format(</span><span style="background: white; color: #a31515">"DELETE FROM dbo.Device WHERE AppID='{0}' AND DeviceToken='{1}';"</span><span style="background: white; color: black">, _appID, oldToken);
}
sql += </span><span style="background: white; color: blue">string</span><span style="background: white; color: black">.Format(</span><span style="background: white; color: #a31515">@"IF NOT EXISTS (SELECT ID FROM dbo.Device WHERE AppID='{0}' AND DeviceToken='{1}')
INSERT INTO dbo.Device ( AppID, DeviceToken ) VALUES ( N'{0}', N'{1}');"</span><span style="background: white; color: black">, _appID, newToken);
_helper.ExecuteNonQuery(sql);
Response.Write(</span><span style="background: white; color: #a31515">"注册成功!"</span><span style="background: white; color: black">);
}
</span><span style="background: white; color: blue">catch</span><span style="background: white; color: black">(</span><span style="background: white; color: #2b91af">Exception </span><span style="background: white; color: black">ex)
{
Response.Write(</span><span style="background: white; color: #a31515">"注册失败,错误详情:"</span><span style="background: white; color: black">+ex.ToString());
}
}
}
}</span>这个过程主要就是保存device token到数据库中,当然如果同时传递旧的设备令牌还需要先删除就的设备令牌,这里简单的在数据库中创建了一张Device表来保存设备令牌,其中记录了应用程序Id和设备令牌。
第三步就是服务器端发送消息,如果要给APNs发送消息就必须按照Apple的标准消息格式组织消息内容。但是好在目前已经有很多开源的第三方类库供我们使用,具体消息如何包装完全不用自己组织,这里使用一个开源的类库Push Sharp来给APNs发送消息 ,除了可以给Apple设备推送消息,Push Sharp还支持Android、Windows Phone等多种设备,更多详细内容大家可以参照官方说明。前面说过如果要开发消息推送应用不能使用一般的开发配置文件,这里还需要注意:如果服务器端要给APNs发送消息其秘钥也必须是通过
APNs Development iOS类型的证书来导出的,一般的

iOS Development类型的证书导出的秘钥无法用作服务器端发送秘钥。下面通过在一个简单的WinForm程序中调用Push Sharp给APNs发送消息,这里读取之前Device表中的所有设备令牌循环发送消息:
<span style="background: white; color: blue">using </span><span style="background: white; color: black">System;
</span><span style="background: white; color: blue">using </span><span style="background: white; color: black">System.IO;
</span><span style="background: white; color: blue">using </span><span style="background: white; color: black">System.Collections.Generic;
</span><span style="background: white; color: blue">using </span><span style="background: white; color: black">System.ComponentModel;
</span><span style="background: white; color: blue">using </span><span style="background: white; color: black">System.Data;
</span><span style="background: white; color: blue">using </span><span style="background: white; color: black">System.Drawing;
</span><span style="background: white; color: blue">using </span><span style="background: white; color: black">System.Text;
</span><span style="background: white; color: blue">using </span><span style="background: white; color: black">System.Windows.Forms;
</span><span style="background: white; color: blue">using </span><span style="background: white; color: black">PushSharp;
</span><span style="background: white; color: blue">using </span><span style="background: white; color: black">PushSharp.Apple;
</span><span style="background: white; color: blue">using </span><span style="background: white; color: black">CMJ.Framework.Data;
</span><span style="background: white; color: blue">using </span><span style="background: white; color: black">CMJ.Framework.Logging;
</span><span style="background: white; color: blue">using </span><span style="background: white; color: black">CMJ.Framework.Windows.Forms;
</span><span style="background: white; color: blue">namespace </span><span style="background: white; color: black">PushNotificationServer
{
</span><span style="background: white; color: blue">public partial class </span><span style="background: white; color: #2b91af">frmMain </span><span style="background: white; color: black">: PersonalizeForm
{
</span><span style="background: white; color: blue">private string </span><span style="background: white; color: black">_appID = </span><span style="background: white; color: #a31515">@"com.cmjstudio.pushnotification"</span><span style="background: white; color: black">;
</span><span style="background: white; color: blue">private </span><span style="background: white; color: black">SqlHelper _helper = </span><span style="background: white; color: blue">new </span><span style="background: white; color: black">SqlHelper();
</span><span style="background: white; color: blue">public </span><span style="background: white; color: black">frmMain()
{
InitializeComponent();
}
</span><span style="background: white; color: blue">private void </span><span style="background: white; color: black">btnClose_Click(</span><span style="background: white; color: blue">object </span><span style="background: white; color: black">sender, </span><span style="background: white; color: #2b91af">EventArgs </span><span style="background: white; color: black">e)
{
</span><span style="background: white; color: blue">this</span><span style="background: white; color: black">.Close();
}
</span><span style="background: white; color: blue">private void </span><span style="background: white; color: black">btnSend_Click(</span><span style="background: white; color: blue">object </span><span style="background: white; color: black">sender, </span><span style="background: white; color: #2b91af">EventArgs </span><span style="background: white; color: black">e)
{
</span><span style="background: white; color: #2b91af">List</span><span style="background: white; color: black"><</span><span style="background: white; color: blue">string</span><span style="background: white; color: black">> deviceTokens = GetDeviceToken();
SendMessage(deviceTokens, tbMessage.Text);
}
</span><span style="background: white; color: blue">#region </span><span style="background: white; color: black">发送消息
</span><span style="background: white; color: gray">/// <summary>
/// </span><span style="background: white; color: green">取得所有设备令牌
</span><span style="background: white; color: gray">/// </summary>
/// <returns></span><span style="background: white; color: green">设备令牌</span><span style="background: white; color: gray"></returns>
</span><span style="background: white; color: blue">private </span><span style="background: white; color: #2b91af">List</span><span style="background: white; color: black"><</span><span style="background: white; color: blue">string</span><span style="background: white; color: black">> GetDeviceToken()
{
</span><span style="background: white; color: #2b91af">List</span><span style="background: white; color: black"><</span><span style="background: white; color: blue">string</span><span style="background: white; color: black">> deviceTokens = </span><span style="background: white; color: blue">new </span><span style="background: white; color: #2b91af">List</span><span style="background: white; color: black"><</span><span style="background: white; color: blue">string</span><span style="background: white; color: black">>();
</span><span style="background: white; color: blue">string </span><span style="background: white; color: black">sql = </span><span style="background: white; color: blue">string</span><span style="background: white; color: black">.Format(</span><span style="background: white; color: #a31515">"SELECT DeviceToken FROM dbo.Device WHERE AppID='{0}'"</span><span style="background: white; color: black">,_appID);
</span><span style="background: white; color: #2b91af">DataTable </span><span style="background: white; color: black">dt = _helper.GetDataTable(sql);
</span><span style="background: white; color: blue">if</span><span style="background: white; color: black">(dt.Rows.Count>0)
{
</span><span style="background: white; color: blue">foreach</span><span style="background: white; color: black">(</span><span style="background: white; color: #2b91af">DataRow </span><span style="background: white; color: black">dr </span><span style="background: white; color: blue">in </span><span style="background: white; color: black">dt.Rows)
{
deviceTokens.Add((dr[</span><span style="background: white; color: #a31515">"DeviceToken"</span><span style="background: white; color: black">]+</span><span style="background: white; color: #a31515">""</span><span style="background: white; color: black">).TrimStart(</span><span style="background: white; color: #a31515">'<'</span><span style="background: white; color: black">).TrimEnd(</span><span style="background: white; color: #a31515">'>'</span><span style="background: white; color: black">).Replace(</span><span style="background: white; color: #a31515">" "</span><span style="background: white; color: black">,</span><span style="background: white; color: #a31515">""</span><span style="background: white; color: black">));
}
}
</span><span style="background: white; color: blue">return </span><span style="background: white; color: black">deviceTokens;
}
</span><span style="background: white; color: gray">/// <summary>
/// </span><span style="background: white; color: green">发送消息
</span><span style="background: white; color: gray">/// </summary>
/// <param name="deviceToken"></span><span style="background: white; color: green">设备令牌</span><span style="background: white; color: gray"></param>
/// <param name="message"></span><span style="background: white; color: green">消息内容</span><span style="background: white; color: gray"></param>
</span><span style="background: white; color: blue">private void </span><span style="background: white; color: black">SendMessage(</span><span style="background: white; color: #2b91af">List</span><span style="background: white; color: black"><</span><span style="background: white; color: blue">string</span><span style="background: white; color: black">> deviceToken, </span><span style="background: white; color: blue">string </span><span style="background: white; color: black">message)
{
</span><span style="background: white; color: green">//创建推送对象
</span><span style="background: white; color: blue">var </span><span style="background: white; color: black">pusher = </span><span style="background: white; color: blue">new </span><span style="background: white; color: #2b91af">PushBroker</span><span style="background: white; color: black">();
pusher.OnNotificationSent += pusher_OnNotificationSent;</span><span style="background: white; color: green">//发送成功事件
</span><span style="background: white; color: black">pusher.OnNotificationFailed += pusher_OnNotificationFailed;</span><span style="background: white; color: green">//发送失败事件
</span><span style="background: white; color: black">pusher.OnChannelCreated += pusher_OnChannelCreated;
pusher.OnChannelDestroyed += pusher_OnChannelDestroyed;
pusher.OnChannelException += pusher_OnChannelException;
pusher.OnDeviceSubscriptionChanged += pusher_OnDeviceSubscriptionChanged;
pusher.OnDeviceSubscriptionExpired += pusher_OnDeviceSubscriptionExpired;
pusher.OnNotificationRequeue += pusher_OnNotificationRequeue;
pusher.OnServiceException += pusher_OnServiceException;
</span><span style="background: white; color: green">//注册推送服务
</span><span style="background: white; color: blue">byte</span><span style="background: white; color: black">[] certificateData = </span><span style="background: white; color: #2b91af">File</span><span style="background: white; color: black">.ReadAllBytes(</span><span style="background: white; color: #a31515">@"E:KenshinCui_Push.p12"</span><span style="background: white; color: black">);
pusher.RegisterAppleService(</span><span style="background: white; color: blue">new </span><span style="background: white; color: #2b91af">ApplePushChannelSettings</span><span style="background: white; color: black">(certificateData, </span><span style="background: white; color: #a31515">"123"</span><span style="background: white; color: black">));
</span><span style="background: white; color: blue">foreach </span><span style="background: white; color: black">(</span><span style="background: white; color: blue">string </span><span style="background: white; color: black">token </span><span style="background: white; color: blue">in </span><span style="background: white; color: black">deviceToken)
{
</span><span style="background: white; color: green">//给指定设备发送消息
</span><span style="background: white; color: black">pusher.QueueNotification(</span><span style="background: white; color: blue">new </span><span style="background: white; color: #2b91af">AppleNotification</span><span style="background: white; color: black">()
.ForDeviceToken(token)
.WithAlert(message)
.WithBadge(1)
.WithSound(</span><span style="background: white; color: #a31515">"default"</span><span style="background: white; color: black">));
}
}
</span><span style="background: white; color: blue">void </span><span style="background: white; color: black">pusher_OnServiceException(</span><span style="background: white; color: blue">object </span><span style="background: white; color: black">sender, </span><span style="background: white; color: #2b91af">Exception </span><span style="background: white; color: black">error)
{
</span><span style="background: white; color: #2b91af">Console</span><span style="background: white; color: black">.WriteLine(</span><span style="background: white; color: #a31515">"消息发送失败,错误详情:" </span><span style="background: white; color: black">+ error.ToString());
PersonalizeMessageBox.Show(</span><span style="background: white; color: blue">this</span><span style="background: white; color: black">, </span><span style="background: white; color: #a31515">"消息发送失败,错误详情:" </span><span style="background: white; color: black">+ error.ToString(), </span><span style="background: white; color: #a31515">"系统提示"</span><span style="background: white; color: black">);
}
</span><span style="background: white; color: blue">void </span><span style="background: white; color: black">pusher_OnNotificationRequeue(</span><span style="background: white; color: blue">object </span><span style="background: white; color: black">sender, PushSharp.Core.</span><span style="background: white; color: #2b91af">NotificationRequeueEventArgs </span><span style="background: white; color: black">e)
{
</span><span style="background: white; color: #2b91af">Console</span><span style="background: white; color: black">.WriteLine(</span><span style="background: white; color: #a31515">"pusher_OnNotificationRequeue"</span><span style="background: white; color: black">);
}
</span><span style="background: white; color: blue">void </span><span style="background: white; color: black">pusher_OnDeviceSubscriptionExpired(</span><span style="background: white; color: blue">object </span><span style="background: white; color: black">sender, </span><span style="background: white; color: blue">string </span><span style="background: white; color: black">expiredSubscriptionId, </span><span style="background: white; color: #2b91af">DateTime </span><span style="background: white; color: black">expirationDateUtc, PushSharp.Core.</span><span style="background: white; color: #2b91af">INotification </span><span style="background: white; color: black">notification)
{
</span><span style="background: white; color: #2b91af">Console</span><span style="background: white; color: black">.WriteLine(</span><span style="background: white; color: #a31515">"pusher_OnDeviceSubscriptionChanged"</span><span style="background: white; color: black">);
}
</span><span style="background: white; color: blue">void </span><span style="background: white; color: black">pusher_OnDeviceSubscriptionChanged(</span><span style="background: white; color: blue">object </span><span style="background: white; color: black">sender, </span><span style="background: white; color: blue">string </span><span style="background: white; color: black">oldSubscriptionId, </span><span style="background: white; color: blue">string </span><span style="background: white; color: black">newSubscriptionId, PushSharp.Core.</span><span style="background: white; color: #2b91af">INotification </span><span style="background: white; color: black">notification)
{
</span><span style="background: white; color: #2b91af">Console</span><span style="background: white; color: black">.WriteLine(</span><span style="background: white; color: #a31515">"pusher_OnDeviceSubscriptionChanged"</span><span style="background: white; color: black">);
}
</span><span style="background: white; color: blue">void </span><span style="background: white; color: black">pusher_OnChannelException(</span><span style="background: white; color: blue">object </span><span style="background: white; color: black">sender, PushSharp.Core.</span><span style="background: white; color: #2b91af">IPushChannel </span><span style="background: white; color: black">pushChannel, </span><span style="background: white; color: #2b91af">Exception </span><span style="background: white; color: black">error)
{
</span><span style="background: white; color: #2b91af">Console</span><span style="background: white; color: black">.WriteLine(</span><span style="background: white; color: #a31515">"消息发送失败,错误详情:" </span><span style="background: white; color: black">+ error.ToString());
PersonalizeMessageBox.Show(</span><span style="background: white; color: blue">this</span><span style="background: white; color: black">, </span><span style="background: white; color: #a31515">"消息发送失败,错误详情:" </span><span style="background: white; color: black">+ error.ToString(), </span><span style="background: white; color: #a31515">"系统提示"</span><span style="background: white; color: black">);
}
</span><span style="background: white; color: blue">void </span><span style="background: white; color: black">pusher_OnChannelDestroyed(</span><span style="background: white; color: blue">object </span><span style="background: white; color: black">sender)
{
</span><span style="background: white; color: #2b91af">Console</span><span style="background: white; color: black">.WriteLine(</span><span style="background: white; color: #a31515">"pusher_OnChannelDestroyed"</span><span style="background: white; color: black">);
}
</span><span style="background: white; color: blue">void </span><span style="background: white; color: black">pusher_OnChannelCreated(</span><span style="background: white; color: blue">object </span><span style="background: white; color: black">sender, PushSharp.Core.</span><span style="background: white; color: #2b91af">IPushChannel </span><span style="background: white; color: black">pushChannel)
{
</span><span style="background: white; color: #2b91af">Console</span><span style="background: white; color: black">.WriteLine(</span><span style="background: white; color: #a31515">"pusher_OnChannelCreated"</span><span style="background: white; color: black">);
}
</span><span style="background: white; color: blue">void </span><span style="background: white; color: black">pusher_OnNotificationFailed(</span><span style="background: white; color: blue">object </span><span style="background: white; color: black">sender, PushSharp.Core.</span><span style="background: white; color: #2b91af">INotification </span><span style="background: white; color: black">notification, </span><span style="background: white; color: #2b91af">Exception </span><span style="background: white; color: black">error)
{
</span><span style="background: white; color: #2b91af">Console</span><span style="background: white; color: black">.WriteLine(</span><span style="background: white; color: #a31515">"消息发送失败,错误详情:" </span><span style="background: white; color: black">+ error.ToString());
PersonalizeMessageBox.Show(</span><span style="background: white; color: blue">this</span><span style="background: white; color: black">, </span><span style="background: white; color: #a31515">"消息发送失败,错误详情:"</span><span style="background: white; color: black">+error.ToString(), </span><span style="background: white; color: #a31515">"系统提示"</span><span style="background: white; color: black">);
}
</span><span style="background: white; color: blue">void </span><span style="background: white; color: black">pusher_OnNotificationSent(</span><span style="background: white; color: blue">object </span><span style="background: white; color: black">sender, PushSharp.Core.</span><span style="background: white; color: #2b91af">INotification </span><span style="background: white; color: black">notification)
{
</span><span style="background: white; color: #2b91af">Console</span><span style="background: white; color: black">.WriteLine(</span><span style="background: white; color: #a31515">"消息发送成功!"</span><span style="background: white; color: black">);
PersonalizeMessageBox.Show(</span><span style="background: white; color: blue">this</span><span style="background: white; color: black">, </span><span style="background: white; color: #a31515">"消息发送成功!"</span><span style="background: white; color: black">, </span><span style="background: white; color: #a31515">"系统提示"</span><span style="background: white; color: black">);
}
</span><span style="background: white; color: blue">#endregion
</span><span style="background: white; color: black">}
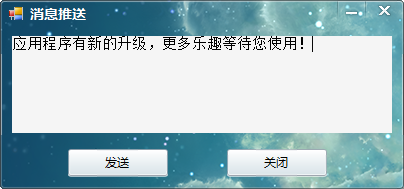
}</span>服务器端消息发送应用运行效果:

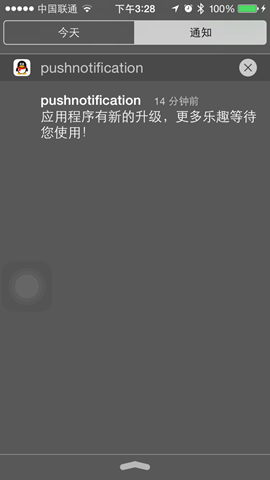
iOS客户端接收的消息的效果:

到目前为止通过服务器端应用可以顺利发送消息给APNs并且iOS应用已经成功接收推送消息。
补充--iOS开发证书、秘钥
iOS开发过程中如果需要进行真机调试、发布需要注册申请很多证书,对于初学者往往迷惑不解,再加上今天的文章中会牵扯到一些特殊配置,这里就简单的对iOS开发的常用证书和秘钥等做一说明。
证书
iOS常用的证书包括开发证书和发布证书,无论是真机调试还是最终发布应用到App Store这两个证书都是必须的,它是iOS开发的基本证书。
a.开发证书:开发证书又分为普通开发证书和推送证书,如果仅仅是一般的应用则前者即可满足,但是如果开发推送应用则必须使用推送证书。
b.发布证书:发布证书又可以分为普通发布证书、推送证书、Pass Type ID证书、站点发布证书、VoIP服务证书、苹果支付证书。同样的,对于需要使用特殊服务的应用则必须选择对应的证书。
应用标识
App ID,应用程序的唯一标识,对应iOS应用的Bundle Identifier,App ID在苹果开发者中心中分为通配应用ID和明确的应用ID,前者一般用于普通应用开发,一个ID可以适用于多个不同标识的应用;但是对于使用消息推送、Passbook、站点发布、iCloud等服务的应用必须配置明确的应用ID。
设备标识
UDID,用于标识每一台硬件设备的标示符。注意它不是device token,device token是根据UDID使用一个只有Apple自己才知道的算法生成的一组标示符。
配置简介
Provisioning Profiles,平时又称为PP文件。将UDID、App ID、开发证书打包在一起的配置文件,同样分为开发和发布两类配置文件。
秘钥
在申请开发证书时必须要首先提交一个秘钥请求文件,对于生成秘钥请求文件的mac,如果要做开发则只需要下载证书和配置简介即可开发。但是如果要想在其他机器上做开发则必须将证书中的秘钥导出(导出之后是一个.p12文件),然后导入其他机器。同时对于类似于推送服务器端应用如果要给APNs发送消息,同样需要使用.p12秘钥文件,并且这个秘钥文件需要是推送证书导出的对应秘钥。
补充--通知中心
对于很多初学者往往会把iOS中的本地通知、推送通知和iOS通知中心的概念弄混。其实二者之间并没有任何关系,事实上它们都不属于一个框架,前者属于UIKit框架,后者属于Foundation框架。
通知中心实际上是iOS程序内部之间的一种消息广播机制,主要为了解决应用程序内部不同对象之间解耦而设计。它是基于观察者模式设计的,不能跨应用程序进程通信,当通知中心接收到消息之后会根据内部的消息转发表,将消息发送给订阅者。下面是一个简单的流程示意图:

了解通知中心需要熟悉NSNotificationCenter和NSNotification两个类:
NSNotificationCenter:是通知系统的中心,用于注册和发送通知,下表列出常用的方法。
方法 说明
- (void)addObserver:(id)observer selector:(SEL)aSelector name:(NSString *)aName object:(id)anObject 添加监听,参数:
observer:监听者
selector:监听方法(监听者监听到通知后执行的方法)
name:监听的通知名称
object:通知的发送者(如果指定nil则监听任何对象发送的通知)
- (id <NSObject>)addObserverForName:(NSString *)name object:(id)obj queue:(NSOperationQueue *)queue usingBlock:(void (^)(NSNotification *note))block 添加监听,参数:
name:监听的通知名称
object:通知的发送者(如果指定nil则监听任何对象发送的通知)
queue:操作队列,如果制定非主队线程队列则可以异步执行block
block:监听到通知后执行的操作
- (void)postNotification:(NSNotification *)notification 发送通知,参数:
notification:通知对象
- (void)postNotificationName:(NSString *)aName object:(id)anObject 发送通知,参数:
aName:通知名称
anObject:通知发送者
- (void)postNotificationName:(NSString *)aName object:(id)anObject userInfo:(NSDictionary *)aUserInfo 发送通知,参数:
aName:通知名称
anObject:通知发送者
aUserInfo:通知参数
- (void)removeObserver:(id)observer 移除监听,参数:
observer:监听对象
- (void)removeObserver:(id)observer name:(NSString *)aName object:(id)anObject 移除监听,参数:
observer:监听对象
aName:通知名称
anObject:通知发送者
NSNotification:代表通知内容的载体,主要有三个属性:name代表通知名称,object代表通知的发送者,userInfo代表通知的附加信息。
虽然前面的文章中从未提到过通知中心,但是其实通知中心我们并不陌生,前面文章中很多内容都是通过通知中心来进行应用中各个组件通信的,只是没有单独拿出来说而已。例如前面的文章中讨论的应用程序生命周期问题,当应用程序启动后、进入后台、进入前台、获得焦点、失去焦点,窗口大小改变、隐藏等都会发送通知。这个通知可以通过前面NSNotificationCenter进行订阅即可接收对应的消息,下面的示例演示了如何添加监听获得UIApplication的进入后台和获得焦点的通知:
<span style="background: white; color: green">//
// KCMainViewController.m
// NotificationCenter
//
// Created by Kenshin Cui on 14/03/27.
// Copyright (c) 2014年 cmjstudio. All rights reserved.
//
</span><span style="background: white; color: blue">#import </span><span style="background: white; color: #a31515">"KCMainViewController.h"
</span><span style="background: white; color: black">@</span><span style="background: white; color: blue">interface </span><span style="background: white; color: black">KCMainViewController ()
@end
@implementation KCMainViewController
- (</span><span style="background: white; color: blue">void</span><span style="background: white; color: black">)viewDidLoad {
[super viewDidLoad];
[self addObserverToNotificationCenter];
}
</span><span style="background: white; color: blue">#pragma </span><span style="background: white; color: black">mark 添加监听
-(</span><span style="background: white; color: blue">void</span><span style="background: white; color: black">)addObserverToNotificationCenter{
</span><span style="background: white; color: green">/*添加应用程序进入后台监听
* observer:监听者
* selector:监听方法(监听者监听到通知后执行的方法)
* name:监听的通知名称(下面的UIApplicationDidEnterBackgroundNotification是一个常量)
* object:通知的发送者(如果指定nil则监听任何对象发送的通知)
*/
</span><span style="background: white; color: black">[[NSNotificationCenter defaultCenter] addObserver:self selector:@selector(applicationEnterBackground) name:UIApplicationDidEnterBackgroundNotification object:[UIApplication sharedApplication]];
</span><span style="background: white; color: green">/* 添加应用程序获得焦点的通知监听
* name:监听的通知名称
* object:通知的发送者(如果指定nil则监听任何对象发送的通知)
* queue:操作队列,如果制定非主队线程队列则可以异步执行block
* block:监听到通知后执行的操作
*/
</span><span style="background: white; color: black">NSOperationQueue *operationQueue=[[NSOperationQueue alloc]init];
[[NSNotificationCenter defaultCenter] addObserverForName:UIApplicationDidBecomeActiveNotification object:[UIApplication sharedApplication] queue:operationQueue usingBlock:^(NSNotification *note) {
NSLog(@</span><span style="background: white; color: #a31515">"Application become active."</span><span style="background: white; color: black">);
}];
}
</span><span style="background: white; color: blue">#pragma </span><span style="background: white; color: black">mark 应用程序启动监听方法
-(</span><span style="background: white; color: blue">void</span><span style="background: white; color: black">)applicationEnterBackground{
NSLog(@</span><span style="background: white; color: #a31515">"Application enter background."</span><span style="background: white; color: black">);
}
@end</span>当然很多时候使用通知中心是为了添加自定义通知,并获得自定义通知消息。在前面的文章“iOS开发系列--视图切换”中提到过如何进行多视图之间参数传递,其实利用自定义通知也可以进行参数传递。通常一个应用登录后会显示用户信息,而登录信息可以通过登录界面获取。下面就以这样一种场景为例,在主界面中添加监听,在登录界面发送通知,一旦登录成功将向通知中心发送成功登录的通知,此时主界面中由于已经添加通知监听所以会收到通知并更新UI界面。
主界面KCMainViewController.m:
<span style="background: white; color: green">//
// KCMainViewController.m
// NotificationCenter
//
// Created by Kenshin Cui on 14/03/27
// Copyright (c) 2014年 cmjstudio. All rights reserved.
//
</span><span style="background: white; color: blue">#import </span><span style="background: white; color: #a31515">"KCMainViewController.h"
</span><span style="background: white; color: blue">#import </span><span style="background: white; color: #a31515">"KCLoginViewController.h"
</span><span style="background: white; color: blue">#define </span><span style="background: white; color: black">UPDATE_LGOGIN_INFO_NOTIFICATION @</span><span style="background: white; color: #a31515">"updateLoginInfo"
</span><span style="background: white; color: black">@</span><span style="background: white; color: blue">interface </span><span style="background: white; color: black">KCMainViewController (){
UILabel *_lbLoginInfo;
UIButton *_btnLogin;
}
@end
@implementation KCMainViewController
- (</span><span style="background: white; color: blue">void</span><span style="background: white; color: black">)viewDidLoad {
[super viewDidLoad];
[self setupUI];
}
-(</span><span style="background: white; color: blue">void</span><span style="background: white; color: black">)setupUI{
UILabel *label =[[UILabel alloc]initWithFrame:CGRectMake(0, 100,320 ,30)];
label.textAlignment=NSTextAlignmentCenter;
label.textColor=[UIColor colorWithRed:23/255.0 green:180/255.0 blue:237/255.0 alpha:1];
_lbLoginInfo=label;
[self.view addSubview:label];
UIButton *button=[UIButton buttonWithType:UIButtonTypeSystem];
button.frame=CGRectMake(60, 200, 200, 25);
[button setTitle:@</span><span style="background: white; color: #a31515">"登录" </span><span style="background: white; color: black">forState:UIControlStateNormal];
[button addTarget:self action:@selector(loginOut) forControlEvents:UIControlEventTouchUpInside];
_btnLogin=button;
[self.view addSubview:button];
}
-(</span><span style="background: white; color: blue">void</span><span style="background: white; color: black">)loginOut{
</span><span style="background: white; color: green">//添加监听
</span><span style="background: white; color: black">[self addObserverToNotification];
KCLoginViewController *loginController=[[KCLoginViewController alloc]init];
[self presentViewController:loginController animated:YES completion:nil];
}
</span><span style="background: white; color: green">/**
* 添加监听
*/
</span><span style="background: white; color: black">-(</span><span style="background: white; color: blue">void</span><span style="background: white; color: black">)addObserverToNotification{
[[NSNotificationCenter defaultCenter] addObserver:self selector:@selector(updateLoginInfo:) name:UPDATE_LGOGIN_INFO_NOTIFICATION object:nil];
}
</span><span style="background: white; color: green">/**
* 更新登录信息,注意在这里可以获得通知对象并且读取附加信息
*/
</span><span style="background: white; color: black">-(</span><span style="background: white; color: blue">void</span><span style="background: white; color: black">)updateLoginInfo:(NSNotification *)notification{
NSDictionary *userInfo=notification.userInfo;
_lbLoginInfo.text=userInfo[@</span><span style="background: white; color: #a31515">"loginInfo"</span><span style="background: white; color: black">];
_btnLogin.titleLabel.text=@</span><span style="background: white; color: #a31515">"注销"</span><span style="background: white; color: black">;
}
-(</span><span style="background: white; color: blue">void</span><span style="background: white; color: black">)dealloc{
</span><span style="background: white; color: green">//移除监听
</span><span style="background: white; color: black">[[NSNotificationCenter defaultCenter] removeObserver:self];
}
@end</span>登录界面KCLoginViewController.m:
<span style="background: white; color: green">//
// KCLoginViewController.m
// NotificationCenter
//
// Created by Kenshin Cui on 14/03/27.
// Copyright (c) 2014年 cmjstudio. All rights reserved.
//
</span><span style="background: white; color: blue">#import </span><span style="background: white; color: #a31515">"KCLoginViewController.h"
</span><span style="background: white; color: blue">#define </span><span style="background: white; color: black">UPDATE_LGOGIN_INFO_NOTIFICATION @</span><span style="background: white; color: #a31515">"updateLoginInfo"
</span><span style="background: white; color: black">@</span><span style="background: white; color: blue">interface </span><span style="background: white; color: black">KCLoginViewController (){
UITextField *_txtUserName;
UITextField *_txtPassword;
}
@end
@implementation KCLoginViewController
- (</span><span style="background: white; color: blue">void</span><span style="background: white; color: black">)viewDidLoad {
[super viewDidLoad];
[self setupUI];
}
</span><span style="background: white; color: green">/**
* UI布局
*/
</span><span style="background: white; color: black">-(</span><span style="background: white; color: blue">void</span><span style="background: white; color: black">)setupUI{
</span><span style="background: white; color: green">//用户名
</span><span style="background: white; color: black">UILabel *lbUserName=[[UILabel alloc]initWithFrame:CGRectMake(50, 150, 100, 30)];
lbUserName.text=@</span><span style="background: white; color: #a31515">"用户名:"</span><span style="background: white; color: black">;
[self.view addSubview:lbUserName];
_txtUserName=[[UITextField alloc]initWithFrame:CGRectMake(120, 150, 150, 30)];
_txtUserName.borderStyle=UITextBorderStyleRoundedRect;
[self.view addSubview:_txtUserName];
</span><span style="background: white; color: green">//密码
</span><span style="background: white; color: black">UILabel *lbPassword=[[UILabel alloc]initWithFrame:CGRectMake(50, 200, 100, 30)];
lbPassword.text=@</span><span style="background: white; color: #a31515">"密码:"</span><span style="background: white; color: black">;
[self.view addSubview:lbPassword];
_txtPassword=[[UITextField alloc]initWithFrame:CGRectMake(120, 200, 150, 30)];
_txtPassword.secureTextEntry=YES;
_txtPassword.borderStyle=UITextBorderStyleRoundedRect;
[self.view addSubview:_txtPassword];
</span><span style="background: white; color: green">//登录按钮
</span><span style="background: white; color: black">UIButton *btnLogin=[UIButton buttonWithType:UIButtonTypeSystem];
btnLogin.frame=CGRectMake(70, 270, 80, 30);
[btnLogin setTitle:@</span><span style="background: white; color: #a31515">"登录" </span><span style="background: white; color: black">forState:UIControlStateNormal];
[self.view addSubview:btnLogin];
[btnLogin addTarget:self action:@selector(login) forControlEvents:UIControlEventTouchUpInside];
</span><span style="background: white; color: green">//取消登录按钮
</span><span style="background: white; color: black">UIButton *btnCancel=[UIButton buttonWithType:UIButtonTypeSystem];
btnCancel.frame=CGRectMake(170, 270, 80, 30);
[btnCancel setTitle:@</span><span style="background: white; color: #a31515">"取消" </span><span style="background: white; color: black">forState:UIControlStateNormal];
[self.view addSubview:btnCancel];
[btnCancel addTarget:self action:@selector(cancel) forControlEvents:UIControlEventTouchUpInside];
}
</span><span style="background: white; color: blue">#pragma </span><span style="background: white; color: black">mark 登录操作
-(</span><span style="background: white; color: blue">void</span><span style="background: white; color: black">)login{
</span><span style="background: white; color: blue">if </span><span style="background: white; color: black">([_txtUserName.text isEqualToString:@</span><span style="background: white; color: #a31515">"kenshincui"</span><span style="background: white; color: black">] && [_txtPassword.text isEqualToString:@</span><span style="background: white; color: #a31515">"123"</span><span style="background: white; color: black">] ) {
</span><span style="background: white; color: green">//发送通知
</span><span style="background: white; color: black">[self postNotification];
[self dismissViewControllerAnimated:YES completion:nil];
}</span><span style="background: white; color: blue">else</span><span style="background: white; color: black">{
</span><span style="background: white; color: green">//登录失败弹出提示信息
</span><span style="background: white; color: black">UIAlertView *alertView=[[UIAlertView alloc]initWithTitle:@</span><span style="background: white; color: #a31515">"系统信息" </span><span style="background: white; color: black">message:@</span><span style="background: white; color: #a31515">"用户名或密码错误,请重新输入!" </span><span style="background: white; color: blue">delegate</span><span style="background: white; color: black">:nil cancelButtonTitle:@</span><span style="background: white; color: #a31515">"取消" </span><span style="background: white; color: black">otherButtonTitles:nil];
[alertView show];
}
}
</span><span style="background: white; color: blue">#pragma </span><span style="background: white; color: black">mark 点击取消
-(</span><span style="background: white; color: blue">void</span><span style="background: white; color: black">)cancel{
[self dismissViewControllerAnimated:YES completion:nil];
}
</span><span style="background: white; color: green">/**
* 添加通知,注意这里设置了附加信息
*/
</span><span style="background: white; color: black">-(</span><span style="background: white; color: blue">void</span><span style="background: white; color: black">)postNotification{
NSDictionary *userInfo=@{@</span><span style="background: white; color: #a31515">"loginInfo"</span><span style="background: white; color: black">:[NSString stringWithFormat:@</span><span style="background: white; color: #a31515">"Hello,%@!"</span><span style="background: white; color: black">,_txtUserName.text]};
NSLog(@</span><span style="background: white; color: #a31515">"%@"</span><span style="background: white; color: black">,userInfo);
NSNotification *notification=[NSNotification notificationWithName:UPDATE_LGOGIN_INFO_NOTIFICATION object:self userInfo:userInfo];
[[NSNotificationCenter defaultCenter] postNotification:notification];
</span><span style="background: white; color: green">//也可直接采用下面的方法
// [[NSNotificationCenter defaultCenter] postNotificationName:UPDATE_LGOGIN_INFO_NOTIFICATION object:self userInfo:userInfo];
</span><span style="background: white; color: black">}
@end</span>运行效果: