15年出现的JAVA反序列化漏洞,另一个是redis配置不当导致机器入侵。只要redis是用root启动的并且未授权的话,就可以通过set方式直接写入一个authorized_keys到系统的/root/.ssh/目录下实现免密码登陆他人的Linux服务器。从而达到入侵成功的效果。fail2ban是一款很棒的开源服务软件,可以监视你的系统日志,然后匹配日志的错误信息(正则式匹配)执行相应的屏蔽动作(一般情况下是防火墙),而且可以发送e-mail通知系统管理员,很好、很实用、很强大!简单来说其功能就是防止暴力破解。工作的原理是通过分析一定时间内的相关服务日志,将满足动作的相关IP利用iptables加入到dorp列表一定时间。 本文将从以下四个方面是说明ssh防止暴力破解的常用方法以及如何用fail2ban来防止暴力破解。
一、实战: sshd服务防止暴力破解
二、fail2ban的安装。
三、fail2ban如何防止暴力破解
四、ssh服务器免秘钥登录
说明:本文的服务器和客户端说明
服务端:xiaolyu76 IP:192.168.31.76
客户端:xiaolyu77 IP:192.168.31.77
一、实战: sshd服务防止暴力破解
1、密码足够复杂,不使用弱口令
密码的长度要大于8位最好大于14位。密码的复杂度是密码要尽可能有数字、大小写字母和特殊符号混合组成,
拓展:弱口令
运维安全最核心的问题就是弱口令
qwe@123 1qaz2wsx 6yhnNHY^ 这些都是弱口令
为什么是弱口令? 因为这些都是英文键盘常见的组合。
强口令: 8位数以上的无规则大小写和数字组合
之前发生的漏洞: 15年出现的JAVA反序列化漏洞,另一个是redis配置不当导致机器入侵。
只要redis是用root启动的并且未授权的话,就可以通过set方式直接写入一个authorized_keys到系统的/root/.ssh/目录下实现免密码登陆他人的Linux服务器。从而达到入侵成功的效果。
2、修改默认端口号
1)安装nmap 扫描工具。nmap
[root@xiaolyu77 ~]# rpm -qa | grep nmap
[root@xiaolyu77 ~]# yum install -y nmap


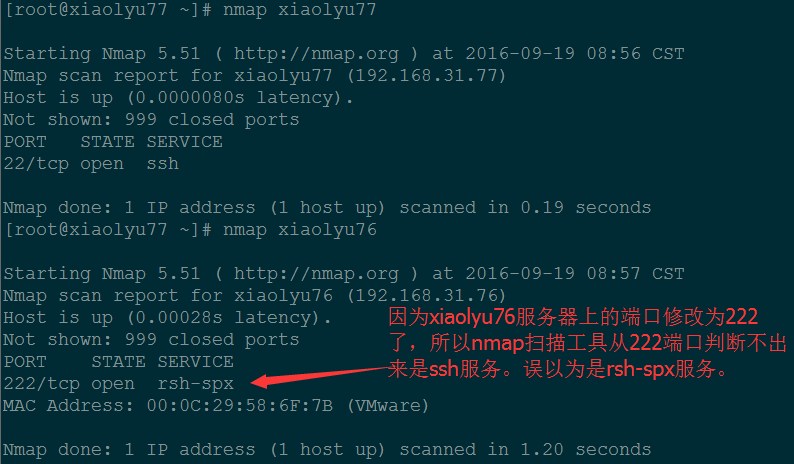
[root@xiaolyu77 ~]# nmap xiaolyu77   #扫描自己的ip地址

Starting Nmap 5.51 ( http://nmap.org ) at 2016-09-19 08:56 CST
Nmap scan report for xiaolyu77 (192.168.31.77)
Host is up (0.0000080s latency).
Not shown: 999 closed ports
PORT   STATE SERVICE
22/tcp open  ssh         #22端口,判断出来是ssh服务。

Nmap done: 1 IP address (1 host up) scanned in 0.19 seconds
[root@xiaolyu77 ~]# nmap xiaolyu76  #扫描xiaolyu76服务器的ip地址

Starting Nmap 5.51 ( http://nmap.org ) at 2016-09-19 08:57 CST
Nmap scan report for xiaolyu76 (192.168.31.76)
Host is up (0.00028s latency).
Not shown: 999 closed ports
PORT    STATE SERVICE
222/tcp open  rsh-spx      #222端口判断不出来是ssh服务,发生误判。
MAC Address: 00:0C:29:58:6F:7B (VMware)

Nmap done: 1 IP address (1 host up) scanned in 1.20 seconds
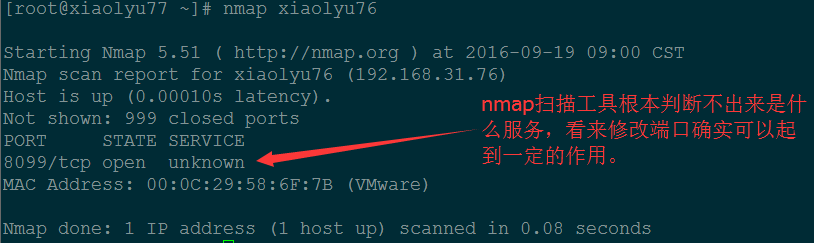
现在将服务器的端口修改成8099:
[root@xiaolyu76 ~]# vim /etc/ssh/sshd_config

3、不使用root用户名登录。
是否可以禁止root身份登录? 不行,因为有些程序需要使用root身份登录并运行。另外判断一个用户是不是超级管理员,看的是用户的ID是否为0。
[root@xiaolyu76 ~]# useradd mk #创建一个用户mk,用它来冒充root用户。
[root@xiaolyu76 ~]# passwd mk #给mk用户添加密码。
Changing password for user mk.
New password:
BAD PASSWORD: it is too simplistic/systematic
BAD PASSWORD: is too simple
Retype new password:
passwd: all authentication tokens updated successfully.
[root@xiaolyu76 ~]# vim /etc/passwd
# passwd文件修改前
root:x:0:0:root:/root:/bin/bash
bin:x:1:1:bin:/bin:/sbin/nologin
daemon:x:2:2:daemon:/sbin:/sbin/nologin
adm:x:3:4:adm:/var/adm:/sbin/nologin
lp:x:4:7:lp:/var/spool/lpd:/sbin/nologin
sync:x:5:0:sync:/sbin:/bin/sync
shutdown:x:6:0:shutdown:/sbin:/sbin/shutdown
halt:x:7:0:halt:/sbin:/sbin/halt
mail:x:8:12:mail:/var/spool/mail:/sbin/nologin
uucp:x:10:14:uucp:/var/spool/uucp:/sbin/nologin
operator:x:11:0:operator:/root:/sbin/nologin
games:x:12:100:games:/usr/games:/sbin/nologin
gopher:x:13:30:gopher:/var/gopher:/sbin/nologin
ftp:x:14:50:FTP User:/var/ftp:/sbin/nologin
nobody:x:99:99:Nobody:/:/sbin/nologin
dbus:x:81:81:System message bus:/:/sbin/nologin
vcsa:x:69:69:virtual console memory owner:/dev:/sbin/nologin
abrt:x:173:173::/etc/abrt:/sbin/nologin
haldaemon:x:68:68:HAL daemon:/:/sbin/nologin
ntp:x:38:38::/etc/ntp:/sbin/nologin
saslauth:x:499:76:"Saslauthd user":/var/empty/saslauth:/sbin/nologin
postfix:x:89:89::/var/spool/postfix:/sbin/nologin
sshd:x:74:74:Privilege-separated SSH:/var/empty/sshd:/sbin/nologin
tcpdump:x:72:72::/:/sbin/nologin
xiao:x:500:500::/home/xiao:/bin/bash
mk:x:501:501::/home/mk:/bin/bash
#passwd文件修改后:(只修改了文件中表蓝色的部分,修改后变成了这种颜色)
root:x:0:0:root:/root:/sbin/nologin #修改后的root用户,不在具有登录权限了。
bin:x:1:1:bin:/bin:/sbin/nologin
daemon:x:2:2:daemon:/sbin:/sbin/nologin
adm:x:3:4:adm:/var/adm:/sbin/nologin
lp:x:4:7:lp:/var/spool/lpd:/sbin/nologin
sync:x:5:0:sync:/sbin:/bin/sync
shutdown:x:6:0:shutdown:/sbin:/sbin/shutdown
halt:x:7:0:halt:/sbin:/sbin/halt
mail:x:8:12:mail:/var/spool/mail:/sbin/nologin
uucp:x:10:14:uucp:/var/spool/uucp:/sbin/nologin
operator:x:11:0:operator:/root:/sbin/nologin
games:x:12:100:games:/usr/games:/sbin/nologin
gopher:x:13:30:gopher:/var/gopher:/sbin/nologin
ftp:x:14:50:FTP User:/var/ftp:/sbin/nologin
nobody:x:99:99:Nobody:/:/sbin/nologin
dbus:x:81:81:System message bus:/:/sbin/nologin
vcsa:x:69:69:virtual console memory owner:/dev:/sbin/nologin
abrt:x:173:173::/etc/abrt:/sbin/nologin
haldaemon:x:68:68:HAL daemon:/:/sbin/nologin
ntp:x:38:38::/etc/ntp:/sbin/nologin
saslauth:x:499:76:"Saslauthd user":/var/empty/saslauth:/sbin/nologin
postfix:x:89:89::/var/spool/postfix:/sbin/nologin
sshd:x:74:74:Privilege-separated SSH:/var/empty/sshd:/sbin/nologin
tcpdump:x:72:72::/:/sbin/nologin
xiao:x:500:500::/home/xiao:/bin/bash
mk:x:0:0::/home/mk:/bin/bash #修改后的mk用户,它的uid,gid都为0。
也就是将/etc/passwd中的这两行做了修改:
改:mk:x:500:500::/home/mk:/bin/bash
为:mk:x:0:0::/home/mk:/bin/bash
改:root:x:0:0:root:/root:/bin/bash
为:root:x:0:0:root:/sbin/nologin
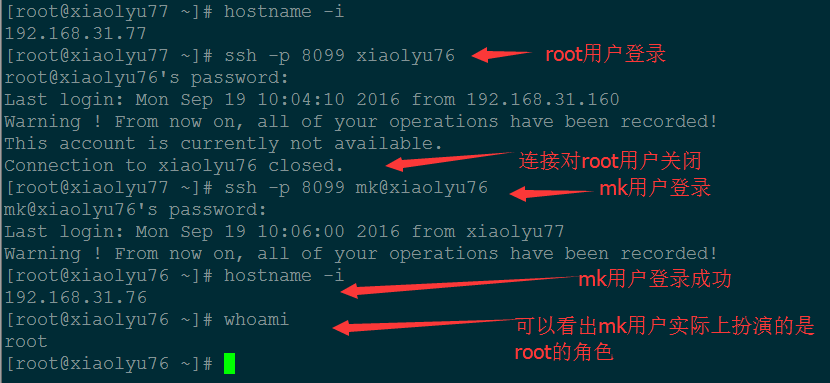
好了,修改完成,分别用root和mk这两个用户来登录一下试试:
[root@xiaolyu77 ~]# hostname -i
192.168.31.77
[root@xiaolyu77 ~]# ssh -p 8099 xiaolyu76
root@xiaolyu76's password:
Last login: Mon Sep 19 10:04:10 2016 from 192.168.31.160
Warning ! From now on, all of your operations have been recorded!
This account is currently not available.
Connection to xiaolyu76 closed.
[root@xiaolyu77 ~]# ssh -p 8099 mk@xiaolyu76
mk@xiaolyu76's password:
Last login: Mon Sep 19 10:06:00 2016 from xiaolyu77
Warning ! From now on, all of your operations have been recorded!
[root@xiaolyu76 ~]# hostname -i
192.168.31.76
[root@xiaolyu76 ~]# whoami
root
[root@xiaolyu76 ~]#
当然了,修改下面内容后,mk用户也是登录不上的。只判断UID是否为0,不查看用户名的:
[root@xiaolyu76 ~]# vim /etc/ssh/sshd_config
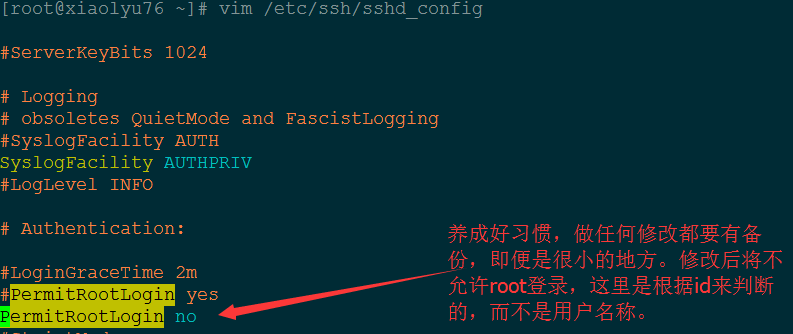
改:
#PermitRootLogin yes
为:
PermitRootLogin no
再来登录一下试试。
[root@xiaolyu76 ~]# ssh -p 8099 mk@xiaolyu76

一般情况这个就可以解决了暴力破解的问题了。
二、fail2ban的安装。
对于上面的三种方法来防止暴力破解,是远远不够的,有一种情况,暴力破解问题比较严重, 需要把暴力破解的用的IP地址直接禁掉。
实战背景:
最近公网网站一直被别人暴力破解sshd服务密码。虽然没有成功,但会导致系统负载很高,原因是在暴力破解的时候,系统会不断地认证用户,从而增加了系统资源额外开销,导致访问公司网站速度很慢。
fail2ban可以监视你的系统日志,然后匹配日志的错误信息(正则式匹配)执行相应的屏蔽动作(一般情况下是防火墙),而且可以发送e-mail通知系统管理员,很好、很实用、很强大!
简单来说其功能就是防止暴力破解。工作的原理是通过分析一定时间内的相关服务日志,将满足动作的相关IP利用iptables加入到dorp列表一定时间。
1. fail2ban的安装:
方法一、使用rpm升级,再通过yum进行安装
rpm -Uvh http://dl.fedoraproject.org/pub/epel/6/x86_64/epel-release-6-8.noarch.rpm #Uvh升级该软件包。
然后 yum install fail2ban
#因为yum安装比较简单,基本上就像傻瓜式安装,这里不演示了。
方法二、源码安装
首先去官网下载最新版fail2ban : http://www.fail2ban.org
下面是打开官网的样子:
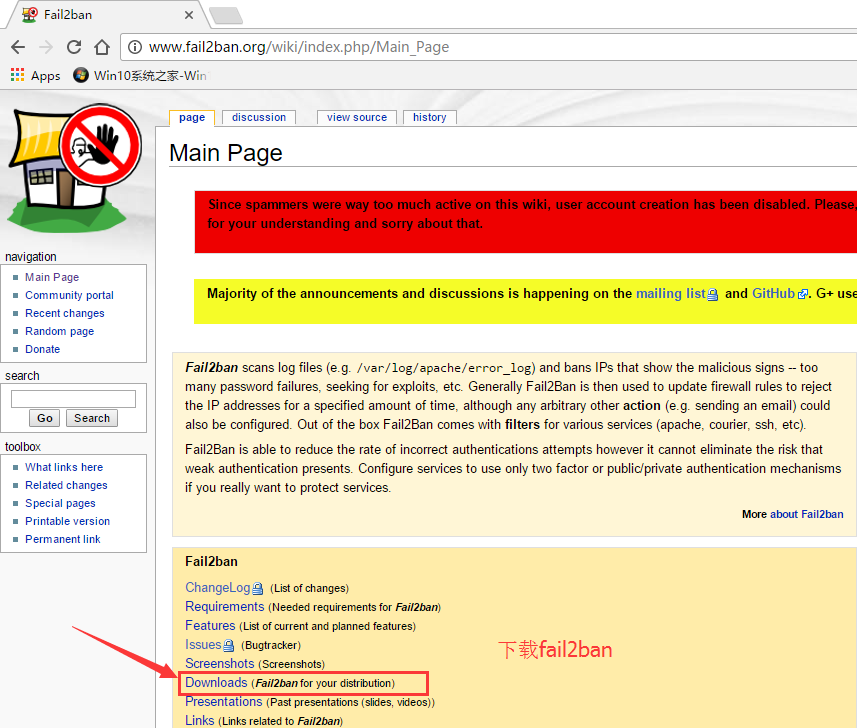
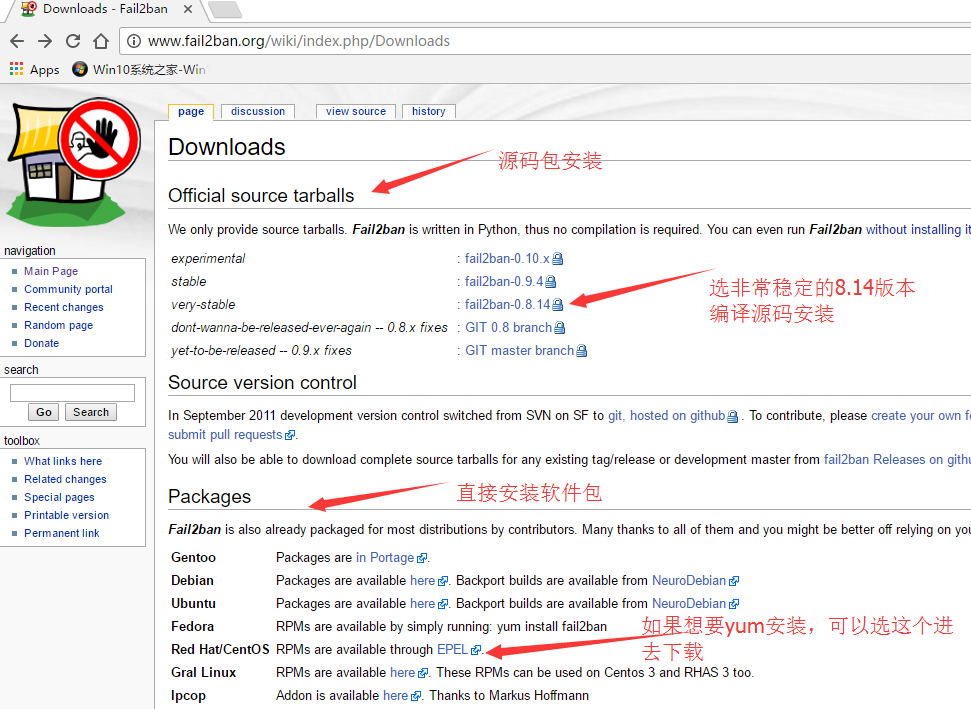
选择下载fail2ban,进入如下界面:
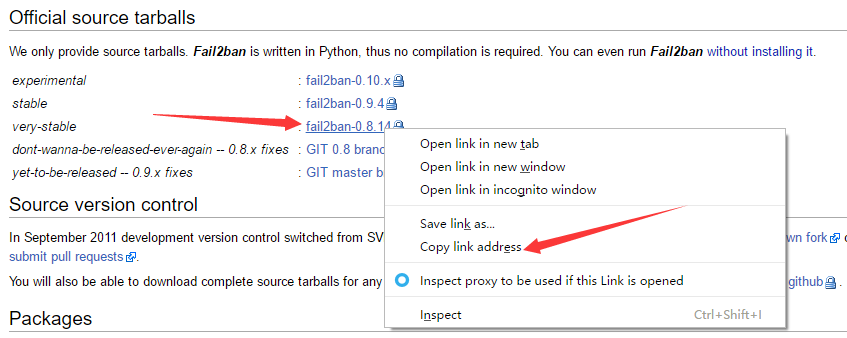
我这里为了直接从CentOS中下载(免去了用xshell或其它工具再拖放到虚拟机 的麻烦),将下载地址复制出来了:
然后,我直接在虚拟机中下载安装:
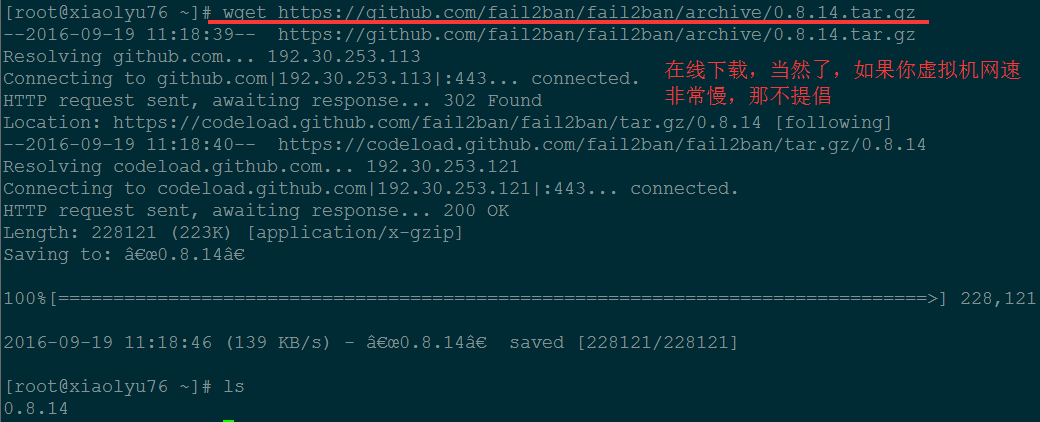
这里出现了一个问题:目前还没有搞定,为什么我在线wget下载的fail2ban文件名单单只有0.8.14呢?
对于陌生的软件,如果进行编译安装的话,通常都要先看它的readme文件,如何进行安装。
解压查看readme文件
[root@xiaolyu76 ~]# tar -zxvf fail2ban-0.8.14.tar.gz
[root@xiaolyu76 fail2ban-0.8.14]# vim README.md
#说明:下面的readme仅仅是我择要摘取,原文太长了。
This README is a quick introduction to Fail2ban. More documentation, FAQ, HOWTOs
are available in fail2ban(1) manpage and on the website http://www.fail2ban.org

Installation:
-------------

**It is possible that Fail2ban is already packaged for your distribution.  In
this case, you should use it instead.**

Required:
- [Python >= 2.4](http://www.python.org)

Optional:
- [pyinotify >= 0.8.3](https://github.com/seb-m/pyinotify)
  - Linux >= 2.6.13
- [gamin >= 0.0.21](http://www.gnome.org/~veillard/gamin)

To install, just do:

    tar xvfj fail2ban-0.8.12.tar.bz2
    cd fail2ban-0.8.12
    python setup.py install

This will install Fail2Ban into /usr/share/fail2ban. The executable scripts are
placed into /usr/bin, and configuration under /etc/fail2ban.
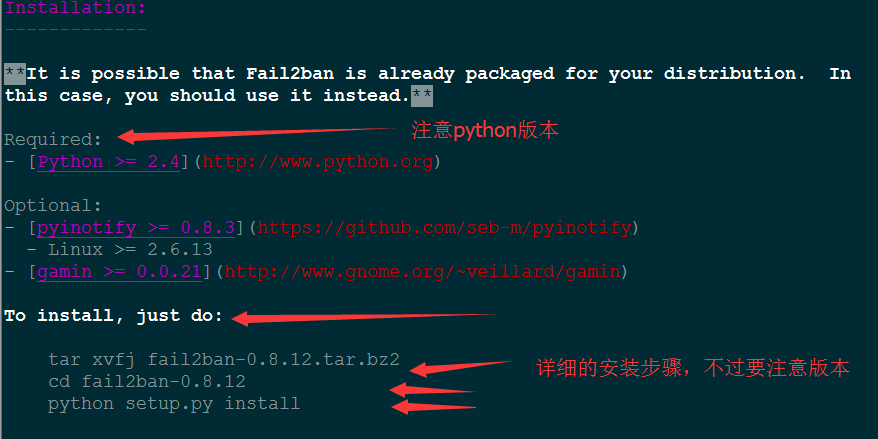
需要安装python开发环境,并且版本要大于2.4
查看当前系统中python的版本:
[root@xiaolyu76 ~]# python -V
Python 2.6.6
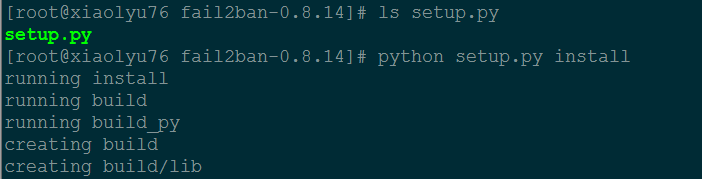
[root@xiaolyu76 ~]# cd fail2ban-0.8.14

[root@xiaolyu76 fail2ban-0.8.14]# ls setup.py
setup.py
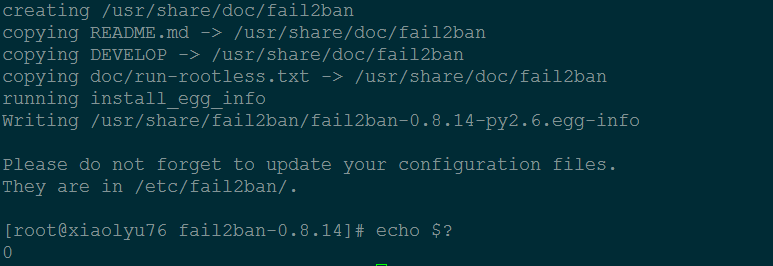
[root@xiaolyu76 fail2ban-0.8.14]# python setup.py install
生成服务启动脚本:
#下面是生成服务启动脚本的程序:
[root@xiaolyu76 fail2ban-0.8.14]# pwd
/root/fail2ban-0.8.14
[root@xiaolyu76 fail2ban-0.8.14]# grep chkconfig ./* -R --color   #查看服务启动脚本是哪个文件,同时着色显示。
./files/redhat-initd:# chkconfig: - 92 08
[root@xiaolyu76 fail2ban-0.8.14]# cp files/redhat-initd /etc/init.d/fail2ban #将服务启动脚本复制到存放开机启动的服务的目录下
[root@xiaolyu76 fail2ban-0.8.14]# chkconfig --add fail2ban  #设置服务的开机启动
[root@xiaolyu76 fail2ban-0.8.14]# service fail2ban start    #service fail2ban start|stop|status|restart测试服务是否正常
Starting fail2ban:                                         [  OK  ]
[root@xiaolyu76 fail2ban-0.8.14]# service fail2ban status
fail2ban-server (pid  5874) is running...
Status
|- Number of jail:    0
`- Jail list:
[root@xiaolyu76 fail2ban-0.8.14]# service fail2ban restart
Stopping fail2ban:                                         [  OK  ]
Starting fail2ban:                                         [  OK  ]
[root@xiaolyu76 fail2ban-0.8.14]# service fail2ban stop
Stopping fail2ban:                                         [  OK  ]
[root@xiaolyu76 fail2ban-0.8.14]#
为什么要生成服务启动脚本呢?生成服务启动脚本,我可以设置开机自启动,可以使用服务的相关命令service 服务名 start|stop|restart|status等等。非常方便。
拓展:
grep的用法
grep ssh /etc/passwd
2)echo -e “this is a world nest line” |grep world
3)打印除包含 math_pattern 行之外的所有的行
grep -v match_pattern file
4)统计文件或文本中包含匹配字符串的行数:
grep -c “test” filename
5)忽略大小写
echo “hello world” |grep -I “HELLO”
2、用tree /etc/fail2ban来查看fail2ban的文件目录树。
[root@xiaolyu76 ~]# tree /etc/fail2ban
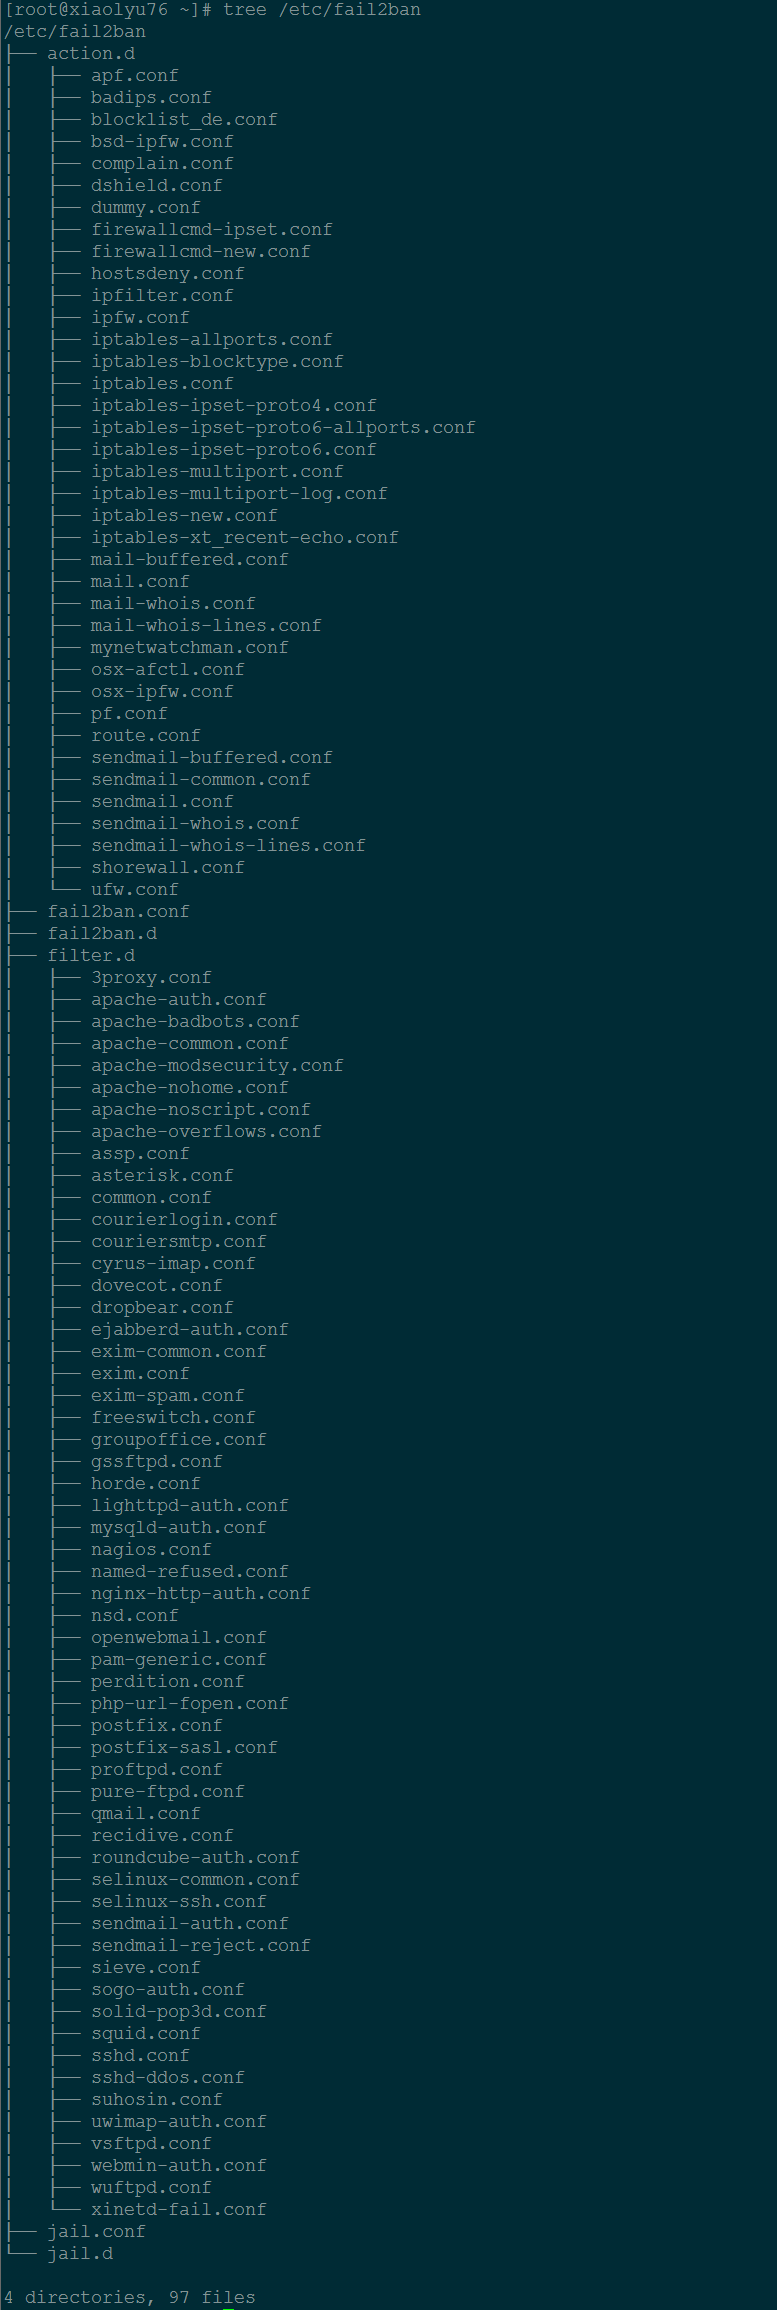
通过文件树,可以看到在安装fail2ban的过程中生成了很多文件,这里给出相关主要文件说明:
/etc/fail2ban/action.d #动作文件夹,内含默认文件。iptables以及mail等动作配置
/etc/fail2ban/fail2ban.conf #定义了fai2ban日志级别、日志位置及sock文件位置
/etc/fail2ban/filter.d #条件文件夹,内含默认文件。过滤日志关键内容设置
/etc/fail2ban/jail.conf #主要配置文件,模块化。主要设置启用ban动作的服务及动作阀值 ( jail [dʒeɪl] 监狱)
/etc/rc.d/init.d/fail2ban #启动脚本文件
三、fail2ban如何防止暴力破解
实例:
设置条件:ssh远程登录5分钟内3次密码验证失败,禁止用户IP访问主机1小时,1小时该限制自动解除,用户可重新登录。
因为动作文件(action.d/iptables.conf)以及日志匹配条件文件(filter.d/sshd.conf )安装后是默认存在的。基本不用做任何修改。所有主要需要设置的就只有jail.conf文件。启用sshd服务的日志分析,指定动作阀值即可。实例文件/etc/fail2ban/jail.conf及说明如下:
fail2ban自身设置
1、fail2ban本身配置
[root@xiaolyu76 ~]# vim /etc/fail2ban/fail2ban.conf
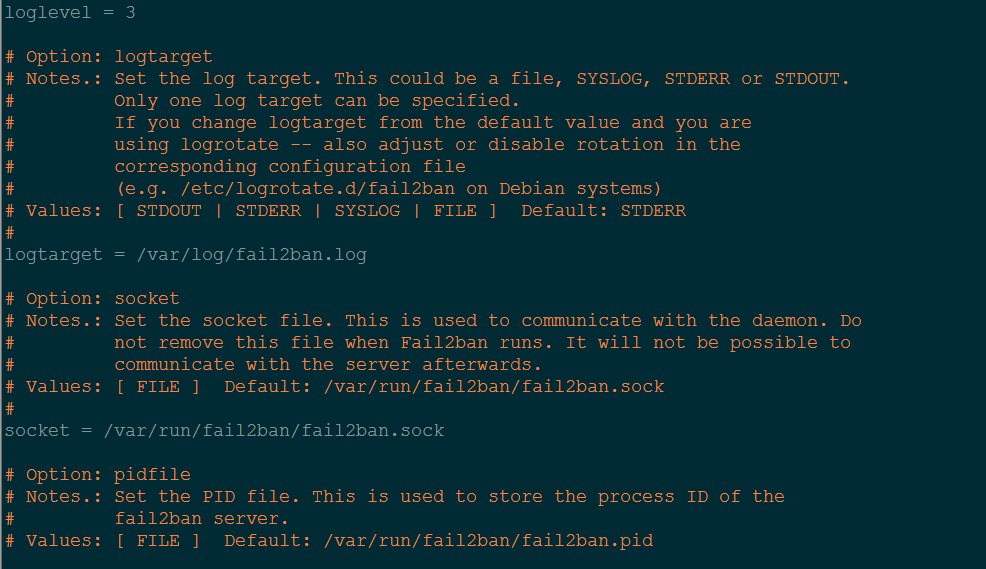
默认fail2ban.conf里面就三个参数,而且都有注释。
loglevel = 3 #默认日志的级别
logtarget = /var/log/fail2ban.log #日志的存放路径
socket = /var/run/fail2ban/fail2ban.sock #socket的位置
2、jail.conf
vim /etc/fail2ban/jail.conf
[DEFAULT]

# "ignoreip" can be an IP address, a CIDR mask or a DNS host. Fail2ban will not
# ban a host which matches an address in this list. Several addresses can be
# defined using space separator.
ignoreip = 127.0.0.1/8

# External command that will take an tagged arguments to ignore, e.g. <ip>,
# and return true if the IP is to be ignored. False otherwise.
#
# ignorecommand = /path/to/command <ip>
ignorecommand =

# "bantime" is the number of seconds that a host is banned.
bantime  = 600

# A host is banned if it has generated "maxretry" during the last "findtime"
# seconds.
findtime  = 600

# "maxretry" is the number of failures before a host get banned.
maxretry = 3

# "backend" specifies the backend used to get files modification.
# Available options are "pyinotify", "gamin", "polling" and "auto".
# This option can be overridden in each jail as well.
#
# pyinotify: requires pyinotify (a file alteration monitor) to be installed.
#              If pyinotify is not installed, Fail2ban will use auto.
# gamin:     requires Gamin (a file alteration monitor) to be installed.
#              If Gamin is not installed, Fail2ban will use auto.
#
# pyinotify: requires pyinotify (a file alteration monitor) to be installed.
#              If pyinotify is not installed, Fail2ban will use auto.
# gamin:     requires Gamin (a file alteration monitor) to be installed.
#              If Gamin is not installed, Fail2ban will use auto.
# polling:   uses a polling algorithm which does not require external libraries.
# auto:      will try to use the following backends, in order:
#              pyinotify, gamin, polling.
backend = auto

# "usedns" specifies if jails should trust hostnames in logs,
#   warn when DNS lookups are performed, or ignore all hostnames in logs
#
# yes:   if a hostname is encountered, a DNS lookup will be performed.
# warn:  if a hostname is encountered, a DNS lookup will be performed,
#        but it will be logged as a warning.
# no:    if a hostname is encountered, will not be used for banning,
#        but it will be logged as info.
usedns = warn


# This jail corresponds to the standard configuration in Fail2ban.
# The mail-whois action send a notification e-mail with a whois request
# in the body.
[DEFAULT] #全局设置
ignoreip = 127.0.0.1/8 10.10.10.0/24 #忽略的IP列表,不受设置限制 如果有二组以上用空白做为间隔
bantime = 600 #屏蔽时间,单位:秒(设置IP被封锁的时间)
findtime = 600 #这个时间段内超过规定次数会被ban掉(设定多长时间内达到最大次数就解锁。)
maxretry = 3 #最大尝试次数
backend = auto #日志修改检测机制(gamin、polling和auto这三种)
[ssh-iptables]

#enabled  = false
enabled  = true
filter   = sshd
action   = iptables[name=SSH, port=ssh, protocol=tcp]
           sendmail-whois[name=SSH, dest=you@example.com, sender=fail2ban@example.com, sendername="Fail2Ban"]
#logpath  = /var/log/sshd.log
logpath  = /var/log/secure
#maxretry = 5
maxretry = 3
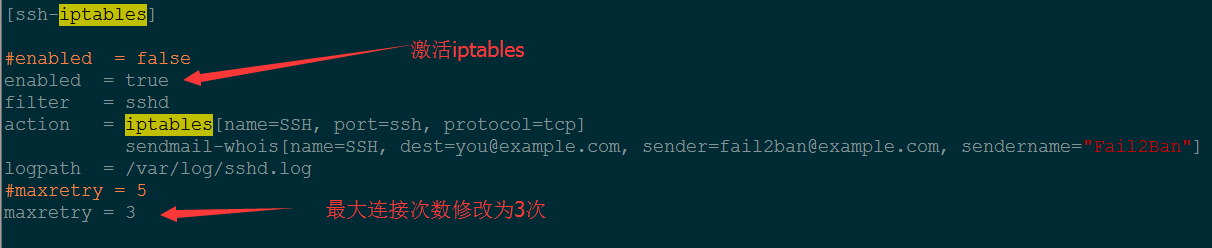
[ssh-iptables] #单个服务检查设置,如设置bantime、findtime、maxretry和全局冲突,服务优先级大于全局设置。
enabled = true #是否激活此项(true/false)修改成 true
filter = sshd #过滤规则filter的名字,对应filter.d目录下的sshd.conf
action = iptables[name=SSH, port=ssh, protocol=tcp] #动作的相关参数,对应action.d/iptables.conf文件
sendmail-whois[name=SSH, dest=you@example.com, sender=fail2ban@example.com, sendername="Fail2Ban"]
#触发报警的收件人
dest=收件者电邮地址, sender=寄件者电邮地址
logpath = /var/log/secure #检测的系统的登陆日志文件。这里要写sshd服务日志文件。 默认为logpath = /var/log/sshd.log
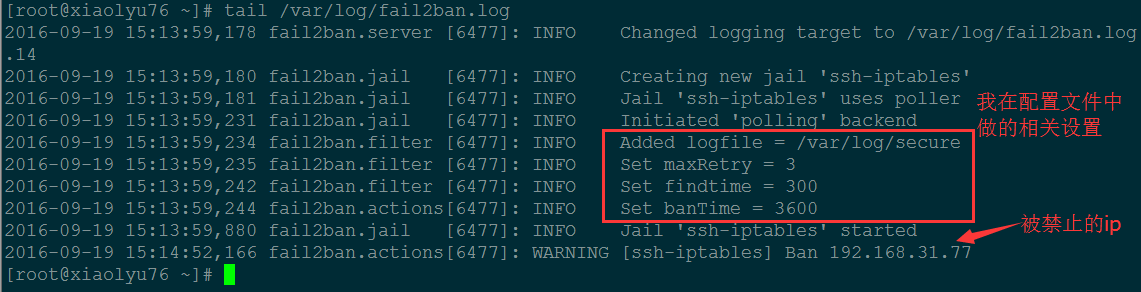
#5分钟内3次密码验证失败,禁止用户IP访问主机1小时。 配置如下
bantime = 3600 #禁止用户IP访问主机1小时
findtime = 300 #在5分钟内内出现规定次数就开始工作
maxretry = 3 #3次密码验证失败

注意:在做这个实验之前要先做如下准备工作:
1. 将/etc/passwd文件中用户mk和root的相关修改恢复过来。#因为用root用户便于做实验。
2. 将/etc/ssh/sshd_config文件中,将禁止root用户登录修改为允许。#说明生产上是要禁止root登录,这里为了方便做实验。
3. iptables防火墙需要配置。
因为我在前面说了fail2ban的工作的原理就是通过分析一定时间内的相关服务日志,将满足动作的相关IP利用iptables加入到dorp列表一定时间。
所以首先要启动防火墙iptables的相关配置:
iptables -A INPUT -p tcp --dport 22 -m state --state NEW -m recent --name ROUTER-SSH --update --seconds 1800 --hitcount 5 -j DROP
iptables -A INPUT -p tcp --dport 22 -m state --state NEW -m recent --name ROUTER-SSH --set -j ACCEPT
特别注意的是如果这个地方dport 端口设置为22,那么/etc/ssh/sshd_config中的Port端口也要设置为22.总之一句话,两个设置端口要一致。
4. sshd服务器的端口,要和iptables 中dport端口要一致,我这里讲两个都设置为22了。
[root@xiaolyu76 ~]# iptables -A INPUT -p tcp --dport 22 -m state --state NEW -m recent --name ROUTER-SSH  --update --seconds 1800 --hitcount 5 -j DROP
[root@xiaolyu76 ~]# iptables -A INPUT -p tcp --dport 22 -m state --state NEW -m recent --name ROUTER-SSH --set -j ACCEPT
[root@xiaolyu76 ~]# service iptables -L  #该命令如果返回防火墙规则,说明防火墙起作用了,否则不起作用。
Usage: iptables {start|stop|reload|restart|condrestart|status|panic|save}
[root@xiaolyu76 ~]#
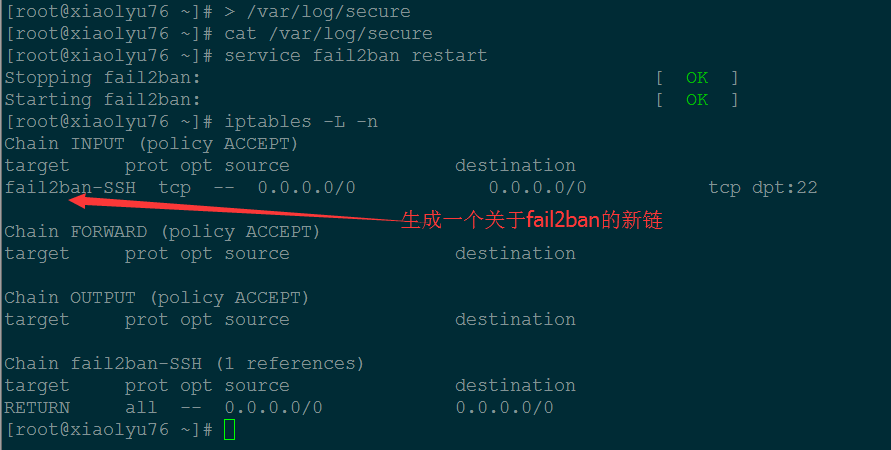
启动服务:
[root@xiaolyu76 ~]# > /var/log/secure  #清空该日志,从现在开始重新写
[root@xiaolyu76 ~]# cat /var/log/secure
[root@xiaolyu76 ~]# service fail2ban restart #重启fail2ban
Stopping fail2ban:                                         [  OK  ]
Starting fail2ban:                                         [  OK  ]
[root@xiaolyu76 ~]# iptables -L -n   #生成关于fail2ban的规则链
Chain INPUT (policy ACCEPT)
target     prot opt source               destination
fail2ban-SSH  tcp  --  0.0.0.0/0            0.0.0.0/0           tcp dpt:22

Chain FORWARD (policy ACCEPT)
target     prot opt source               destination

Chain OUTPUT (policy ACCEPT)
target     prot opt source               destination

Chain fail2ban-SSH (1 references)
target     prot opt source               destination
RETURN     all  --  0.0.0.0/0            0.0.0.0/0
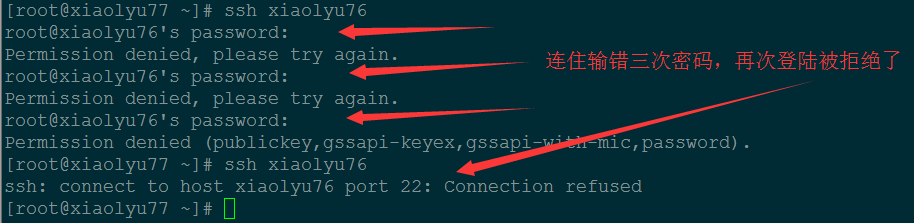
测试:故意输入错误密码3次,再进行登录时,会拒绝登录
[root@xiaolyu77 ~]# ssh xiaolyu76
root@xiaolyu76's password:
Permission denied, please try again.
root@xiaolyu76's password:
Permission denied, please try again.
root@xiaolyu76's password:
Permission denied (publickey,gssapi-keyex,gssapi-with-mic,password).
[root@xiaolyu77 ~]# ssh xiaolyu76
ssh: connect to host xiaolyu76 port 22: Connection refused
如何查看登录被拒绝的相关信息呢?
1. 我们可以用iptables查看连接被屏蔽的情况:iptables -L
[root@xiaolyu76 ~]# iptables -L |tail -4

2. 还可以通过fail2ban-client status来查看被屏蔽的情况:

说明: 如果fail2ban-client status ssh-iptables 显示被ban的ip和数目就表示成功了,如果都是0,说明没有成功
3. 也可以通过查看fail2ban的日志看到相关的信息
[root@xiaolyu76 ~]# tail /var/log/fail2ban.log
如何解除被禁止的IP ?
1. 直接重启fail2ban服务即马上解除所有IP
因为重新启动fail2ban,iptables中的规则就会全部被清空。
2. 到了fail2ban规定时间之后自动解除
那如何查看发送的邮件呢?
四、ssh服务器免秘钥登录:
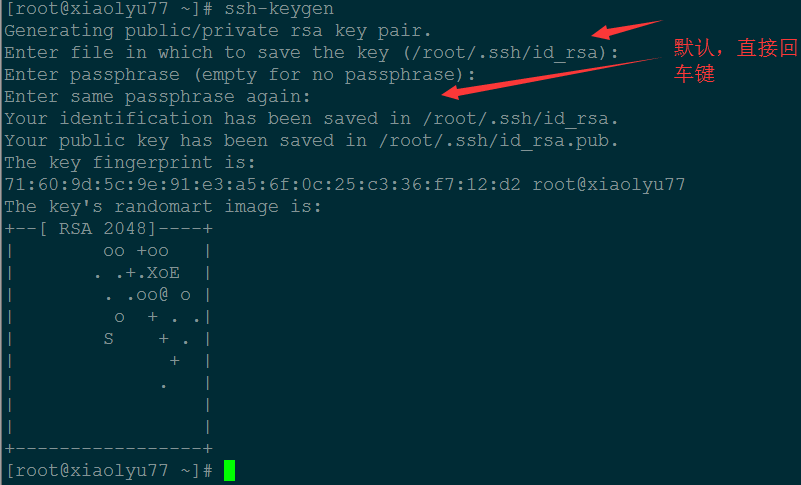
1. 在客户端(我这里是xiaolyu77主机)执行ssh-keygen生成秘钥对
[root@xiaolyu77 ~]# ssh-keygen
2. 将该秘钥对复制到服务器上:
[root@xiaolyu77 .ssh]# ssh-copy-id -i /root/.ssh/id_rsa.pub xiaolyu76
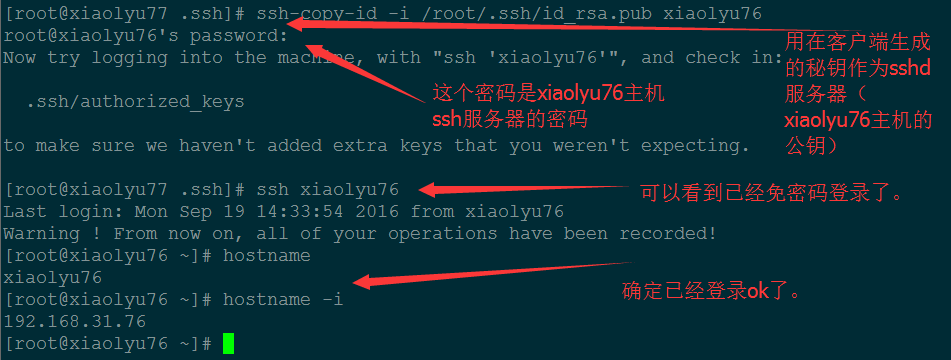
3. 现在,服务器xiaolyu76的主机上ssh服务的公钥是客户端xiaolyu77的主机上ssh服务的私钥,那么可否在xiaolyu76(服务器端)来免密码登录
xiaolyu77(客户端)呢?
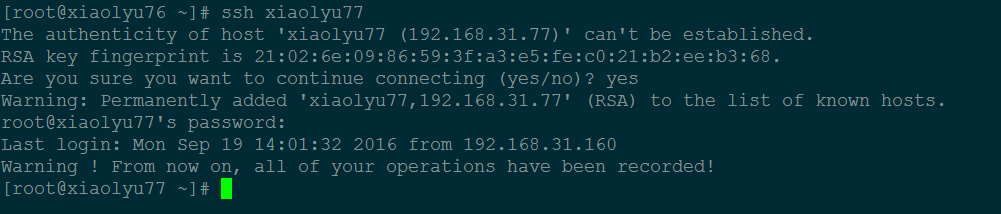
可以看到,显然不可以,这是为什么呢?因为xiaolyu76的私钥和xiaolyu77的公钥之间没有任何关系。因为是私钥加密,公钥解密。
说通俗一点就是如果私钥是钥匙,那么公钥就是锁。xiaolyu76的私钥和xiaolyu77的公钥没有什么关系,就是钥匙打不开锁,所以不能够免密码登录。