PS:如果图片模糊,鼠标右击复制图片网址,然后在浏览器中打开即可。
一、回顾系统进度以及本章概要
目前博客系统已经数据库创建、以及依赖注入Autofac集成,接下来就是日志和缓存集成,这里日志用的是Nlog,其实还有其他的日志框架如log4,这些博客园都有很多介绍,这里就不说了,缓存机制用的是微软自带的MemoryCache和比较流行Redis,这里我也只是了解使用,没有做更升入的研究,以后好好学一下Redis,然后就是实现一个BaseController父类用来重写JsonResult方法为的是返回时间格式问题,默认json返回的时间格式是Date(84923838332223)转为常见的yyyy-MM-dd HH:mm:ss格式。
二、缓存机制实现
1、在公共程序集中创建连个文件加一个Cache用来存放缓存类,一个是Log是用来创建Nlog类,这里都使用接口来实现,以便可以以后可以多个实现。
2、首先创建一个ICacheManager接口类。
ICacheManager接口类代码:


using System;
using System.Collections.Generic;
using System.Linq;
using System.Text;
using System.Threading.Tasks;

namespace _52MVCBlog.Common.Cache
{
    public interface ICacheManager
    {
        /// <summary>
        // 获取
        // </summary>
        // <typeparam name="TEntity"></typeparam>
        // <param name="key"></param>
        // <returns></returns>
        TEntity Get<TEntity>(string key);
        //设置
        void Set(string key, object value, TimeSpan cacheTime);
        //判断是否存在
        bool Contains(string key);
        //移除
        void Remove(string key);
        //清除
        void Clear();
    }
}
3、在实现微软缓存机制的时候需要引用System.Runtime.Caching.dll,创建一个MemoryCacheManager 类
MemoryCacheManager 类代码:
using System;
using System.Collections.Generic;
using System.Linq;
using System.Runtime.Caching;
using System.Text;
using System.Threading.Tasks;

namespace _52MVCBlog.Common.Cache
{
    public class MemoryCacheManager:ICacheManager
    {
        public TEntity Get<TEntity>(string key)
        {
            return (TEntity)MemoryCache.Default.Get(key);
        }

        public void Set(string key, object value, TimeSpan cacheTime)
        {
            MemoryCache.Default.Add(key, value, new CacheItemPolicy { SlidingExpiration = cacheTime });
        }

        public bool Contains(string key)
        {
            return MemoryCache.Default.Contains(key);
        }

        public void Remove(string key)
        {
            MemoryCache.Default.Remove(key);
        }

        public void Clear()
        {
            foreach (var item in MemoryCache.Default)
            {
                this.Remove(item.Key);
            }
        }
    }
}
4、创建SerializeHelper公共帮助类用来做系列化和反序列化,需要用nuget下载JSON.Net引用
SerializeHelper类代码:
using Newtonsoft.Json;
using System;
using System.Collections.Generic;
using System.Linq;
using System.Text;
using System.Threading.Tasks;

namespace _52MVCBlog.Common
{
    public class SerializeHelper
    {
        /// <summary>
        /// 序列化
        /// </summary>
        /// <param name="item"></param>
        /// <returns></returns>
        public static byte[] Serialize(object item)
        {
            string jsonString = JsonConvert.SerializeObject(item);
            return Encoding.UTF8.GetBytes(jsonString);
        }

        /// <summary>
        /// 反序列化
        /// </summary>
        /// <typeparam name="TEntity"></typeparam>
        /// <param name="value"></param>
        /// <returns></returns>
        public static TEntity Deserialize<TEntity>(byte[] value)
        {
            if (value == null)
            {
                return default(TEntity);
            }
            var jsonString = Encoding.UTF8.GetString(value);
            return JsonConvert.DeserializeObject<TEntity>(jsonString);
        }

    }
}
5、实现RedisCacheManager类,这里我们使用的免费的Redis客服端是StackExchange.Redis.可以在nuget中下载到。建议使用控制台命令Install-Package StackExchange.Redis -Version 1.2.6
RedisCacheManager类代码:
using StackExchange.Redis;
using System;
using System.Collections.Generic;
using System.Configuration;
using System.Linq;
using System.Text;
using System.Threading.Tasks;

namespace _52MVCBlog.Common.Cache
{
    //Install-Package StackExchange.Redis -Version 1.2.6
    public class RedisCacheManager : ICacheManager
    {
        private readonly string redisConnenctionString;
        public volatile ConnectionMultiplexer redisConnection;
        private readonly object redisConnectionLock = new object();

        public RedisCacheManager()
        {
            //链接redis服务语句
            string redisConfiguration = ConfigurationManager.ConnectionStrings["redisCache"].ToString();
            if (string.IsNullOrWhiteSpace(redisConfiguration))
            {
                throw new ArgumentException("redis config is empty", "redisConfiguration");
            }

            this.redisConnenctionString = redisConfiguration;
            this.redisConnection = GetRedisConnection();
        }

        private ConnectionMultiplexer GetRedisConnection()
        {
            if (this.redisConnection != null && this.redisConnection.IsConnected)
            {
                return this.redisConnection;
            }
            lock (redisConnectionLock)
            {
                if (this.redisConnection != null)
                {
                    //释放redis连接
                    this.redisConnection.Dispose();
                }
                this.redisConnection = ConnectionMultiplexer.Connect(redisConnenctionString);
            }
            return this.redisConnection;
        }

        public TEntity Get<TEntity>(string key)
        {
            RedisValue value = this.redisConnection.GetDatabase().StringGet(key);
            if (value.HasValue)
                return SerializeHelper.Deserialize<TEntity>(value);
            else
                return default(TEntity);
        }

        public void Set(string key, object value, TimeSpan cacheTime)
        {
            if (value != null)
                this.redisConnection.GetDatabase().StringSet(key, SerializeHelper.Serialize(value), cacheTime);
        }

        public bool Contains(string key)
        {
            return this.redisConnection.GetDatabase().KeyExists(key);
        }

        public void Remove(string key)
        {
            this.redisConnection.GetDatabase().KeyDelete(key);
        }

        public void Clear()
        {
            foreach (var endPoint in this.redisConnection.GetEndPoints())
            {
                var server = this.GetRedisConnection().GetServer(endPoint);
                foreach (var key in server.Keys())
                {
                    this.Remove(key);
                }
            }
        }
    }
}
三、日志处理:Nlog日志框架
1、首先实现一个日子接口ILogger
ILogger接口代码:
using System;
using System.Collections.Generic;
using System.Linq;
using System.Text;
using System.Threading.Tasks;

namespace _52MVCBlog.Common.Log
{
    public interface ILogger
    {
        void Debug(string message);
        void Debug(string message, Exception exception);
        void Error(string message);
        void Error(string message, Exception exception);
        void Fatal(string message);
        void Fatal(string message, Exception exception);
        void Info(string message);
        void Info(string message, Exception exception);
        void Warn(string message);
        void Warn(string message, Exception exception);
    }
}
2.在nuget中添加Nlog框架
Install-Package NLog -Version 5.0.0-beta11
Install-Package NLog.Schema -Version 4.5.0-rc01
Install-Package NLog.Config -Version 4.5.0-rc01
nlog.config是日志框架的配置文件。
Nloglogger类代码:
using NLog;
using System;
using System.Collections.Generic;
using System.Linq;
using System.Text;
using System.Threading.Tasks;

namespace _52MVCBlog.Common.Log
{
    public class NLogLogger : ILogger
    {
        private readonly Logger logger = LogManager.GetCurrentClassLogger();
        public void Debug(string message)
        {
            logger.Debug(message);
        }

        public void Debug(string message, Exception exception)
        {
            logger.Debug(exception, message);
        }

        public void Error(string message)
        {
            logger.Error(message);
        }

        public void Error(string message, Exception exception)
        {
            logger.Error(exception, message);
        }

        public void Fatal(string message)
        {
            logger.Fatal(message);
        }

        public void Fatal(string message, Exception exception)
        {
            logger.Fatal(exception, message);
        }

        public void Info(string message)
        {
            logger.Info(message);
        }

        public void Info(string message, Exception exception)
        {
            logger.Info(exception, message);
        }

        public void Warn(string message)
        {
            logger.Warn(message);
        }

        public void Warn(string message, Exception exception)
        {
            logger.Warn(exception, message);
        }
    }
}
3、配置日志文件NLog.config,这里是在从Common程序集拷贝到webUI层应用这个文件,因为最终日志是在web下运行。
在targets的节点下面配置,这里是以文件的方式保存日子,你也可以使用这个配置一个直接把日子写到数据库中
这里日志保存在发布站点App_DataLogs下
在rules节点下配置 <logger name="*" minlevel="Error" writeTo="file" />表示什么级别的日志对应放在哪个配置里面。

NLog.config配置代码:
<?xml version="1.0" encoding="utf-8" ?>
<nlog xmlns="http://www.nlog-project.org/schemas/NLog.xsd"
      xmlns:xsi="http://www.w3.org/2001/XMLSchema-instance"
      xsi:schemaLocation="http://www.nlog-project.org/schemas/NLog.xsd NLog.xsd"
      autoReload="true"
      throwExceptions="false"
      internalLogLevel="Off" internalLogFile="c:	emp
log-internal.log">

  <!-- optional, add some variables
  https://github.com/nlog/NLog/wiki/Configuration-file#variables
  -->
  <variable name="myvar" value="myvalue"/>

  <!--
  See https://github.com/nlog/nlog/wiki/Configuration-file
  for information on customizing logging rules and outputs.
   -->
  <targets>
    <!-- 定义输出模板:
        type="File":这个记录方式为文件类型
        fileName="${logDirectory}/All.log":表示输出到文件All.log中
        layout="...":输出文件中错误的显示格式
        ${logDirectory}:为上述定义的路径
        ${longdate}:输出长日期 yyyy-MM-dd HH:mm:ss.ffff(例:2013-01-31 14:49:21.2120)
        ${level}:错误等级(由低到高为Trace,Debug,Info,Warn,Error,Fatal)
        ${newline}:输出 新的一行
        ${stacktrace}:输出 堆栈信息
        ${callsite:className=True:fileName=True:includeSourcePath=True:methodName=True}:输出 命名空间.类名.方法名(文件路径:行号)
        ${message}:输出错误信息-->
    <target xsi:type="File"
            name="file"
            header="------------------------------Start------------------------------"
            footer="------------------------------End------------------------------"
            lineEnding="CR"
            fileName="${basedir}/App_Data/Logs/${shortdate}.log"
            layout="${longdate} - ${level:uppercase=true}:${message} ${callsite:fileName=true} ${exception:format=Type,Message,Method,StackTrace:maxInnerExceptionLevel=5:innerFormat=ShortType,Message,Method,StackTrace}"
            keepFileOpen="false"
            archiveFileName="${basedir}/App_Data/Logs/Backup_${shortdate}.{##}.log"
            archiveNumbering="Sequence"
            archiveEvery="Day"
            maxArchiveFiles="30">

    </target>

    <!--
    add your targets here
    See https://github.com/nlog/NLog/wiki/Targets for possible targets.
    See https://github.com/nlog/NLog/wiki/Layout-Renderers for the possible layout renderers.
    -->

    <!--
    Write events to a file with the date in the filename.
    <target xsi:type="File" name="f" fileName="${basedir}/logs/${shortdate}.log"
            layout="${longdate} ${uppercase:${level}} ${message}" />
    -->
  </targets>

  <rules>
    <!-- add your logging rules here -->
    <logger name="*" minlevel="Error" writeTo="file"/>
    <!--
    Write all events with minimal level of Debug (So Debug, Info, Warn, Error and Fatal, but not Trace)  to "f"
    <logger name="*" minlevel="Debug" writeTo="f" />
    -->
  </rules>
</nlog>
4、日志测试
4.1在52MVCBlog.WebCore程序集下面创建Filters文件夹,在测试之前首先设置一个全局错误机制文件ExpFilter.cs继承HandleErrorAttribute,放在Filters文件夹下面(需要引用System.Web.Mvc与System.Web)
ExpFilter类代码:
using _52MVCBlog.Common.Log;
using Newtonsoft.Json;
using System;
using System.Collections.Generic;
using System.Linq;
using System.Text;
using System.Threading.Tasks;
using System.Web.Mvc;

namespace _52MVCBlog.WebCore.Filters
{
    public class ExpFilter : HandleErrorAttribute
    {
        public override void OnException(ExceptionContext filterContext)
        {
            Exception exp = filterContext.Exception;

            //获取ex的第一级内部异常
            Exception innerEx = exp.InnerException == null ? exp : exp.InnerException;
            //循环获取内部异常直到获取详细异常信息为止
            while (innerEx.InnerException != null)
            {
                innerEx = innerEx.InnerException;
            }

            NLogLogger nlog = new NLogLogger();

            if(filterContext.HttpContext.Request.IsAjaxRequest())
            {
                nlog.Error(innerEx.Message);
                JsonConvert.SerializeObject(new { status = 1, msg = "请求发生错误,请联系管理员" });
            }
            else
            {
                nlog.Error("Error", exp);
                ViewResult vireResult = new ViewResult();
                vireResult.ViewName = "/Views/Shared/Error.cshtml";
                filterContext.Result = vireResult;
            }

            //告诉MVC框架异常被处理
            filterContext.ExceptionHandled = true;

            base.OnException(filterContext);
        }
    }
}
4.2这里对两种请求方式做处理一种是Ajax请求,一种是对链接地址做处理,另外还需要在webui下创建一个错误提醒页面。(/Views/Shared/Error.cshtml)
@{
    Layout = null;
}

<!DOCTYPE html>

<html>
<head>
    <meta name="viewport" content="width=device-width" />
    <title>错误</title>
</head>
<body>
    <h2>抱歉,处理您的请求出错。</h2>
    <h3>请联系系统管理员</h3>
</body>
</html>
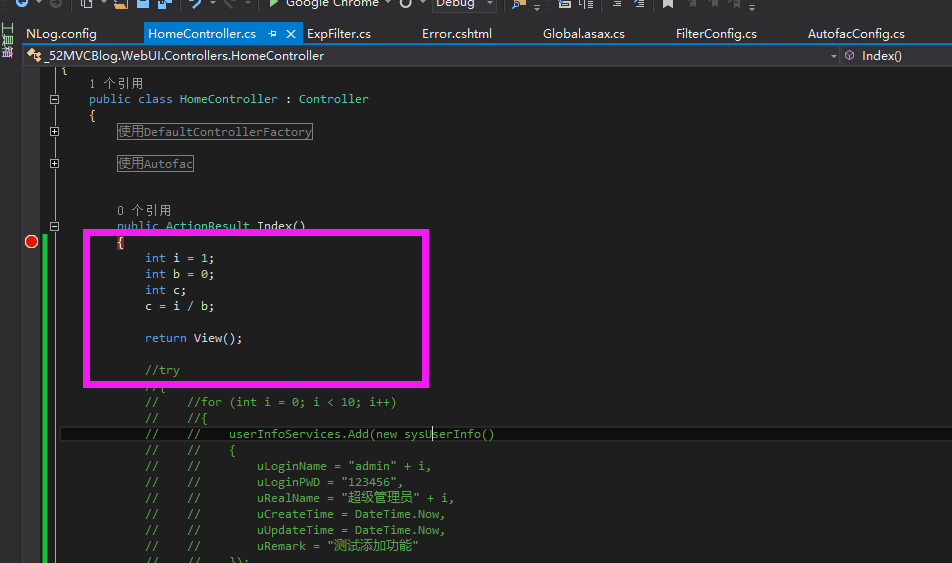
4.3在HomeController控制器下写错误代码
4.4配置全局错误处理机制,需要在App_Start文件夹下新建FilterConfig.cs配置类,才能起作用。
FilterConfig.cs配置类代码:
using _52MVCBlog.WebCore.Filters;
using System;
using System.Collections.Generic;
using System.Linq;
using System.Web;
using System.Web.Mvc;

namespace _52MVCBlog.WebUI.App_Start
{
    public class FilterConfig
    {
        public static void RegisterGlobalFilters(GlobalFilterCollection filters)
        {
            //filters.Add(new HandleErrorAttribute());

            //将统一的action异常捕获过滤器ExpFilter注册成为全局
            filters.Add(new ExpFilter());
        }
    }
}
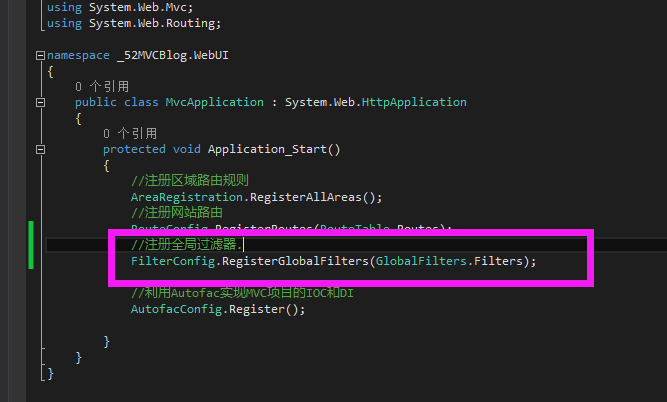
在Global.asax中的Application_Start()中注册全局过滤器.
4.5日志和异常测试结果:这里直接开始执行(不调试)

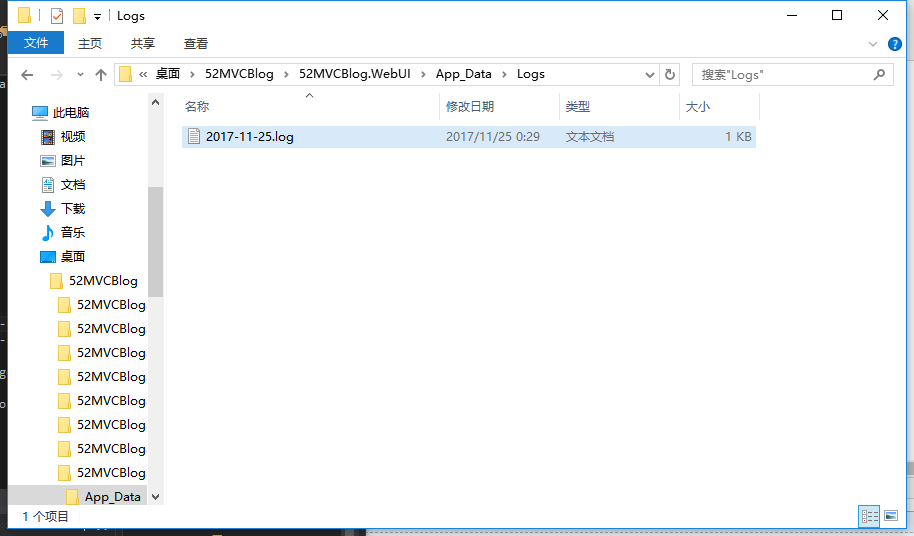
然后在项目文件下查看web站点下的App_DataLogs查看日子文件
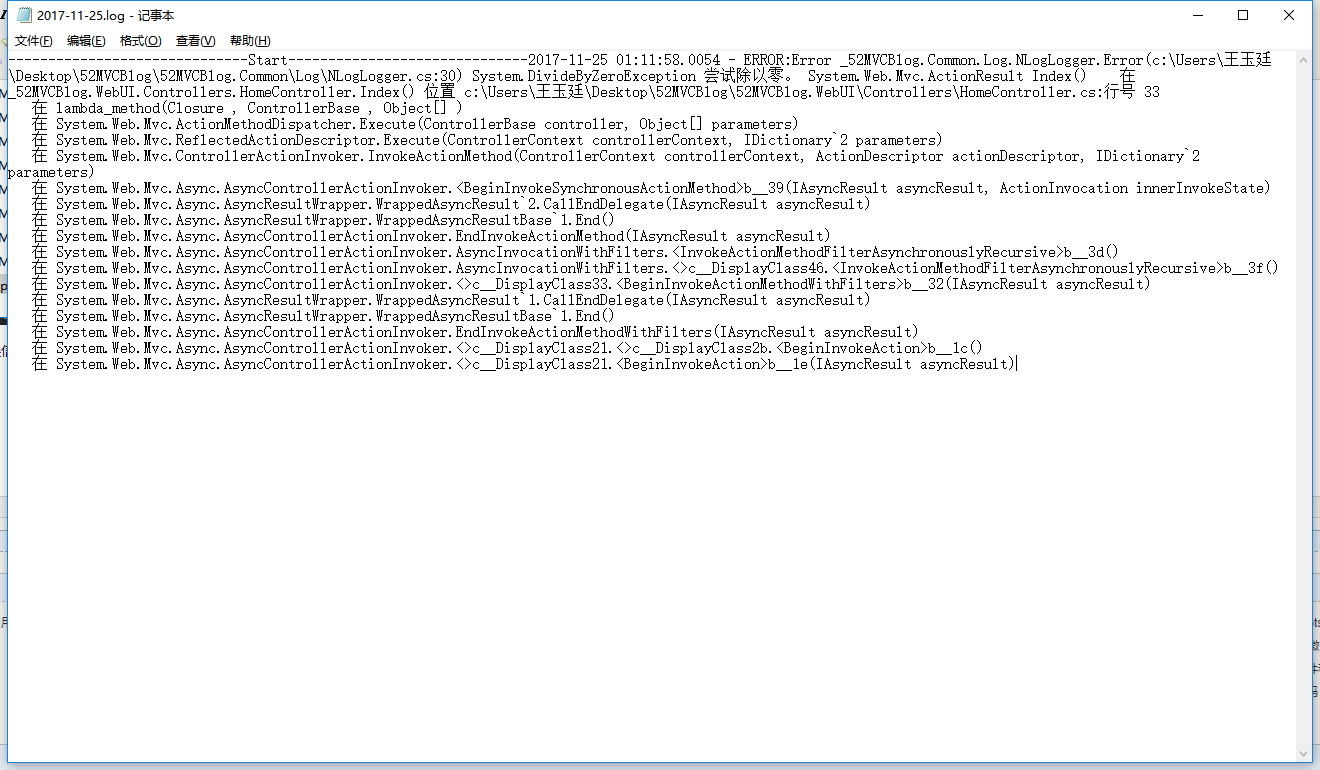
日志信息:错误信息,以及错误是那个文件多少行都有显示。
四、在52MVCBlog.WebCore程序集创建BaseController控制器基类
这里使用反序列化工具都是Newtonsoft.Json
JsonNetResult类继承JsonResult类,实现对首字母和时间进行格式化。代码:
using Newtonsoft.Json;
using Newtonsoft.Json.Serialization;
using System;
using System.Collections.Generic;
using System.Linq;
using System.Text;
using System.Threading.Tasks;
using System.Web.Mvc;

namespace _52MVCBlog.WebCore
{
    public class JsonNetResult:JsonResult
    {
        public override void ExecuteResult(ControllerContext context)
        {
            if (context==null)
            {
                throw new ArgumentNullException("context");
            }

            var response = context.HttpContext.Response;
            response.ContentType = !string.IsNullOrEmpty(base.ContentType) ? base.ContentType : "application/json";
            if (base.ContentEncoding!=null)
            {
                response.ContentEncoding = base.ContentEncoding;
            }

            JsonSerializerSettings jsonSerialization = new JsonSerializerSettings();
            //首字母小写
            jsonSerialization.ContractResolver = new CamelCasePropertyNamesContractResolver();
            //日期格式化
            jsonSerialization.DateFormatString = "yyyy-MM-dd HH:mm:ss";

            var json = JsonConvert.SerializeObject(Data, Formatting.None, jsonSerialization);

            response.Write(json);

            //base.ExecuteResult(context);
        }
    }
}
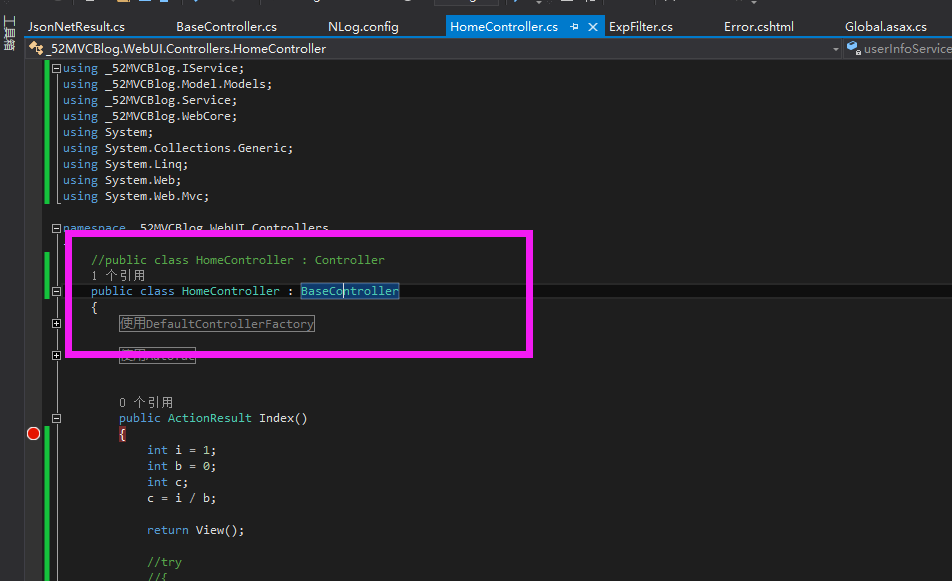
BaseController继承类Controller类,返回JsonNetResult,实现返回对首字母和时间进行格式化,代码:
using System;
using System.Collections.Generic;
using System.Linq;
using System.Text;
using System.Threading.Tasks;
using System.Web.Mvc;

namespace _52MVCBlog.WebCore
{
    public class BaseController : Controller
    {
        protected override JsonResult Json(object data, string contentType, Encoding contentEncoding, JsonRequestBehavior behavior)
        {
            return new JsonNetResult() { Data = data, ContentType = contentType, ContentEncoding = contentEncoding, JsonRequestBehavior = behavior };
        }
    }
}
直接在创建的控制器下集成:
接下来就是准备实现页面布局,先做个简单的前台查看,后台分布的功能,然后在一步一步的完善,希望大家多多指点,多多支持,谢谢了。