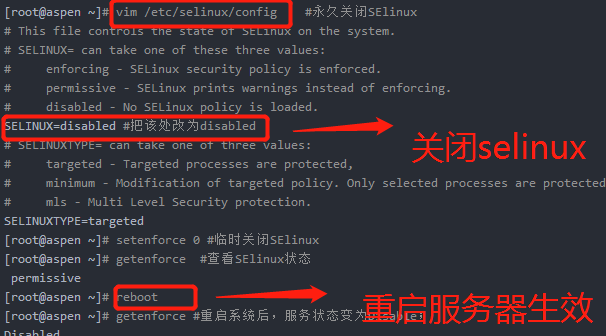
1.关闭selinux
2.关闭防火墙
![]()
3.关闭NetworkManager
![]()
4.为系统运维管理员创建普通用户,并配置sudo(vi sudo)

5.清空泄漏系统版本信息的文件
6.基础优化sshd服务
vim /etc/ssh/sshd_config


egrep -n 'GSSAPIA|UseDNS' /etc/ssh/sshd_config(查看是否修改了)

7.修改系统YUM源,添加系统epel源
curl -o /etc/yum.repos.d/CentOS-Base.repo http://mirrors.aliyun.com/repo/Centos-7.repo #修改系统YUM源
curl -o /etc/yum.repos.d/epel.repo http://mirrors.aliyun.com/repo/epel-7.repo #添加系统epel源yum repolist #查看系统YUM源和epel源
8.yum install -y tree vim wget bash-completion bash-completion-extras lrzsz net-tools sysstat iotop iftop htop unzip nc nmap telnet bc psmisc 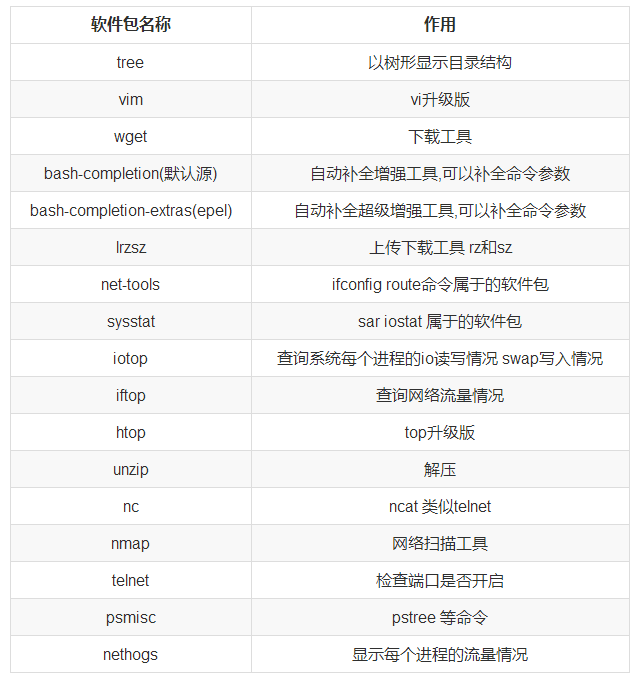
9.优化linux内核参数
cat >>/etc/sysctl.conf<<EOF
net.ipv4.tcp_fin_timeout = 2
net.ipv4.tcp_tw_reuse = 1
net.ipv4.tcp_tw_recycle = 1
net.ipv4.tcp_syncookies = 1
net.ipv4.tcp_keepalive_time = 600
net.ipv4.ip_local_port_range = 4000 65000
net.ipv4.tcp_max_syn_backlog = 16384
net.ipv4.tcp_max_tw_buckets = 36000
net.ipv4.route.gc_timeout = 100
net.ipv4.tcp_syn_retries = 1
net.ipv4.tcp_synack_retries = 1
net.core.somaxconn = 16384
net.core.netdev_max_backlog = 16384
net.ipv4.tcp_max_orphans = 16384
PASS_MAX_DAYS:90
PASS_MIN_DAYS:0
PASS_MIN_LENS:8
PASS_WARN_AGE:7修改内容如下:
Permitrootlogin no/etc/hosts.allow中添加内容如下(允许放行地址)
sshd:192.168.23.11:allow
/etc/hosts.deny中添加内容如下:
sshd:ALL
15.防火墙添加端口
firewall-cmd --permanent --add-port=3000/tcp
firewall-cmd --reload
![]()
16.清空防火墙规则
查看防火墙状态
firewall-cmd --state

停止firewall
systemctl stop firewalld.service

禁止firewall开机启动
systemctl disable firewalld.service

17.清除防火墙规则
iptables -F
(flush 清除所有的已定规则)
iptables -X
(delete 删除所有用户“自定义”的链(tables))
iptables -Z
(zero 将所有的chain的计数与流量统计都归零)