对于刚入门的springboot的新手来说,学的过程中碰到的一些问题记录下。
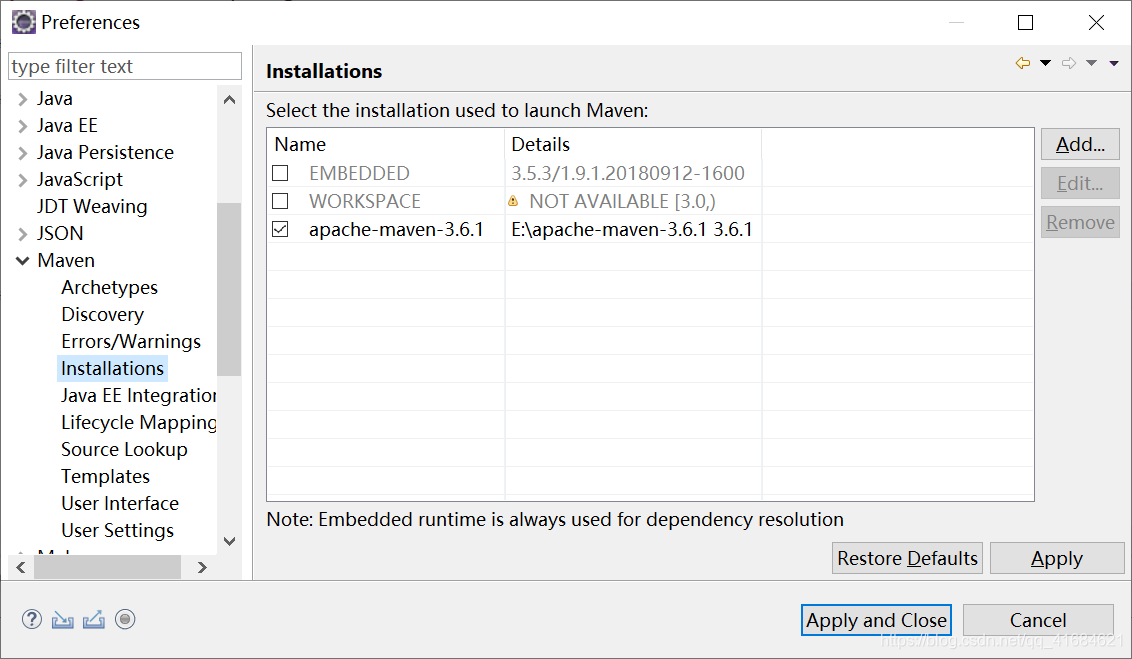
- 首先,配置好Maven环境及本地仓库
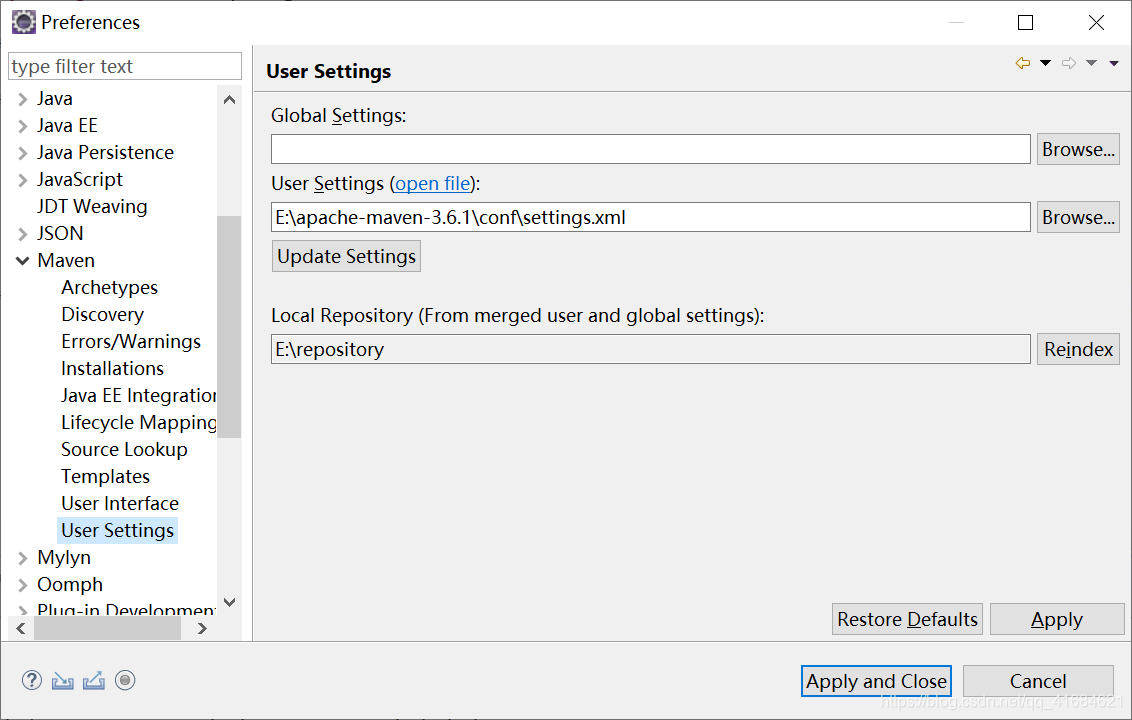
之后进入Maven安装目录conf文件夹下的settings.xml配置文件,用Notepadd++打开文件。
- 配置本地仓库指向自己创建的本地仓库,如图

- 把jdk版本固定为1.8,在 标签下插入以下代码
<profile>
	<id>jdk-1.8</id>
	<activation>
    <activeByDefault>true</activeByDefault>
    <jdk>1.8</jdk>
	</activation>
	<properties>
    <maven.compiler.source>1.8</maven.compiler.source>
    <maven.compiler.target>1.8</maven.compiler.target>
    <maven.compiler.compilerVersion>1.8</maven.compiler.compilerVersion>
	</properties>
</profile>
- Maven将中央仓库修改为阿里云的仓库地址,如果不改的话下载jar包的速度非常慢,建议改掉,下载速度不是一般的快。在 标签中插入以下代码
	<!--国内中央仓库配置-阿里云中央仓库 -->
	<mirror>
        <id>nexus-aliyun</id>
        <mirrorOf>*</mirrorOf>
        <name>Nexus aliyun</name>
        <url>http://maven.aliyun.com/nexus/content/groups/public</url>
    </mirror>
2.在eclipse新建个Maven工程,File–>New–>Other…–>查找Maven–>Maven Project–>Next

- 打开springboot项目,在pom.xml下写入以下代码,继承父工程和依赖注入。
	<parent>
        <groupId>org.springframework.boot</groupId>
        <artifactId>spring-boot-starter-parent</artifactId>
        <version>1.5.9.RELEASE</version>
	</parent>
    <dependencies>
        <dependency>
            <groupId>org.springframework.boot</groupId>
            <artifactId>spring-boot-starter-web</artifactId>
        </dependency>
    </dependencies>
- 在src/main/resource 下创建名为application.pproperties文件,创建步骤:src/main/resource右键–>New–>File–>改名即可。在application.pproperties写入以下代码
server.port=8081
把端口改为8081,避免与Tomcat运行出现端口被占用问题
- 然后在右击项目–>Maben–>Update Project,更新Maven项目。
- 接着在src/main/java创建个包和类,如:com.xdr包下的Application.java,代码如下
package com.xdr.spring;

import org.springframework.boot.SpringApplication;
import org.springframework.boot.autoconfigure.SpringBootApplication;

/*
 * springboot启动类(引导类)
 */

@SpringBootApplication //表明当前类是springboot的引导类
public class Application {

	public static void main(String[] args) {
		System.out.println("启动springboot");
		SpringApplication.run(Application.class, args);
	}
}
最后启动项目,运行出
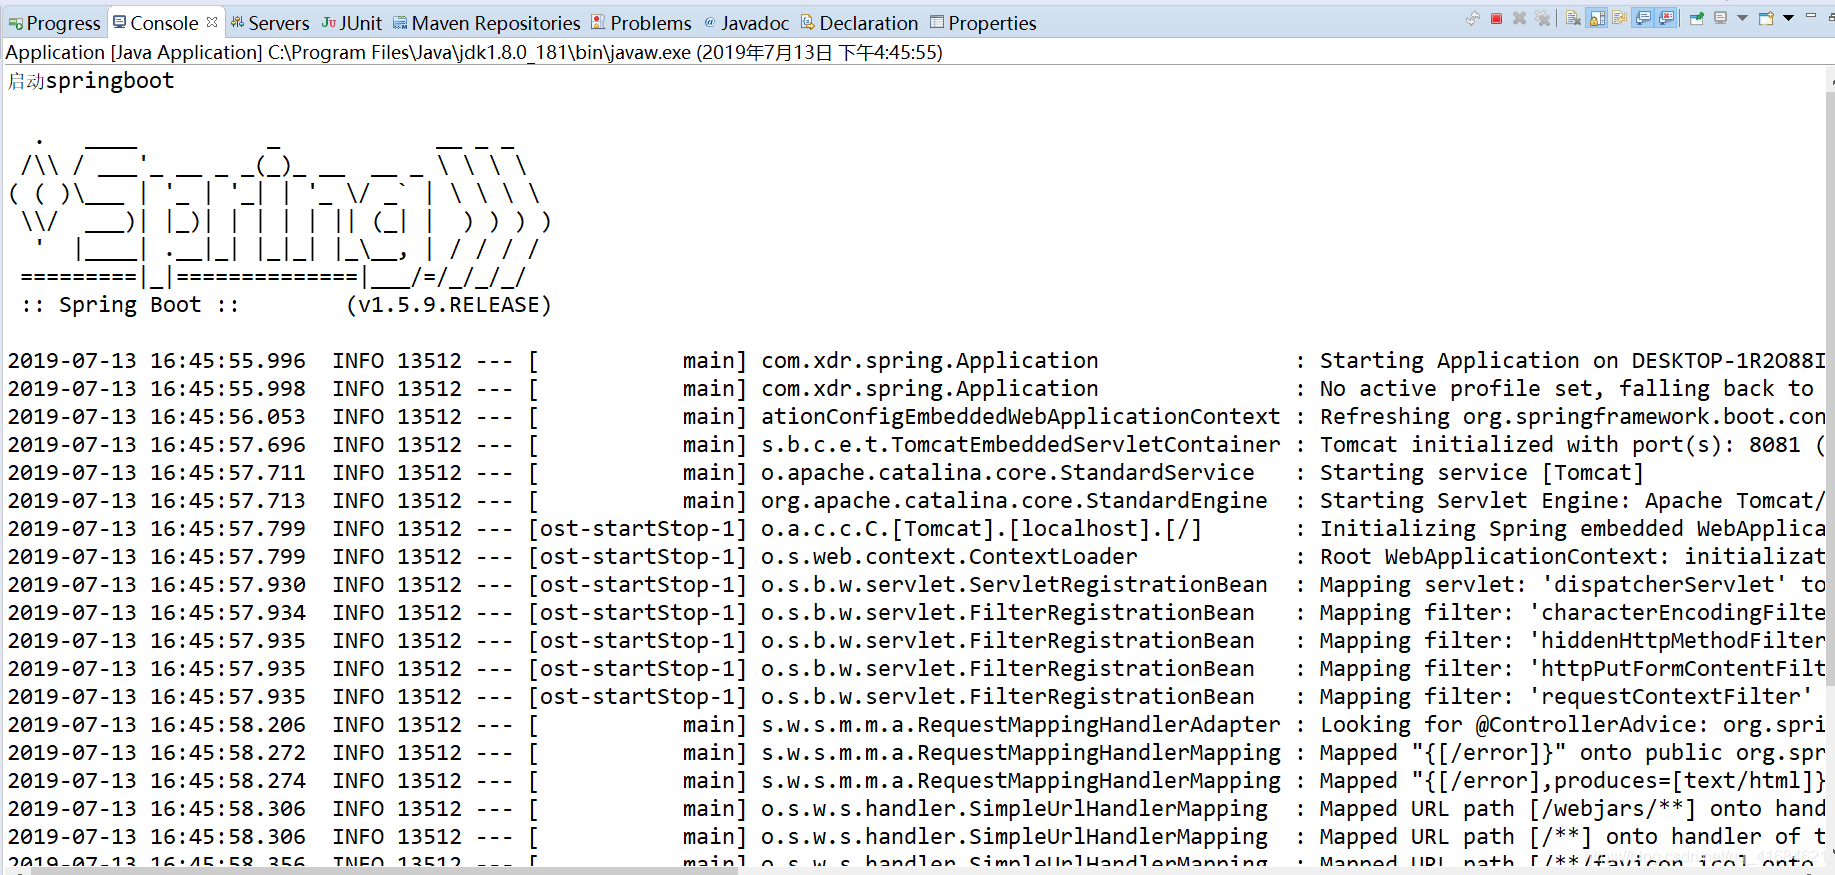
说明springboot项目运行成功了。