一、概述
mybatis最初配置信息是基于 XML ,映射语句(SQL)也是定义在 XML 中的。而到了 MyBatis 3提供了新的基于注解的配置。
二、常见注解
- @Insert:实现新增
- @Update:实现更新
- @Delete:实现删除
- @Select:实现查询
- @Result:实现结果集封装
- @Results:可以与@Result 一起使用,封装多个结果集
- @ResultMap:实现引用@Results 定义的封装
- @One:实现一对一结果集封装
- @Many:实现一对多结果集封装
- @SelectProvider: 实现动态 SQL 映射
- @CacheNamespace:实现注解二级缓存的使用
三、注解实现CRUD
1.编写实体类
package com.xhbjava.domain;

import java.io.Serializable;
import java.util.List;

import com.xhbjava.enumeration.SexEnum;
/**
 * 用户类
 * @author Mr.wang
 *@date    2020年2月28日
 */
public class User implements Serializable{
    private int id;
    private String userName;
    private String realName;
    private SexEnum sex;
    private String moble;
    //此处故意设置和数据库字段不一致
    private String userEmail;
    private String note;
    //对角色进行一对多关联
    private List<Role> roleList;
    public int getId() {
        return id;
    }
    public void setId(int id) {
        this.id = id;
    }
    public String getUserName() {
        return userName;
    }
    public void setUserName(String userName) {
        this.userName = userName;
    }
    public String getRealName() {
        return realName;
    }
    public void setRealName(String realName) {
        this.realName = realName;
    }
    public SexEnum getSex() {
        return sex;
    }
    public void setSex(SexEnum sex) {
        this.sex = sex;
    }
    public String getMoble() {
        return moble;
    }
    public void setMoble(String moble) {
        this.moble = moble;
    }
    public String getuserEmail() {
        return userEmail;
    }
    public void setuserEmail(String userEmail) {
        this.userEmail = userEmail;
    }
    public String getNote() {
        return note;
    }
    public void setNote(String note) {
        this.note = note;
    }
    public List<Role> getRoleList() {
        return roleList;
    }
    public void setRoleList(List<Role> roleList) {
        this.roleList = roleList;
    }
    @Override
    public String toString() {
        return "User [id=" + id + ", userName=" + userName + ", realName=" + realName + ", sex=" + sex + ", moble="
                + moble + ", userEmail=" + userEmail + ", note=" + note + ", roleList=" + roleList + "]";
    }


}
2.持久层开发持久层接口
package com.xhbjava.dao;

import java.util.List;

import org.apache.ibatis.annotations.Delete;
import org.apache.ibatis.annotations.Insert;
import org.apache.ibatis.annotations.Result;
import org.apache.ibatis.annotations.ResultMap;
import org.apache.ibatis.annotations.Results;
import org.apache.ibatis.annotations.Select;
import org.apache.ibatis.annotations.SelectKey;
import org.apache.ibatis.annotations.Update;

import com.xhbjava.domain.User;

/**
 * 用户接口
 *
 * @author Mr.wang
 * @date 2020年2月28日
 */
public interface IUserDao {
    /**
     * 查询所有用户
     *
     * @return
     */
    @Select("select * from t_user")
    @Results(id="userMap",
    value= {@Result(id=true,column="id",property="id"),
            @Result(column="user_name",property="userName"),
            @Result(column="real_name",property="realName"),
            @Result(column="sex",property="sex"),
            @Result(column="moble",property="moble"),
            @Result(column="email",property="userEmail"),
            @Result(column="note",property="note")

    })
    List<User> findAll();

    /**
     * 根据id获取用户
     *
     * @param id
     * @return
     */
    @Select("select * from t_user where id =#{id}")
    public User getUser(Long id);
    /**
     * 根据用户id查询用户
     * @param userId
     * @return
     */
    @Select("select * from t_user where id = #{id} ")
    @ResultMap("userMap")
    User findById(Integer userId);

    /**
     * 保存用户
     *
     * @param user
     * @return
     */
    @Insert("insert into t_user(user_name,real_name,sex,moble,email,note) values(#{userName},#{realName},#{sex},#{moble},#{userEmail},#{note})")
    @SelectKey(keyColumn="id",keyProperty="id",resultType=Integer.class,before =
    false, statement = { "select last_insert_id()" })
    public int saveUser(User user);

    /**
     * 更新用户
     * @param user
     * @return
     */
    @Update("update t_user set user_name=#{userName},real_name=#{realName},sex=#{sex},moble=#{moble},email=#{userEmail},note=#{note}")
     public int updateUser(User user);
    /**
     * 删除用户
     * @param id
     * @return
     */
    @Delete("delete from t_user where id = #{id}")
    public int deleteUser(int id);
}
3.编写 SqlMapConfig 配置文件
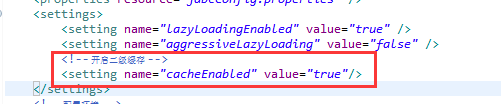
<?xml version="1.0" encoding="UTF-8"?>
<!DOCTYPE configuration
        PUBLIC "-//mybatis.org//DTD Config 3.0//EN"
        "http://mybatis.org/dtd/mybatis-3-config.dtd">
<!-- 主配置文件 -->
<configuration>

    <properties resource="jdbcConfig.properties" />
    <settings>
        <setting name="lazyLoadingEnabled" value="true" />
        <setting name="aggressiveLazyLoading" value="false" />
        <!-- 开启二级缓存 -->
        <setting name="cacheEnabled" value="true"/>
    </settings>
    <!-- 配置环境 -->
    <environments default="mysql">
        <!-- 配置mysql环境 -->
        <environment id="mysql">
            <!-- 配置事务类型 -->
            <transactionManager type="JDBC"></transactionManager>
            <!-- 配置数据源 -->
            <dataSource type="POOLED">
                <property name="driver" value="${jdbc.driver}" />
                <property name="url" value="${jdbc.url}" />
                <property name="username" value="${jdbc.username}" />
                <property name="password" value="${jdbc.password}" />
            </dataSource>
        </environment>
    </environments>
    <!-- 配置映射文件 -->
    <mappers>
        <package name="com.xhbjava.dao" />
    </mappers>
</configuration>
4.编写测试类进行测试
@Test
    public void saveUser() {
        // 5.创建Dao的代理对象
        session = factory.openSession(true);
        userDao = session.getMapper(IUserDao.class);
        User u = new User();
        u.setUserName("lisi");
        u.setRealName("李四");
        u.setSex(null);
        u.setMoble("12121212");
        u.setuserEmail("1212@qq.com");
        u.setNote("备注");
        int id = userDao.saveUser(u);
        System.out.println("==="+id);
    }

注意:
(1)SqlMapConfig.xml该怎么写还怎么写,注解开发,只是用来替代mapper.xml映射文件的.
(2)不要写mapper.xml映射文件
(3)不同的sql语句,要对应不同的@Servlet,@Insert,@Update,@Delete注解
四、使用注解实现复杂关系映射开发
之前我们实现复杂关系开发时,我们在映射文件中通过<resultMap>标签来实现,在使用注解开发时我们需要借助@Results 注解,@Result 注解,@One 注解和@Many 注解。
1.复杂关系映射的注解说明
(1)@Results注释代替标签<resultMap>,该注解中可以使用@Result注解,也可以使用@Result 集合@Results({@Result(),@Result()})或@Results(@Result())
(2)@Resutl 注解代替了<id>和<result>标签,@Result中的属性介绍:id是否是主键字段,column数据库列名,property需要装配的属性名,one 需要使用@One注解(@Result(one=@One)())),many 需要使用的@Many 注解(@Result(many=@many)()))
@One 注解(一对一)
代替了<assocation>标签,是多表查询的关键,在注解中用来指定子查询返回单一对象。
(3)@One 注解属性介绍:
select 指定用来多表查询的 sqlmapper
fetchType 会覆盖全局的配置参数 lazyLoadingEnabled。。
使用格式:
@Result(column=" ",property="",one=@One(select=""))
(4)@Many 注解(多对一)
代替了<Collection>标签,是是多表查询的关键,在注解中用来指定子查询返回对象集合。
注意:聚集元素用来处理“一对多”的关系。需要指定映射的 Java 实体类的属性,属性的 javaType(一般为 ArrayList)但是注解中可以不定义;
使用格式:
@Result(property="",column="",many=@Many(select=""))
2.使用注解实现一对一复杂关系映射及延迟加载
我们之前通过加载职员信息的时候加载工牌实现一对一。
(1)添加Employee和WorkCard实体类
(2)Employee持久层接口使用注解配置
package com.xhbjava.dao;

import org.apache.ibatis.annotations.One;
import org.apache.ibatis.annotations.Result;
import org.apache.ibatis.annotations.Results;
import org.apache.ibatis.annotations.Select;
import org.apache.ibatis.mapping.FetchType;

import com.xhbjava.domain.Employee;

/**
 * 雇员接口
 *
 * @author Mr.wang
 * @date 2020年2月27日
 */
public interface IEmployeeDao {

    @Select("select * from t_employee where id=#{id}")
    @Results(id = "workcardMap", value = { @Result(id = true,
            column = "id", property = "id"),
            @Result(column = "real_name", property = "real_name"),
            @Result(column = "sex", property = "sex",typeHandler=SexTypeHandler.class),
            @Result(column = "birthday", property = "birthday"),
            @Result(column = "mobile", property = "mobile"),
            @Result(column = "email", property = "email"),
            @Result(column = "position", property = "position"),
            @Result(column = "note", property = "note"),
            @Result(column = "id", property = "workcard",
            one = @One(select = "com.xhbjava.dao.IWorkCardDao.getWorkCard", fetchType = FetchType.LAZY)) })
    public Employee getEmployee(Long id);

}
(3)IWorkCardDao持久层接口使用注解配置
package com.xhbjava.dao;
/**
 * 工牌接口
 * @author Mr.wang
 *@date    2020年2月27日
 */

import org.apache.ibatis.annotations.Result;
import org.apache.ibatis.annotations.Results;
import org.apache.ibatis.annotations.Select;

import com.xhbjava.domain.WorkCard;

public interface IWorkCardDao {
    @Select("SELECT id, emp_id as empId, real_name as realName, department, mobile,
" +
            "        position, note FROM t_work_card" +
            "        where emp_id = #{empId}")
    @Results(id="workCardMap",
    value= {
    @Result(id=true,column="id",property="id"),
    @Result(column="emp_id",property="empId"),
    @Result(column="real_name",property="realName"),
    @Result(column="department",property="department"),
    @Result(column="mobile",property="mobile"),
    @Result(column="position",property="position"),
    @Result(column="note",property="note")
    })
    public WorkCard getWorkCard(Long empId);
}
(4)编写测试类进行测试
@Test
    public void getEmployeeTaskByEmpId() {
        // 5.创建Dao的代理对象
        session = factory.openSession(true);
        employeeDao = session.getMapper(IEmployeeDao.class);
        Employee employee = employeeDao.getEmployee(1l);
        // System.out.println("===="+employee.getBirthday());
        logger.info(employee.getWorkcard().getDepartment());
    }

3.使用注解实现一对多复杂关系映射
通过之前的例子员工和员工任务是一对多,我们进行注解配置。
(1)Employee持久层接口使用注解配置
package com.xhbjava.dao;

import org.apache.ibatis.annotations.Many;
import org.apache.ibatis.annotations.One;
import org.apache.ibatis.annotations.Result;
import org.apache.ibatis.annotations.Results;
import org.apache.ibatis.annotations.Select;
import org.apache.ibatis.mapping.FetchType;

import com.xhbjava.domain.Employee;
import com.xhbjava.typeHandler.SexTypeHandler;

/**
 * 雇员接口
 *
 * @author Mr.wang
 * @date 2020年2月27日
 */
public interface IEmployeeDao {

    @Select("select * from t_employee where id=#{id}")
    @Results(id = "workcardMap", value = { @Result(id = true,
            column = "id", property = "id"),
            @Result(column = "real_name", property = "realName"),
            @Result(column = "sex", property = "sex",typeHandler=SexTypeHandler.class),
            @Result(column = "birthday", property = "birthday"),
            @Result(column = "mobile", property = "mobile"),
            @Result(column = "email", property = "email"),
            @Result(column = "position", property = "position"),
            @Result(column = "note", property = "note"),
            @Result(column = "id", property = "workcard",
            one = @One(select = "com.xhbjava.dao.IWorkCardDao.getWorkCard", fetchType = FetchType.LAZY)),
            @Result(column = "id", property = "employeeTaskList",
            many=@Many(select = "com.xhbjava.dao.IEmployeeTaskDao.getEmployeeTaskByEmpId", fetchType = FetchType.LAZY)
                    )
                })
    public Employee getEmployee(Long id);

}
(2)IEmployeeTaskDao持久层接口使用注解配置
package com.xhbjava.dao;

import org.apache.ibatis.annotations.Result;
import org.apache.ibatis.annotations.Results;
import org.apache.ibatis.annotations.Select;

import com.xhbjava.domain.EmployeeTask;

/**
 * 员工任务
 *
 * @author Mr.wang
 * @date 2020年2月27日
 */
public interface IEmployeeTaskDao {
    @Select("select id, emp_id, task_name, task_id, note from t_employee_task
" +
            "        where emp_id = #{empId}")
    @Results(id="getEmployeeTaskByEmpId",
    value= {
    @Result(id=true,column="id",property="id"),
    @Result(column="emp_id",property="empId"),
    @Result(column="task_name",property="taskName"),
    @Result(column="task_id",property="taskId"),
    @Result(column="note",property="note"),
    })
    public EmployeeTask getEmployeeTaskByEmpId(Long empid);

}
(3)编写测试类测试
@Test
    public void getEmployeeTaskByEmpId() {
        // 5.创建Dao的代理对象
        session = factory.openSession(true);
        employeeDao = session.getMapper(IEmployeeDao.class);
        Employee employee = employeeDao.getEmployee(1l);
        // System.out.println("===="+employee.getBirthday());
        logger.info(employee.getEmployeeTaskList().get(0).getTaskName());
    }

五、基于注解的二级缓存
1.在 SqlMapConfig 中开启二级缓存支持
2.在持久层接口中使用注解配置二级缓存
//mybatis 基于注解方式实现配置二级缓存
@CacheNamespace(blocking=true)
public interface IEmployeeDao {
    public Employee getEmployee(Long id);

}
workcard