pxe+KStart无人值守批量安装服务器操作系统
应用场景:100台服务器安装操作系统
pxe server部署dhcp、tftp、http(HTTP/FTP/NFS任选其一,本次部署采用HTTP)、Kickstart,用来提供安装所需要的系统文件以及所要安装的软件。关闭Firewalld/SElinux(为实验方便,减少麻烦,生产环境不推荐)
dhcp:分配给客户机的IP 以及指定tftp服务器地址,pxe启动引导文件的放置位置
tftp:提供引导文件(pxelinux.0)、内核文件(vmlinuz)、驱动文件(initrd.img)、菜单文件(pxelinux.cfg/default)、背景文件(splash.png)、字体文件(vesamenu.c32)等
http:用于提供安装源文件,类似yum源功能。
第一步:安装dhcp服务(多网卡),修改配置文件
需要注意:双网卡,subnet不能在同一网段,可以通过systemctl status dhcpd检查。
[root@x112 ~]# yum install -y dhcp
[root@x112 ~]# rpm -qa| grep dhcp
dhcp-common-4.2.5-79.el7.centos.x86_64
dhcp-libs-4.2.5-79.el7.centos.x86_64
dhcp-4.2.5-79.el7.centos.x86_64
[root@x112 ~]#
[root@x112 ~]# vim  /etc/dhcp/dhcpd.conf
[root@x112 ~]# cat /etc/dhcp/dhcpd.conf
#
# DHCP Server Configuration file.
#   see /usr/share/doc/dhcp*/dhcpd.conf.example
#   see dhcpd.conf(5) man page
#

subnet 192.168.0.0  netmask 255.255.255.0 {
  range 192.168.0.20 192.168.0.30;
  option domain-name-servers 192.168.0.122;
  option domain-name "internal.example.org";
  option routers 192.168.0.1;
  default-lease-time 600;
  max-lease-time 7200;
  next-server 192.168.0.122;     #指定tftp服务器地址
  filename "pxelinux.0";         #指定pxelinux.0文件
}


[root@x112 ~]#systemctl start dhcpd && systemctl enable dhcpd

添加多网卡配置
[root@x112 ~]# nmcli connection add con-name eth1 ifname eth1 type ethernet ipv4.addresses 192.168.0.122/24 ipv4.method manual
Connection 'eth1' (f73b73ff-3fb6-455f-94c3-e6ed49fcf2c1) successfully added.
[root@x112 ~]# nmcli connection reload
[root@x112 ~]# nmcli connection up eth1
Connection successfully activated (D-Bus active path: /org/freedesktop/NetworkManager/ActiveConnection/3)
[root@x112 ~]# ip a
第二步:安装TFTP服务(无需认证,小文件传输)
安装xinetd、tftp-server和syslinux服务
[root@x112 ~]# yum install -y tftp-server  xinetd
[root@x112 ~]# cd /var/lib/tftpboot/
[root@x112 tftpboot]# ls
[root@x112 tftpboot]#

配置xinetd,由xinetd管理tftp
[root@x112 tftpboot]# vim /etc/xinetd.d/tftp
[root@x112 tftpboot]# cat /etc/xinetd.d/tftp
# default: off
# description: The tftp server serves files using the trivial file transfer
#	protocol.  The tftp protocol is often used to boot diskless
#	workstations, download configuration files to network-aware printers,
#	and to start the installation process for some operating systems.
service tftp
{
	socket_type		= dgram
	protocol		= udp
	wait			= yes
	user			= root
	server			= /usr/sbin/in.tftpd
	server_args		= -s /var/lib/tftpboot
	disable			= no        #默认为yes,改成no
	per_source		= 11
	cps			= 100 2
	flags			= IPv4
}
[root@x112 tftpboot]# systemctl start xinetd&& systemctl enable xinetd
[root@x112 tftpboot]#systemctl start tftp && systemctl enable tftp

该文件夹默认为空,pxelinux.0引导文件由syslinux服务提供,需要安装syslinux服务。
[root@x112 tftpboot]# yum install -y syslinux
[root@x112 tftpboot]# cp /usr/share/syslinux/pxelinux.0 ./
[root@x112 tftpboot]# ls
pxelinux.0            #定义了系统启动的流程
[root@x112 tftpboot]#
第二步:挂载系统光盘文件,拷贝系统安装所需文件
[root@x112 tftpboot]# mount /dev/sr0 /mnt/
mount: /dev/sr0 is write-protected, mounting read-only
[root@x112 tftpboot]# cd /mnt/
[root@x112 mnt]# cd isolinux/

isolinux文件夹默认拥有系统安装所需的所有文件
[root@x112 isolinux]# ls
boot.cat  boot.msg  grub.conf  initrd.img  isolinux.bin  isolinux.cfg  memtest  splash.png  TRANS.TBL  vesamenu.c32  vmlinuz

文件说明:isolinux.cfg启动菜单文件; vesamenu.c32字体文件;vmlinuz内核文件;  initrd.img驱动文件;splash.png背景文件;


安装规定,需要将菜单文件拷贝到tftp主目录的pxelinux.cfg目录中,并重命名为default;
[root@x112 isolinux]# mkdir /var/lib/tftpboot/pxelinux.cfg
[root@x112 isolinux]# cp isolinux.cfg /var/lib/tftpboot/pxelinux.cfg/default
[root@x112 isolinux]#

拷贝内核文件、驱动文件、背景文件等
[root@x112 isolinux]# cp vmlinuz initrd.img /var/lib/tftpboot/
[root@x112 isolinux]# ls /var/lib/tftpboot/
initrd.img  pxelinux.0  pxelinux.cfg  vmlinuz
[root@x112 isolinux]# cp vesamenu.c32 splash.png /var/lib/tftpboot/
[root@x112 isolinux]# ls /var/lib/tftpboot/
initrd.img  pxelinux.0  pxelinux.cfg  splash.png  vesamenu.c32  vmlinuz
[root@x112 isolinux]#
第三步:安装http服务
[root@x112 ~]# yum -y install  http
[root@x112 ~]# systemctl start httpd&& systemctl enable httpd
[root@x112 ~]# mkdir /var/www/html/kick
[root@x112 ~]# mount /dev/sr0 /var/www/html/kick
mount: /dev/sr0 is write-protected, mounting read-only
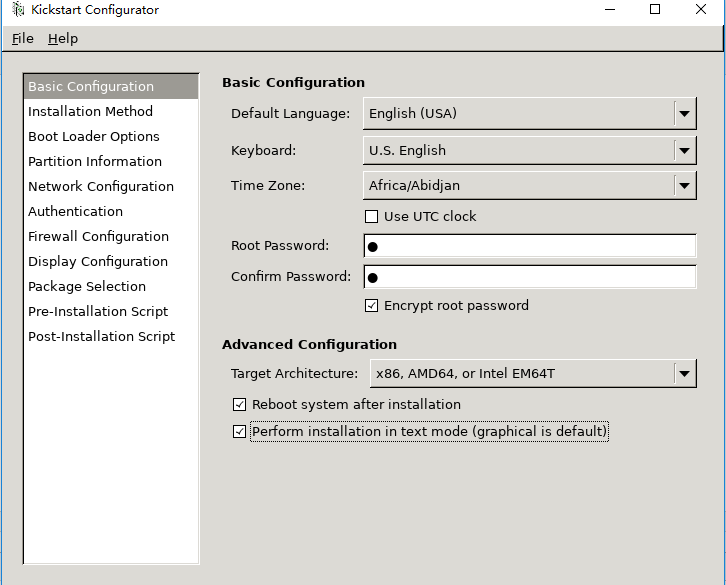
第四步:安装system-config-kickstart工具,创建自动应答文件
安装system-config-kickstart后,无法启动图形界面,网上处理方法如下
[root@x112 ~]# system-config-kickstart
Could not open display because no X server is running. Try running ‘system-config-kickstart --help‘ for a list of options.

[root@x112 ~]# yum  groupinstall x11
[root@x112 ~]# system-config-kickstart
此方法有时不生效,可以使用方法二:
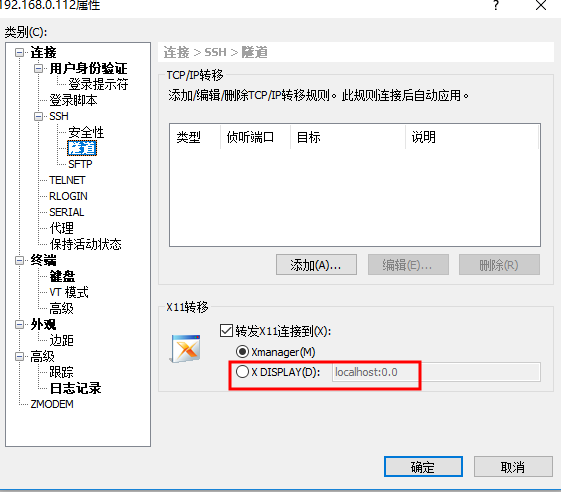
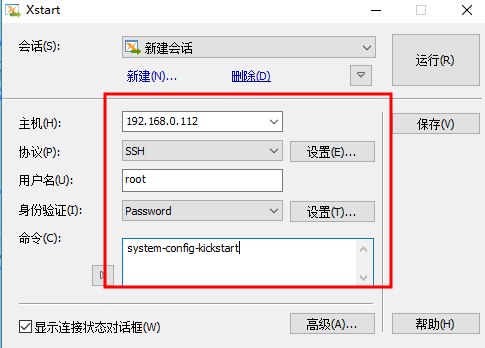
1、使用xshell远程连接,执行system-config-kickstart命令可能无法弹出选择框,可以安装gdm;
[root@x112 html]# yum install -y gdm

2、在xstart里执行(xstart是xmanager的一个套件)
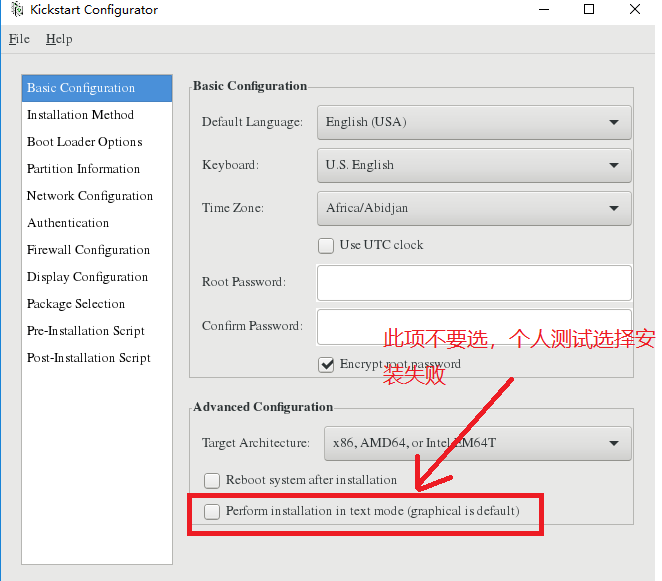
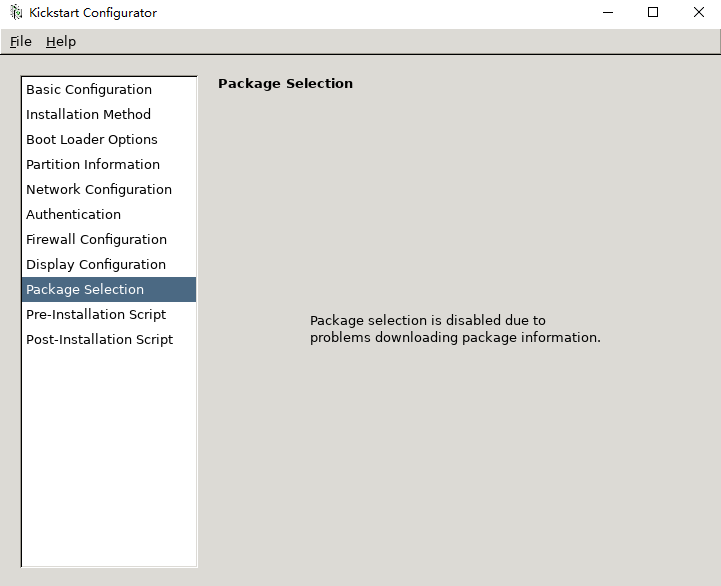
运行Package Selection时,无法选择软件包内容,解决办法:
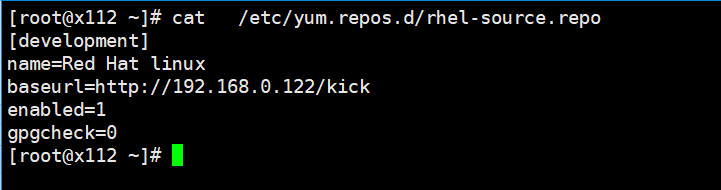
修改yum源的名称为development,官方规定,要求修改后才显示。
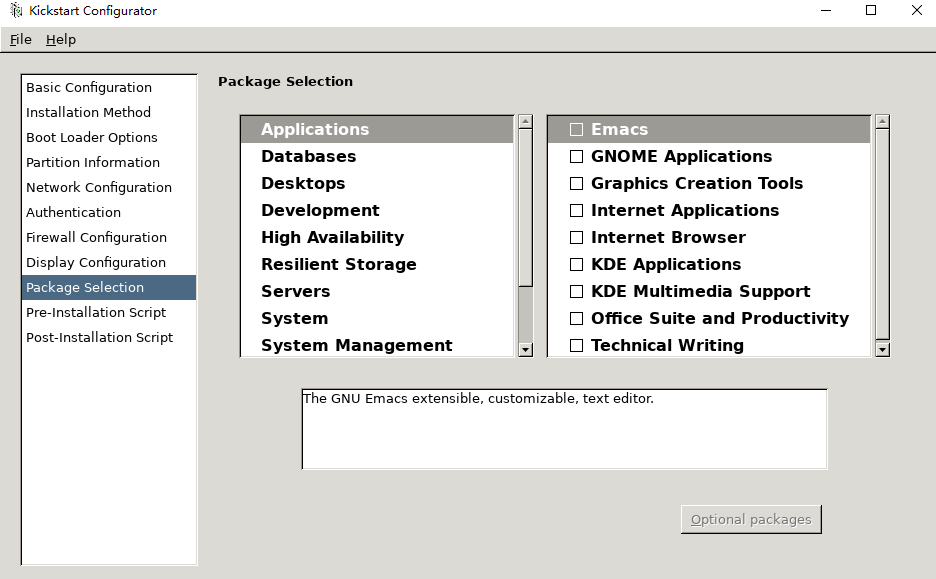
修改后效果:
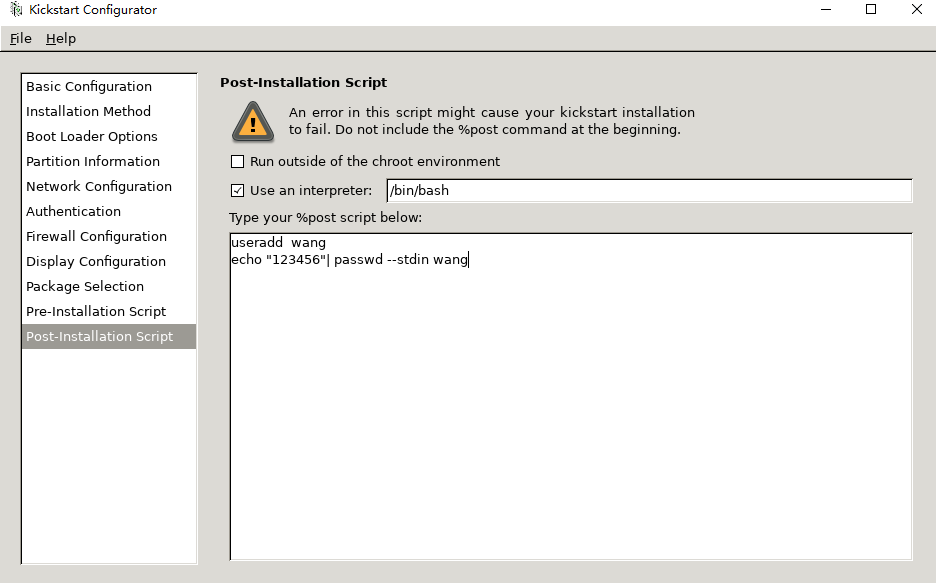
配置完成后保存文件

[root@x112 ~]# cp ks.cfg /var/www/html
#复制ks.cfg文件到http发布目录下面,注意,ks.cfg就是无人值守安装时要用的Kickstart文件,要对应:/tftpboot/pxelinux.cfg/default文件中设置ks=http://192.168.10.1/ks.cfg

[root@x112 ~]# cat ks.cfg
#platform=x86, AMD64, or Intel EM64T
#version=DEVEL
# Install OS instead of upgrade
install
# Keyboard layouts
keyboard 'us'
# Root password
rootpw --iscrypted $1$t/E1BuCD$7IYOUS1wG1qzj6Rsb.aFB1
# System language
lang en_US
# System authorization information
auth --useshadow --passalgo=sha512
# Use text mode install
text
# SELinux configuration
selinux --disabled
# Do not configure the X Window System
skipx


# Firewall configuration
firewall --disabled
# Network information
network --bootproto=dhcp --device=ens33
# Reboot after installation
reboot
# System timezone
timezone Africa/Abidjan
# Use network installation
url --url="http://192.168.0.122/kick"
# System bootloader configuration
bootloader --location=none
# Clear the Master Boot Record
zerombr
# Partition clearing information
clearpart --all --initlabel
# Disk partitioning information
part /boot --fstype="ext4" --size=200
part swap --fstype="swap" --size=1000
part / --fstype="ext4" --size=10000

%post --interpreter=/bin/bash
useradd lisi
echo "123456"|passwd --stdin lisi
%end

%packages
@base

%end

[root@x112 ~]# mount /dev/sr0 /var/www/html/kick/
mount: /dev/sr0 is write-protected, mounting read-only
#挂载光盘镜像到ks,cfg指定的http安装目录。

[root@x112 pxelinux.cfg]# echo "/dev/sr0 /var/www/html/kick iso9660 defaults 0 0" >> /etc/fstab
#设置为开机自动挂载
第五步:修改系统启动菜单文件
重点:
append initrd=initrd.img inst.repo=http://192.168.2.112/kick inst.ks=http://192.168.2.112/ks.cfg #删除原有的从磁盘安装,添加 ks=http://192.168.2.112/ks.cfg ,表示从http下载安装包文件
[root@x112 pxelinux.cfg]# vim default
default vesamenu.c32
timeout 60             #默认值为600,表示等待60秒开始安装

label linux
  menu label ^Install CentOS 7
  menu default         #添加此项,可以自动安装
  kernel vmlinuz
   append initrd=initrd.img inst.repo=http://192.168.2.112/kick inst.ks=http://192.168.2.112/ks.cfg    #删除原有的从磁盘安装,添加 ks=http://192.168.2.112/ks.cfg ,表示从http下载安装包文件。


label check
menu label Test this ^media & install CentOS 7
menu default                #删除此行,默认会优先使用此行配置,
kernel vmlinuz
append initrd=initrd.img inst.stage2=hd:LABEL=CentOSx207x20x86_64 rd.live.check quiet
[root@x112 pxelinux.cfg]# systemctl restart dhcpd xinetd
[root@x112 pxelinux.cfg]#
#重启服务
第六步:客户端创建虚机,进行测试