通过 mapper 接口加载映射文件,这对于后面 ssm三大框架 的整合是非常重要的。那么什么是通过 mapper 接口加载映射文件呢?
我们首先看以前的做法,在全局配置文件 mybatis-configuration.xml 通过 <mappers> 标签来加载映射文件,那么如果我们项目足够大,有很多映射文件呢,难道我们每一个映射文件都这样加载吗,这样肯定是不行的,那么我们就需要使用 mapper 接口来加载映射文件
以前的做法:

改进做法:使用 mapper 接口来加载映射文件
1、定义 userMapper 接口
|
1
2
3
4
5
6
7
8
9
10
11
12
13
14
15
16
17
18
19
20
21
22
|
package com.ys.mapper;import org.apache.ibatis.annotations.Delete;import org.apache.ibatis.annotations.Insert;import org.apache.ibatis.annotations.Select;import org.apache.ibatis.annotations.Update;import com.ys.po.User;public interface UserMapper { //根据 id 查询 user 表数据 public User selectUserById(int id) throws Exception; //向 user 表插入一条数据 public void insertUser(User user) throws Exception; //根据 id 修改 user 表数据 public void updateUserById(User user) throws Exception; //根据 id 删除 user 表数据 public void deleteUserById(int id) throws Exception;} |
2、在全局配置文件 mybatis-configuration.xml 文件中加载 UserMapper 接口(单个加载映射文件)

3、编写UserMapper.xml 文件
|
1
2
3
4
5
6
7
8
9
10
11
12
13
14
15
16
17
18
19
20
21
22
23
24
25
26
27
28
29
30
31
32
33
34
35
36
37
38
39
40
41
42
43
44
45
46
47
48
49
50
51
52
53
54
55
56
57
58
59
60
61
62
63
64
65
66
67
|
<?xml version="1.0" encoding="UTF-8" ?><!DOCTYPE mapper PUBLIC "-//mybatis.org//DTD Mapper 3.0//EN" "http://mybatis.org/dtd/mybatis-3-mapper.dtd"><mapper namespace="com.ys.mapper.UserMapper"> <!-- 根据 id 查询 user 表中的数据 id:唯一标识符,此文件中的id值不能重复 resultType:返回值类型,一条数据库记录也就对应实体类的一个对象 parameterType:参数类型,也就是查询条件的类型 --> <select id="selectUserById" resultType="com.ys.po.User" parameterType="int"> <!-- 这里和普通的sql 查询语句差不多,后面的 #{id}表示占位符,里面不一定要写id,写啥都可以,但是不要空着 --> select * from user where id = #{id1} </select> <!-- 根据 id 更新 user 表的数据 --> <update id="updateUserById" parameterType="com.ys.po.User"> update user u <!-- <set> <if test="username != null and username != ''"> u.username = #{username}, </if> <if test="sex != null and sex != ''"> u.sex = #{sex} </if> </set> --> <trim prefix="set" suffixOverrides=","> <if test="username != null and username != ''"> u.username = #{username}, </if> <if test="sex != null and sex != ''"> u.sex = #{sex}, </if> </trim> where id=#{id} </update> <!-- 向 user 表插入一条数据 --> <insert id="insertUser" parameterType="com.ys.po.User"> <!-- 将插入的数据主键返回到 user 对象中 keyProperty:将查询到的主键设置到parameterType 指定到对象的那个属性 select LAST_INSERT_ID():查询上一次执行insert 操作返回的主键id值,只适用于自增主键 resultType:指定 select LAST_INSERT_ID() 的结果类型 order:AFTER,相对于 select LAST_INSERT_ID()操作的顺序 --> <selectKey keyProperty="id" resultType="int" order="AFTER"> select LAST_INSERT_ID() </selectKey> insert into user(username,sex,birthday,address) value(#{username},#{sex},#{birthday},#{address}) </insert> <!-- 根据 id 删除 user 表的数据 --> <delete id="deleteUserById" parameterType="int"> delete from user where id=#{id} </delete> </mapper> |
4、测试
|
1
2
3
4
5
6
7
8
9
10
11
|
//根据id查询user表数据@Testpublic void testSelectUserById(){ /*这个字符串由 userMapper.xml 文件中 两个部分构成 <mapper namespace="com.ys.po.userMapper"> 的 namespace 的值 <select id="selectUserById" > id 值*/ String statement = "com.ys.mapper.UserMapper.selectUserById"; User user = session.selectOne(statement, 1); System.out.println(user); session.close();} |
5、批量加载映射文件
|
1
2
3
4
5
6
|
<mappers> <!--批量加载mapper 指定 mapper 接口的包名,mybatis自动扫描包下的mapper接口进行加载 --> <package name="com.ys.mapper"/></mappers> |
6、注意
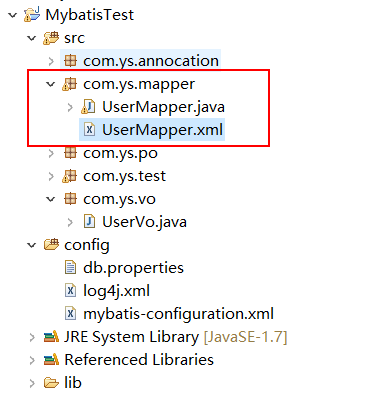
1、UserMapper 接口必须要和 UserMapper.xml 文件同名且在同一个包下,也就是说 UserMapper.xml 文件中的namespace是UserMapper接口的全类名
2、UserMapper接口中的方法名和 UserMapper.xml 文件中定义的 id 一致
3、UserMapper接口输入参数类型要和 UserMapper.xml 中定义的 parameterType 一致
4、UserMapper接口返回数据类型要和 UserMapper.xml 中定义的 resultType 一致