参照官方教程,实现pytorch自定义算子。主要分为以下几步:
- 改写算子为torch C++版本
- 注册算子
- 编译算子生成库文件
- 调用自定义算子
一、改写算子
这里参照官网例子,结合openCV实现仿射变换,C++代码如下:
点击展开warpPerspective.cpp
#include "torch/script.h"
#include "opencv2/opencv.hpp"

torch::Tensor warp_perspective(torch::Tensor image, torch::Tensor warp) {
    // BEGIN image_mat
    cv::Mat image_mat(/*rows=*/image.size(0),
        /*cols=*/image.size(1),
        /*type=*/CV_32FC1,
        /*data=*/image.data_ptr<float>());
    // END image_mat

    // BEGIN warp_mat
    cv::Mat warp_mat(/*rows=*/warp.size(0),
        /*cols=*/warp.size(1),
        /*type=*/CV_32FC1,
        /*data=*/warp.data_ptr<float>());
    // END warp_mat

    // BEGIN output_mat
    cv::Mat output_mat;
    cv::warpPerspective(image_mat, output_mat, warp_mat, /*dsize=*/{ 8, 8 });
    // END output_mat

    // BEGIN output_tensor
    torch::Tensor output = torch::from_blob(output_mat.ptr<float>(), /*sizes=*/{ 8, 8 });
    return output.clone();
    // END output_tensor
}
二、注册算子
在warpPerspective.cpp文件末尾即warp_perspective函数后面加入如下代码,注意pytorch版本不同,注册方式不一样。 1.6.0及以后的版本在include/torch/目录下才有library.h文件,可以采用TORCH_LIBRARY。而之前的版本可以采用torch::RegisterOperators。
//static auto registry = torch::RegisterOperators("my_ops::warp_perspective", &warp_perspective);  // torch.__version__: 1.5.0

//// torch.__version__ >= 1.6.0  torch/include/torch/library.h
TORCH_LIBRARY(my_ops, m) {
    m.def("warp_perspective", warp_perspective);
}
三、编译算子生成库文件
编译成库文件有三种方式:
方式一:通过CMake编译
方式二: 通过torch的JIT编译
方式三:通过Setuptools编译
方式一、CMake编译
这里分别在win10和Ubuntu18.04下进行编译,CMakeLists.txt文件如下,注意win10下需要把相关依赖库拷贝到相应生成目录,后面调用的时候才能正常运行。
点击展开CMakeLists.txt
# ref: https://pytorch.org/tutorials/advanced/torch_script_custom_ops.html

cmake_minimum_required(VERSION 3.9 FATAL_ERROR)
project(warp_perspective)

set(CMAKE_VERBOSE_MAKEFILE ON)
# >>> build type
set(CMAKE_BUILD_TYPE "Release")				# 指定生成的版本
set(CMAKE_CXX_FLAGS_DEBUG "$ENV{CXXFLAGS} -O0 -Wall -g2 -ggdb")
set(CMAKE_CXX_FLAGS_RELEASE "$ENV{CXXFLAGS} -O3 -Wall")
# <<<

if(WIN32)
    # windows10
    # Torch
    set(TORCH_ROOT "D:/Anaconda3/envs/Test374/Lib/site-packages/torch")  # 我这里采用虚拟环境安装的pytorch
    include_directories(${TORCH_ROOT}/include)
    link_directories(${TORCH_ROOT}/lib/)
    set(TORCH_LIBRARIES "${TORCH_ROOT}/lib/*.lib")   # 可以选择需要的库

    # Opencv
    set(OPENCV_ROOT "D:/AI/Classify/C++/opencv")
    include_directories(${OPENCV_ROOT}/include)
    link_directories(${OPENCV_ROOT}/lib/x64/)

    # Define our library target
    add_library(warp_perspective SHARED warpPerspective.cpp)

    # Enable C++14
    target_compile_features(warp_perspective PRIVATE cxx_std_14)

    # Link against Torch
    target_link_libraries(warp_perspective "${TORCH_LIBRARIES}")

    # Link against OpenCV
    target_link_libraries(warp_perspective
    	opencv_world420
    )
elseif(UNIX)
    # Ubuntu18.04
    # Torch
    set(TORCH_ROOT "/home/zjh/anaconda3/envs/Test374/lib/python3.7/site-packages/torch")
    include_directories(${TORCH_ROOT}/include)
    link_directories(${TORCH_ROOT}/lib/)

    # Opencv
    set(OpenCV_DIR "/home/zjh/learn/libtorch/Examples/opencv")
    include_directories(${OpenCV_DIR}/include)
    link_directories(${OpenCV_DIR}/lib/Linux64/)

    # Define our library target
    add_library(warp_perspective SHARED warpPerspective.cpp)

    # Enable C++14
    target_compile_features(warp_perspective PRIVATE cxx_std_14)

    # libtorch库文件
    target_link_libraries(warp_perspective
        # CPU
        c10
        torch_cpu
        # GPU
        c10_cuda
        torch_cuda
    )

    # opencv库文件
    target_link_libraries(warp_perspective
        opencv_core
        opencv_imgproc
    )
endif()

# windows需要把相关依赖库copy到编译目录下
if (MSVC)
  file(GLOB OPENCV_DLLS "${OPENCV_ROOT}/bin/x64/opencv_world420.dll")
  add_custom_command(TARGET warp_perspective
                     POST_BUILD
                     COMMAND ${CMAKE_COMMAND} -E copy_if_different
                     ${OPENCV_DLLS}
                     $<TARGET_FILE_DIR:warp_perspective>)
endif (MSVC)
方式二、jit compilation
该方式在Linux下需要将opencv相关的库文件,放置在/usr/local/lib下才能运行通过,编写jitCompilation.py如下,然后运行即可生成相应的库文件。
点击展开jitCompilation.py
import torch.utils.cpp_extension
torch.utils.cpp_extension.load(
name="warp_perspective",
sources=["warpPerspective.cpp"],
extra_ldflags=["-lopencv_core", "-lopencv_imgproc"],
is_python_module=False,
verbose=True,
extra_include_paths=["/home/learn/libtorch/opencv/include"],
)
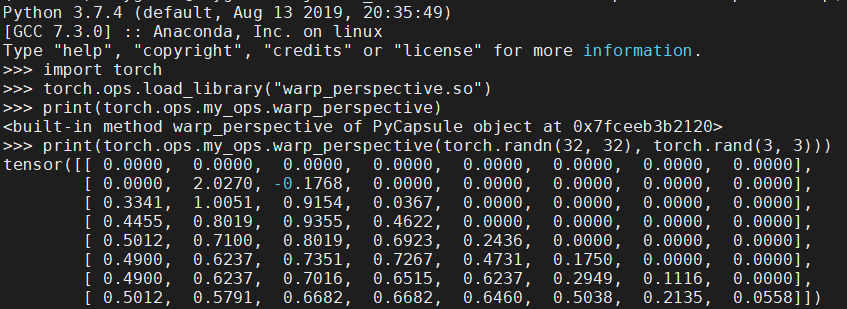
print(torch.ops.my_ops.warp_perspective)
print(torch.ops.my_ops.warp_perspective(torch.randn(32, 32), torch.rand(3, 3)))
方式三、setupTools
编写setup.py,然后执行命令python setup.py build develop生成对应的库。
点击展开setup.py
from setuptools import setup
from torch.utils.cpp_extension import BuildExtension, CppExtension

setup(
    name="warp_perspective",
    ext_modules=[
        CppExtension(
            "warp_perspective",
            ["warp_perspective.cpp"],
            libraries=["opencv_core", "opencv_imgproc"],
            include_dirs=["/home/learn/opencv/include"],
            library_dirs=["/home/learn/opencv/lib/Linux64"]
        )
    ],
    cmdclass={"build_ext": BuildExtension.with_options(no_python_abi_suffix=True)},
)
四、调用
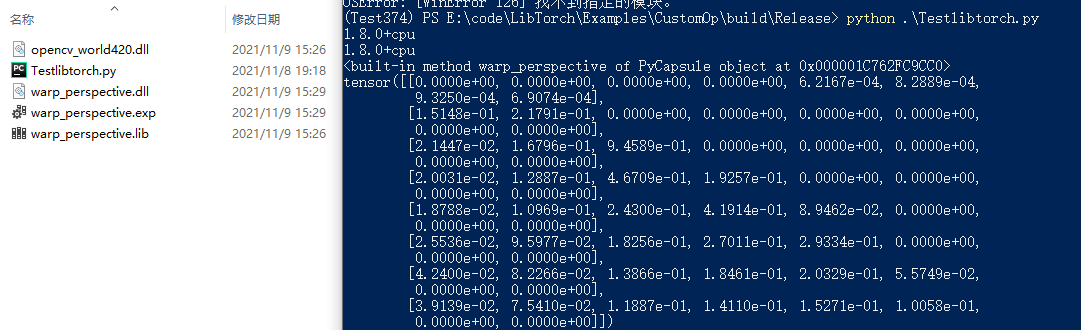
- windows10
利用CMake方式构建后在build文件夹下会有一个.sln文件,用visual studio打开后点击生成,相应的Release文件夹下会生成warp_perspective.dll。
import torch
print(torch.__version__)
torch.ops.load_library("./warp_perspective.dll")
print(torch.__version__)
print(torch.ops.my_ops.warp_perspective)
print(torch.ops.my_ops.warp_perspective(torch.randn(32, 32), torch.rand(3, 3)))
- Linux
编译完成后会生成相应的动态库(so文件),调用结果如下。
注意: 直接运行可能会出现以下错误
-
错误

解决措施
手动把opencv库放置在同一目录下,或者在CMakeLists.txt文件中加入if (MSVC) *** endif (MSVC)部分
-
错误

解决措施:
CMakeLists.txt文件中加入add_definitions(-D _GLIBCXX_USE_CXX11_ABI=0)
参考链接:https://discuss.pytorch.org/t/undefined-symbol-when-import-lltm-cpp-extension/32627/2
五、转onnx
主要是把自定义算子利用torch.onnx.register_custom_op_symbolic函数将自定义算子注册进行注册,然后导出onnx模型即可。如果用onnxruntime调用导出的模型,则会报test_custom未定义,可以参照PyTorchCustomOperator进行改写。
转换流程
- step1 先C++ torch该写算子,导出库文件
- step2 torch加载库文件, 如:
torch.ops.load_library("./fps.dll") - step3 torch注册算子, 如:
def my_fps(g, xyz, npoints): return g.op("my_ops::fps", xyz, npoints) - step4 torch.onnx注册算子, 如:
torch.onnx.register_custom_op_symbolic("my_ops::fps", my_fps, 9) - step5 修改模型,如:
farthest_point_sample(xyz, S))变为torch.ops.my_ops.fps(xyz, S)
点击展开export.py
import torch
torch.ops.load_library("./testCustom.so")


class MyNet(torch.nn.Module):
    def __init__(self, num_classes):
        super(MyNet, self).__init__()
        self.num_classes = num_classes

    def forward(self, xyz, other):
        return torch.ops.my_ops.test_custom(xyz, other)


def my_custom(g, xyz, other):
    return g.op("cus_ops::test_custom", xyz, other)
torch.onnx.register_custom_op_symbolic("my_ops::test_custom", my_custom, 9)


if __name__ == "__main__":
    net = MyNet(2)
    xyz = torch.rand((2, 3))
    other = torch.rand((1, 3))

    print("xyz: ", xyz)
    out = net(xyz, other)
    print("out: ", out)

    # export onnx
    torch.onnx.export(net,
            (xyz, other),
            "./model.onnx",
            input_names=["points", "cate"],
            output_names=["cls_prob"],
            custom_opsets={"cus_ops": 11},
            dynamic_axes={
                "points": {0: "channel", 1: "n_point"},
                "cls_prob": {0: "channel", 1: "n"}
            }
            )