一、Thymeleaf简介
Thymeleaf模板引擎主要用来做视图的展示。在springboot中默认支持thymeleaf,来替代原来ssm项目中的jsp。相较于jsp或其他的模板引擎,thymeleaf有如下特点:
1)动静结合,thymeleaf 既可以在有后台交互的情况下运行,也可以在不与后台交互的情况下运行,方便前后端开发人员协同开发;
2)多方言的支持,支持spring的标准方言,可以和springboot完美整合;
二、Thymeleaf 使用
1)在pom.xml文件中导入依赖;
<!--        thymeleaf 模板依赖-->
        <dependency>
            <groupId>org.springframework.boot</groupId>
            <artifactId>spring-boot-starter-thymeleaf</artifactId>
        </dependency>
2) 在templates 目录下新建html页面,并加入thymeleaf的命名空间即可使用,Thymeleaf的命名空间为:xmlns:th="http://www.thymeleaf.org";
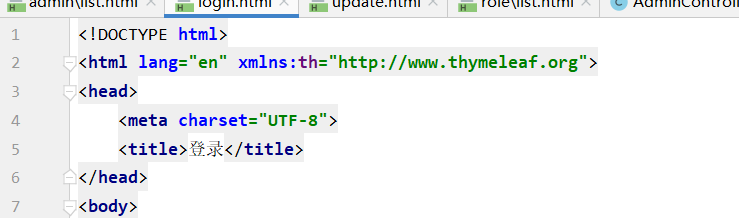
3)引入命名空间之后,我们便可以使用thymeleaf的语法来展示数据;
三、Thymeleaf 的语法
Thyemeleaf的使用与jsp中的jstl和el表达式使用方法相似;
Thymeleaf 表达式:用来取值,写在thymeleaf属性标签中。
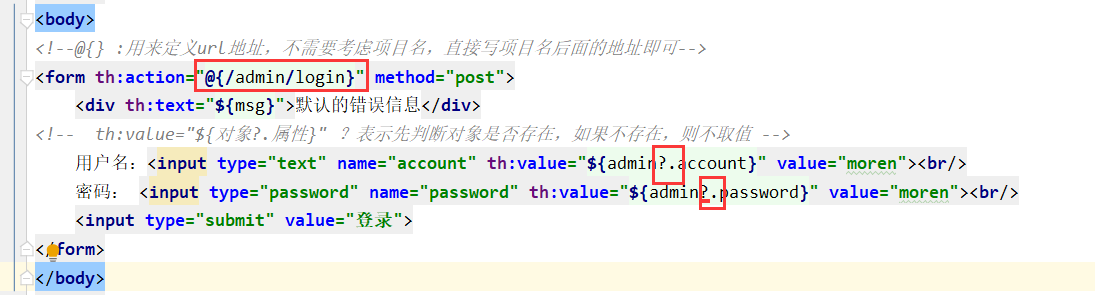
1) ${} :从域中取值,与el表达式类似;
注意:当对象不存在的情况下,去获取对象的属性的话,会抛出异常;
所以取值的时候,如果可能存在不存在的情况,需在对象后添加?判断对象是否存在;
默认从request域中取值;
常见的内置对象:
1)session: 从session中获取值,类似jsp中的${session} == ${sessionScope}
2)request: httpServletRequest对象,${request} == ${pageContext.request.}
3)servletContext: ServletContext对象(application域)
4)ctx : 上下文对象
5)vars: 上下文变量
6)local: 上下文的语言环境;
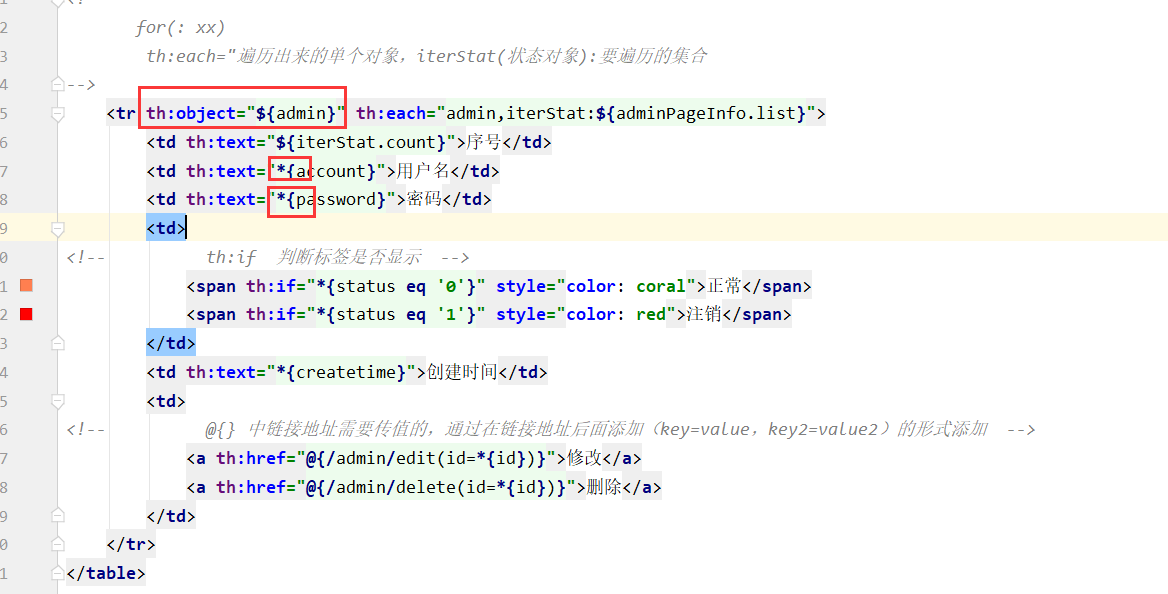
2) *{} :选择变量表达式,需要配合th:object 属性标签一起使用。th:object可以绑定一个对象,*{属性名} 去获取绑定的对象的属性;
3) #{} :获取国际化消息表达式;
4) ~{} :代码块表达式,用来加载代码片段。 需配合 th:replace th:insert th:include 三个属性标签使用。类似 <%@include >;
<body>
<!--  insert 插入代码片段 ,包含最外层的标签  ~{模板名称::代码片段名称}
       </head><header>
            <div>头部导航栏</div>
            <ul>
                <li>首页</li>
                <li>文章</li>
            </ul>
        </header></div>
 -->
<div th:insert="~{admin/common::head}">
    原来内容
</div>

<table>
    <tr>
        <td>序号</td>
        <td>用户名</td>
        <td>密码</td>
        <td>状态</td>
        <td>创建时间</td>
        <td>操作</td>
    </tr>
<!--
       for(: xx)
        th:each="遍历出来的单个对象,iterStat(状态对象):要遍历的集合
-->
    <tr th:object="${admin}" th:each="admin,iterStat:${adminPageInfo.list}">
        <td th:text="${iterStat.count}">序号</td>
        <td th:text="*{account}">用户名</td>
        <td th:text="*{password}">密码</td>
        <td>
<!--          th:if  判断标签是否显示  -->
            <span th:if="*{status eq '0'}" style="color: coral">正常</span>
            <span th:if="*{status eq '1'}" style="color: red">注销</span>
        </td>
        <td th:text="*{createtime}">创建时间</td>
        <td>
<!--          @{} 中链接地址需要传值的,通过在链接地址后面添加(key=value,key2=value2)的形式添加  -->
            <a th:href="@{/admin/edit(id=*{id})}">修改</a>
            <a th:href="@{/admin/delete(id=*{id})}">删除</a>
        </td>
    </tr>
</table>

<!--   替换内容,将引入的标签,替换掉现有标签 ,
     标签内容全部过来
       <footer>
            <div>版权所有,翻版必究</div>
        </footer>
 -->
<div th:replace="~{admin/common::footerDiv}">
    <span>原来内容</span>
</div>
<!--   include 加载代码片段,
   不包含最外面的标签
         <div>
            <div>版权所有,翻版必究</div>
        </div>
     -->
<div th:include="~{admin/common::footerDiv}">
    <span>原来内容</span>
</div>
</body>
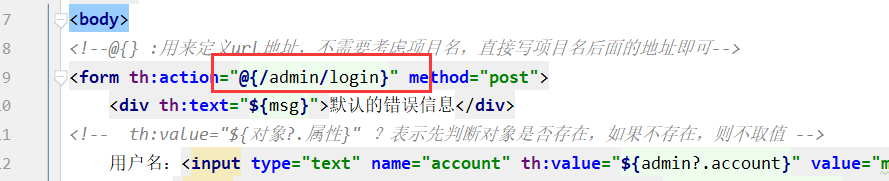
5) @{} :用来定义链接url地址。 比如 img src a href <script > <link>等;

四、Thymeleaf 属性标签
编写在html标签上,替代原有的html标签属性,以达到动态展示数据。
Thymelaef属性标签都是以th:开头。几乎涵盖了html标签中所有的属性。
常见的标签:
1) th:text :设置当前标签 的文本内容;
2) th:value : 设置当前元素的value值;
3) th:utext: 设置当前元素的html内容;
4) th:title ;
5) th:if :相当于<c:if> 用来做判断,如果表达式为false,则当前标签不显示;
6) th:each :相当于<c:foreach> ,用来遍历数据;
7) th:object : 声明变量,配合*{} 一起使用;
8) th:fragment :用来定义一个代码片段,以供th:insert replace include 调用;
9) th:insert : 将代码片段的所有内容(包含最外层的标签)插入到使用th:insert的html标签中。 <div th:insert=”~{}”></div>;
10) th:replace : 将代码片段替换掉使用th:insert的html标签;
11) th:include :将代码片段的内容(不包含最外层的标签)插入到使用th:insert的html标签中;
五、Thymeleaf 函数
Thymeleaf 函数写在表达式中,用来对数据进行数据格式话,字符串操作,集合操作等
常用的函数:
1) #strings: 字符串操作函数,跟java中string的api类似。 跟jstl el 表达式中 fn:函数标签类似。
2) #dates :用来对日期进行操作,日期的格式化,获取日期的年月日,创建日期等
3) #numbers: 用来对数值进行格式化,保留指定小数位,分隔符展示等
4) #arrays 数组的操作,获取数组长度,是否包含某个元素等等。。。
5) #maps: map集合操作
6) 。。。
测试代码:
@Controller
public class FunctionController {

    @GetMapping("/function")
    public String function(ModelMap modelMap){
        modelMap.put("name","james");
        modelMap.put("birthday",new Date());
        modelMap.put("arrayData",new String[]{"james","yao","yi"});
        return "function.html";
    }
}
function.html界面:
<body>
     <h1>字符函数</h1>
     长度:<span><div th:text="${#strings.length(name)}"></div></span></br>
     首字母大写:<span><div th:text="${#strings.capitalize(name)}"></div></span></br>
     contains:<span><div th:text="${#strings.contains(name,'jam')}"></div></span></br>
     isEmpty:<span><div th:text="${#strings.isEmpty(name)}"></div></span></br>
     substring:<span><div th:text="${#strings.substring(name,0,2)}"></div></span></br>

<h1>日期函数</h1>
     不格式化:<span th:text="${birthday}"></span><br/>
format 指定格式:<span th:text="${#dates.format(birthday,'yyyy-MM-dd HH:mm:ss')}"></span><br/>
format不指定格式:<span th:text="${#dates.format(birthday)}"></span><br/>
year:<span th:text="${#dates.year(birthday)}"></span><br/>
month:<span th:text="${#dates.month(birthday)}"></span><br/>
dayOfWeekName:<span th:text="${#dates.dayOfWeekName(birthday)}"></span><br/>
创建日期:<span th:text="${#dates.createToday()}"></span><br/>

<h1>数值函数</h1>
整数的格式化:<span th:text="${#numbers.formatInteger(100,5)}"></span><br/>
<!--     COMMA 逗号  POINT.WHITESPACE 空格-->
整数的格式化带分隔符:<span th:text="${#numbers.formatInteger(100,5,'COMMA')}"></span><br/>
<!--     前两个参数与整数一样,第三个参数为保留的小数位,四舍五入-->
 小数的格式化:<span th:text="${#numbers.formatDecimal(100.94876,5,3)}"></span><br/>
 <!--     COMMA 逗号  POINT.WHITESPACE 空格-->
 小数的格式化带分隔符:<span th:text="${#numbers.formatDecimal(100.94876,3,3,'COMMA')}"></span><br/>
百分比:<span th:text="${#numbers.formatPercent(0.783646,5,3)}"></span><br/>

<h1>数组函数arrays</h1>
数组长度:<span th:text="${#arrays.length(arrayData)}"></span><br/>
是否为空:<span th:text="${#arrays.isEmpty(arrayData)}"></span><br/>
是否包含:<span th:text="${#arrays.contains(arrayData,'james')}"></span><br/>

<h1>list集合函数</h1>
<!--     #lists #maps  #sets-->
<!--<span th:text="${#lists.contains()}"></span>-->
</body>
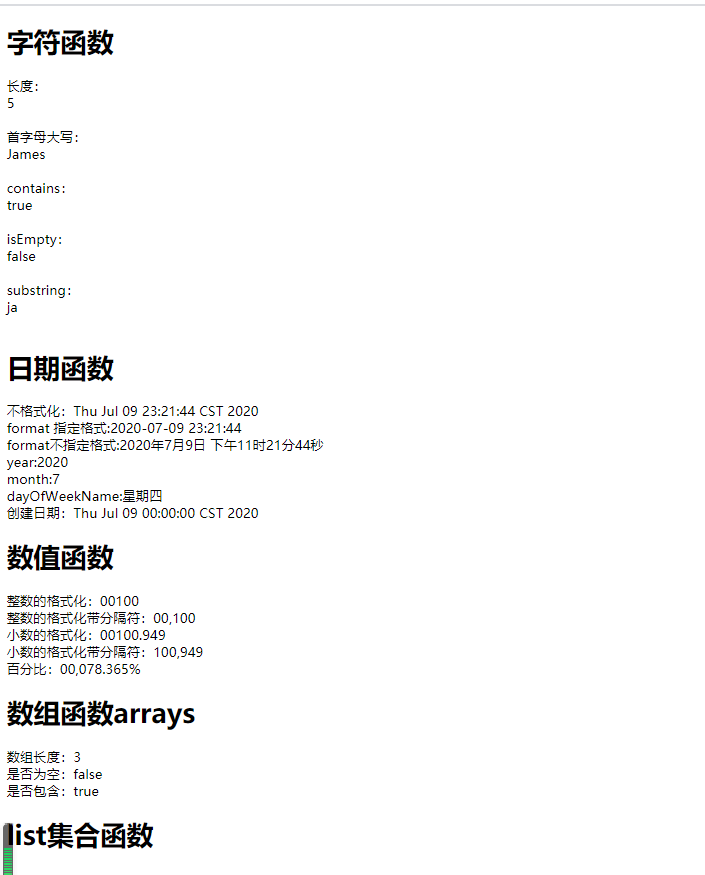
测试结果为:
六、Springboot中文件上传下载
Springboot中文件上传下载与springmvc 完全一致。
1)控制层代码:
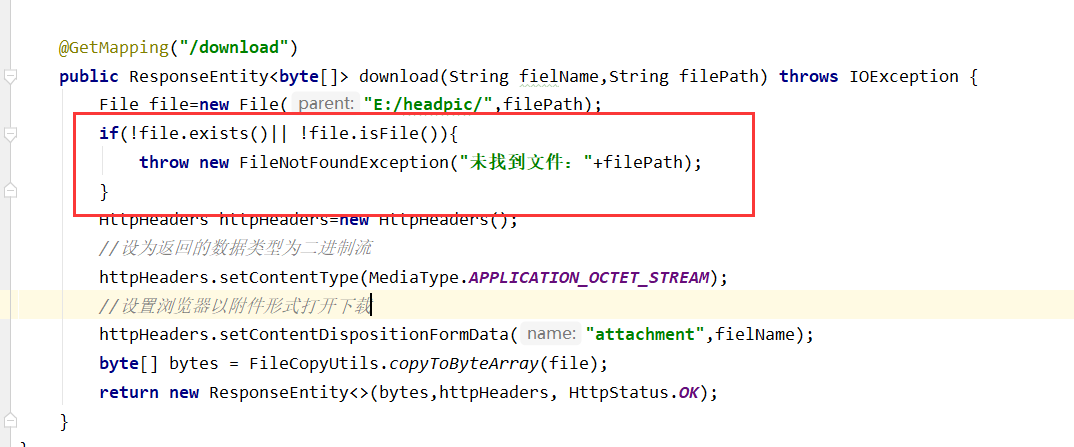
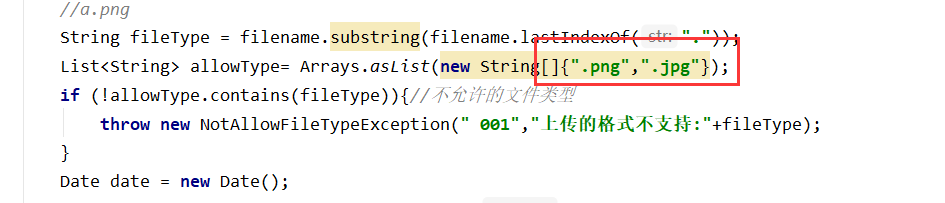
@Controller
public class FileController {

    @GetMapping("/toUpload")
    public String toUpload(){
        return "upload.html";
    }
    @PostMapping("/upload")
    public String upload(MultipartFile multipartFile, ModelMap modelMap) throws IOException {
//        if (multipartFile==null){ throw new FileNotFoundException(); }
        //获取文件名
        String filename = multipartFile.getOriginalFilename();
        // 日期 时间戳+用户ID
        //随机一个uuid名称
        String randName = UUID.randomUUID().toString();
        //a.png
        String fileType = filename.substring(filename.lastIndexOf("."));
        List<String> allowType= Arrays.asList(new String[]{".png",".jpg"});
        if (!allowType.contains(fileType)){//不允许的文件类型
            throw new NotAllowFileTypeException(" 001","上传的格式不支持:"+fileType);
        }
        Date date = new Date();
        SimpleDateFormat sdf=new SimpleDateFormat("yyyyMMdd");
        String today=sdf.format(date);
        String path="E:/headpic/"+ today;
        //创建文件对象用来指定保存的位置和名称
        File file=new File(path,randName+fileType);
        //如果父目录不存在,创建
        if (!file.getParentFile().exists()){
            file.getParentFile().mkdirs();
        }
        //将文件保存到对应的目录
        multipartFile.transferTo(file);
        modelMap.put("filePath",today+"/"+randName+fileType);
        modelMap.put("fileName",randName+fileType);
        return "upload.html";
    };

    @GetMapping("/download")
    public ResponseEntity<byte[]> download(String fielName,String filePath) throws IOException {
        File file=new File("E:/headpic/",filePath);
        if(!file.exists()|| !file.isFile()){
            throw new FileNotFoundException("未找到文件:"+filePath);
        }
        HttpHeaders httpHeaders=new HttpHeaders();
        //设为返回的数据类型为二进制流
        httpHeaders.setContentType(MediaType.APPLICATION_OCTET_STREAM);
        //设置浏览器以附件形式打开下载
        httpHeaders.setContentDispositionFormData("attachment",fielName);
        byte[] bytes = FileCopyUtils.copyToByteArray(file);
        return new ResponseEntity<>(bytes,httpHeaders, HttpStatus.OK);
    }
}
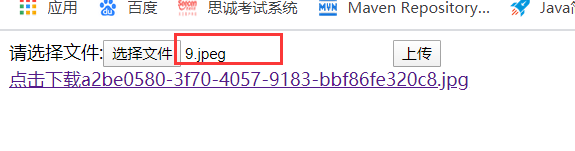
2)后台upload.html页面代码为:
<body>
<form th:action="@{/upload}" method="post" enctype="multipart/form-data">
    请选择文件:<input type="file" name="multipartFile">
    <input type="submit" value="上传">
</form>
<a th:href="@{/download(fileName=*{fileName},filePath=*{filePath})}" th:text="${'点击下载'+fileName}"></a>
</body>
3)要想实现文件的上传和下载,必须要配置资源映射;
/**
 * springmvc相关配置类
 * WebMvcConfigurer 用来配置springmvc的配置项
 */
@Configuration//配置类注解
public class WebConfig implements WebMvcConfigurer {
    /**
     * 配置资源映射,相当于xml中的 <resource></resource>
     * @param registry
     */
    @Override
    public void addResourceHandlers(ResourceHandlerRegistry registry) {
        registry
                .addResourceHandler("/headpic/**")//配置请求地址
                .addResourceLocations("file:E:/headpic/");//配置资源目录
    }
}
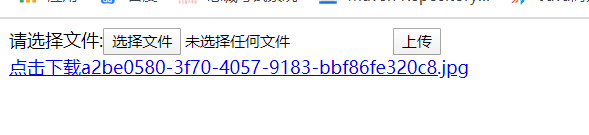
4)最后我们的界面是这样的;
七、Springboot全局异常处理
Spring3.2之后,可以通过@ControllerAdvice+@ExceptionHandler 这两个注解来实现全局的异常处理。
@ControllerAdvice 加载类上面;
@ExceptionHandler 添加在异常处理的方法上面;
步骤:
1)写一个全局异常处理的类,并添加@ControllerAdvice注解;
2)写对应异常处理的方法,并在方法上添加@ExceptionHandler注解;
@ControllerAdvice
public class GlobalExceptionHandler {

    /**
     * @ExceptionHandler:指定处理特定异常,当项目发生指定的异常时,便会进入此方法
     * @param e
     * @return
     */
    @ExceptionHandler(FileNotFoundException.class)
    public Object handlerException(FileNotFoundException e){
        String message = e.getMessage();
        ModelAndView modelAndView = new ModelAndView();
        modelAndView.setViewName("error/fileNotFound.html");
        modelAndView.addObject("msg",message);
        return modelAndView;
    }
    @ExceptionHandler(Exception.class)
    public ModelAndView handlerException(Exception e){
        String message = e.getMessage();
        ModelAndView modelAndView = new ModelAndView();
        modelAndView.setViewName("error/fileNotFound.html");
        modelAndView.addObject("msg",message);
        return modelAndView;
    }
}
3)写一个自定义异常的NotAllowFileTypeException.java类;
/**
 * 自定义异常
 */
public class NotAllowFileTypeException extends RuntimeException{
    private String code;
    public NotAllowFileTypeException(String message, String code){
        super(message);
        this.code=code;
    }
    public String getCode() {
        return code;
    }
    public void setCode(String code) {
        this.code = code;
    }
}
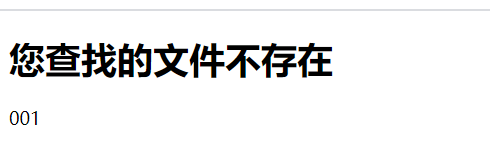
4)fileNotFound.html页面;
<!DOCTYPE html>
<html lang="en" xmlns:th="http://www.thymeleaf.org">
<head>
    <meta charset="UTF-8">
    <title>文件找不到</title>
</head>
<body>
<h1>您查找的文件不存在</h1>
<div th:text="${msg}"></div>
</body>
</html>
5)我们现在先测试第一种情况,抛FileNotFoundException 的异常,是一个文件找不到的异常,我们还是在上一个文件上传下载的页面中来测试;
①、我们的方法时,先上传图片,然后再去那个文件夹中把所有图片删掉即可;

点击链接下载,正常情况下,是可以下载的,但是
由于我们把文件夹中的图片删除了,文件夹里面就没有图片了,就会走fileNotFound.html页面;抛出异常;
结果就是这样的:

②我们再测试一个文件类型不对的异常,使用普通的异常Exception,当我们上传.png,.jpg以外格式的图片时,就会抛出异常;
点击上传,
八、Springboot中的拦截器
1)配置拦截器
/**
 * springmvc相关配置类
 * WebMvcConfigurer 用来配置springmvc的配置项
 */
@Configuration//配置类注解
public class WebConfig implements WebMvcConfigurer {
    /**
     * 配置springmvc拦截器
     * @param registry
     */
    @Override
    public void addInterceptors(InterceptorRegistry registry) {
        registry.addInterceptor(new LoginInterceptor())//添加拦截器对象
                .addPathPatterns("/**")//指定需要拦截的地址
                .excludePathPatterns("/admin/login","/admin/toLogin","/headpic/**")//指定放行的请求
                .order(1);//指定顺序
    }
}
2)登录拦截;
控制层:
//跳转到登录页面
    @RequestMapping("/toLogin")
    public String toLogin(){
        return "/admin/login.html";
    }
    @PostMapping("/login")
    public String login(TAdmin tAdmin, HttpSession session,ModelMap modelMap){
        TAdmin tAdmin1=adminService.selectByAccount(tAdmin.getAccount());
        if (tAdmin1==null||!tAdmin.getPassword().equals(tAdmin1.getPassword())){
           //回传登录信息
            modelMap.put("admin",tAdmin);
            modelMap.put("msg","用户名密码不正确");
            return "/admin/login.html";
        }
        //将对象放session域中
        session.setAttribute("admin",tAdmin1);
        return "/admin/detail.html";
    }
登录拦截器LoginInterceptor,java;
public class LoginInterceptor implements HandlerInterceptor {
    @Override
    public boolean preHandle(HttpServletRequest request, HttpServletResponse response, Object handler) throws Exception {
        TAdmin admin = (TAdmin) request.getSession().getAttribute("admin");
        if (admin!=null){
            return true;
        }
        response.sendRedirect(request.getContextPath()+"/admin/toLogin");
        return false;
    }

    @Override
    public void postHandle(HttpServletRequest request, HttpServletResponse response, Object handler, ModelAndView modelAndView) throws Exception {

    }

    @Override
    public void afterCompletion(HttpServletRequest request, HttpServletResponse response, Object handler, Exception ex) throws Exception {

    }
}
这样,拦截器的话,差不多就可以了;