5、视图解析与模板引擎
视图解析:SpringBoot默认不支持 JSP,需要引入第三方模板引擎技术实现页面渲染。
1、视图解析
1、视图解析原理流程
1、目标方法处理的过程中,所有数据都会被放在 ModelAndViewContainer 里面。包括数据和视图地址
2、方法的参数是一个自定义类型对象(从请求参数中确定的),把他重新放在 ModelAndViewContainer
3、任何目标方法执行完成以后都会返回 ModelAndView(数据和视图地址)。
4、processDispatchResult 处理派发结果(页面改如何响应)
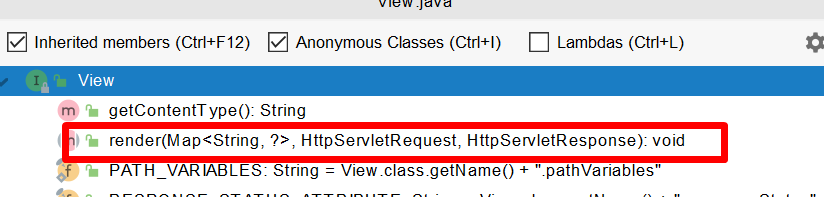
● render(mv, request, response); 进行页面渲染逻辑
○ 根据方法的String返回值得到 View 对象【定义了页面的渲染逻辑】
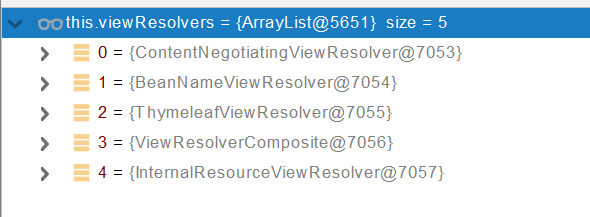
■ 1、所有的视图解析器尝试是否能根据当前返回值得到View对象
■ 2、得到了 redirect:/main.html --> Thymeleaf new RedirectView()
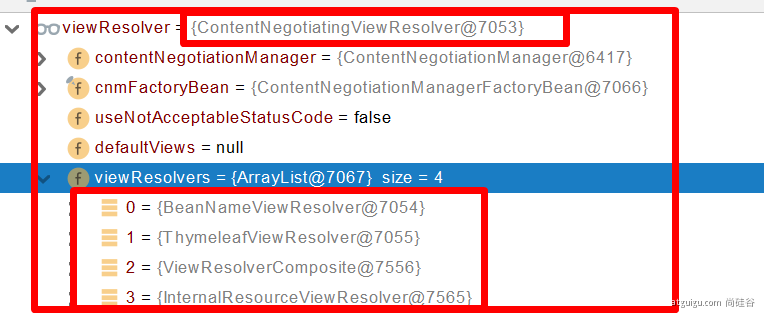
■ 3、ContentNegotiationViewResolver 里面包含了下面所有的视图解析器,内部还是利用下面所有视图解析器得到视图对象。
■ 4、view.render(mv.getModelInternal(), request, response); 视图对象调用自定义的render进行页面渲染工作
● RedirectView 如何渲染【重定向到一个页面】
● 1、获取目标url地址
● 2、response.sendRedirect(encodedURL);
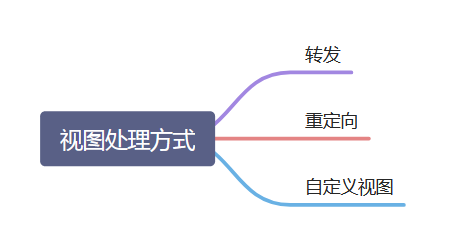
视图解析:
○ 返回值以 forward: 开始: new InternalResourceView(forwardUrl); -->
转发request.getRequestDispatcher(path).forward(request, response);
○ 返回值以 redirect: 开始: new RedirectView() --》 render就是重定向
○ 返回值是普通字符串: new ThymeleafView()--->
自定义视图解析器+自定义视图; 大厂学院。

2、模板引擎-Thymeleaf
1、thymeleaf简介
Thymeleaf is a modern server-side Java template engine for both web and standalone environments, capable of processing HTML, XML, JavaScript, CSS and even plain text.
现代化、服务端Java模板引擎
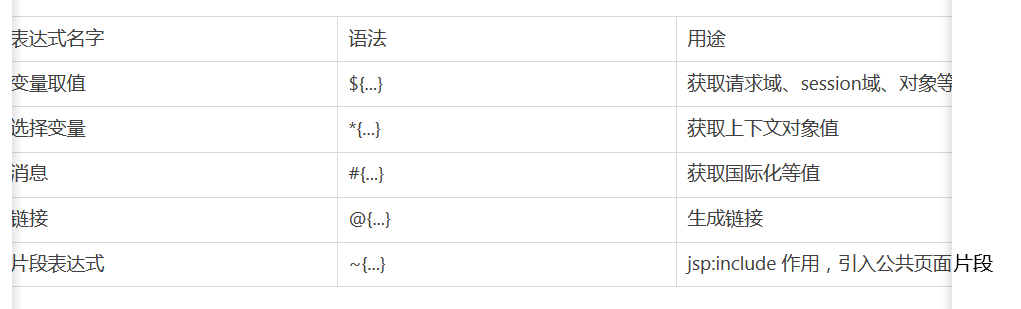
2、基本语法
-
表达式
-
字面量
文本值: 'one text' , 'Another one!' ,…数字: 0 , 34 , 3.0 , 12.3 ,…布尔值: true , false
空值: null
变量: one,two,.... 变量不能有空格 -
文本操作
字符串拼接: +
变量替换: |The name is ${name}| -
数学运算
运算符: + , - , * , / , % -
布尔运算
运算符: and , or
一元运算: ! , not -
比较运算
比较: > , < , >= , <= ( gt , lt , ge , le )等式: == , != ( eq , ne ) -
条件运算
If-then: (if) ? (then)
If-then-else: (if) ? (then) : (else)
Default: (value) ?: (defaultvalue) -
特殊操作
无操作: _
3、设置属性值-th:attr
设置单个值
<form action="subscribe.html" th:attr="action=@{/subscribe}">
  <fieldset>
    <input type="text" name="email" />
    <input type="submit" value="Subscribe!" th:attr="value=#{subscribe.submit}"/>
  </fieldset>
</form>
设置多个值
<img src="../../images/gtvglogo.png" th:attr="src=@{/images/gtvglogo.png},title=#{logo},alt=#{logo}" />
以上两个的代替写法 th:xxxx
<input type="submit" value="Subscribe!" th:value="#{subscribe.submit}"/>
<form action="subscribe.html" th:action="@{/subscribe}">
所有h5兼容的标签写法
https://www.thymeleaf.org/doc/tutorials/3.0/usingthymeleaf.html#setting-value-to-specific-attributes
4、迭代
<tr th:each="prod : ${prods}">
        <td th:text="${prod.name}">Onions</td>
        <td th:text="${prod.price}">2.41</td>
        <td th:text="${prod.inStock}? #{true} : #{false}">yes</td>
</tr>
<tr th:each="prod,iterStat : ${prods}" th:class="${iterStat.odd}? 'odd'">
  <td th:text="${prod.name}">Onions</td>
  <td th:text="${prod.price}">2.41</td>
  <td th:text="${prod.inStock}? #{true} : #{false}">yes</td>
</tr>
5、条件运算
<a href="comments.html"
th:href="@{/product/comments(prodId=${prod.id})}"
th:if="${not #lists.isEmpty(prod.comments)}">view</a>
<div th:switch="${user.role}">
  <p th:case="'admin'">User is an administrator</p>
  <p th:case="#{roles.manager}">User is a manager</p>
  <p th:case="*">User is some other thing</p>
</div>
6、属性优先级

3、thymeleaf使用
1、引入Starter
        <dependency>
            <groupId>org.springframework.boot</groupId>
            <artifactId>spring-boot-starter-thymeleaf</artifactId>
        </dependency>
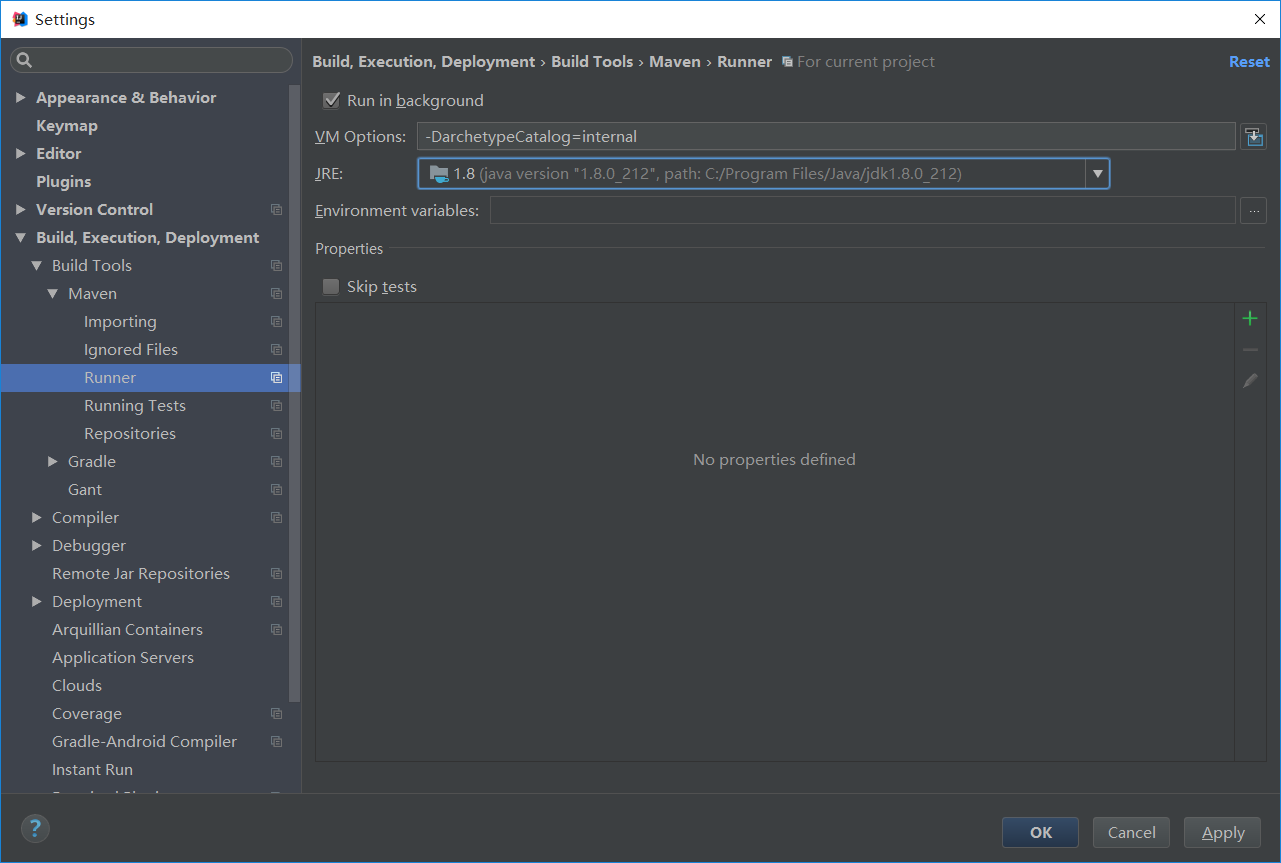
2、自动配置好了thymeleaf
@Configuration(proxyBeanMethods = false)
@EnableConfigurationProperties(ThymeleafProperties.class)
@ConditionalOnClass({ TemplateMode.class, SpringTemplateEngine.class })
@AutoConfigureAfter({ WebMvcAutoConfiguration.class, WebFluxAutoConfiguration.class })
public class ThymeleafAutoConfiguration { }
自动配好的策略
● 1、所有thymeleaf的配置值都在 ThymeleafProperties
● 2、配置好了 SpringTemplateEngine
● 3、配好了 ThymeleafViewResolver
● 4、我们只需要直接开发页面
	public static final String DEFAULT_PREFIX = "classpath:/templates/";

	public static final String DEFAULT_SUFFIX = ".html";  //xxx.html
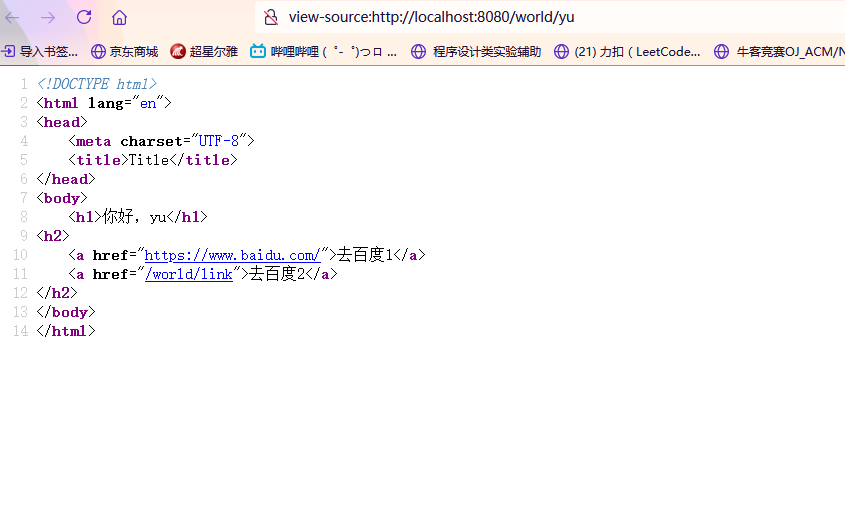
3、页面开发
在templates下新建 success.html
<!DOCTYPE html>
<html lang="en" xmlns:th="http://www.thymeleaf.org">
<head>
    <meta charset="UTF-8">
    <title>Title</title>
</head>
<body>
<h1 th:text="${msg}">哈哈</h1>
<h2>
    <a href="www.atguigu.com" th:href="${link}">去百度</a>  <br/>
    <!--@{}里应该加上链接,而且在运行时会自动加前缀-->
    <a href="https://www.cnblogs.com/xingkongcanghai/" th:href="@{/link}">去百度2</a>
</h2>
</body>
</html>
在controller下新建 ViewTestController
package com.yu.boot.controller;

import org.springframework.stereotype.Controller;
import org.springframework.ui.Model;
import org.springframework.web.bind.annotation.GetMapping;

@Controller
public class ViewTestController {
    @GetMapping("/yu")
    public String  yu(Model model){
        //model中的数据会被放在请求域中 request.setAttribute("a",aa)
        model.addAttribute("msg","你好,yu");
        model.addAttribute("link","https://www.baidu.com/");
        return "success";
    }
}
需要注意:@{}里应该加上链接,而且在运行时会自动加前缀 ,例如此例子中
若在application.yaml中加上
server:
  servlet:
    context-path: /world
则:
4、构建后台管理系统
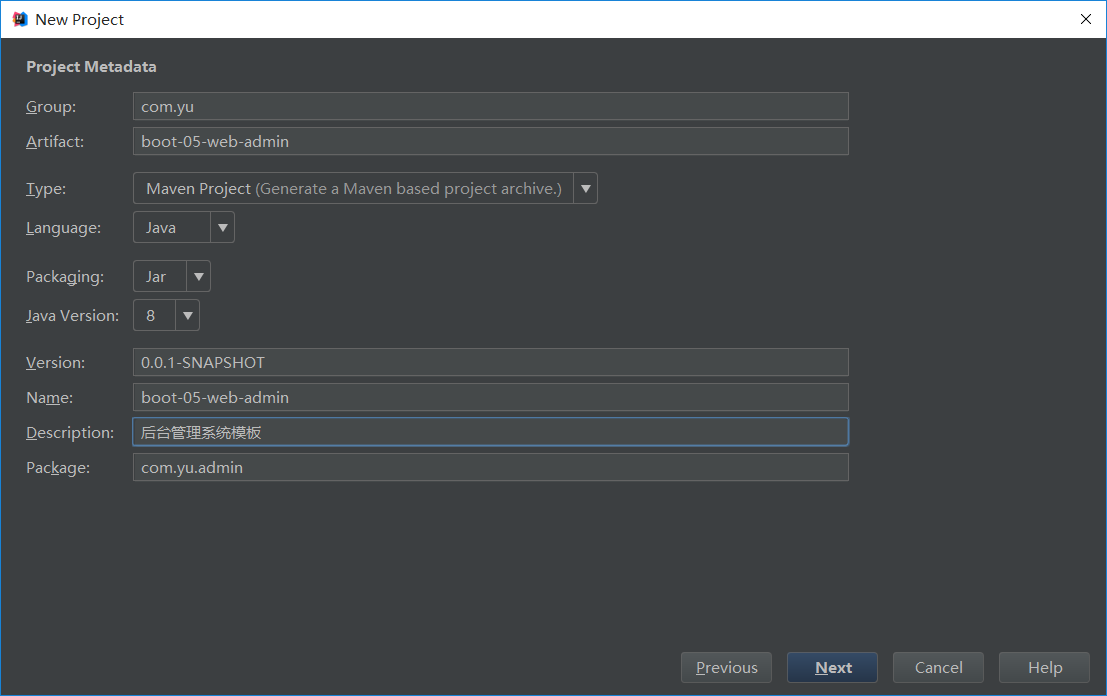
1、项目创建
new project -> Spring Initializr -> default -> com.yu->boot-05-web-admin->
web -> springweb
developer tools -> devtools、lombok、configuration processor
template engines -> thymeleaf

删去暂时没用的文件
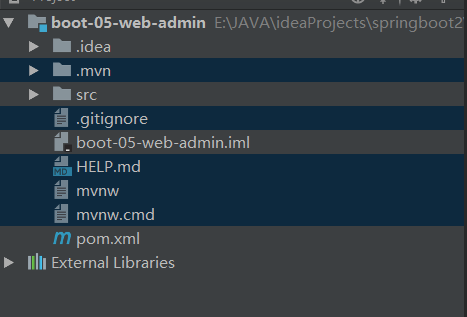
注意
2、静态资源处理
自动配置好,我们只需要把所有静态资源放到 static 文件夹下
将静态资源文件夹放到resources.static下
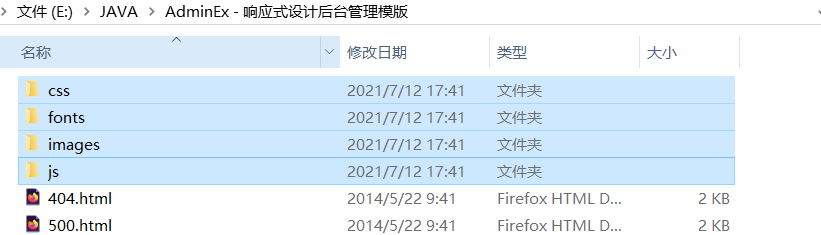
将index.html和login.html放到templates下
将index重命名为main
在templates新建table文件夹
将dynamic_table.html、editable_table.html、pricing_table.html、responsive_table.html、basic_table.html 放入
3、路径构建
th:action="@{/login}"
login.html
<form class="form-signin" action="index.html" method="post" th:action="@{/login}">
完整代码在文末
4、模板抽取
th:insert/replace/include
th:insert:保留自己的主标签,保留th:fragment的主标签
th:replace:不保留自己的主标签,保留th:fragment的主标签
th:include:保留自己的主标签,不保留th:fragment的主标签(官方3.0不推荐)
抽取公共页面
templates下新建common.html
5、页面跳转
在src.main.java.com.yu.admin下创建controller.
IndexController
    @PostMapping("/login")
    public String main(User user, HttpSession session, Model model){

        if(StringUtils.hasLength(user.getUserName()) && "123456".equals(user.getPassword())){
            //把登陆成功的用户保存起来
            session.setAttribute("loginUser",user);
            //登录成功重定向到main.html;  重定向防止表单重复提交
            return "redirect:/main.html";
        }else {
            model.addAttribute("msg","账号密码错误");
            //回到登录页面
            return "login";
        }

    }
6、数据渲染
    @GetMapping("/dynamic_table")
    public String dynamic_table(Model model){
        //表格内容的遍历
        List<User> users = Arrays.asList(new User("zhangsan", "123456"),
                new User("lisi", "123444"),
                new User("haha", "aaaaa"),
                new User("hehe ", "aaddd"));
        model.addAttribute("users",users);

        return "table/dynamic_table";
    }
        <table class="display table table-bordered" id="hidden-table-info">
        <thead>
        <tr>
            <th>#</th>
            <th>用户名</th>
            <th>密码</th>
        </tr>
        </thead>
        <tbody>
        <tr class="gradeX" th:each="user,stats:${users}">
            <td th:text="${stats.count}">Trident</td>
            <td th:text="${user.userName}">Internet</td>
            <td >[[${user.password}]]</td>
        </tr>
        </tbody>
        </table>
login.html
main.html
admin.bean.User