一、创建项目目录

二、添加开发依赖( html-webpack-plugin、webpack、webpack-cli、webpack-dev-server、webpack-api-mocker)
如下所示位于package.json文件中
...
"devDependencies": {
    "html-webpack-plugin": "^3.2.0",
    "webpack": "^4.6.0",
    "webpack-cli": "^2.0.15",
    "webpack-dev-server": "^3.1.3",
    "webpack-api-mocker": "^1.4.3"
  },
...
使用npm install 或者 yarn install (推荐,原因你懂的)
三、创建 webpack.config.js 文件,编写相关配置
 1 const path = require('path');
 2 const HtmlWebpackPlugin = require('html-webpack-plugin');
 3 const apiMocker = require('webpack-api-mocker');
 4
 5 module.exports = {
 6     mode: 'development', //当前环境
 7     entry: { //程序的启动入口
 8         app: './src/index.js'
 9     },
10     devServer: {
11         /****************此处星星多,注意看此处****************************/
12         //利用webpack-dev-server 的before 方法调用webpack-api-mocker
13         // path.resolve('./mocker/index.js') 中的'./mocker/index.js'为mock文件的相对路径
14         /***************以上只是个人的浅显理解罢了(有不同理解请交流)******************/
15         before(app) {
16             apiMocker(app, path.resolve('./mocker/index.js'), {
17                 // 'GET /api/users/list': 'http://localhost:3000',
18                 // 'GET /api/userinfo/:id': 'http://localhost:3000',
19             })
20         }
21     },
22     output: { //配置文件输出路径
23         filename: '[name].bundle.js',
24         path: path.resolve(__dirname, 'dist')
25     },
26     plugins: [ //利用模板文件生成.html
27         new HtmlWebpackPlugin({
28             title: 'webpack+react',
29             template: "./src/entry.ejs",
30             filename: "./index.html",
31         }),
32     ]
33 };
话不多说直接上‘./mocker/index.js’文件
 1 module.exports = {
 2     [`GET /api/user`]: (req, res) => {
 3         console.log('---->', req.params);
 4         return res.json({
 5             id: 1,
 6             username: 'kenny',
 7             sex: 6
 8         });
 9     }
10 }
附录1.
webpack.config.js中的entry.ejs文件
 1 <!DOCTYPE html>
 2 <html lang="en">
 3
 4 <head>
 5     <meta http-equiv="Content-type" content="text/html; charset=utf-8" />
 6     <!--看这里,看这里,请看我这里-->
 7     <title>
 8         <%= htmlWebpackPlugin.options.title %>
 9     </title>
10     <!-- 如果不这这样写 html-webpack-plugin 中的title是不生效的哦-->
11     <link rel="stylesheet" href="/favicon.png" type="text/css" />
12 </head>
13
14 <body>
15     <!-- <div id="root"></div> -->
16     Visit :/mocker/index.js to customize the API Try it?
17     <hr>
18     <div>name:
19         <span id="name"></span>
20     </div>
21     <div>age:
22         <span id="age"></span>
23     </div>
24 </body>
25
26 </html>
webpack.config.js 配置文件中的 entry下app对应值的index.js文件
 1 fetch('/api/user', {
 2         'Accept': 'application/json',
 3         'Content-Type': 'application/x-www-form-urlencoded',
 4     })
 5     .then((response) => response.json())
 6     .then(data => {
 7         console.log('data:', data);
 8         document.getElementById('name').innerHTML = data.username;
 9         document.getElementById('age').innerHTML = data.sex;
10     })
OK!接下来npm start 或者 yarn install 运行下试试吧。
效果图如下:
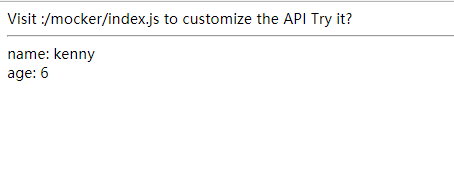
思维重构:以上方式多个mock文件时不就需要改动webpack.config.js文件?这种事情我是绝不允许的。各位看客请看:
解决方法:编写webpack.mocker.js文件为所有mock文件的总成,启动时自动包装mock(话不多说直接上代码)
1 const mock = {};
2
3 require('fs').readdirSync(require('path').join(__dirname + '/mocker')).forEach(function (file) {
4     Object.assign(mock, require('./mocker/' + file))
5 });
6 module.exports = mock;