1. 简介
Eureka是Netflix开发的服务发现框架,并被Spring cloud 收录 并封装成为其服务治理的模块实现
Eureka采用了CS的架构设计,分为 Server端 和 Client端,
Eureka Server: 提供服务注册服务,各个微服务节点通过配置启动后,会在 Server中进行注册,这样Server中的服务注册列表将会存储所有可用服务节点的信息,服务节点的信息可以在界面中直观看到
Eureka Client :通过注册中心进行访问, 分为消费方 和 提供方,提供方启动服务, 会注册进 Server中 并发送心跳,(默认周期为30秒),如果Server在多个心跳周期内(默认三个:90s)没有收到该节点的心跳,会将该服务节点中列表中移除, 消费方请求Server端 获取需要的服务节点信息地址等信息,并进行调用
示意图:

2. 单机Eureka Server构建
父工程依赖 控制springcloud 系列的版本
<dependencyManagement>
        <dependencies>
            <!--spring boot 2.2.2-->
            <dependency>
                <groupId>org.springframework.boot</groupId>
                <artifactId>spring-boot-dependencies</artifactId>
                <version>2.2.2.RELEASE</version>
                <type>pom</type>
                <scope>import</scope>
            </dependency>
        </dependencies>
    </dependencyManagement>
eureka-server pom依赖
<dependencies>
    	<!-- Eureka server 依赖 -->
        <dependency>
            <groupId>org.springframework.cloud</groupId>
            <artifactId>spring-cloud-starter-netflix-eureka-server</artifactId>
        </dependency>

        <!-- boot web actuator -->
        <dependency>
            <groupId>org.springframework.boot</groupId>
            <artifactId>spring-boot-starter-web</artifactId>
        </dependency>
        <dependency>
            <groupId>org.springframework.boot</groupId>
            <artifactId>spring-boot-starter-actuator</artifactId>
        </dependency>

    </dependencies>
yml配置文件:
server:
  port: 7001
spring:
    application:
        name: cloud-eureka-service

eureka:
  instance:
    hostname: localhost   #eureka服务端的实例名称
  client:
    register-with-eureka: false   #false表示不向注册中心注册自己
    fetch-registry: false   #false表示自己端就是注册中心
    serviceUrl:
      defaultZone: http://${eureka.instance.hostname}:${server.port}/eureka/
主启动配置文件: 使用EnableEurekaServer 注解开启服务自动配置
@SpringBootApplication
@EnableEurekaServer
public class EurekaMain7001 {
    public static void main(String[] args) {
        SpringApplication.run(EurekaMain7001.class,args);
    }
}
浏览器访问:http://127.0.0.1:7001/

至此一个最基本的Eureka server就搭建完成
3. Eureka Client 端服务提供方搭建
pom依赖 Eureka client
<dependency>
    <groupId>org.springframework.cloud</groupId>
    <artifactId>spring-cloud-starter-netflix-eureka-client</artifactId>
</dependency>

<!-- boot web actuator -->
<dependency>
   <groupId>org.springframework.boot</groupId>
   <artifactId>spring-boot-starter-web</artifactId>
</dependency>
<dependency>
   <groupId>org.springframework.boot</groupId>
   <artifactId>spring-boot-starter-actuator</artifactId>
</dependency>
yml配置
server:
  port: 8001

spring:
  application:
    name: cloud-payment-service #集群部署按照这个名字区分

eureka:
  client:
    register-with-eureka: true   #是否将自己注册到注册中心
    fetch-registry: true    #是否从服务端抓取已有的注册信息
    service-url:
      defaultZone: http://localhost:7001/eureka  # eureka 服务地址
  instance:
    instance-id: payment8001 # 修改eureka 管理页面中的 服务 Status 中的服务名
    prefer-ip-address: true  #访问路径可以显示IP地址
编写controller 提供服务
@RestController
public class PaymentController {

    @Value("${server.port}")
    private String serverPort;


    @GetMapping(value = "/get/{id}")
    public String getPaymentById(@PathVariable("id") Long id) {
        return "接受的参数为:"+id+"端口为:"+serverPort
    }

}
主启动类
@SpringBootApplication
@EnableEurekaClient
public class PaymentMain8001 {
    public static void main(String[] args) {
        SpringApplication.run(PaymentMain8001.class,args);
    }
}
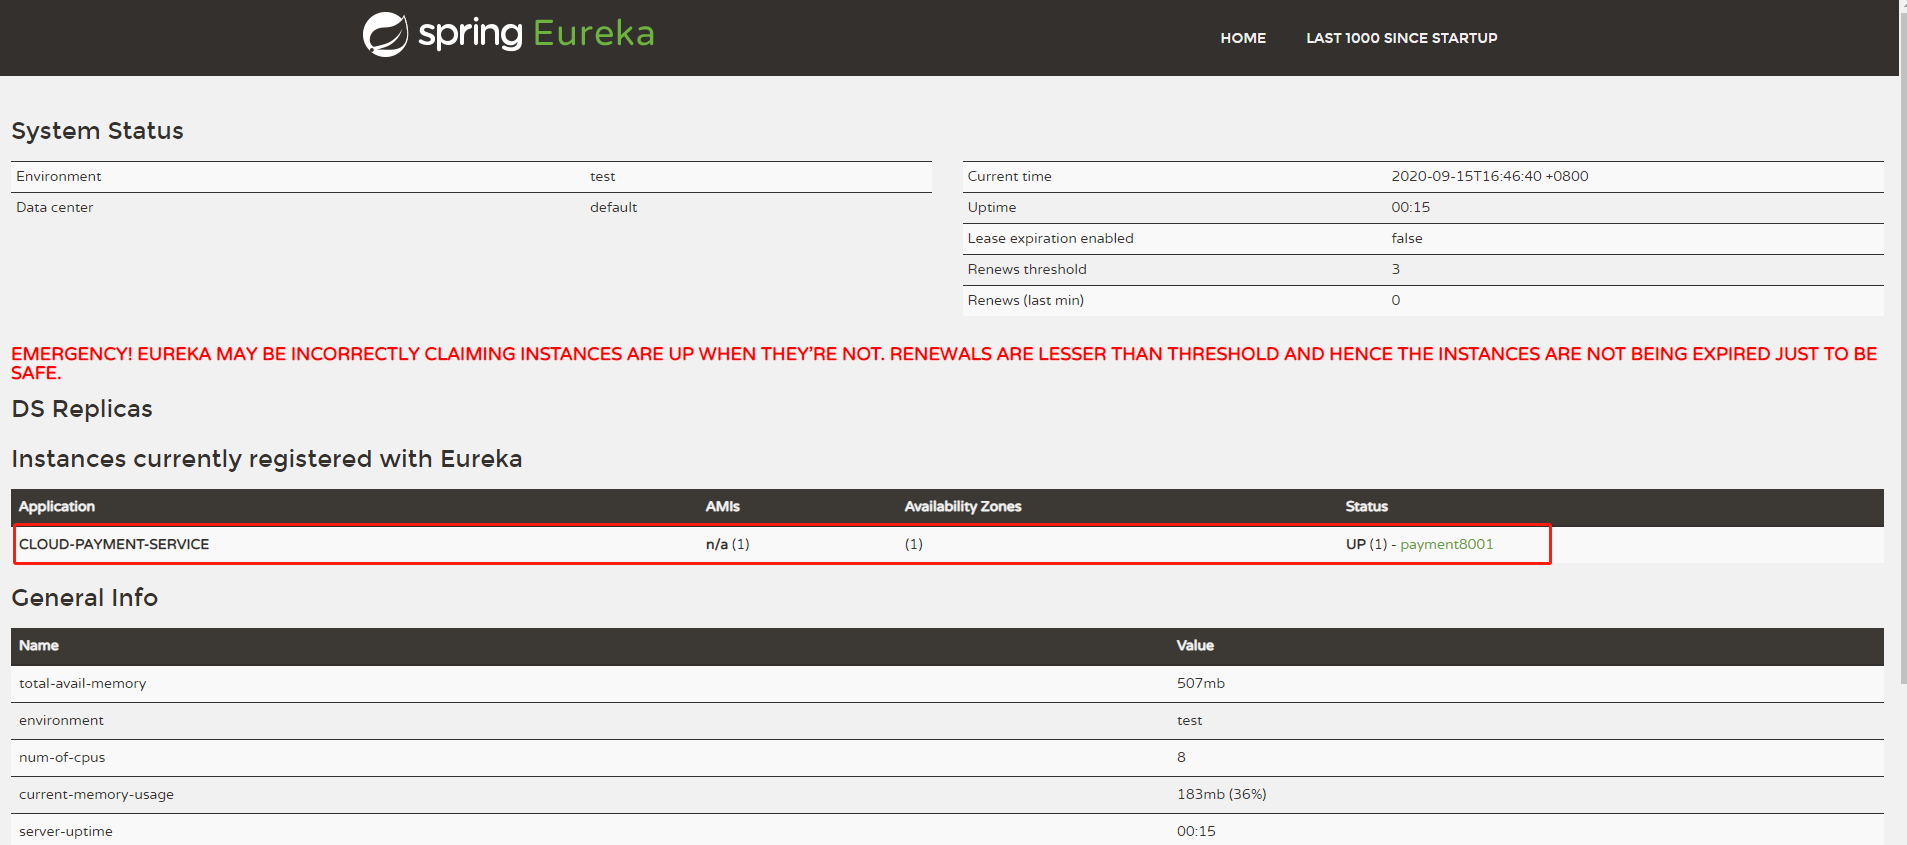
查看 eureka 监控页面 发现注册服务列表已经有服务注册
图中红色的字是自我保护机制的提示信息 后面讲
4. Eureka Client 端服务消费方搭建
pom依赖和 提供方一样,都是eureka client
yml配置
server:
  port: 80


spring:
  application:
    name: cloud-consummer-service

eureka:
  client:
    register-with-eureka: true   #是否将自己注册到注册中心
    fetch-registry: true    #是否从服务端抓取已有的注册信息
    service-url:
      defaultZone: http://localhost:7001/eureka #eureka server地址
使用@LoadBalanced 注解构建 RestTemplate,用来获取服务 并调用
加强 RestTemplate ,client 默认使用 Ribbon 技术进行远程调用,后面详说
@Configuration
public class RestTemplateConfig {

    @Bean
    @LoadBalanced
    public RestTemplate initRestTemplate(){
        return new RestTemplate();
    }
}
编写controller 调用 服务
@RestController
@Slf4j
public class OrderController {
	//host 为服务名
    public static final String PAYMENT_URL="http://CLOUD-PAYMENT-SERVICE";

    @Resource
    private RestTemplate restTemplate;

    @GetMapping("/consumer/get/{id}")
    public String get(@PathVariable("id") Long id){
        return restTemplate.getForObject(PAYMENT_URL+"/get/create/"+id,String.class);
    }
}
主启动类
@SpringBootApplication
@EnableEurekaClient
public class OrderMain80 {

    public static void main(String[] args) {
        SpringApplication.run(OrderMain80.class, args);
    }
}
查看监控页面 发现服务消费方也注册了进来

调用消费方接口:http://localhost/consumer/get/80
成功调用服务提供方接口 返回信息:接受的参数为:80端口为:8001
实际生产环境中,为了保证高可用,服务注册中心和 服务提供方都会部署集群,下面进行集群部署
5. Eureka Server 集群
将刚刚的 单机 服务项目拷贝一份 并进行修改
修改 yml
互相指定对方服务的地址,相互注册 相互守望
server:
  port: 7002
spring:
  application:
    name: cloud-eureka-service

eureka:
  instance:
    hostname: localhost7002   #eureka服务端的实例名称
  client:
    register-with-eureka: true
    fetch-registry: true
    service-url:
      defaultZone: http://localhost7001:7001/eureka/  #必须使用hostname集群
填写的地址必须是 对方地址的hostname,可以配置etc/hosts文件,
并且将 register-with-eureka 和 fetch-registry 置为true 才可以相互注册
启动两个服务

发现两个 服务已经互相注册成功 并显示在 集群节点上
6. 服务提供方搭建集群并注册到集群注册中心
同样将之前搭建的 服务提供方 拷贝一份,并修改yaml
修改端口 为8002
spring.application.name 的名称保持一致
server:
  port: 8002

spring:
  application:
    name: cloud-payment-service #集群部署按照这个名字区分

eureka:
  client:
    register-with-eureka: true   #是否将自己注册到注册中心
    fetch-registry: true    #是否从服务端抓取已有的注册信息
    service-url:
      defaultZone: http://127.0.0.1:7001/eureka,http://127.0.0.1:7002/eureka
  instance:
    instance-id: payment8002 # 修改eureka 管理页面中的 服务 Status 中的服务名
    prefer-ip-address: true  #访问路径可以显示IP地址
启动 两个服务提供方,查看注册中心 发现都已经注册成功

修改服务消费 方配置,指定注册中心集群,多个url使用,分割
defaultZone: http://127.0.0.1:7001/eureka,http://127.0.0.1:7002/eureka
多次调用接口,发现已经轮询调用 连个服务提供方
接受的参数为:80端口为:8001
接受的参数为:80端口为:8002
7. 常用参数
1. eureka.client.register-with-eureka=true(默认)
该项配置说明,是否向注册中心注册自己,在非集群环境下Server端设为为false,表示自己不注册自己
2. eureka.client.fetch-registry=true(默认)
该项配置说明,注册中心只要维护微服务实例清单,不需要作检索服务,在非集群环境下Server端设为为false
3. eureka.instance.lease-renewal-interval-in-seconds=30(默认)
该配置说明,服务提供者会维持一个心跳告诉eureka server 自己的健康,这个就是一个心跳周期
4. eureka.instance.lease-expiration-duration-in-seconds=90(默认)
该配置说明,从最后一次续约时间开始,记时90s 如果还没接受到客户端的心跳则剔除
5. eureka.client.registry-fetch-interval-seconds=30
缓存在调用方的微服务实例清单刷新时间(前提:eureka.client.fetch-registry为true,检索服务列表)