1.安装python3.5可能使用的依赖
yum install openssl-devel bzip2-devel expat-devel gdbm-devel readline-devel sqlite-devel
或者
yum install zlib-devel bzip2-devel openssl-devel ncurses-devel sqlite-devel readline-devel tk-devel gcc make
wget https://www.python.org/ftp/python/3.5.1/Python-3.5.1.tgz
tar -zxvf Python-3.5.1.tgz
把python移到/usr/local下面
mv Python-3.5.1 /usr/local
删除旧版本的python依赖
ll /usr/bin | grep python
rm -rf /usr/bin/python
进入python目录
cd /usr/local/Python-3.5.1/
•配置
./configure
编译
make
编译,安装
make install
删除旧的软链接,创建新的软链接到最新的python
rm -rf /usr/bin/python
ln -s /usr/local/bin/python3.5 /usr/bin/python
python -V
2.把默认python改成了python3的版本后,yum无法使用
https://blog.csdn.net/u013214212/article/details/81540840
既然把默认python改成了python3的版本,那么这时候yum就出问题了,因为yum貌似不支持python3,开发了这个命令的老哥也不打算继续写支持python3的版本了,
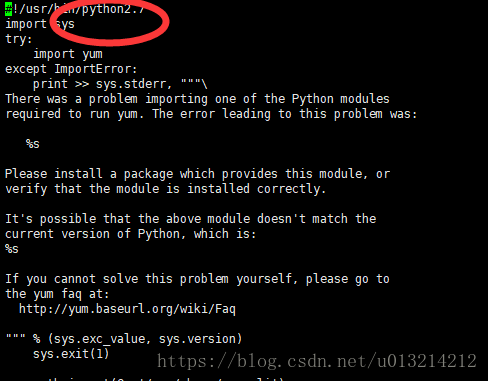
所以,如果和python版本相关的文件就不要通过yum下载了,这里我们需要把yum默认的指向改为python2.7的版本,
分别是两个文件,使用vi打开,输入i进行修改,修改完之后按esc键,然后输入":wq",这就完成了修改并保存
vi /usr/libexec/urlgrabber-ext-down
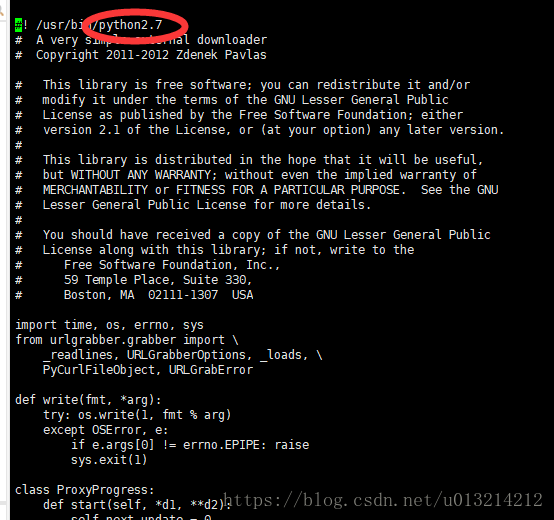
vi /usr/bin/yum
这样我们就完成了新安装的centos系统中的两个python版本的全部流程。
在小黑框中输入python2则调起python2,输入python,则默认调起python3,pip2调起python2下的pip,pip调起python下的pip。
1.CentOS7安装图解
https://www.osyunwei.com/archives/7829.html
2.CentOS 7下安装Python3.5
https://blog.csdn.net/sinat_14826983/article/details/80350543
yum update
yum install deltarpm -y
4.安装依赖
yum install -y gcc
yum install gcc-c++
yum -y install zlib zlib-devel openssl openssl--devel pcre pcre-devel
yum install openssl-devel bzip2-devel expat-devel gdbm-devel readline-devel sqlite-devel
wget https://www.python.org/ftp/python/3.5.1/Python-3.5.1.tgz 或者 后面加上--no-check-certificate
tar -zxvf Python-3.5.1.tgz
把python移到/usr/local下面
mv Python-3.5.1 /usr/local
删除旧版本的python依赖
ll /usr/bin | grep python
rm -rf /usr/bin/python
cd /usr/local/Python-3.5.1/
./configure
make -j6
make install
删除旧的软链接,创建新的软链接到最新的python
rm -rf /usr/bin/python
ln -s /usr/local/bin/python3.5 /usr/bin/python
python -V
cd /opt
yum(yum命令报错解决方案)
3.既然把默认python改成了python3的版本后,yum无法使用
https://blog.csdn.net/u013214212/article/details/81540840
既然把默认python改成了python3的版本,那么这时候yum就出问题了,因为yum貌似不支持python3,开发了这个命令的老哥也不打算继续写支持python3的版本了,
所以,如果和python版本相关的文件就不要通过yum下载了,这里我们需要把yum默认的指向改为python2.7的版本,
分别是两个文件,使用vi打开,输入i进行修改,修改完之后按esc键,然后输入":wq",这就完成了修改并保存
vi /usr/libexec/urlgrabber-ext-down
vi /usr/bin/yum
wget -c https://nginx.org/download/nginx-1.12.0.tar.gz
tar -zxvf nginx-1.12.0.tar.gz
cd nginx-1.12.0/
./configure
make -j6
make install
pip3 install --upgrade pip
pip3 install -r requirements.txt
pip3 install uwsgi
pip3 install django==1.9.8 或 pip3 install django==1.11.1
pip3 install xadmin
pip3 install future
pip3 install django_crispy_forms
pip3 install django-formtools
pip3 install httplib2
pip3 install six
pip3 install django_import_export
pip3 install django-cors-headers
pip3 install django-pure-pagination
pip3 install requests
pip3 install pymysql
pip3 install apscheduler==2.1.2
yum install python-devel zlib-devel libjpeg-turbo-devel -y
pip3 install Pillow
#部署项目
mkdir /opt/script/
cp conf/my.http.flv.live.conf /usr/local/srs/conf/
cp conf/srs.conf /usr/local/srs/conf/
cp conf/touch.conf /usr/local/nginx/conf/
cp conf/touch.ini /opt/script/
rm /opt/touch/ -rf
cp touch/ /opt/ -rf
cp conf/run.sh /opt/
mkdir /mnt/disk/
mkdir /mnt/disk/nginx
mkdir /usr/local/nginx/html
mkdir /usr/local/nginx/html/images/
mkdir /mnt/disk/nginx/html/images/
cp touch/tmp/* /usr/local/nginx/html/images/
cp images/* /usr/local/nginx/html/images/
5.检查依赖 pip freeze > requirements.txt
安装依赖 pip3 install -r requirements.txt
pip3 install django==1.9.8 或 pip3 install django==1.11.1(centos7.6)
xadmin
future
django_crispy_forms
httplib2
six
django_import_export
Pillow
django-cors-headers
django-pure-pagination
django-formtools
requests
pymysql
apscheduler==2.1.2
centos7.4
pip3 install Django==1.11.1
pip3 install django-cors-headers==2.5.2
pip3 install django-crispy-forms==1.7.2
pip3 install django-formtools==2.1
pip3 install django_import_export
pip3 install django-pure-pagination==0.3.0
pip3 install future==0.17.1
pip3 install httplib2==0.9.2
pip3 install --upgrade pip
pip3 install Pillow==5.4.1
pip3 install PyMySQL==0.9.3
pip3 install requests==2.21.0
pip3 install six==1.12.0
pip3 install urllib3==1.24.1
pip3 install uWSGI==2.0.18
pip3 install xadmin==0.6.1
pip3 install xlrd==1.2.0
pip3 install xlwt==1.3.0
偶尔出现在centos7的问题,会出现ImportError: cannot import name MiddlewareMixin
解决方法 安装 pip3 install Django==1.11.1
然而又出现下面 ImportError: cannot import name patterns
vim touch/extra_apps/DjangoUeditor/urls.py
# coding:utf-8
from django import VERSION
if VERSION[0:2] > (1, 3):
from django.conf.urls import patterns, url
else:
from django.conf.urls.defaults import patterns, url
from .views import get_ueditor_controller
urlpatterns = [
url(r'^controller/$', get_ueditor_controller)
]
改为:
# coding:utf-8
from django import VERSION
if VERSION[0:2] > (1, 3):
from django.conf.urls import url
else:
from django.conf.urls.defaults import url
from .views import get_ueditor_controller
urlpatterns = [
url(r'^controller/$', get_ueditor_controller)
]
6.可能遇到的问题
render_to_string() got an unexpected keyword argument 'context_instance'
https://blog.csdn.net/HeatDeath/article/details/70312915
context must be a dict rather than RequestContext.
就是context变为
{
"context":context
}
systemctl disable firewalld.service
7.启动脚本
pkill -9 nginx
pkill -9 srs
pkill -9 uwsgi
cd /usr/local/nginx/
./sbin/nginx -c conf/touch.conf &
cd /usr/local/srs/
./objs/srs -c conf/my.http.flv.live.conf > /dev/null &
cd /opt/
uwsgi --ini script/touch.ini &
yum install -y git
srs官方文档:https://github.com/ossrs/srs/wiki/v2_CN_SampleHttp
第一步,获取SRS。详细参考GIT获取代码
git clone https://github.com/ossrs/srs
cd srs/trunk
第二步,编译SRS。详细参考Build
./configure && make
编译好后,make install
然后复制目录
cp -r ./objs/ /usr/local/srs/
cp -r ./objs/nginx/ /usr/local/srs/objs/
创建软链接
ln -sf /usr/local/srs/etc/init.d/srs /etc/init.d/srs
chkconfig --add srs
编译好后,make install
然后复制目录
cp -r ./objs/ /usr/local/srs/
cp -r ./objs/nginx/ /usr/local/srs/objs/
创建软链接
ln -sf /usr/local/srs/etc/init.d/srs /etc/init.d/srs
chkconfig --add srs
8.配置脚本自启动
1、赋予脚本可执行权限(/opt/script/run.sh是你的脚本路径)
chmod +x /opt/script/run.sh
chmod +x /opt/run.sh
2 编辑 vim /etc/rc.d/rc.local文件,在末尾增加如下内容
/opt/script/run.sh
/opt/run.sh
3、在centos7中,/etc/rc.d/rc.local的权限被降低了,所以需要执行如下命令赋予其可执行权限
chmod +x /etc/rc.d/rc.local
9.安装redis
yum install redis
service redis start 或 systemctl start redis.service
chkconfig redis on
reboot重启,观看效果。