1.首先以一个项目做例子,该项目用到的框架即为SpringMVC+mybatis,项目环境为MyEclipse+sqlserver+tomcat6,项目的地址(项目+数据库备份文件)大家可以上我的百度云下载http://pan.baidu.com/s/1o8qDqxs
2.还原项目怎么还原这里不具体说了,打开项目,找到ApplicationContext.xml,先改变一下数据库的连接,把用户名和密码设成自己的数据库的用户名和密码

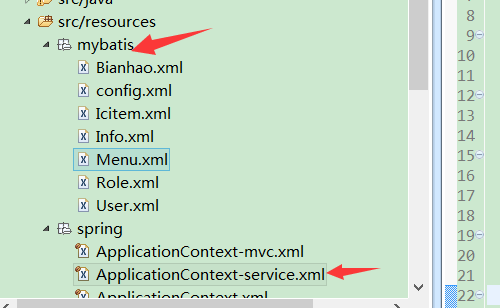
3.我们现在整体看一下这个项目的结构,首先是整合SpringMVC,Appicationcontext-mvc.xml
<?xml version="1.0" encoding="UTF-8"?>
<beans xmlns="http://www.springframework.org/schema/beans"
xmlns:xsi="http://www.w3.org/2001/XMLSchema-instance"
xmlns:mvc="http://www.springframework.org/schema/mvc"
xmlns:context="http://www.springframework.org/schema/context"
xsi:schemaLocation="http://www.springframework.org/schema/beans http://www.springframework.org/schema/beans/spring-beans-3.0.xsd
http://www.springframework.org/schema/mvc http://www.springframework.org/schema/mvc/spring-mvc-3.0.xsd
http://www.springframework.org/schema/context http://www.springframework.org/schema/context/spring-context-3.0.xsd">
<!-- 启用spring mvc 注解-->
<mvc:annotation-driven/>
<!-- 自动扫描的包名 ,使Spring支持自动检测组件,如注解的Controller-->
<context:component-scan base-package="com.flf.controller" />
<!--配置拦截器, 多个拦截器,顺序执行 -->
<mvc:interceptors>
<mvc:interceptor>
<!-- 匹配的是url路径 -->
<mvc:mapping path="/**/*.html*"/>
<bean class="com.flf.interceptor.LoginHandlerInterceptor"/>
</mvc:interceptor>
<mvc:interceptor>
<mvc:mapping path="/**/*.html*"/>
<bean class="com.flf.interceptor.RightsHandlerInterceptor"/>
</mvc:interceptor>
</mvc:interceptors>
<!-- 视图解析器:定义跳转的文件的前后缀 -->
<bean class="org.springframework.web.servlet.view.InternalResourceViewResolver">
<property name="prefix" value="/jsp/"/>
<property name="suffix" value=".jsp"/><!--可为空,方便实现自已的依据扩展名来选择视图解释类的逻辑 -->
</bean>
<bean id="exceptionResolver" class="com.flf.resolver.MyExceptionResolver"></bean>
</beans>
4.整合mybitas,ApplicationContext.xml
<?xml version="1.0" encoding="UTF-8"?>
<beans xmlns="http://www.springframework.org/schema/beans"
xmlns:xsi="http://www.w3.org/2001/XMLSchema-instance"
xmlns:aop="http://www.springframework.org/schema/aop"
xmlns:tx="http://www.springframework.org/schema/tx"
xsi:schemaLocation="http://www.springframework.org/schema/beans http://www.springframework.org/schema/beans/spring-beans.xsd
http://www.springframework.org/schema/aop http://www.springframework.org/schema/aop/spring-aop-2.0.xsd
http://www.springframework.org/schema/tx http://www.springframework.org/schema/tx/spring-tx-2.0.xsd">
<import resource="ApplicationContext-service.xml"/>
<!-- 配置数据源 ,与数据库的连接-->
<bean id="dataSource" class="org.springframework.jdbc.datasource.DriverManagerDataSource">
<property name="driverClassName" value="com.microsoft.sqlserver.jdbc.SQLServerDriver"/>
<property name="username" value="sa"/>
<property name="password" value="123456"/>
<property name="url" value="jdbc:sqlserver://localhost:1433; DatabaseName=chongqing"/>
</bean>
<!-- mybatis配置 -->
<bean id="sqlSessionFactory" class="org.mybatis.spring.SqlSessionFactoryBean">
<property name="dataSource" ref="dataSource"/>
<property name="configLocation" value="classpath:mybatis/config.xml"/>
</bean>
<bean id="sqlSession" class="org.mybatis.spring.SqlSessionTemplate">
<constructor-arg index="0" ref="sqlSessionFactory"></constructor-arg>
</bean>
<!-- 扫描 basePackage下所有的接口,根据对应的mapper.xml为其生成代理类-->
<bean class="org.mybatis.spring.mapper.MapperScannerConfigurer">
<property name="basePackage" value="com.flf.mapper" />
</bean>
<!-- 数据源指向于DataSource -->
<bean name="transactionManager" class="org.springframework.jdbc.datasource.DataSourceTransactionManager">
<property name="dataSource" ref="dataSource"></property>
</bean>
<!-- 增删该查的操作指向于transactionManager -->
<tx:advice id="txAdvice" transaction-manager="transactionManager">
<tx:attributes>
<tx:method name="delete*" propagation="REQUIRED" read-only="false"
rollback-for="java.lang.Exception"/>
<tx:method name="insert*" propagation="REQUIRED" read-only="false"
rollback-for="java.lang.Exception" />
<tx:method name="update*" propagation="REQUIRED" read-only="false"
rollback-for="java.lang.Exception" />
<tx:method name="save*" propagation="REQUIRED" read-only="false"
rollback-for="java.lang.Exception" />
<tx:method name="*" propagation="REQUIRED" read-only="true"/>
</tx:attributes>
</tx:advice>
<!--
aop: 作用表达于com.flf.service下的所有service,指向于txAdvice的方法
-->
<aop:config>
<aop:pointcut id="pc" expression="execution(* com.flf.service..*(..))" />
<aop:advisor pointcut-ref="pc" advice-ref="txAdvice" />
</aop:config>
</beans>
5web.xml整合SpringMVC和mybitas
<?xml version="1.0" encoding="UTF-8"?>
<web-app xmlns:xsi="http://www.w3.org/2001/XMLSchema-instance" xmlns="http://java.sun.com/xml/ns/javaee" xsi:schemaLocation="http://java.sun.com/xml/ns/javaee http://java.sun.com/xml/ns/javaee/web-app_2_5.xsd" version="2.5">
<!--
<display-name>wl</display-name>
<context-param>
<param-name>webAppRootKey</param-name>
<param-value>wl</param-value>
</context-param>
-->
<!-- 初始化过程首先读的节点 -->
<context-param>
<param-name>contextConfigLocation</param-name>
<param-value>classpath:spring/ApplicationContext.xml</param-value>
</context-param>
<context-param>
<param-name>log4jConfigLocation</param-name>
<param-value>classpath:log4j.xml</param-value>
</context-param>
<!-- 配置字符集 -->
<filter>
<filter-name>encodingFilter</filter-name>
<filter-class>org.springframework.web.filter.CharacterEncodingFilter</filter-class>
<init-param>
<param-name>encoding</param-name>
<param-value>utf-8</param-value>
</init-param>
</filter>
<filter-mapping>
<filter-name>encodingFilter</filter-name>
<url-pattern>/*</url-pattern>
</filter-mapping>
<listener>
<listener-class>org.springframework.web.util.Log4jConfigListener</listener-class>
</listener>
<listener>
<listener-class>org.springframework.web.context.ContextLoaderListener</listener-class>
</listener>
<listener>
<listener-class>com.flf.listener.WebAppContextListener</listener-class>
</listener>
<!-- 初始化 DispatcherServlet时,该框架在 web应用程序classpath目录中寻找spring/ApplicationContext-mvc.xml的文件,
并在那里定义相关的Beans,重写在全局中定义的任何Beans -->
<servlet>
<servlet-name>springMvc</servlet-name>
<servlet-class>org.springframework.web.servlet.DispatcherServlet</servlet-class>
<init-param>
<param-name>contextConfigLocation</param-name>
<param-value>classpath:spring/ApplicationContext-mvc.xml</param-value>
</init-param>
<load-on-startup>1</load-on-startup>
</servlet>
<!-- 所有以.html的请求,都会被DispatcherServlet处理 -->
<servlet-mapping>
<servlet-name>springMvc</servlet-name>
<url-pattern>*.html</url-pattern>
</servlet-mapping>
</web-app>
6.当我们新增一个对象的时候,先要在Applicationcontext.service中注入该对象的service,然后再在mybatis文件夹中增加该对象对应的xml文件
本人微信号xjt199561,有什么技术上的交流欢迎添加