(这种安装方法非常稳定,用了好几年)
大部分实验通过GNS3的本地安装可以完成,少部分比如高级交换的内容需才要用到IOU
1.双击导入GNS3 VM
现在用GNS3的IOU功能
2.开机以后会获取一个地址:192.168.252.1
192.168.111.6乾颐堂CCNA一体化模拟器,改网络适配器VMNET1为固定IP
启动了VMNET1的DHCP。
192.168.111.128(2018-6-11)(手动配置桥接到VNMET1,IP地址和VMNET1在同一网段上)
cmd ping测试。
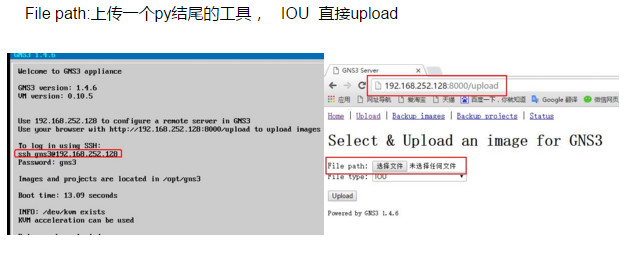
File path:上传一个py结尾的工具, IOU 直接upload
3.在GNS3VM中查看并加载文件
会有一个upload的位置cdGNS3下面去,回车,进shell
查看文件:cd /opt/gns3/images/IOU/
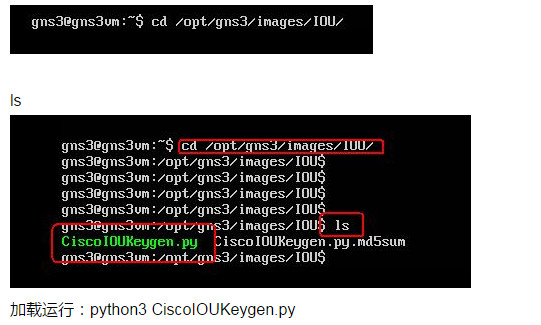
l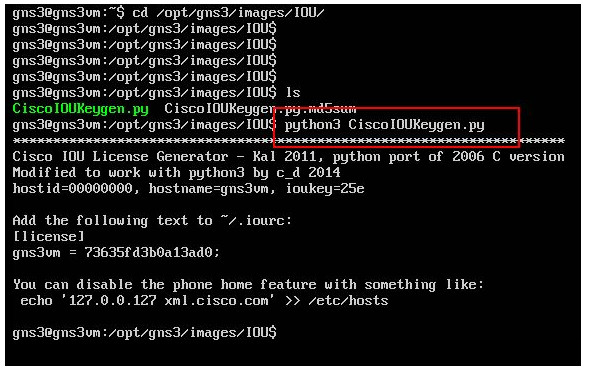

4.产生一个授权文件[license]做到一个ioulic.txt文件里面去
【注意】在制作的txt文件中=两边要有空格
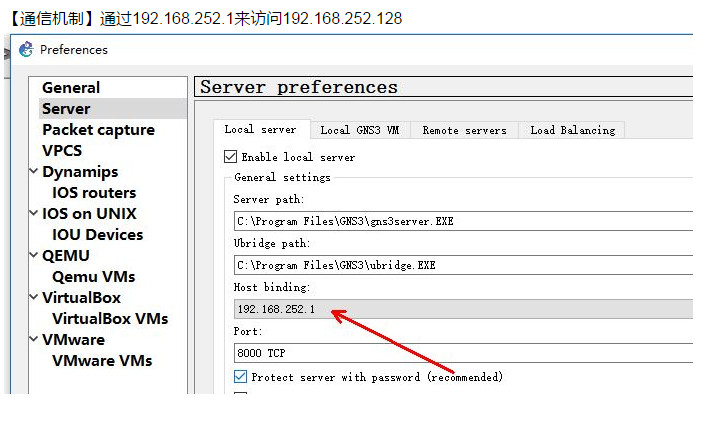
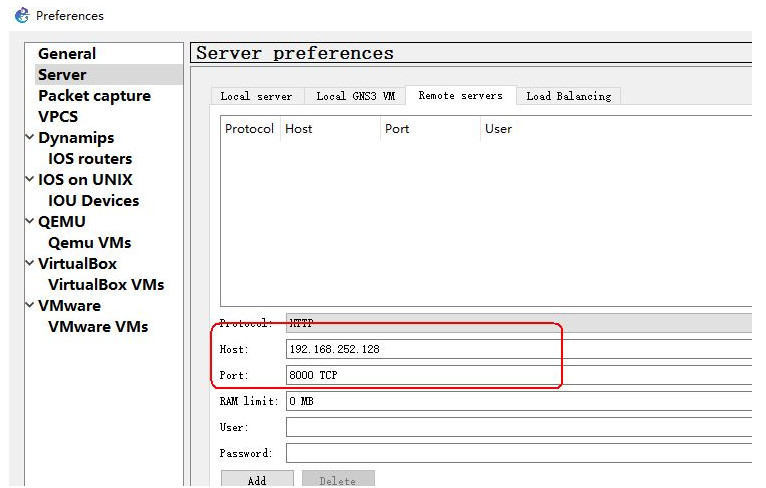
5.改GNS3服务器ip:
改local server和remote server的服务器ip地址:
Local server ->VMnet 1网卡
Remote server ->GNS3 VM开始的地址
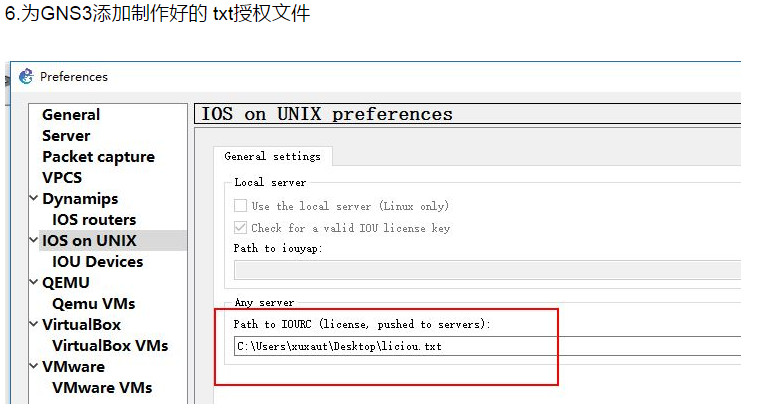
6.为GNS3添加制作好的 txt授权文件
【通信机制】通过192.168.252.1来访问192.168.252.128

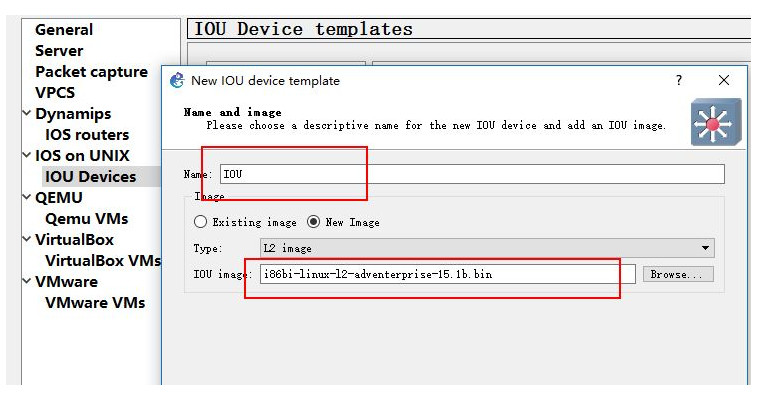
7.为GNS3添加IOU
选择IOU的 OS文件
IOU的配置:
IOU1#conf t
Enter configuration commands, one per line. End with CNTL/Z.
IOU1(config)#vlan 10
IOU1(config-vlan)#exit
IOU1(config)#inter range e0/0 - 1
IOU1(config-if-range)#spanning-tree portfast
%Warning: portfast should only be enabled on ports connected to a single
host. Connecting hubs, concentrators, switches, bridges, etc... to this
interface when portfast is enabled, can cause temporary bridging loops.
Use with CAUTION
%Portfast will be configured in 3 interfaces due to the range command
but will only have effect when the interfaces are in a non-trunking mode.
IOU1(config-if-range)#
IOU1(config-if-range)#sw acc vlan 10
IOU1(config-if-range)#end
IOU1#conf t
Enter configuration commands, one per line. End with CNTL/Z.
IOU1(config)#interface vlan 10
IOU1(config-if)#ip add
*Oct 21 09:06:11.032: %LINEPROTO-5-UPDOWN: Line protocol on Interface Vlan10, c
IOU1(config-if)#ip add 10.1.1.254 255.255.255.0
IOU1(config-if)#no sh
IOU1(config-if)#end
R1的配置:
Router(config)#int fa0/0
Router(config-if)#ip add 10.1.1.1 255.255.255.0
Router(config-if)#no sh
R2的配置:
Router(config)#int fa0/0
Router(config-if)#ip add 10.1.1.2 255.255.255.0
Router(config-if)#no sh
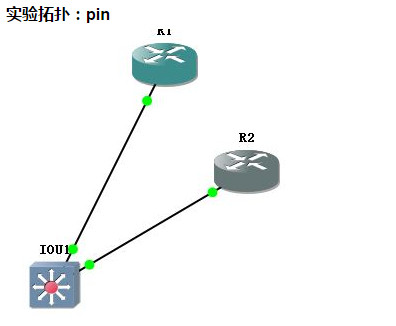
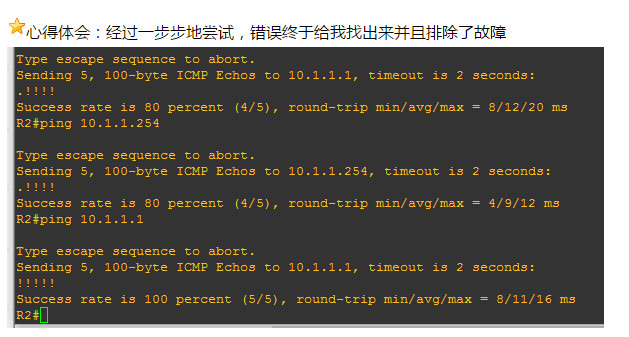
实验拓扑:ping
1、网络适配器改成仅主机模式;
2、VMnet 1(虚拟机的网络适配器) local server和Remote server(Linux操作系统的网卡)的IP地址需要在同一网段上
试了一下,可以用虚拟机GNS3VM来运行IOU和相关的路由器
<wiz_tmp_tag id="wiz-table-range-border" contenteditable="false" style="display: none;">