1. 新建项目,生成web.xml(生成的目录结构如下所示)

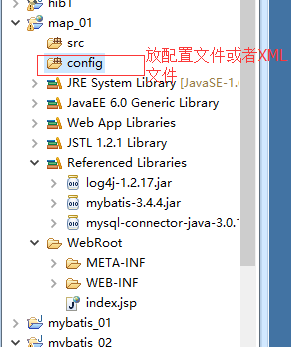
目录结构如下图

2. 导入mybatis包,数据库驱动包,log4j包(复制到webroot目录下的lib文件夹下面,并添加到构建路径)

3. 创建源文件夹(resources fold)config(可以自己命名),存放所有xml和properties等配置文件。
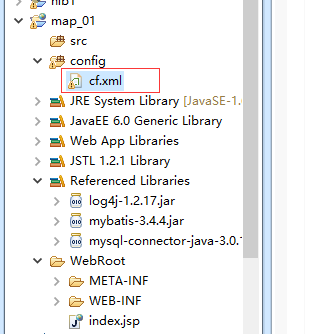
4. 新建总配置文件cf.xml(可自行命名)
 1 <?xml version="1.0" encoding="UTF-8"?>
 2 <!DOCTYPE configuration PUBLIC "-//mybatis.org//DTD Config 3.0//EN" "http://mybatis.org/dtd/mybatis-3-config.dtd" >
 3 <configuration>
 4 <!-- 别名标签 -->
 5 <!--把鼠标移到configuration标签上面会出现以下信息:原因是因为引入了dtd约束文件 Element : configuration
 6 Copyright 2009-2016 the original author or authors. Licensed under the Apache License, Version 2.0
 7  (the "License"); you may not use this file except in compliance with the License. You may obtain a copy
 8  of the License at http://www.apache.org/licenses/LICENSE-2.0 Unless required by applicable law or
 9  agreed to in writing, software distributed under the License is distributed on an "AS IS" BASIS,
10  WITHOUT WARRANTIES OR CONDITIONS OF ANY KIND, either express or implied. See the License
11  for the specific language governing permissions and limitations under the License.
12
13 Content Model : (properties?, settings?, typeAliases?, typeHandlers?, objectFactory?,
14  objectWrapperFactory?, reflectorFactory?, plugins?, environments?, databaseIdProvider?, mappers?)  -->
15
16
17
18     <!-- 属性文件  引入外部的配置文件 -->
19     <properties resource="c.properties"></properties>
20 <!-- 别名    在单个配置文件中 写别名即可-->
21     <typeAliases>
22         <typeAlias type="com.pojo.StudentInfo" alias="studentinfo" />
23         <!-- 自动生成包下面的所有类的别名,别名就是类名,并且首字母大小写都可以使用 -->
24         <!--<package name="com.pojo" />  -->
25
26     </typeAliases>
27     <!-- 使用哪个小环境  default就等于哪个小环境的id -->
28     <environments default="development">
29
30         <environment id="development">
31         <!-- jdbc事务管理 -->
32             <transactionManager type="JDBC">
33             </transactionManager>
34             <!-- 数据库连接池 -->
35             <dataSource type="POOLED">
36                 <property name="driver" value="${drivername}" />
37                 <!-- localhost可以用127.0.0.1或者本机的ip地址表示 -->
38                 <property name="url" value="${url}" />
39                 <property name="username" value="${username}" />
40                 <property name="password" value="${password}" />
41             </dataSource>
42         </environment>
43
44         <environment id="mysql">
45         <!-- jdbc事务管理 -->
46             <transactionManager type="JDBC">
47             </transactionManager>
48             <!-- 数据库连接池 -->
49             <dataSource type="POOLED">
50                 <property name="drivername" value="${drivername}" />
51                 <!-- localhost可以用127.0.0.1或者本机的ip地址表示 -->
52                 <property name="url" value="${url}" />
53                 <property name="username" value="${username}" />
54                 <property name="password" value="${password}" />
55             </dataSource>
56         </environment>
57
58     </environments>
59
60     <!-- 引入单个映射配置文件  *号表示0个或者多个 -->
61     <mappers>
62         <mapper resource="com/imp/IStudent.xml" />
63         <!-- <package name="com.imp" /> -->
64
65     </mappers>
66 </configuration>
5. 创建属性文件config.properties,存放数据库连接信息

1 drivername=com.mysql.jdbc.Driver
2 url=jdbc:mysql://localhost:3306/myweb?characterEncoding=utf-8
3 username=xzt
4 password=xzt521
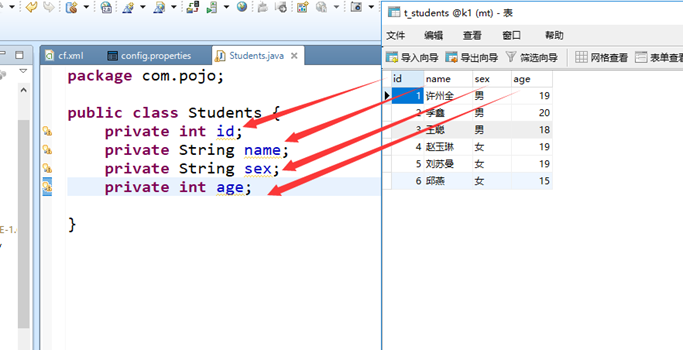
6. 创建实体类,用于接收数据库数据,属性和表字段对应,添加get,set和无参构造
7. 创建一个接口,用来操作学生表的数据,例:查询所有数据
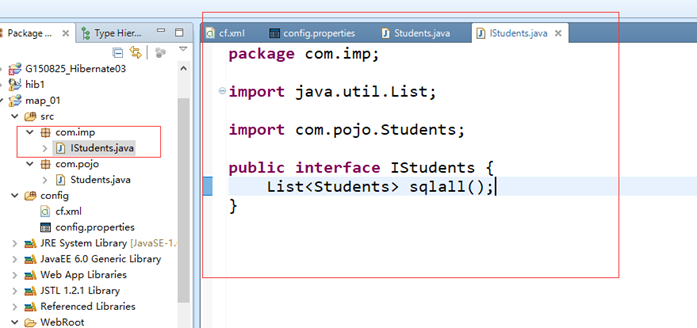
 1 package com.imp;
 2
 3 import java.util.List;
 4
 5 import com.pojo.Students;
 6
 7 public interface IStudents {
 8     /**
 9      * 要符合三个规范才能使用不用写实现类的形式。
10      * 1.使用mapper代理接口方式
11      * 2.接口名称和对应的xml文件的名字相同(后缀名不算)
12      * 3.在同一目录下
13      * @return
14      */
15     List<StudentInfo> sqlall();
16
17 }
8. 创建对应的XML文件(mapper代理方式),因为要使用总配置文件的自动引入XML,所以必须满足
一. 使用mapper代理方式
二. 接口和XML文件的名称一样(后缀不算)
三. 要在同一包下

9.写工具类获取数据库连接
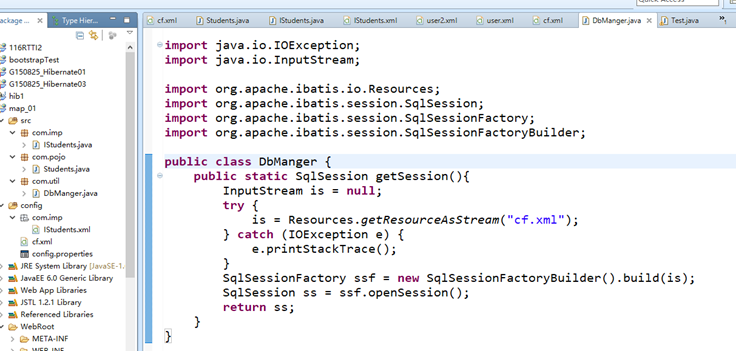
 1 package com.util;
 2
 3
 4 import java.io.IOException;
 5 import java.io.InputStream;
 6
 7 import org.apache.ibatis.io.Resources;
 8 import org.apache.ibatis.session.SqlSession;
 9 import org.apache.ibatis.session.SqlSessionFactory;
10 import org.apache.ibatis.session.SqlSessionFactoryBuilder;
11
12 public class MybatisConnection {
13     /**
14      * 使用静态方法
15      * 使用静态方法可以不用创建对象,直接点方法就可以使用方法了
16      * @return
17      */
18     public static SqlSession getSqlsession1(){
19         InputStream is = null;
20         try {
21             is = Resources.getResourceAsStream("cf.xml");
22         } catch (IOException e) {
23             // TODO 自动生成的 catch 块
24             e.printStackTrace();
25         }
26         SqlSessionFactory sqlSessionFactory = new SqlSessionFactoryBuilder().build(is);
27         SqlSession sqlSession = sqlSessionFactory.openSession();
28
29
30         return sqlSession;
31
32
33     }
34
35
36 }
10.测试方法
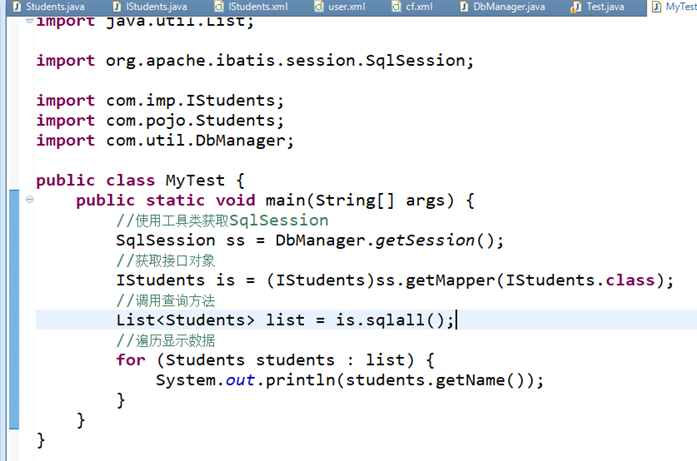
 1 package com.test;
 2
 3 import java.util.List;
 4
 5 import org.apache.ibatis.session.SqlSession;
 6
 7 import com.imp.IScore;
 8 import com.imp.IStudents;
 9 import com.pojo.Score;
10 import com.pojo.Students;
11 import com.util.DbManager;
12
13 public class MyTest {
14     public static void main(String[] args) {
15         //使用工具类获取SqlSession
16         SqlSession ss = DbManager.getSession();
17         //获取接口对象
18 //        IStudents is = (IStudents)ss.getMapper(IStudents.class);
19 //        //调用查询方法
20 //        List<Students> list = is.sqlall();
21 //        //遍历显示数据
22 //        for (Students students : list) {
23 //            System.out.println(students.getName());
24 //        }
25
26         IScore iscore = (IScore)ss.getMapper(IScore.class);
27         List<Score> list = iscore.sqlScore();
28
29         for (Score score : list) {
30             System.out.println("学生姓名:"+score.getStu().getName()+"____科目:"+score.getLess()+"___分数:"+score.getScore());
31         }
32
33      }
未完待续