摘要:这篇文章主要介绍深度学习的几个应用领域及安装tensorflow
深度学习应用领域
- 图像识别
- 语音识别
- 音频处理
- 自然语言处理
- 机器人
- 生物信息处理
- 电脑游戏
- 搜索引擎
- 网络广告投放
- 医学自动诊断
- 金融
基本工具介绍
- Protocol Buffer:结构化数据工具
- Bazel:自动化构建工具,用来编译程序
TensoFlow介绍
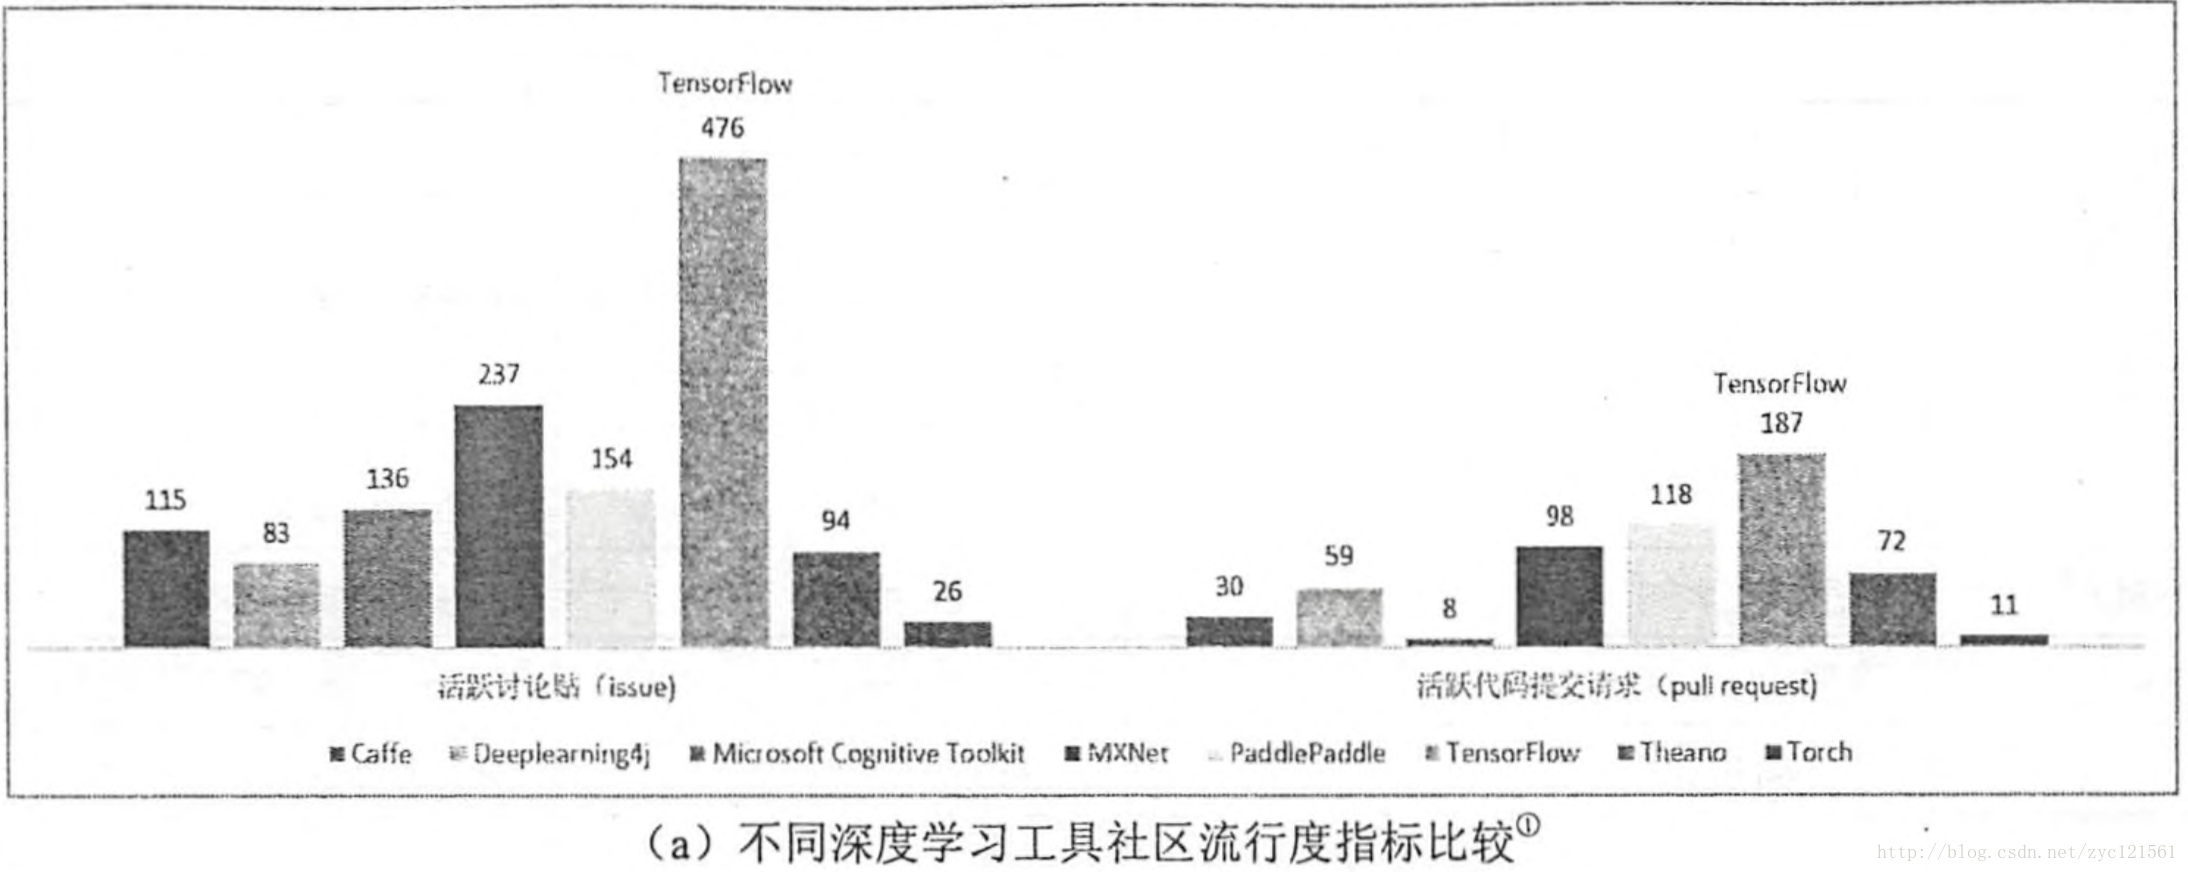
- TensorFlow是由谷歌开发并维护的深度学习框架,在目前主流的深度学习框架中处于领先地位
安装TensorFLow
使用Python的pip命令安装,楼主安装的是CPU 版本
楼主使用的Python版本:3.6.1|Anaconda 4.4.0
安装命令: pip install tensorflow --upgrade
等待安装,一切正常的话,安装完成后进行一下测试:
import tensorflow
如果导入正常,说明安装成功,下面使用一个例子打印出Hello world
# 测试Tensorflow
import tensorflow as tf

__author__ = 'yooongchun'


def test():
    hello = tf.Variable('Hello world', name='helloworld')

    with tf.Session() as sess:
        initialize = tf.global_variables_initializer()
        sess.run(initialize)
print(sess.run(hello))在main函数中调用test:
if __name__=='__main__':
  test()
上面的示例会打印出如下结果:
b'Hello world'TensorFlow 入门
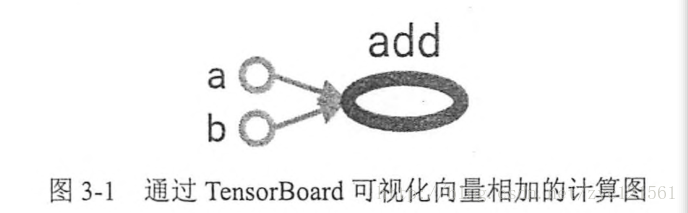
计算图:TensoFlow是一个通过计算图的形式来表述计算的编程系统。TensorFlow中的每一个计算都是计算图上的一个节点,而节点之间的边描述了计算之间的依赖关系。如下图示意
计算图例子
# TensorFlow 计算图使用例子


# author = yooongchun


# time = 20180102


import tensorflow as tf


# 新建一个计算图

g1=tf.Graph()
with g1.as_default():
v=tf.get_variable("v",initializer=tf.zeros_initializer(),shape=[1])


# 新建另一个计算图,说明计算图之间的变量不共享

g2=tf.Graph()
with g2.as_default():
v=tf.get_variable("v",initializer=tf.ones_initializer(),shape=[1])


# 读取计算图中变量值

with tf.Session(graph=g1) as sess:
tf.global_variables_initializer().run()
with tf.variable_scope('',reuse=True):
    print(sess.run(tf.get_variable('v')))

with tf.Session(graph=g2) as sess:
tf.global_variables_initializer().run()
with tf.variable_scope('',reuse=True):
    print(sess.run(tf.get_variable('v')))
运行结果:
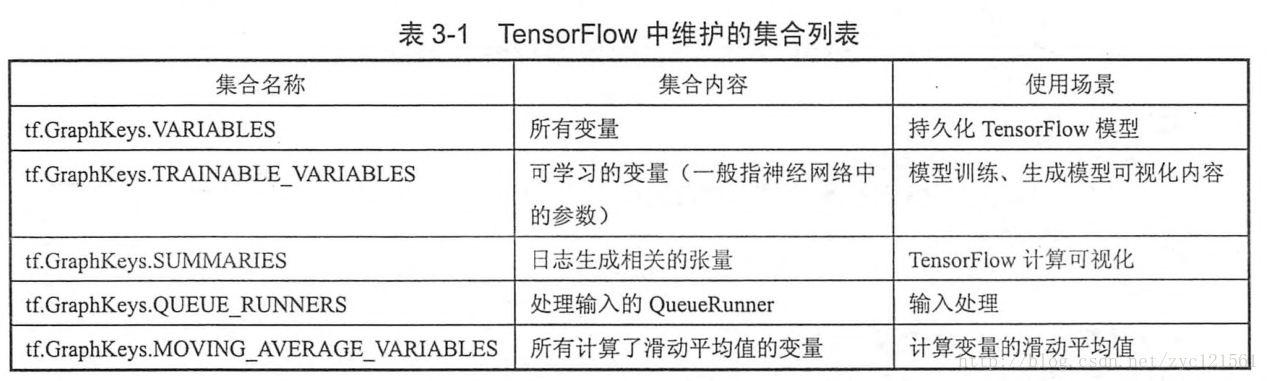
2018-01-02 09:05:11.360838: W C:	f_jenkinshomeworkspace
el-winMwindowsPY36	ensorflowcoreplatformcpu_feature_guard.cc:45] The TensorFlow library wasn't compiled to use AVX instructions, but these are available on your machine and could speed up CPU computations.
2018-01-02 09:05:11.366188: W C:	f_jenkinshomeworkspace
el-winMwindowsPY36	ensorflowcoreplatformcpu_feature_guard.cc:45] The TensorFlow library wasn't compiled to use AVX2 instructions, but these are available on your machine and could speed up CPU computations.
[ 0.]
[ 1.]
[Finished in 2.5s]
使用集合管理不同类别资源:TensorFlow提供了一些自动维护的常用集合,如下图所示
TensorFlow 计算模型:张量–TensorFlow管理数据的方式,Tensorflow中所有的数据都通过张量表示,简单来说就是多维数组。其中,零维张量及标量(scalar),为一个数,一阶张量为向量(vector),以此类推。张量中保存的是运算过程而非结果,如下例子所示:
# TensorFlow 张量运算例子


# author = yooongchun


# time = 20180102


import tensorflow as tf

a=tf.constant([1.0,2.0],name='a')
b=tf.constant([2.0,3.0],name='b')
result=tf.add(a,b,name='add')
print(result)
结果:
Tensor("add:0", shape=(2,), dtype=float32)
[Finished in 2.6s]
上面的结果表示:
- 结果来自add节点的第一个输出,结果为一维数组长度为2,类型为float32
Tensorflow运行模型–会话(Session):用来执行定义好的运算,比如对上面的程序计算结果
# TensorFlow 会话运算例子


# author = yooongchun


# time = 20180102


import tensorflow as tf

a=tf.constant([1.0,2.0],name='a')
b=tf.constant([2.0,3.0],name='b')
result=tf.add(a,b,name='add')

with tf.Session() as sess:
print(sess.run(result))

# 结果


# [ 3.  5.]