一、什么叫做AOp
解析:Aop(Aspect Oriented Programming)是面向切面编程,软件编程的一种思想。
OOp(Object Oriented Programming)是面向对象编程。
Aop是基于OOp的,又高于OOp。
二、区别
面向对象编程是从【静态角度】考虑程序的结构,而面向切面编程是从【动态角度】考虑程序运行过程。
AOP底层,就是采用【动态代理】模式实现的。采用了两种代理:JDK动态代理和CGLIB动态代理。
三、切入点表达式
execution(【modifiers-pattern?】 访问修饰符
ret-type-pattern 返回值类型
【declaring-type-pattern?】 全限定性类名
name-pattern(param-pattern) 方法名(参数名) 包名.类型名.方法名
【throws-pattern?】) 抛出异常类型
public void doLog(String log){
}
方法签名
切入点表达式要匹配的对象就是目标方法的方法名。所以,execution表达式中明显就是方法的签名。注意:表达式中加[]的部分表示可省略部分,各部分间用空格分开。在其中可以使用以下符号:
符号 意义
* 0至多个任意字符
.. 用在方法参数中,表示任意多个参数
用在包名后,表示当前包及其子包路径
+ 用在类名后,表示当前类及其子类
用在接口后,表示当前接口及其实现类
案例:
execution(public * *(..)) 指定切入点为:任意公共方法
execution(* set*(..)) 指定切入点为:任何一个以"set"开始的方法
四、基本术语(一些名词):
(1)切面(Aspect)
切面泛指[*交叉业务逻辑*]。事务处理和日志处理可以理解为切面。常用的切面有通知(Advice)与顾问(Advisor)。实际就是对主业务逻辑的一种增强。
(2)织入(Weaving)
织入是指将切面代码插入到目标对象的过程。代理的invoke方法完成的工作,可以称为织入。
(3) 连接点(JoinPoint)
连接点是指可以被切面织入的方法。通常业务接口的方法均为连接点
(4)切入点(PointCut)
切入点指切面具体织入的方法
注意:被标记为final的方法是不能作为连接点与切入点的。因为最终的是不能被修改的,不能被增强的。
(5)目标对象(Target)
目标对象指将要被增强的对象。即包含主业务逻辑的类的对象。
(6)通知(Advice)
通知是切面的一种实现,可以完成简单的织入功能。通知定义了增强代码切入到目标代码的时间点,是目标方法执行之前执行,还是执行之后执行等。切入点定义切入的位置,通知定义切入的时间。
(7)顾问(Advisor)
顾问是切面的另一种实现,能够将通知以更为复杂的方式织入到目标对象中,是将通知包装为更复杂切面的装配器。
五、Spring的经典AOP配置方案
1、使用的是Aspectj第三方框架,实现了AOP思想Xml
2、注解配置的AOP
3、纯POJO 就是一个普通的类<aop:config>
4、代理工厂模式就是最原始的一种
(一)首先我们介绍的是纯POJO(通过POJO来实现一个前置增强类)

首先我们先新建一个web项目我们分别在src下面新建包
其次我们引入我们需要的包

接下来我们定一个普通的UserBiz类
package cn.happy.biz;

public class UserBiz {
   public void addStu(UserInf user){
       System.out.println("add  ok");
   }
}
我们在aop包下BeforeAdvice前置增强类,它需要实现
MethodBeforeAdvice接口的before方法
package cn.happy.aop;

import java.lang.reflect.Method;

import org.springframework.aop.MethodBeforeAdvice;

/**
 * before
 * @author Happy
 *
 */
public class BeforeAdvice implements MethodBeforeAdvice{

    /**
     *
     * @param method 被代理的目标的方法
     * @param args  传递给目标方法的参数
     * @param obj    被代理的目标对象

     * @throws Throwable
     */
    @Override
    public void before(Method method, Object[] args , Object obj)
            throws Throwable {
        System.out.println("========before======");
    }
我们接下来写配置文件(注意引入的命名空间)<aop:config>配置下实现切面
<?xml version="1.0" encoding="UTF-8"?>
<beans xmlns="http://www.springframework.org/schema/beans"
    xmlns:xsi="http://www.w3.org/2001/XMLSchema-instance"
   xmlns:aop="http://www.springframework.org/schema/aop"
    xsi:schemaLocation="
        http://www.springframework.org/schema/beans http://www.springframework.org/schema/beans/spring-beans.xsd
        http://www.springframework.org/schema/aop http://www.springframework.org/schema/aop/spring-aop.xsd
        ">

   <bean id="biz" class="cn.happy.biz.UserBiz"></bean>

   <!-- 前置 -->
   <bean id="beforeAdvice" class="cn.happy.aop.BeforeAdvice"></bean>
<!-- aop配置切面 -->
<aop:config>
<!-- 定义切点 -->
<aop:pointcut expression="execution(public void *(cn.happy.biz.UserInf))" id="pointcut"/>
<!-- 增强处理和切点结合 -->
<aop:advisor advice-ref="beforeAdvice" pointcut-ref="pointcut"/>
<aop:advisor advice-ref="afterAdivice" pointcut-ref="pointcut"/>
</aop:config>
测试类
@Test
    public void testOne(){
        ApplicationContext ctx=new ClassPathXmlApplicationContext("applicationContext.xml");
        UserBiz biz = (UserBiz)ctx.getBean("biz");
        biz.addStu(new UserInf());

    }
(二)用注解配置的AOP(五种通知:前置通知,后置通知,返回通知,异常通知,环绕通知)

如上图所示建立包和类i
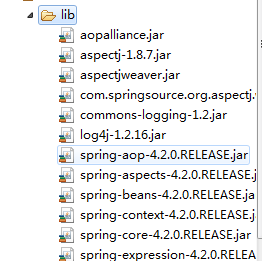
引入上图夹包
定一个接口
package cn.happy.enetity;
/**
 * 1.业务接口
 * @author Happy
 *
 */
public interface ISomeService {
    //1.1  执行事务
   public void doTransaction();
    //1.2 书写日志
   public String doLog();
}
一定一个实现接口的实现类
package cn.happy.enetity;

public class SomeServiceImpl implements ISomeService {

    public void doTransaction() {
        System.out.println("开启事务");
    }

    public String doLog() {
        System.out.println("书写日志"+5/0);
        return "我是书写日志的返回值哦!!!!!";
    }

}
定一个增强类用注解写
package cn.happy.aspece;

import org.aspectj.lang.ProceedingJoinPoint;
import org.aspectj.lang.annotation.After;
import org.aspectj.lang.annotation.AfterReturning;
import org.aspectj.lang.annotation.AfterThrowing;
import org.aspectj.lang.annotation.Around;
import org.aspectj.lang.annotation.Aspect;
import org.aspectj.lang.annotation.Before;

@Aspect
public class MyAspect {
    //前置通知
    @Before(value="execution(public * *(..))")
    public void MyBefore(){
        System.out.println("这是前置通知哦!!!!!!!在执行目标对象之前执行");
    }

    //后置通知
    @AfterReturning(value="execution(public * *(..))")
    public void MyAfterReturning(){
        System.out.println("这是后置通知哦!!!!!!!在执行目标对象之前执行");
    }

    //环绕通知
/*    @Around(value="execution(public * *(..))")
    public void MyAround(ProceedingJoinPoint pjp){
        System.out.println("这是环绕通知前哦!!!!!!!在执行目标对象之前执行");
        try {
            pjp.proceed();
            System.out.println("这是环绕通知后哦!!!!!!!在执行目标对象之前执行");
        } catch (Throwable e) {
            // TODO Auto-generated catch block
            e.printStackTrace();
        }
    }*/

    //异常通知
    @AfterThrowing(value="execution(public * *(..))")
    public void MyAfterThrowing(){
        System.out.println("这是异常通知哦!!!!!!!在执行目标对象之前执行");
    }

    //最终通知
    @After(value="execution(public * *(..))")
    public void MyAfter(){
        System.out.println("这是最终通知哦!!!!!!!在执行目标对象之前执行");
    }
}
配置文件
<?xml version="1.0" encoding="UTF-8"?>
<beans xmlns="http://www.springframework.org/schema/beans"
    xmlns:xsi="http://www.w3.org/2001/XMLSchema-instance"
    xmlns:context="http://www.springframework.org/schema/context"
    xmlns:aop="http://www.springframework.org/schema/aop"
     xsi:schemaLocation="
        http://www.springframework.org/schema/beans http://www.springframework.org/schema/beans/spring-beans.xsd
        http://www.springframework.org/schema/context http://www.springframework.org/schema/context/spring-context.xsd
        http://www.springframework.org/schema/aop http://www.springframework.org/schema/aop/spring-aop.xsd">

   <!-- 目标对象 -->
   <bean id="someService" class="cn.happy.enetity.SomeServiceImpl"></bean>

   <!-- 切面: -->
   <bean id="myAspect" class="cn.happy.aspece.MyAspect"></bean>
   <!--aop:aspectj可以启动对@AspectJ注解支持-->
  <aop:aspectj-autoproxy/>
</beans>
测试类
package cn.happy.test;

import org.junit.Test;
import org.junit.runner.RunWith;
import org.springframework.context.ApplicationContext;
import org.springframework.context.support.ClassPathXmlApplicationContext;

import cn.happy.enetity.ISomeService;


public class Spring_01Test {
    @Test
    public void testOne(){

        ApplicationContext ctx=new ClassPathXmlApplicationContext("applicationContext.xml");
        ISomeService service = (ISomeService)ctx.getBean("someService");
        service.doTransaction();
        String result = service.doLog();
        System.out.println(result);
    }
}
(三)使用的是Aspectj第三方框架,实现了AOP思想XML的方式(就是一个普通类通过配置实现 )

如图所示建立包和类引入包同上
定一个接口
package enetity;
/**
 * 1.业务接口
 * @author Happy
 *
 */
public interface ISomeService {
    //1.1  执行事务
   public void doTransaction();
    //1.2 书写日志
   public String doLog();
}
定义一个实现类
package enetity;

public class SomeServiceImpl implements ISomeService {

    public void doTransaction() {
        System.out.println("开启事务");
    }

    public String doLog() {
        /*System.out.println("书写日志"+5/0);*/
        System.out.println("书写日志");
        return "我是书写日志的返回值哦!!!!!";
    }

}
定一个增强类就是一个普通类通过配置实现
package aspece;

import org.aspectj.lang.ProceedingJoinPoint;


public class MyAspect {
    // 前置通知execution(public * *(..))
    public void MyBefore() {
        System.out.println("这是前置通知哦!!!!!!!在执行目标对象之前执行");
    }

    // 后置通知execution(public * *(..))
    public void MyAfterReturning() {
        System.out.println("这是后置通知哦!!!!!!!在执行目标对象之前执行");
    }

    // 异常通知
    public void MyAfterThrowing() {
        System.out.println("这是异常通知哦!!!!!!!在执行目标对象之前执行");
    }

    // 最终通知
    public void MyAfter() {
        System.out.println("这是最终通知哦!!!!!!!在执行目标对象之前执行");
    }

    //环绕通知
    public String MyAround(ProceedingJoinPoint pjp){
        System.out.println("这是环绕通知前哦!!!!!!!在执行目标对象之前执行");
        try {
            Object result=pjp.proceed();
            System.out.println("这是环绕通知后哦!!!!!!!在执行目标对象之前执行");
        } catch (Throwable e) {
            // TODO Auto-generated catch block
            e.printStackTrace();
        }
        return "result";
    }
}
配置文件
<?xml version="1.0" encoding="UTF-8"?>
<beans xmlns="http://www.springframework.org/schema/beans"
    xmlns:xsi="http://www.w3.org/2001/XMLSchema-instance"
    xmlns:context="http://www.springframework.org/schema/context"
    xmlns:aop="http://www.springframework.org/schema/aop"
     xsi:schemaLocation="
        http://www.springframework.org/schema/beans http://www.springframework.org/schema/beans/spring-beans.xsd
        http://www.springframework.org/schema/context http://www.springframework.org/schema/context/spring-context.xsd
        http://www.springframework.org/schema/aop http://www.springframework.org/schema/aop/spring-aop.xsd">

   <!-- 目标对象 -->
   <bean id="someService" class="enetity.SomeServiceImpl"></bean>

   <!-- 切面: -->
   <bean id="myAspect" class="aspece.MyAspect"></bean>


  <!--  aop的配置 -->
  <aop:config>
  <!-- 切点 -->
  <aop:pointcut expression="execution(public * *(..))" id="dopointcut"/>
      <aop:aspect ref="myAspect">

          <aop:before method="MyBefore" pointcut-ref="dopointcut"/>
          <aop:after-returning method="MyAfterReturning" pointcut-ref="dopointcut"/>
          <!-- <aop:after-throwing method="MyAfterThrowing" pointcut-ref="dopointcut"/> -->
          <aop:after method="MyAfter" pointcut-ref="dopointcut"/>
          <aop:around method="MyAround" pointcut-ref="dopointcut"/>
      </aop:aspect>

  </aop:config>
</beans>
测试类
@Test
    public void testOne(){

        ApplicationContext ctx=new ClassPathXmlApplicationContext("applicationContext.xml");
        ISomeService service = (ISomeService)ctx.getBean("someService");
        service.doTransaction();
        String result = service.doLog();
        System.out.println(result);
    }
(四)代理工厂模式就是最原始的一种

如图所示建立包和类
定义一个接口
package cn.happy.service;

public interface ISomeService {
    // 執行事務
    public void doTransaction();

    // 記錄日誌
    public String doLog();
}
定义一个实现类
package cn.happy.service;

public class ISomeServiceImpl implements ISomeService{
    //目标方法
    public void doTransaction() {
        System.out.println("开启事务");

    }

    public String doLog() {
        System.out.println("记录日志");
        return null;
    }

}
定义一个增强类
package cn.happy.aop;

import java.lang.reflect.Method;

import org.springframework.aop.MethodBeforeAdvice;
/*
.前置通知 MethodBeforeAdvice
 定义前置通知,需要实现MethodBeforeAdvice接口,
 该接口中有一个方法before(),会在目标方法执行之前执行。
 */
public class MyMethodBeforeAdvice implements MethodBeforeAdvice {

    public void before(Method arg0, Object[] arg1, Object arg2)
            throws Throwable {
        System.out.println("Before");

    }

}
配置实现一个前置通知
<?xml version="1.0" encoding="UTF-8"?>
<beans xmlns="http://www.springframework.org/schema/beans"
    xmlns:xsi="http://www.w3.org/2001/XMLSchema-instance" xmlns:aop="http://www.springframework.org/schema/aop"
    xsi:schemaLocation="
        http://www.springframework.org/schema/beans
        http://www.springframework.org/schema/beans/spring-beans.xsd
         http://www.springframework.org/schema/aop
         http://www.springframework.org/schema/aop/spring-aop-4.1.xsd
        ">
    <!-- 业务对象 -->
    <bean id="someService" class="cn.happy.service.ISomeServiceImpl" />
    <!-- 交叉业务 -->
    <bean id="beforeAdivce" class="cn.happy.aop.MyMethodBeforeAdvice" />
    <!-- 代理对象 -->
    <bean id="serviceProxy" class="org.springframework.aop.framework.ProxyFactoryBean">
        <property name="targetName" value="someService" />
        <property name="interceptorNames" value="beforeAdivce,afterAdivce" />
    </bean>
</beans>
测试类
package cn.happy.test;

import org.junit.Test;
import org.springframework.context.ApplicationContext;
import org.springframework.context.support.ClassPathXmlApplicationContext;

import cn.happy.service.ISomeService;
import cn.happy.service.ISomeService1;

public class Test1 {
	@Test
	public void testOne(){

		ApplicationContext ctx=new ClassPathXmlApplicationContext("applicationContext.xml");
		ISomeService service = (ISomeService)ctx.getBean("serviceProxy");
		service.doTransaction();
		service.doLog();

	}
}