勿以恶小而为之,勿以善小而不为--------------------------刘备
劝诸君,多行善事积福报,莫作恶
上一章简单介绍了Struts2拦截器的简单应用,登录权限拦截器及与过滤器的区别(八),如果没有看过,请观看上一章
Struts国际化,简写成i18n,全称是internationalization,中间有18个字母. L10n,为本地化 localization。
关于Java SE 的国际化操作,可以看老蝴蝶以前写的文章: JavaSE实现国际化操作(十五)
一. Strut2实现国际化
Struts2实现国际化可以在前端实现,也可以在后端进行相应的实现。
一般国际化的都是前端的显示标签和后端传递过来的提示信息,一般采用前端国际化的多一些。
在前端国际化时,用一个登录表单的页面来进行相应的说明。
需要先搭建一个基本的Struts的运行环境,包括struts.xml和web.xml的配置)
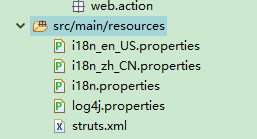
在src 下有三个国际化文件, i18n.properties, i18n_en_US.properties文件,i18n_zh_CN.properties 文件。
其中,i18n_zh_CN.properties 文件的内容,与i18n.properties的文件内容相同。
默认是中文的。
一.一 利用<s:text> 标签 实际国际化
1.首先根据前端的页面标签和提示信息,将国际化内容大致提取出来,放置在国际化的属性文件中。
将属性文件中的key 按照i18n.模块.标签的方式进行命名。
一.一.一 i18n_zh_CN.properties 属性文件
zh_CN中文与默认的一致,内容均为:
###下面是登录表单login.jsp的国际化配置
###登录页面
i18n.login.title=u767bu5f55u9875u9762
###用户名
i18n.login.userName=u7528u6237u540d
###密码
i18n.login.password=u5bc6u7801
###登陆
i18n.login.submit=u767bu9646
###重置
i18n.login.reset=u91cdu7f6e
###下面是登录成功表单success.jsp的国际化配置
###带参数传递,欢迎{0}登录,性别是{1},年龄{2}
i18n.success.welcome=u6b22u8fceu007bu0030u007du767bu5f55u002cu6027u522bu662fu007bu0031u007du002cu5e74u9f84u007bu0032u007d
一.一.二 i18n_en_US.properties 属性文件
en_US英文为:
###下面是登录表单login.jsp的国际化配置
###登录页面
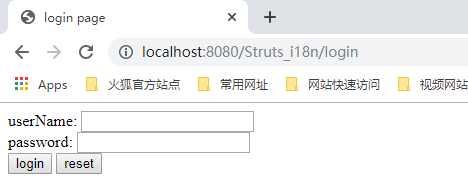
i18n.login.title=login page
###用户名
i18n.login.userName=userName
###密码
i18n.login.password=password
###登陆
i18n.login.submit=login
###重置
i18n.login.reset=reset
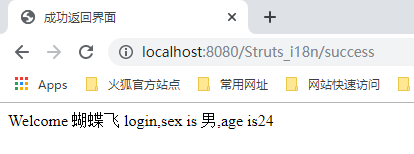
###下面是登录成功表单success.jsp的国际化配置
###带参数
i18n.success.welcome=Welcome {0} login,sex is {1},age is{2}
一.一. 三 配置struts.xml 文件 ,添加 struts.custom.i18n.resources 变量
在Struts.xml中配置资源所在的路径,value的值为 国际化文件的名称。
(必须配置,否则找不到文件在哪儿)
<!-- 添加国际化的资源所在的位置 -->
<constant name="struts.custom.i18n.resources" value="i18n"></constant>
一.一.四 编写前端 /content/login.jsp 文件
需要将内容和提示信息都换成<s:text name="key">的形式。
<%@ page language="java" contentType="text/html; charset=UTF-8"
    pageEncoding="UTF-8"%>
<%@ taglib uri="/struts-tags" prefix="s"%>
<!DOCTYPE html>
<html>
<head>
<meta http-equiv="Content-Type" content="text/html; charset=UTF-8">
<title><s:text name="i18n.login.title"/></title>
</head>
<body>
	<s:form action="User_login.action" namespace="/" method="post">
			<s:text name="i18n.login.userName"/>: <s:textfield  name="name"/>  <br/>
			<s:text name="i18n.login.password"/>: <s:password name="password"/><br/>
   			<input type="submit" value="<s:text name='i18n.login.submit'></s:text>"/>
   			<input type="reset" value="<s:text name='i18n.login.reset'></s:text>"/>
	</s:form>
</body>
</html>
注意,<s:submit>是无法使用的,改成标准的html标签即可。
也可以使用<s:set> 先setter值,然后再取出。
用getText()方式来获取。
 <s:set var="submit" value="getText('i18n.login.submit')"/>
 <s:submit value="%{submit}"></s:submit>
一.一.五 编写前端 /content/success.jsp 页面
对于占位符填充的国际化,可以用 <s:param> 传递占位符参数。
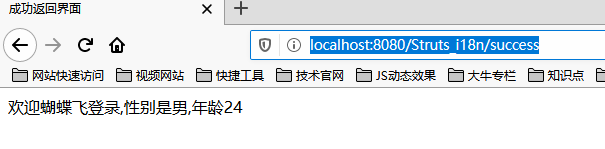
如:成功 /content/success.jsp 界面,填充参数。
<s:text name="i18n.success.welcome">
	<s:param name="0">蝴蝶飞</s:param>
	<s:param name="1">男</s:param>
	<s:param name="2">24</s:param>
</s:text>
一.六 重启服务器,进行验证
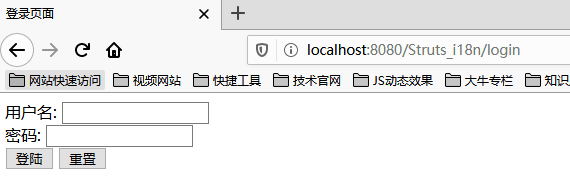
一.六.一 中文环境
输入网址: http://localhost:8080/Struts_i18n/login , 会跳转到 login.jsp 页面
输入网址: http://localhost:8080/Struts_i18n/success, 会跳转到 success.jsp 页面
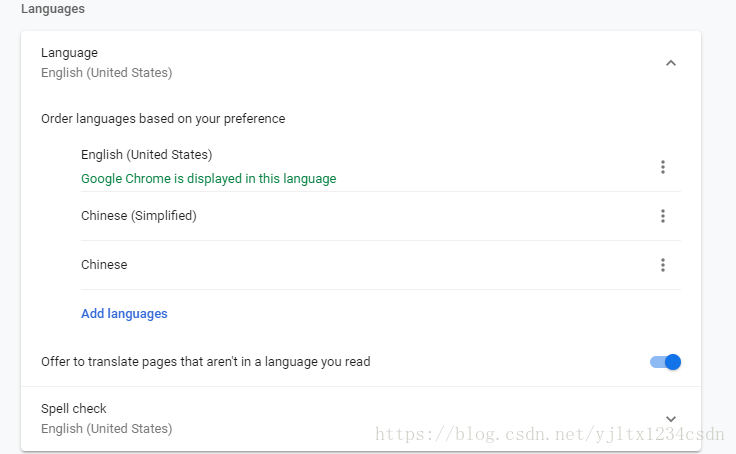
一.六.二 英文环境
现在改变成英文状态, goole浏览器改变settings,高级选择语言,添加美国英语,并将其选择为浏览器语言,并move to up,移动到最上面
输入网址: http://localhost:8080/Struts_i18n/login , 会跳转到 login.jsp 页面
输入网址: http://localhost:8080/Struts_i18n/success, 会跳转到 success.jsp 页面
二 中英文链接动态选择语言
实现的效果是,在登录页面或者主页面选择一种语言,然后全局都使用这种语言。
如Login.jsp时显示一种默认的语言,有一个选择语言的框,点击中文后,跳转到success.jsp显示中文,
success.jsp跳转到list.jsp也会显示中文。
在login.jsp页面点击英文后,跳转到success.jsp显示英文,success.jsp跳转到list.jsp也会显示英文。
模拟这种全局都显示一种语言的项目。要想全局都使用这种语言,就需要对全局性进行一次判断,
故最好用拦截器实现。 非常幸运的是,Struts2中有一个i18n的拦截器,我们只需要稍微添加一些操作即可。
二.一 编写后端 LoginAction, 用于实现跳转
package com.yjl.web.action;

import com.opensymphony.xwork2.ActionSupport;

/**
* @author 两个蝴蝶飞
* @version 创建时间:Aug 27, 2018 10:56:50 AM
* 登录的国际化操作
*/
public class LoginAction extends ActionSupport{
	private static final long serialVersionUID = 1L;
	//跳转到首页,用的是默认的语言环境
	public String toLogin(){
		return "toLogin";
	}
	//跳转到登录页面,用的是选择的语言环境
	public String login(){
		return SUCCESS;
	}
	//根据所选择的语言环境,继续相应的跳转,表示全局性选择语言。
	public String list(){
		return "list";
	}
}
二.二 配置 struts.xml 文件
<struts>
	<!--修改国际化编码 -->
	<constant name="struts.i18n.encoding" value="UTF-8"></constant>
	<!--修改是否为开发者模式 -->
	<constant name="struts.devMode" value="true"></constant>
	<!--修改ui样式表 -->
	<constant name="struts.ui.theme" value="simple"></constant>
	<!-- 添加国际化的资源所在的位置 -->
	<constant name="struts.custom.i18n.resources" value="i18n"></constant>
	<package name="hello" extends="struts-default" namespace="/">
		<action name="Login_*" class="com.yjl.web.action.LoginAction" method="{1}">
				<result name="toLogin">/WEB-INF/content/login2.jsp</result>
				<result name="success">/WEB-INF/content/success2.jsp</result>
				<result name="list">/WEB-INF/content/list2.jsp</result>
		</action>
		<!-- 配置跳转页面 -->
		<action name="*">
			<result>/WEB-INF/content/{1}.jsp</result>
		</action>
	</package>
</struts>
二.三 编写前端页面
二.三.一 编写 /content/login2.jsp
<%@ page language="java" contentType="text/html; charset=UTF-8"
    pageEncoding="UTF-8"%>
<%@ taglib uri="/struts-tags" prefix="s"%>
<!DOCTYPE html>
<html>
<head>
<meta http-equiv="Content-Type" content="text/html; charset=UTF-8">
<title><s:text name="i18n.login.title"/></title>
</head>
<body>
	<s:form action="Login_login.action" namespace="/" method="post">
			<s:text name="i18n.login.userName"/>: <s:textfield  name="name"/>  <br/>
			<s:text name="i18n.login.password"/>: <s:password name="password"/><br/>

   			<input type="submit" value="<s:text name='i18n.login.submit'></s:text>"/>
   			<input type="reset" value="<s:text name='i18n.login.reset'></s:text>"/> <br/>
   			<s:a action="Login_login.action?request_locale=zh_CN" namespace="/">中文</s:a>
   			<s:a action="Login_login.action?request_locale=en_US" namespace="/">英文</s:a>
	</s:form>
</body>
</html>
二.三.二 编写 /content/success2.jsp
<body>
	<s:text name="i18n.success.welcome">
		<s:param name="0">两个蝴蝶飞</s:param>
		<s:param name="1">男</s:param>
		<s:param name="2">24</s:param>
	</s:text>
	<s:a action="Login_list" namespace="/">跳转到list页面</s:a>
</body>
二.三.三 编写 /content/list2.jsp
<body>
	<s:text name="i18n.success.welcome">
		<s:param name="0">YJL</s:param>
		<s:param name="1">男</s:param>
		<s:param name="2">24</s:param>
	</s:text>
</body>
二.四 重启服务器 检测跳转是否正确
输入网址: http://localhost:8080/Struts_i18n/Login_toLogin
页面按照设定进行相应的跳转,只是语言只是一种语言,没有改变。
因为并没有写拦截器呢。
二.五 创建国际化拦截器类I18nInterceptor
在com.yjl.web.interceptor包下创建一个类 I18nInterceptor
package com.yjl.web.interceptor;
import java.util.Locale;
import java.util.Map;
import com.opensymphony.xwork2.ActionContext;
import com.opensymphony.xwork2.ActionInvocation;
import com.opensymphony.xwork2.interceptor.MethodFilterInterceptor;

/**
* @author 两个蝴蝶飞
* @version 创建时间:Aug 27, 2018 5:44:21 PM
* 类说明  国际化的拦截器
*/
public class I18NInterceptor extends MethodFilterInterceptor{
	private static final long serialVersionUID = 1L;
	@Override
	protected String doIntercept(ActionInvocation ai) throws Exception {
		//1. 得到ActionContext对象,从而获取session
		ActionContext actionContext=ai.getInvocationContext();
		Map<String,Object> session=(Map<String, Object>) actionContext.getSession();
		//2.得到里面设置的值Locale  注意key值
		Locale locale=(Locale) session.get("WW_TRANS_I18N_LOCALE");
		//3. 判断这个值是否为null,如果为null则设置一个默认值
		if(locale==null){
			Locale defaultLocale=new Locale("zh","CN");
			//将其设置到session中
			session.put("WW_TRANS_I18N_LOCALE", defaultLocale);
		}
		//返回
		return ai.invoke();
	}
}
其中Locale defaultLocale=new Locale("zh","CN");
是采用硬编码编码进去的。
二.六 在struts.xml中配置拦截器
拦截器的具体使用请参照上一章
<package name="user" extends="struts-default" namespace="/">
		<interceptors>
			<interceptor name="i18nInterceptor" class="com.yjl.web.interceptor.I18NInterceptor"></interceptor>
			<interceptor-stack name="defaultStack">
				<interceptor-ref name="i18nInterceptor"></interceptor-ref>
				<interceptor-ref name="defaultStack"></interceptor-ref>
			</interceptor-stack>
		</interceptors>
		<action name="Login_*" class="com.yjl.web.action.LoginAction" method="{1}">
				<result name="toLogin">/login.jsp</result>
				<result name="success">/success.jsp</result>
				<result name="list">/list.jsp</result>
		</action>
</package>
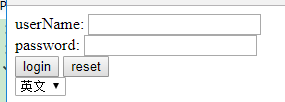
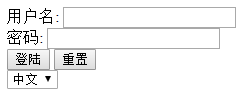
二.七 重启服务器,验证语言是否可以进行选择
经过验证,发现可以正常的进行跳转,可以不用改变浏览器的环境,就可以自由选择语言。
选择中文:

选择英文:

三. 国际化完善操作
项目中有两个小的不完美的地方,
第一,默认语言是硬编码。
第二,选择中英文时,不能是两个单独的链接,而应该是一个select框进行选择。
三.一 解决默认语言硬编码
三.一.一 拦截器 I18NInterceptor 配置
在I18nInterceptor拦截器中添加两个参数,country和language,
并指明默认参数为"zh","cn". 表明用户可以不传递这两个参数,默认是中文
private String country="zh";
private String language="CN";
public String getCountry() {
	return country;
}
public void setCountry(String country) {
	this.country = country;
}
public String getLanguage() {
	return language;
}
public void setLanguage(String language) {
	this.language = language;
}
三.一.二 struts.xml中配置
<interceptors>
	<interceptor name="i18nInterceptor" class="com.yjl.web.interator.I18NInterceptor"></interceptor>
	<interceptor-stack name="defaultStack">
		<interceptor-ref name="i18nInterceptor">
			<param name="country">zh</param>
			<param name="language">CN</param>
		</interceptor-ref>
		<interceptor-ref name="defaultStack"></interceptor-ref>
	</interceptor-stack>
</interceptors>
三.二 解决链接显示的问题
三.二.一 引入关于json的jar包
需要引入关于json的包json-default, 其中必须要引入json与struts的jar包。

三.二.二 修改 /content/login.jsp 页面
	<div class="content">
		<s:form action="Login_login.action" namespace="/" method="post">
				<s:text name="i18n.login.userName"/>: <s:textfield  name="name"/>  <br/>
				<s:text name="i18n.login.password"/>: <s:password name="password"/><br/>
	   			<input type="submit" value="<s:text name='i18n.login.submit'/>"/>
	   			<input type="reset" value="<s:text name='i18n.login.reset'/>"/>
		</s:form>
	</div>
	<s:select name="i18nCharset" id="i18nSelect" list="#{'zh_CN':'中文','en_US':'英文'}">
   				<%--这里中文和英文也应该用国际化<s:text>显示的,为了简便,为中文写出来
   					不能用html注释--%>
   				<!-- <option value="zh_CN">中文</option>
   				<option value="en_US">英文</option> -->
   	</s:select>
三.二.三 重写 LoginAction 方法
添加一个charset字符串数据,实现setter和getter方法,传递选择的数据。
然后添加一个getCharacterSelect()方法。
package com.yjl.web.action;

import java.util.Locale;
import java.util.Map;

import com.opensymphony.xwork2.ActionContext;
import com.opensymphony.xwork2.ActionSupport;

/**
* @author 两个蝴蝶飞
* @version 创建时间:Aug 27, 2018 10:56:50 AM
* 登录的国际化操作
*/
public class LoginAction extends ActionSupport{
	private static final long serialVersionUID = 1L;
	private String charset;
	public void setCharset(String charset) {
		this.charset = charset;
	}
	public String getCharset() {
		return charset;
	}

	//跳转到首页,用的是默认的语言环境
	public String toLogin(){
		return "toLogin";
	}
	//跳转到登录页面,用的是选择的语言环境
	public String login(){
		return SUCCESS;
	}
	//根据所选择的语言环境,继续相应的跳转,表示全局性选择语言。
	public String list(){
		return "list";
	}
	//语言编码改变时调用这一个
	public String charsetChange(){
		return "charsetChange";
	}
	//获取相应的编码
	public String getCharsetSelect(){
		Map<String,Object> session=(Map<String, Object>) ActionContext.getContext().getSession();
		Locale locale=(Locale) session.get("WW_TRANS_I18N_LOCALE");
		//取得值
		charset=locale.getLanguage()+"_"+locale.getCountry();
		System.out.println("获取的值:"+charset);
		return "getCharsetSelect";
	}
}
三.二.四 配置 struts.xml 文件
在struts.xml中:
    <action name="Login_*" class="com.yjl.web.action.LoginAction" method="{1}">
		<result name="toLogin">/login.jsp</result>
		<result name="charsetChange">/login.jsp</result>
        <!--注意json形式的写法-->
		<result name="getCharsetSelect" type="json">
			<param name="root">charset</param>
		</result>
		<result name="success">/success.jsp</result>
		<result name="list">/list.jsp</result>

</action>
注意,包要添加 default-json 的包。
<package name="hello" extends="struts-default,json-default" namespace="/">
三.二.五 在/content/login2.jsp 页面中 添加如下 js
添加 js 脚本代码
<!-- 在线引入jquery 需要联网,用户可以自己下载后本地引用即可-->
<script src="https://cdn.bootcss.com/jquery/1.10.2/jquery.min.js"></script>
<script>
	$(document).ready(function(){
		$("select#i18nSelect").change(function(){
			//select改变时触发整个
			//取得option中的值
			var charset=$("select#i18nSelect option:selected").val();
				$.post("/Struts_i18n/Login_charsetChange.action",{"request_locale":charset},
						 function(data,status){
			       			 //成功之后,刷新一下界面
			       			window.location.reload();
						}
			    );
		});
	});
	$(document).ready(function(){
		$.post("/Struts_i18n/Login_getCharsetSelect.action",
				 function(data,status){
					var charset=data;
	       			$("select#i18nSelect").val(charset);
				}
		);
	});
</script>
三.二.六 重启服务器,验证
按照设计那样运行,可以实现自动回显的操作了。
注意两个js思想的使用。
本章节代码链接为:
链接:https://pan.baidu.com/s/1ddREC5hnwWpO9xSb3hYBcQ
提取码:z5d9
谢谢您的观看!!!