以下内容参考了 http://www.mkyong.com/spring-security/spring-security-form-login-example/
接上回,在前面的Hello World示例中,Spring Security为我们自动生成了默认登录页,对于大多数项目而言,如此简单的登录页并不能满足实际需求,接下来,我们看看如何自定义登录页
一、项目结构
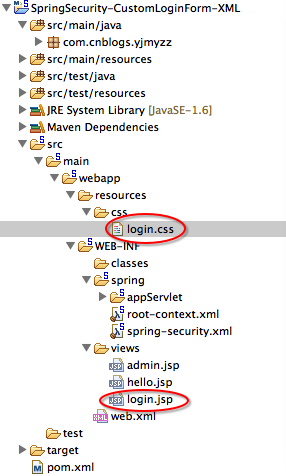
与前一个示例相比较,只是多了一个css样式以及登录页login.jsp,这二个文件具体的内容如下:


 1 @CHARSET "UTF-8";
 2
 3 .error {
 4     padding: 15px;
 5     margin-bottom: 20px;
 6     border: 1px solid transparent;
 7     border-radius: 4px;
 8     color: #a94442;
 9     background-color: #f2dede;
10     border-color: #ebccd1;
11 }
12
13 .msg {
14     padding: 15px;
15     margin-bottom: 20px;
16     border: 1px solid transparent;
17     border-radius: 4px;
18     color: #31708f;
19     background-color: #d9edf7;
20     border-color: #bce8f1;
21 }
22
23 #login-box {
24     width: 300px;
25     padding: 20px;
26     margin: 100px auto;
27     background: #fff;
28     -webkit-border-radius: 2px;
29     -moz-border-radius: 2px;
30     border: 1px solid #000;
31 }
 1 <%@ page language="java" contentType="text/html; charset=UTF-8"
 2     pageEncoding="UTF-8"%>
 3 <%@ taglib prefix="c" uri="http://java.sun.com/jsp/jstl/core"%>
 4 <!DOCTYPE html PUBLIC "-//W3C//DTD HTML 4.01 Transitional//EN" "http://www.w3.org/TR/html4/loose.dtd">
 5 <html>
 6 <head>
 7 <meta http-equiv="Content-Type" content="text/html; charset=UTF-8">
 8 <title>Login Page</title>
 9 <link rel="Stylesheet" type="text/css" href="${pageContext.request.contextPath}/resources/css/login.css" />
10 </head>
11 <body onload='document.loginForm.username.focus();'>
12     <h1>Spring Security Custom Login Form (XML)</h1>
13
14     <div id="login-box">
15         <h3>Login with Username and Password</h3>
16         <c:if test="${not empty error}">
17             <div class="error">${error}</div>
18         </c:if>
19         <c:if test="${not empty msg}">
20             <div class="msg">${msg}</div>
21         </c:if>
22         <form name='loginForm'
23             action="<c:url value='j_spring_security_check' />" method='POST'>
24             <table>
25                 <tr>
26                     <td>User:</td>
27                     <td><input type='text' name='username' value=''></td>
28                 </tr>
29                 <tr>
30                     <td>Password:</td>
31                     <td><input type='password' name='password' /></td>
32                 </tr>
33                 <tr>
34                     <td colspan='2'><input name="submit" type="submit"
35                         value="submit" /></td>
36                 </tr>
37             </table>
38             <input type="hidden" name="${_csrf.parameterName}"
39                 value="${_csrf.token}" />
40         </form>
41     </div>
42 </body>
43 </html>
有几个地方解释一下:
第9行,css静态资源的引用方式,如果对Spring MVC不熟悉的人,可借此示例学习一下
15-20行,用了一个if标签来判断登录验证是否有错,如果验证失败,则显示错误信息,其中error,msg这二个变量,是从Controller里返回的信息(后面马上会讲到)
23行form表单的action地址留意一下,这个不能改,这是Spring Security的约定
38-39行的隐藏域_csrf,这是用来防止跨站提交攻击的,如果看不懂,可暂时无视。
二、Controller
 1 package com.cnblogs.yjmyzz;
 2
 3 import org.springframework.stereotype.Controller;
 4 import org.springframework.web.bind.annotation.RequestMapping;
 5 import org.springframework.web.bind.annotation.RequestMethod;
 6 import org.springframework.web.bind.annotation.RequestParam;
 7 import org.springframework.web.servlet.ModelAndView;
 8
 9 @Controller
10 public class HelloController {
11
12     @RequestMapping(value = { "/", "/welcome" }, method = RequestMethod.GET)
13     public ModelAndView welcome() {
14
15         ModelAndView model = new ModelAndView();
16         model.addObject("title", "Spring Security Custom Login Form");
17         model.addObject("message", "This is welcome page!");
18         model.setViewName("hello");
19         return model;
20
21     }
22
23     @RequestMapping(value = "/admin", method = RequestMethod.GET)
24     public ModelAndView admin() {
25
26         ModelAndView model = new ModelAndView();
27         model.addObject("title", "Spring Security Custom Login Form");
28         model.addObject("message", "This is protected page!");
29         model.setViewName("admin");
30
31         return model;
32
33     }
34
35     //新增加的Action方法,映射到
36     // 1. /login 登录页面的常规显示
37     // 2. /login?error 登录验证失败的展示
38     // 3. /login?logout 注销登录的处理
39     @RequestMapping(value = "/login", method = RequestMethod.GET)
40     public ModelAndView login(
41             @RequestParam(value = "error", required = false) String error,
42             @RequestParam(value = "logout", required = false) String logout) {
43
44         ModelAndView model = new ModelAndView();
45         if (error != null) {
46             model.addObject("error", "Invalid username and password!");
47         }
48
49         if (logout != null) {
50             model.addObject("msg", "You've been logged out successfully.");
51         }
52         model.setViewName("login");
53
54         return model;
55
56     }
57
58 }
增加了一个login方法,映射到登录的三种情况(常规显示,出错展示,注销登录)
三、spring-security.xml
 1 <beans:beans xmlns="http://www.springframework.org/schema/security"
 2     xmlns:beans="http://www.springframework.org/schema/beans" xmlns:xsi="http://www.w3.org/2001/XMLSchema-instance"
 3     xsi:schemaLocation="http://www.springframework.org/schema/beans
 4     http://www.springframework.org/schema/beans/spring-beans-3.0.xsd
 5     http://www.springframework.org/schema/security
 6     http://www.springframework.org/schema/security/spring-security-3.2.xsd">
 7
 8     <http auto-config="true">
 9         <intercept-url pattern="/admin" access="ROLE_USER" />
10         <form-login login-page="/login" default-target-url="/welcome"
11             authentication-failure-url="/login?error" username-parameter="username"
12             password-parameter="password" />
13         <logout logout-success-url="/login?logout" />
14         <!-- enable csrf protection -->
15         <csrf />
16     </http>
17
18     <authentication-manager>
19         <authentication-provider>
20             <user-service>
21                 <user name="yjmyzz" password="123456" authorities="ROLE_USER" />
22             </user-service>
23         </authentication-provider>
24     </authentication-manager>
25
26 </beans:beans>
注意8-16行的变化,一看即懂,就不多做解释了
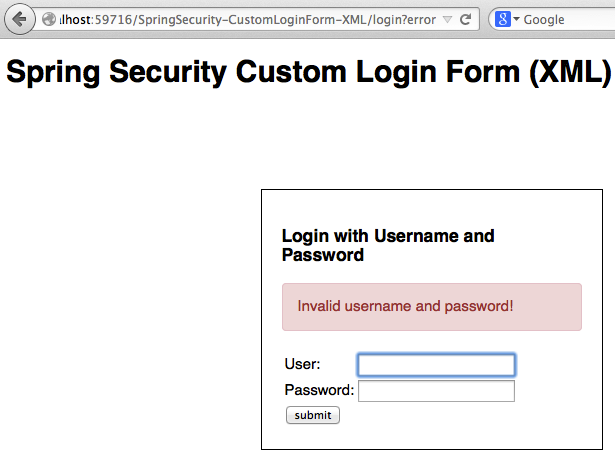
运行效果:
登录页正常显示的截图

登录失败的截图
有兴趣的还可以看下对应的html源代码

防跨站提交攻击的_csrf隐藏域,会生成一个随机的类似guid字符串来做校验,以确定本次http post确实是从本页面发起的,这跟asp.net里mac ViewState的思路一致。
最后附示例源代码下载:SpringSecurity-CustomLoginForm-XML(0717).zip