import cv2
import numpy as np
img = cv2.imread("Resources/The Legend of Zelda.jpg")
kernel = np.ones((5, 5), np.uint8) # 卷积核
# 颜色空间转换,转换成灰度图(注意是BGR而不是RBG)
imgGray = cv2.cvtColor(img, cv2.COLOR_BGR2GRAY)
# 平滑处理,高斯模糊, 高斯核的宽和高只能是奇数
imgBlur = cv2.GaussianBlur(imgGray, (5, 5), 0)
# 边缘检测, 实际也是采用了高斯模糊去除噪音并设置梯度阈值进行过滤
imgCanny = cv2.Canny(img, 150, 200)
# 膨胀,可以适当增加迭代次数
imgDilated = cv2.dilate(imgCanny, kernel, iterations=1)
# 侵蚀
imgEroded = cv2.erode(imgDilated, kernel, iterations=1)
# 缩小到0.2倍并拼接
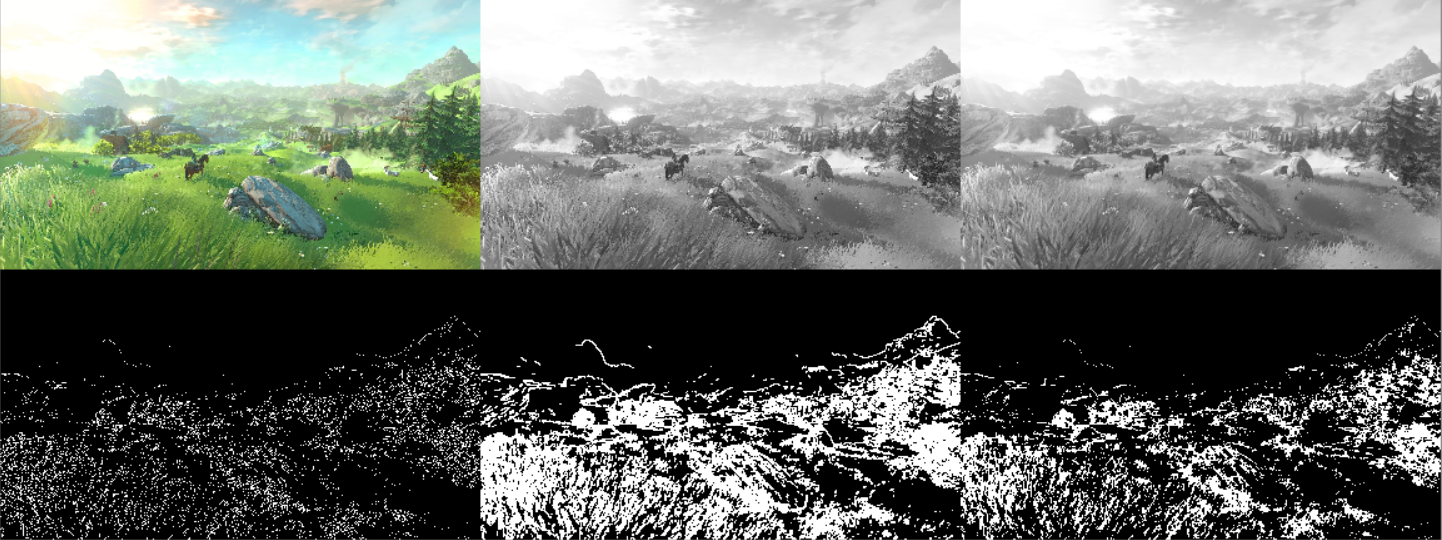
imgStack = stackImages(0.2, [[img, imgGray, imgBlur],
[imgCanny, imgDilated, imgEroded]])
cv2.imshow("Image Stack", imgStack)
cv2.waitKey(0)
其中stackImage函数的定义为
def stackImages(scale, imgArray):
    '''
    图像堆栈,可缩放,按列表排列,不受颜色通道限制
    '''
    rows = len(imgArray)
    cols = len(imgArray[0])
    rowsAvailable = isinstance(imgArray[0], list)
    width = imgArray[0][0].shape[1]
    height = imgArray[0][0].shape[0]
    if rowsAvailable:
        for x in range(0, rows):
            for y in range(0, cols):
                if imgArray[x][y].shape[:2] == imgArray[0][0].shape[:2]:
                    imgArray[x][y] = cv2.resize(imgArray[x][y], (0, 0), None, scale, scale)
                else:
                    imgArray[x][y] = cv2.resize(imgArray[x][y], (imgArray[0][0].shape[1], imgArray[0][0].shape[0]),
                                                None, scale, scale)
                if len(imgArray[x][y].shape) == 2:
                    imgArray[x][y] = cv2.cvtColor(imgArray[x][y], cv2.COLOR_GRAY2BGR)
        imageBlank = np.zeros((height, width, 3), np.uint8)
        hor = [imageBlank]*rows
        hor_con = [imageBlank]*rows
        for x in range(0, rows):
            hor[x] = np.hstack(imgArray[x])
        ver = np.vstack(hor)
    else:
        for x in range(0, rows):
            if imgArray[x].shape[:2] == imgArray[0].shape[:2]:
                imgArray[x] = cv2.resize(imgArray[x], (0, 0), None, scale, scale)
            else:
                imgArray[x] = cv2.resize(imgArray[x], (imgArray[0].shape[1], imgArray[0].shape[0]), None,scale, scale)
            if len(imgArray[x].shape) == 2:
                imgArray[x] = cv2.cvtColor(imgArray[x], cv2.COLOR_GRAY2BGR)
        hor = np.hstack(imgArray)
        ver = hor
    return ver
封装了numpy中的vstack和hstack,方便使用
效果:
更多图像处理可参考官方文档:https://docs.opencv.org/master/d2/d96/tutorial_py_table_of_contents_imgproc.html