前言
前不久看到一篇《.NET Core 在腾讯财付通的企业级应用开发实践》,给现在研究.Net Core及想往微服务方向发展的人来了一剂强心针。于是我也就立刻去下Ocelot的源码及去阅读官方文档。
Ocelot的Github地址:https://github.com/TomPallister/Ocelot
官方文档地址:http://ocelot.readthedocs.io
环境及安装
目前版本的Ocelot是基于.Net core 2.0开发的,所以你的项目也得是.net core2.0及以上的。
- 新建一个netcoreapp2.0 项目
dotnet new console -n ApiGateway
- 安装Ocelot
dotnet add package Ocelot
- 编写代码
Progarm.cs
using System;
using System.IO;
using Microsoft.AspNetCore.Hosting;
using Microsoft.Extensions.DependencyInjection;

namespace ApiGateway
{
    class Program
    {
        static void Main(string[] args)
        {
            IWebHostBuilder builder = new WebHostBuilder();

            builder.ConfigureServices(s => {
                s.AddSingleton(builder);
            });

            builder.UseKestrel()
                .UseContentRoot(Directory.GetCurrentDirectory())
                .UseStartup<Startup>();

            var host = builder.Build();

            host.Run();
        }
    }
}
Startup.cs
using Microsoft.AspNetCore.Builder;
using Microsoft.AspNetCore.Hosting;
using Microsoft.Extensions.Configuration;
using Microsoft.Extensions.DependencyInjection;
using Microsoft.Extensions.Logging;
using Ocelot.DependencyInjection;
using Ocelot.Middleware;
using CacheManager.Core;
using ConfigurationBuilder = Microsoft.Extensions.Configuration.ConfigurationBuilder;
using System;

namespace ApiGateway
{
    public class Startup
    {
        public Startup(IHostingEnvironment env)
        {
            var builder = new ConfigurationBuilder()
                .SetBasePath(env.ContentRootPath)
                .AddJsonFile("appsettings.json", optional: true, reloadOnChange: true)
                .AddJsonFile($"appsettings.{env.EnvironmentName}.json", optional: true)
                .AddJsonFile("configuration.json")
                .AddEnvironmentVariables();

            Configuration = builder.Build();
        }

        public IConfigurationRoot Configuration { get; }

        public void ConfigureServices(IServiceCollection services)
        {
            services.AddOcelot(Configuration); //此处添加Ocelot服务
        }

        public void Configure(IApplicationBuilder app, IHostingEnvironment env, ILoggerFactory loggerFactory)
        {
            loggerFactory.AddConsole(Configuration.GetSection("Logging"));

            app.UseOcelot().Wait();//此处使用Ocelot服务
        }
    }
}
- 编写配置文件
大家可能看到了上述代码中使用了几个json文件,我们将configuration.json走位Ocelot的配置文件使用,具体配置内容下面会细说
{
    "ReRoutes": [],
    "GlobalConfiguration": {}
}
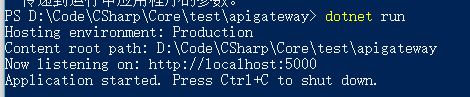
至此,一个可运行的API网关即搭建完成(虽然什么都没有)
配置
Ocelot的使用基本是靠配置完成,我根据官方文档整理了一份对配置文件的理解,请参考下面注释
{
    "ReRoutes": [
    {//官方文档ReRoutes全节点示例
      //Upstream表示上游请求,即客户端请求到API Gateway的请求
      "UpstreamPathTemplate": "/", //请求路径模板
      "UpstreamHttpMethod": [ //请求方法数组
        "Get"
      ],

      //Downstreamb表示下游请求,即API Gateway转发的目标服务地址
      "DownstreamScheme": "http", //请求协议,目前应该是支持http和https
      "DownstreamHost": "localhost", //请求服务地址,应该是可以是IP及域名
      "DownstreamPort": 51779, //端口号
      "DownstreamPathTemplate": "/", //下游请求地址模板
      "RouteClaimsRequirement": { //标记该路由是否需要认证
        "UserType": "registered" //示例,K/V形式,授权声明,授权token中会包含一些claim,如填写则会判断是否和token中的一致,不一致则不准访问
      },
      //以下三个是将access claims转为用户的Header Claims,QueryString,该功能只有认证后可用
      "AddHeadersToRequest": { //
        "UserType": "Claims[sub] > value[0] > |", //示例
        "UserId": "Claims[sub] > value[1] > |"//示例
      },
      "AddClaimsToRequest": {},
      "AddQueriesToRequest": {},

      "RequestIdKey": "", //设置客户端的请求标识key,此key在请求header中,会转发到下游请求中
      "FileCacheOptions": { //缓存设置
        "TtlSeconds": 15, //ttl秒被设置为15,这意味着缓存将在15秒后过期。
        "Region": "" //缓存region,可以使用administrator API清除
      },
      "ReRouteIsCaseSensitive": false, //路由是否匹配大小写
      "ServiceName": "", //服务名称,服务发现时必填

      "QoSOptions": { //断路器配置,目前Ocelot使用的Polly
        "ExceptionsAllowedBeforeBreaking": 0, //打开断路器之前允许的例外数量。
        "DurationOfBreak": 0,                 //断路器复位之前,打开的时间(毫秒)
        "TimeoutValue": 0                     //请求超时时间(毫秒)
      },
      "LoadBalancer": "", //负载均衡 RoundRobin(轮询)/LeastConnection(最少连接数)
      "RateLimitOptions": { //官方文档未说明
        "ClientWhitelist": [],
        "EnableRateLimiting": false,
        "Period": "",
        "PeriodTimespan": 0,
        "Limit": 0
      },
      "AuthenticationOptions": { //认证配置
        "AuthenticationProviderKey": "", //这个key对应的是代码中.AddJWTBreark中的Key
        "AllowedScopes": []//使用范围
      },
      "HttpHandlerOptions": {
        "AllowAutoRedirect": true, //指示请求是否应该遵循重定向响应。 如果请求应该自动遵循来自Downstream资源的重定向响应,则将其设置为true; 否则为假。 默认值是true。
        "UseCookieContainer": true //该值指示处理程序是否使用CookieContainer属性来存储服务器Cookie,并在发送请求时使用这些Cookie。 默认值是true。
      },
      "UseServiceDiscovery": false //使用服务发现,目前Ocelot只支持Consul的服务发现
    }
    ],
    "GlobalConfiguration": {}
}
路由 Routing
路由是API网关的标配,Ocelot会将上游请求(Upstream)转发到下游请求(Downstream)
示例:
{
    "DownstreamPathTemplate": "/api/posts/{postId}",
    "DownstreamScheme": "https",
    "DownstreamPort": 80,
    "DownstreamHost" "localhost",
    "UpstreamPathTemplate": "/posts/{postId}",
    "UpstreamHttpMethod": [ "Put", "Delete" ]
}
其中使用{任意字符}括住的作为占位符变量使用,转发请求时,会将下游请求的{任意字符}替换为上游请求的{任意字符}。
Ocelot的默认路由是不区分大小写的,如果需要区分大小写,需要增加如下配置
"ReRouteIsCaseSensitive": true
了解路由后一个基础的API网关就建立而成了,下一篇讲介绍下其他功能