一、strtus:第1步:把上面的jar包下载完成后,先在eclipse中新建一个web工程,新建工程的同时最好选上创建的同时添加web.xml文件
第2步:找到下载并解压好的strtus文件中找到apps目录下的strtus2-blank.war的压缩包,再找到这个压缩包中WEB-INF目录下的lib目录,最后将lib中的所有jar包复制到我们新建项目的lib包中
第3步:配置web.xml文件,找到前面lib包所在的同级目录下的web.xml文件,复制出其配置的过滤器,
注意:由于struts版本不同所以其配置的过滤器写法上略有差异,我们一般参照官方给的模板
第4步:我们可以写我们的action类了,编写action类我们一般会继承ActionSupport父类在aciton类中我们可以定义一个返回值为String类型的execute()方法[该方法为默认方法]。这里的action我们可以简单理解为MVC模式下的控制器
第5步:我们需要配置一个非常重要的struts.xml文件,我们还是找到前面lib包所在同级目录下的src目录下的java目录下的struts.xml文件将xml文件头信息复制出来
第6步:运行项目
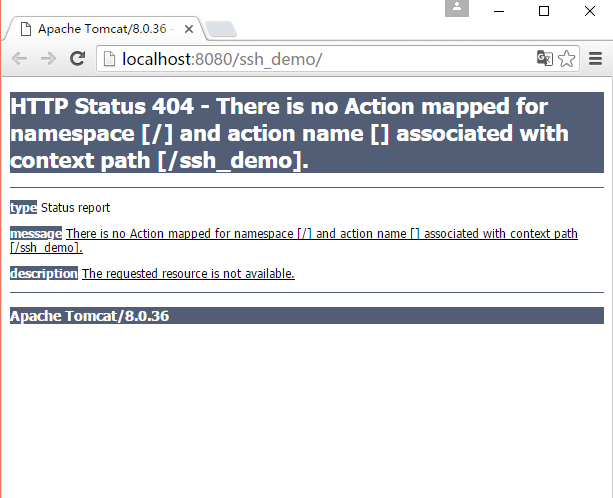
此时我们发现我们的请求已经被struts成功拦截,接下来我们输入我们正确的访问路径也就是我们上一步配置action中name属性的值

如图所示页面已经正常显示,最后我们看一下后台

二、Spring
简介:从简单性、可测试性和松耦合的角度而言,任何java应用都可以从Spring中受益。简单来说,Sring就是一个轻量级的控制反转(IoC)和页面切向(AOP)容器框架。
1)本质:监听器(就像一只鹰,盘旋在空中,监视着程序运行,在程序运行过程中负责注入实例)
2)功能:管理所用到的实现类。
3)在 eclipse 中使用 Spring4(配置好 Struts 的基础上):
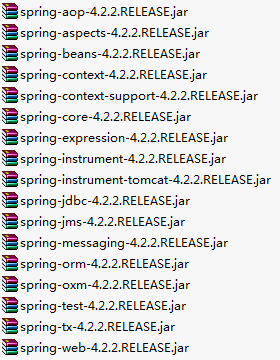
①、导入相应的 jar 包( spring 官方包里,lib 目录里除了带 resource 和 javadoc 后缀的jar包):
②、配置 web.xml 文件添加 Listener

<!-- spring的监听器配置开始 -->
        <!-- 配置上下文参数,保存 applicationContext.xml 文件的路径,该文件一般直接写在 src 目录下 -->
    <context-param>
                <!-- 参数名称(固定不变) -->
        <param-name>contextConfigLocation</param-name>
                <!-- classpath(既 src 目录)":"等价于"/",多个配置文件之间用","隔开 -->
        <param-value>classpath:applicationContext.xml,classpath:xxx.xml,……</param-value>
    </context-param>
    <!-- 监听器配置 -->
    <listener>
        <listener-class>org.springframework.web.context.ContextLoaderListener</listener-class>
    </listener>
<?xml version="1.0" encoding="UTF-8"?>
<beans xmlns="http://www.springframework.org/schema/beans"
        xmlns:xsi="http://www.w3.org/2001/XMLSchema-instance"
        xmlns:p="http://www.springframework.org/schema/p"
        xmlns:aop="http://www.springframework.org/schema/aop"
        xmlns:context="http://www.springframework.org/schema/context"
        xmlns:jee="http://www.springframework.org/schema/jee"
        xmlns:tx="http://www.springframework.org/schema/tx"
        xsi:schemaLocation="
            http://www.springframework.org/schema/aop http://www.springframework.org/schema/aop/spring-aop-4.2.xsd
            http://www.springframework.org/schema/beans http://www.springframework.org/schema/beans/spring-beans-4.2.xsd
            http://www.springframework.org/schema/context http://www.springframework.org/schema/context/spring-context-4.2.xsd
            http://www.springframework.org/schema/jee http://www.springframework.org/schema/jee/spring-jee-4.2.xsd
            http://www.springframework.org/schema/tx http://www.springframework.org/schema/tx/spring-tx-4.2.xsd">
    <!-- 类似于财务部门一样,类就是钱,所有需要类的实例都由srping去管理 -->
        <!-- 给 Struts 注入相应的实现类 -->
    <bean id="myIndexAction" class="ssh.action.IndexAction" scope="prototype">
        <!-- 等价于 setIs(myIndexService),实现注入 -->
        <property name="is" ref="myIndexService"/>
    </bean>

    <!-- 等价于myIndexService = new ssh.service.IndexServiceImpl() -->
    <bean id="myIndexService" class="ssh.service.IndexServiceImpl" scope="prototype">
        <property name="id" ref="myIndexDao"/>
    </bean>
    <!-- 同上 -->
    <bean id="myIndexDao" class="ssh.dao.IndexDaoImpl" scope="prototype">
     <!-- 加入 hibernate 的配置信息,这里先不用管 -->
        <property name="sf" ref="sessionFactory"></property>
    </bean>
</beans>
Hibernate工作原理及为什么要用?
原理:
1.通过Configuration().configure();读取并解析hibernate.cfg.xml配置文件
2.由hibernate.cfg.xml中的<mapping resource="com/xx/User.hbm.xml"/>读取并解析映射信息
3.通过config.buildSessionFactory();//创建SessionFactory
4.sessionFactory.openSession();//打开Sesssion
5.session.beginTransaction();//创建事务Transation
6.persistent operate持久化操作
7.session.getTransaction().commit();//提交事务
8.关闭Session
9.关闭SesstionFactory
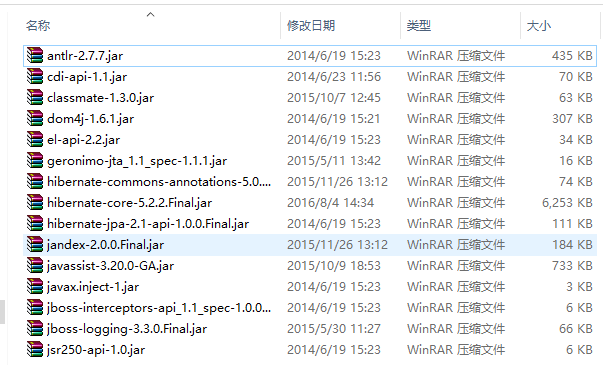
第1步:我们依旧需要引入hibernate的jar包
找到hibernate解压好的文件目录,在该目录下的lib目录下有一个required目录,将该目录下的所有jar包引入到我们项目的lib目录下。
第2步:我们又要和配置文件打交道了,首先我们要配置一个在src目录下的一个实体映射文件entityname.hbm.xml。
 1 <?xml version="1.0" encoding="UTF-8"?>
 2 <!DOCTYPE hibernate-mapping PUBLIC
 3     "-//Hibernate/Hibernate Mapping DTD 3.0//EN"
 4     "http://www.hibernate.org/dtd/hibernate-mapping-3.0.dtd">
 5 <hibernate-mapping>
 6     <class name="entity.BookCard" table="BookCard">
 7         <id name="cid" column="cid"></id>
 8         <property name="name"  column="name" type="string" length="50" not-null="true"></property>
 9         <property name="sex" column="sex"></property>
10         <property name="cardDate" column="cardDate"></property>
11         <property name="deposit" column="deposit"></property>
12     </class>
13 </hibernate-mapping>
 1 <?xml version="1.0" encoding="utf-8"?>
 2 <!DOCTYPE hibernate-configuration PUBLIC
 3     "-//Hibernate/Hibernate Configuration DTD 3.0//EN"
 4     "http://www.hibernate.org/dtd/hibernate-configuration-3.0.dtd">
 5
 6 <hibernate-configuration>
 7     <session-factory name="foo">
 8         <!-- 配置mySql连接参数 -->
 9          <property name="dialect">org.hibernate.dialect.MySQL5Dialect</property>
10          <property name="connection.pool_size">5</property>
11          <property name="show_sql">true</property>
12          <property name="format_sql">true</property>
13          <property name="hbm2ddl.auto">update</property>
14
15          <property name="connection.driver_class">com.mysql.jdbc.Driver</property>
16          <property name="connection.url">jdbc:mysql://localhost:3306/CardDB</property>
17          <property name="connection.username">root</property>
18          <property name="connection.password">123456</property>
19
20          <mapping resource="BookCard.hbm.xml"/>
21     </session-factory>
22
23 </hibernate-configuration>

页面中的数据已经成功显示
