一、Python环境搭建
- 从Docker Hub上拉取Python镜像
本次实验选择的Python镜像版本为Python:3
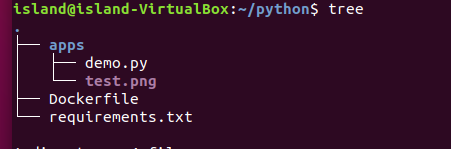
- 文件结构
- Dockerfile
安装第三方库的时候可能会出现超时问题,可以在换源,在pip install 后面添加 -i https://pypi.tuna.tsinghua.edu.cn/simple,如果换源之后还会出现超时,则在pip install 在添加--default-timeout=100,来修改默认等待时间。
FROM python:3
MAINTAINER ISLAND
WORKDIR /usr/src/app
COPY requirements.txt ./
RUN pip install  --default-timeout=100 --no-cache-dir -i https://pypi.tuna.tsinghua.edu.cn/simple -r requirements.txt
VOLUME /usr/src/app
CMD ["python","demo.py"]
- 构建Python镜像
docker build -t python:v1 .

- 创建一个网络,接下来的Mysql和Python容器均要运行在同一个网络中才能相互访问。
docker network create --subnet=172.1.0.0/16 py_mysql

二、测试
- Hello World程序

- 日历输出

- 对数据库增加数据操作

- 查询数据操作

- 修改数据操作

- 删除数据操作

- 使用OpenCV进行绘图
将绘制好的图线保存在宿主机中。
import numpy as np
import cv2
# Create a black image
img = np.zeros((512,512,3), np.uint8)

# Draw a diagonal blue line with thickness of 5 px
img = cv2.line(img,(0,0),(511,511),(255,0,0),5)

img = cv2.circle(img,(447,63), 63, (0,0,255), -1)
img = cv2.ellipse(img,(256,256),(100,50),0,0,180,255,-1)
pts = np.array([[10,5],[20,30],[70,20],[50,10]], np.int32)
pts = pts.reshape((-1,1,2))
img = cv2.polylines(img,[pts],True,(0,255,255))
font = cv2.FONT_HERSHEY_SIMPLEX
cv2.putText(img,'OpenCV',(10,500), font, 4,(255,255,255),2,cv2.LINE_AA)

cv2.imwrite('test.png',img)
三、问题&&解决办法&&时长
问题&&解决办法
- 安装第三库超时
pip install 后面添加 --default-timeout=100 -i https://pypi.tuna.tsinghua.edu.cn/simple。
- 无法连接数据库
docker创建的容器会处于不同的网络当中,在这种情况下两个容器是不相痛的。因此我们可以先创建一个网络,然后在把容器都放在自己创建的网络当中,这样两个容器就可以相互访问了。
- Linux无法直接图形
Ubuntu的内核是linux,从本质上讲,这个系统是没有图形化界面,因此我们直接使用OpenCV的cv2.imshow()方法是无法直接显示的,后来我去安装了一下matplotlib也无法直接显示图片,最终的结论是只能先把处理好的图片用cv2.imwrite()保存在文件中,然后在查看。