首先要安装好netcore运行环境
现在我们已经发布好了项目,并且压缩为tar格式
创建netcore文件夹
命令:mkdir netcore
上传到netcore目录下,使用rz

然后解压到当前目录
命令:tar -xvf TestNetcore3.tar

查看目录

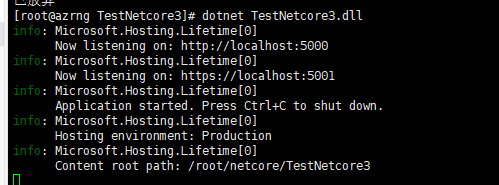
现在我们进入到TestNetcore3文件夹里面去运行项目

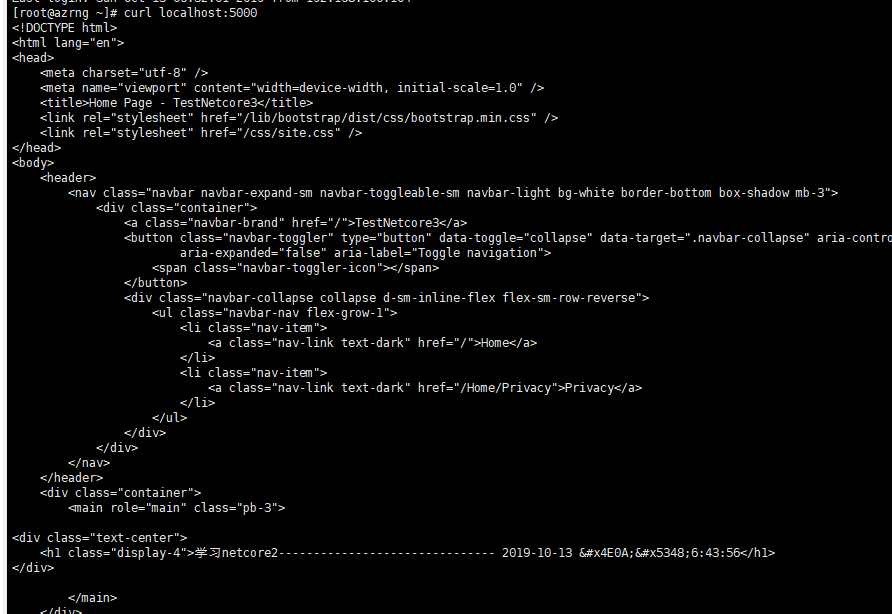
然后去内部访问一下这个端口

是我们刚才创建的项目,那么我们外部访问下
访问不同,这个时候我们应该使用Nginx
安装步骤:
第一步:sudo yum install epel-release
第二步:sudo yum install nginx
第三步:启动 sudo systemctl start nginx
设置nginx开始启动:systemctl enable nginx
其他命令:
systemctl disable nginx #禁止开机启动
systemctl status nginx #查看运行状态
systemctl restart nginx #重启服务
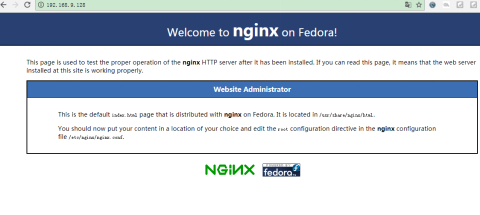
在浏览器上输入Nginx所在服务器的IP地址,可以看到欢迎页表示安装成功,如果无法访问可以检查下安装Nginx步骤或者防火墙之类的。
If you are running a firewall, run the following commands to allow HTTP and HTTPS traffic:
如果有运行防火墙,那需要允许http和https的通道访问,运行下面三个命令:
sudo firewall-cmd --permanent --zone=public --add-service=http
sudo firewall-cmd --permanent --zone=public --add-service=https
sudo firewall-cmd --reload

下一步我们需要去监听5000端口
当前我们是在root文件夹下,我们需要进入etc/nginx目录,所以我们需要先访问上层

然后进入指定的目录文件夹中
命令:cd /etc/nginx

进入conf.d
命令:cd conf.d/

Netcore.conf是我们的第一个网站,现在我们需要重新创建一个

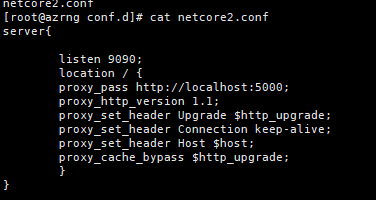
然后编辑netcore2.conf,使用vim编辑,可能需要安装(yum -y install vim)

在里面加入:
server{
listen 9090;
location / {
proxy_pass http://localhost:5000;
proxy_http_version 1.1;
proxy_set_header Upgrade $http_upgrade;
proxy_set_header Connection keep-alive;
proxy_set_header Host $host;
proxy_cache_bypass $http_upgrade;
}
}
然后查看下

然后修改为立即生效nginx -s reload 或者 systemctl restart nginx #重启服务

然后再次访问
但是那个命令nginx -s reload有时候不生效,需要systemctl restart nginx或者杀死进程重新启用
杀死进程:
资料来源:https://www.cnblogs.com/waynechan/p/9437934.html
错误解决:https://blog.csdn.net/quanqxj/article/details/89375436