一、安装conda
![]()


二、安装CUDA
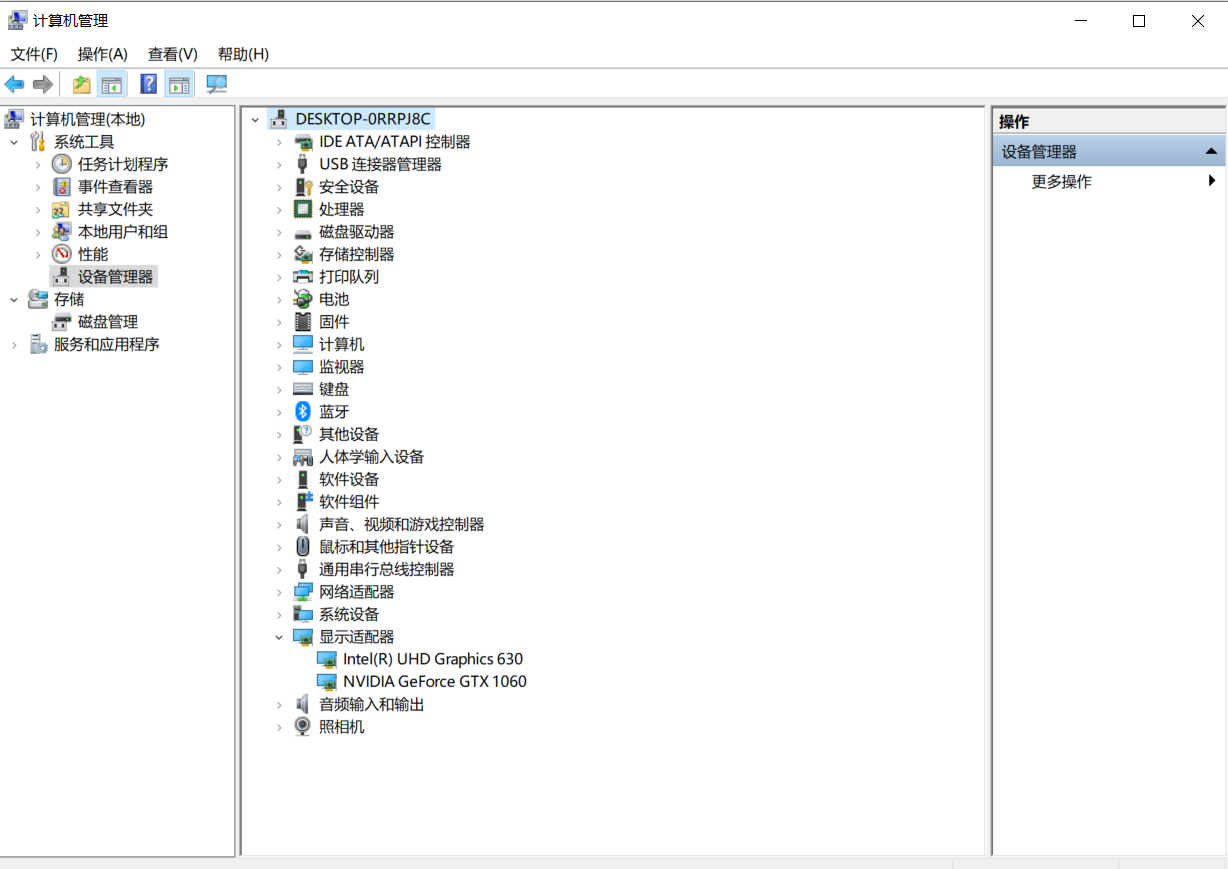
1、查看显卡型号:我的电脑——》管理---->设备管理器——》显示适配器,可以看到GTX1060
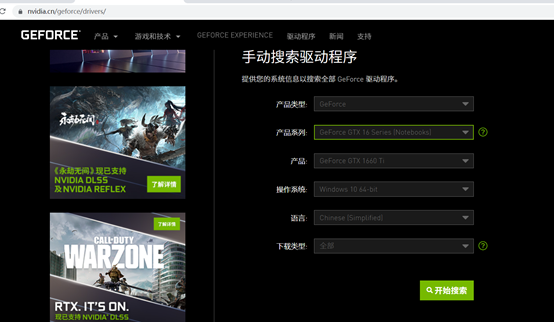
2、下载相应的控制面板
3、查看控制面板:控制面板-》硬件和声音-》NVIDIA控制面板,左下角系统信息,组件。


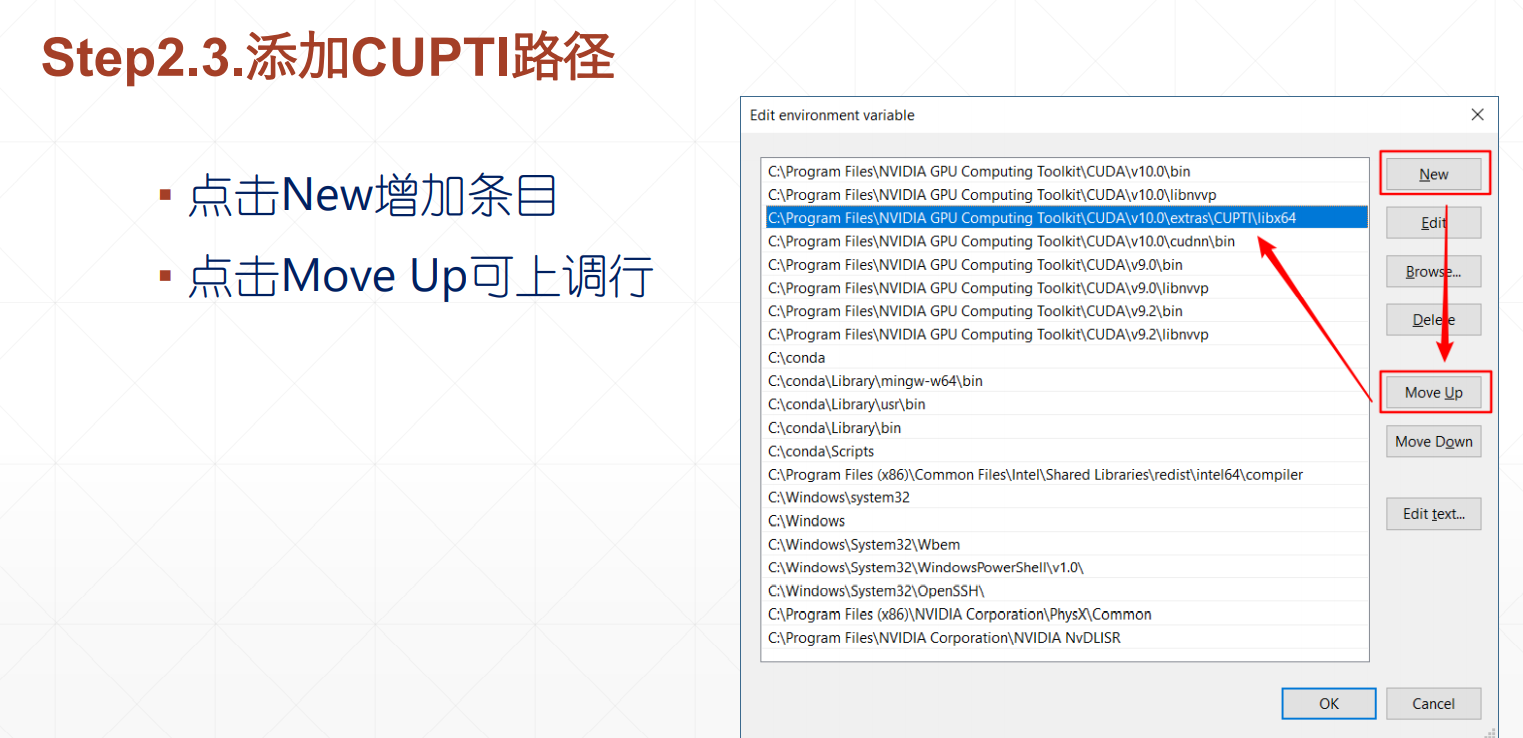
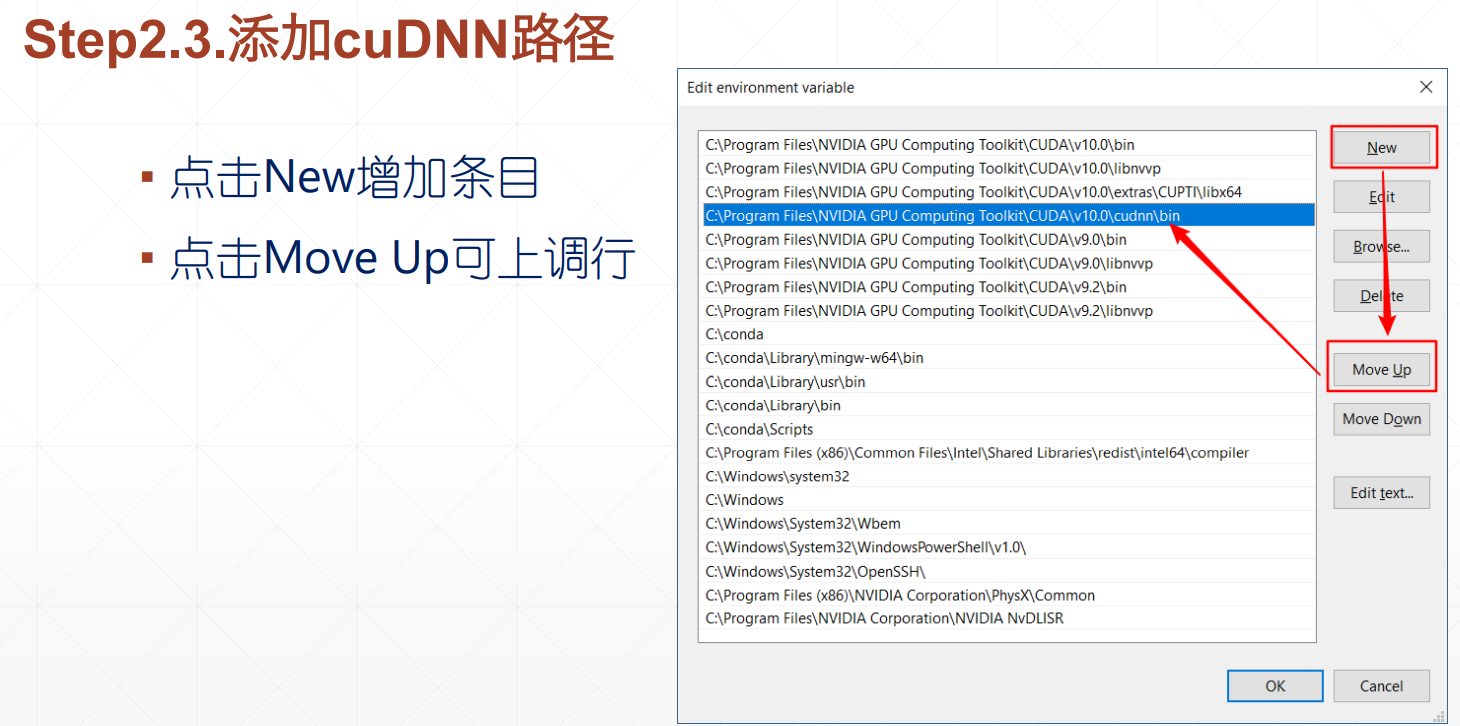
注意,路径不要变

一、删除镜像
# 换回默认源(清除所有用户添加的镜像源路径,只保留默认的路径) conda config --remove-key channels
# 显示所有镜像通道路径命令
conda config --show channels
#删除环境conda remove -n rcnn --all
二、添加镜像
conda config --add channels https://mirrors.tuna.tsinghua.edu.cn/anaconda/pkgs/free conda config --add channels https://mirrors.tuna.tsinghua.edu.cn/anaconda/pkgs/main conda config --add channels https://mirrors.tuna.tsinghua.edu.cn/anaconda/pkgs/pro conda config --add channels https://mirrors.tuna.tsinghua.edu.cn/anaconda/pkgs/msys2conda config --add channels https://mirrors.tuna.tsinghua.edu.cn/anaconda/cloud/pytorch
conda config --set show_channel_urls yes三、创建环境
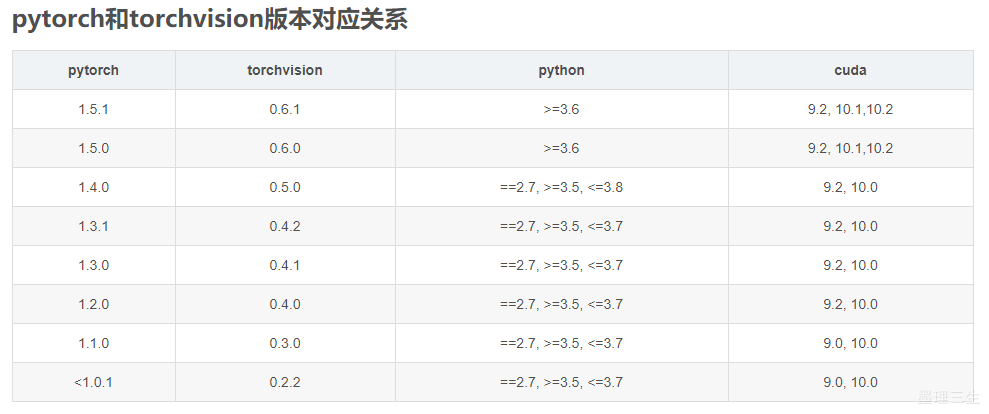
注意,只能下载python3.7以下。如pytorch1.2,torchvision0.4,python3.7cuda10.0
conda clean -i
conda create -n pt_gpu python=3.7
activate pt_gpu
四、安装
conda install pytorch torchvision cudatoolkit=10.0
pip install sentence_transformers
pip install faiss-cpu
pip install tensorflow-gpu==1.14.0
或者
pip install tensorflow==1.13.0rc1 transformers sentence_transformers faiss-cpu
五、验证
import torch
print(torch.__version__)
print("gpu:", torch.cuda.is_available())
六、安装tensorflow
conda create -n tf2 python=3.7
conda activate tf2
pip install tensorflow-gpu==2.0.0-rc0
import os
os.environ['TF_CPP_MIN_LOG_LEVEL']='2'

import tensorflow as tf

a = tf.constant(1.)
b = tf.constant(2.)
print(a+b)

print('GPU:', tf.test.is_gpu_available())