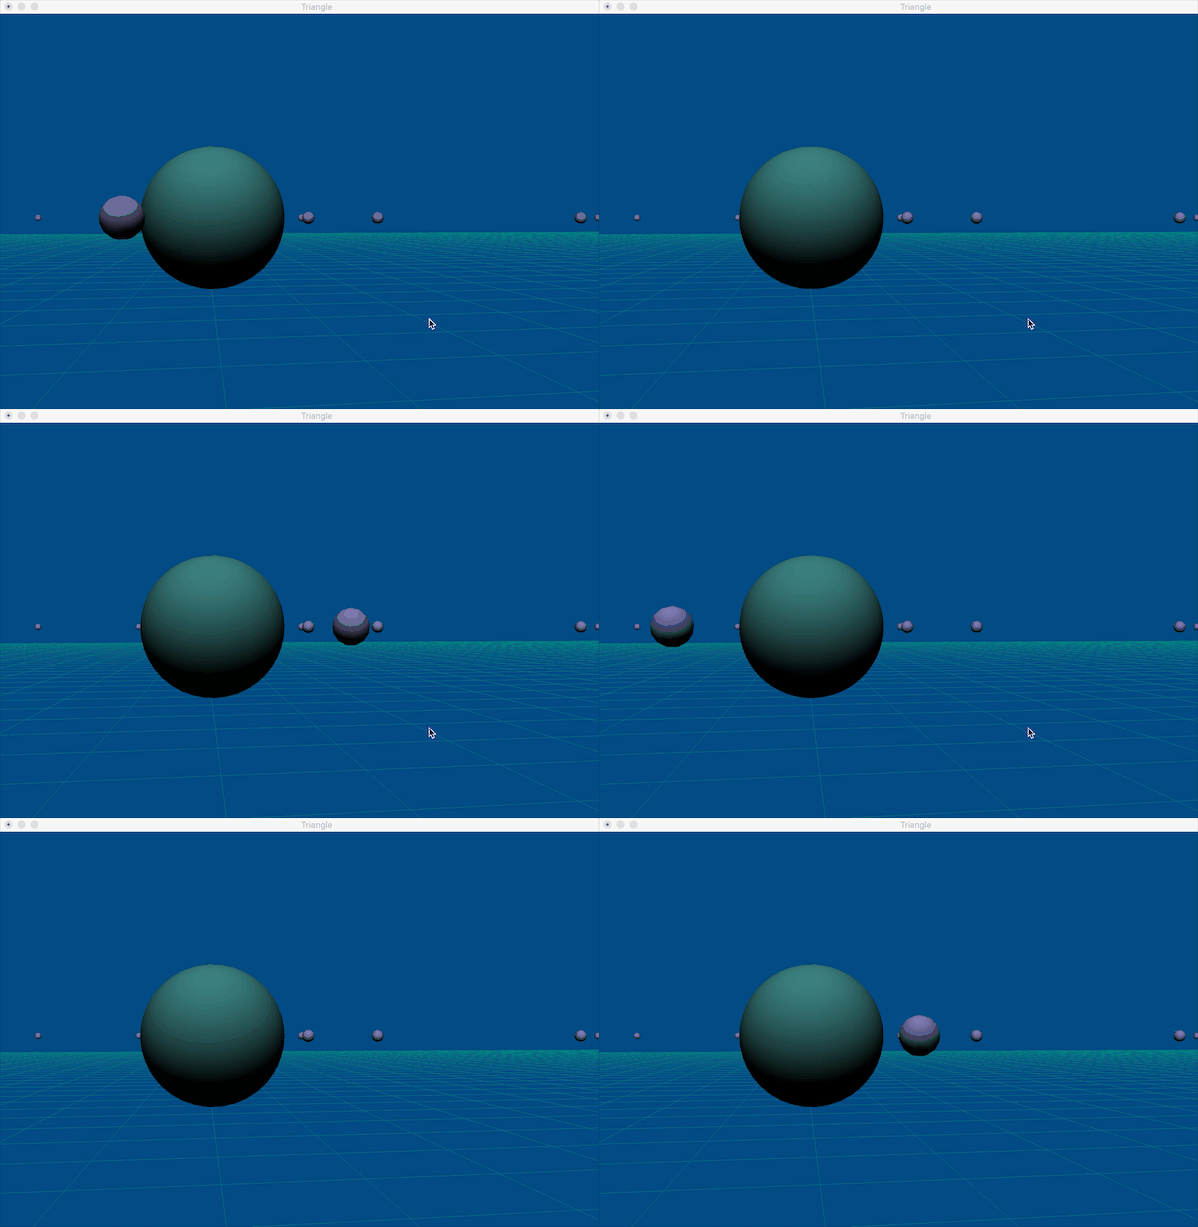
综合demo案例,效果如下

一、主要代码
  1 // 初始化 设置
  2 void SetupRC() {
  3
  4     // 初始化
  5     glClearColor(0, 0.3, 0.5, 1);
  6     shaderManager.InitializeStockShaders();
  7     // 开启深度测试 -- 球体转动
  8     glEnable(GL_DEPTH_TEST);
  9
 10     // 地板的顶点数据
 11     floorTriangleBatch.Begin(GL_LINES, 324);// line 方式绘制连接,324个顶点
 12     for (GLfloat x = -20.f; x <= 20.f; x += 0.5f) {
 13         floorTriangleBatch.Vertex3f(x, -0.5f, 20.f);
 14         floorTriangleBatch.Vertex3f(x, -0.5f, -20.f);
 15         floorTriangleBatch.Vertex3f(20.f, -0.5f, x);
 16         floorTriangleBatch.Vertex3f(-20.f, -0.5f, x);
 17     }
 18     floorTriangleBatch.End();
 19
 20     // 设置大球模型
 21     gltMakeSphere(bigSphereBatch, 0.4f, 40, 80);// 半径,切40
 22
 23     // 设置小球模型
 24     gltMakeSphere(sphereBatch, 0.1f, 13, 26);
 25     // 小球们的位置
 26 //    sphere.SetOrigin(-1.f,0.0f,-1.f);
 27     for (int i=0; i<SPHERE_NUM; i++) {
 28         // y轴不变,X,Z产生随机值
 29         GLfloat x = ((GLfloat)((rand() % 400) - 200 ) * 0.1f);
 30         GLfloat z = ((GLfloat)((rand() % 400) - 200 ) * 0.1f);
 31         // 设置球的位置
 32         spheres[i].SetOrigin(x,0.0f,z);
 33     }
 34
 35 }
 36
 37
 38
 39 // 渲染
 40 void RenderScene(void) {
 41
 42     // 清除窗口 颜色、深度缓冲区
 43     glClear(GL_COLOR_BUFFER_BIT | GL_DEPTH_BUFFER_BIT);
 44
 45     // 颜色们
 46     static GLfloat vFloorColor[] = {0.0, 0.5, 0.5, 1};// 地板颜色
 47     static GLfloat vBigSphereColor[] = {0.3, 0.5, 0.5, 1};// 大球颜色
 48     static GLfloat vSphereColor[] = {0.5, 0.5, 0.7, 1};// 小球颜色
 49
 50     // 定时器时间 动画 --> 大球自传
 51     static CStopWatch rotTimer;
 52     float yRot = rotTimer.GetElapsedSeconds() * 60.0f;
 53
 54     modelViewMatix.PushMatrix();// 压栈 --> copy 一份栈顶矩阵 --> 单元矩阵
 55
 56
 57     // 观察者矩阵压栈
 58     /*
 59      观察者的移动要影响到所有绘制物体,所以要 先压栈
 60      */
 61     M3DMatrix44f cameraM;
 62     cameraFrame.GetCameraMatrix(cameraM);
 63     modelViewMatix.PushMatrix(cameraFrame);
 64
 65
 66     // 地板
 67     shaderManager.UseStockShader(GLT_SHADER_FLAT,transformPipeline.GetModelViewProjectionMatrix(),vFloorColor);
 68     floorTriangleBatch.Draw();
 69
 70
 71     // 大球
 72     M3DVector4f vLightPos = {0.0f,10.0f,5.0f,1.0f};// 点光源位置
 73     modelViewMatix.Translate(0, 0, -3.0f);// 向屏幕里面(-z)移动 3 --> 只移动一次
 74
 75     modelViewMatix.PushMatrix();// 压栈 -- 模型视图矩阵(经过了一次平移的结果矩阵)
 76     modelViewMatix.Rotate(yRot, 0, 1, 0);// yRot:旋转角度 沿Y轴转动
 77     shaderManager.UseStockShader(GLT_SHADER_POINT_LIGHT_DIFF,transformPipeline.GetModelViewMatrix(),transformPipeline.GetProjectionMatrix(),vLightPos,vBigSphereColor);// GLT_SHADER_POINT_LIGHT_DIFF:电光源着色器;vLightPos:光源位置;vBigSphereColor:绘制颜色
 78     bigSphereBatch.Draw();
 79     // 绘制大球后 pop出大球的绘制矩阵
 80     modelViewMatix.PopMatrix();
 81
 82
 83     // 随机摆放的小球们
 84 //    modelViewMatix.PushMatrix();
 85 //    modelViewMatix.MultMatrix(sphere);
 86 //    shaderManager.UseStockShader(GLT_SHADER_POINT_LIGHT_DIFF,transformPipeline.GetModelViewMatrix(),transformPipeline.GetProjectionMatrix(),vLightPos,vSphereColor);
 87 //    sphereBatch.Draw();
 88 //    modelViewMatix.PopMatrix();
 89     for (int i=0; i<SPHERE_NUM; i++) {
 90         modelViewMatix.PushMatrix();
 91         modelViewMatix.MultMatrix(spheres[i]);
 92         shaderManager.UseStockShader(GLT_SHADER_POINT_LIGHT_DIFF,transformPipeline.GetModelViewMatrix(),transformPipeline.GetProjectionMatrix(),vLightPos,vSphereColor);
 93         sphereBatch.Draw();
 94
 95         modelViewMatix.PopMatrix();
 96     }
 97
 98     // 围绕大球旋转的小球
 99     /*
100      --> 为什么没有压栈呢??? --> 此球是绘制的最后一步了,它的绘制不会影响其他(后面没有其他了),所以没有必要压栈
101      压栈的目的是绘制 不同物体时 不同的矩阵变换 不要彼此影响
102      */
103     modelViewMatix.Rotate(yRot * -2, 0, 1, 0);// 旋转弧度 yRot * -2 --> +2、-2 旋转方向
104     modelViewMatix.Translate(0.8f, 0, 0);// 小球X轴上平移一下,0.8f-->越大距离大球越远
105     shaderManager.UseStockShader(GLT_SHADER_POINT_LIGHT_DIFF,transformPipeline.GetModelViewMatrix(),transformPipeline.GetProjectionMatrix(),vLightPos,vSphereColor);
106     sphereBatch.Draw();
107
108
109     // 观察者矩阵出栈
110     modelViewMatix.PopMatrix();
111
112     // pop 出绘制初始的压栈
113     modelViewMatix.PopMatrix();
114
115     // 交换缓冲区
116     glutSwapBuffers();
117
118     // 重新绘制
119     glutPostRedisplay();
120 }
二、重点总结
1)整体绘制思路:
1、绘制地板
2、绘制大球
3、绘制随机的50个小球
4、绘制围绕大球旋转的小球
5、添加键位控制移动 -- 压栈观察者矩阵
2)压栈
RenderScene中,压栈逻辑:
压栈一个单元矩阵
--> 压栈观察者矩阵 --> 绘制地板
--> 压栈 绘制大球--> 大球绘制结束 --> 出栈
--> 压栈 绘制小球们 --> 小球们绘制完成 --> 出栈
--> 绘制旋转的小球 --> 绘制完成
--> 观察者矩阵出栈
--> 整体出出栈