第一种,使用官网操作:
1、环境准备
- jdk1.8
- Maven 3.6.3
- Springboot:最新版
- IDEA
官方提供了一个快速生成的网站,IDEA集成了这个网站、
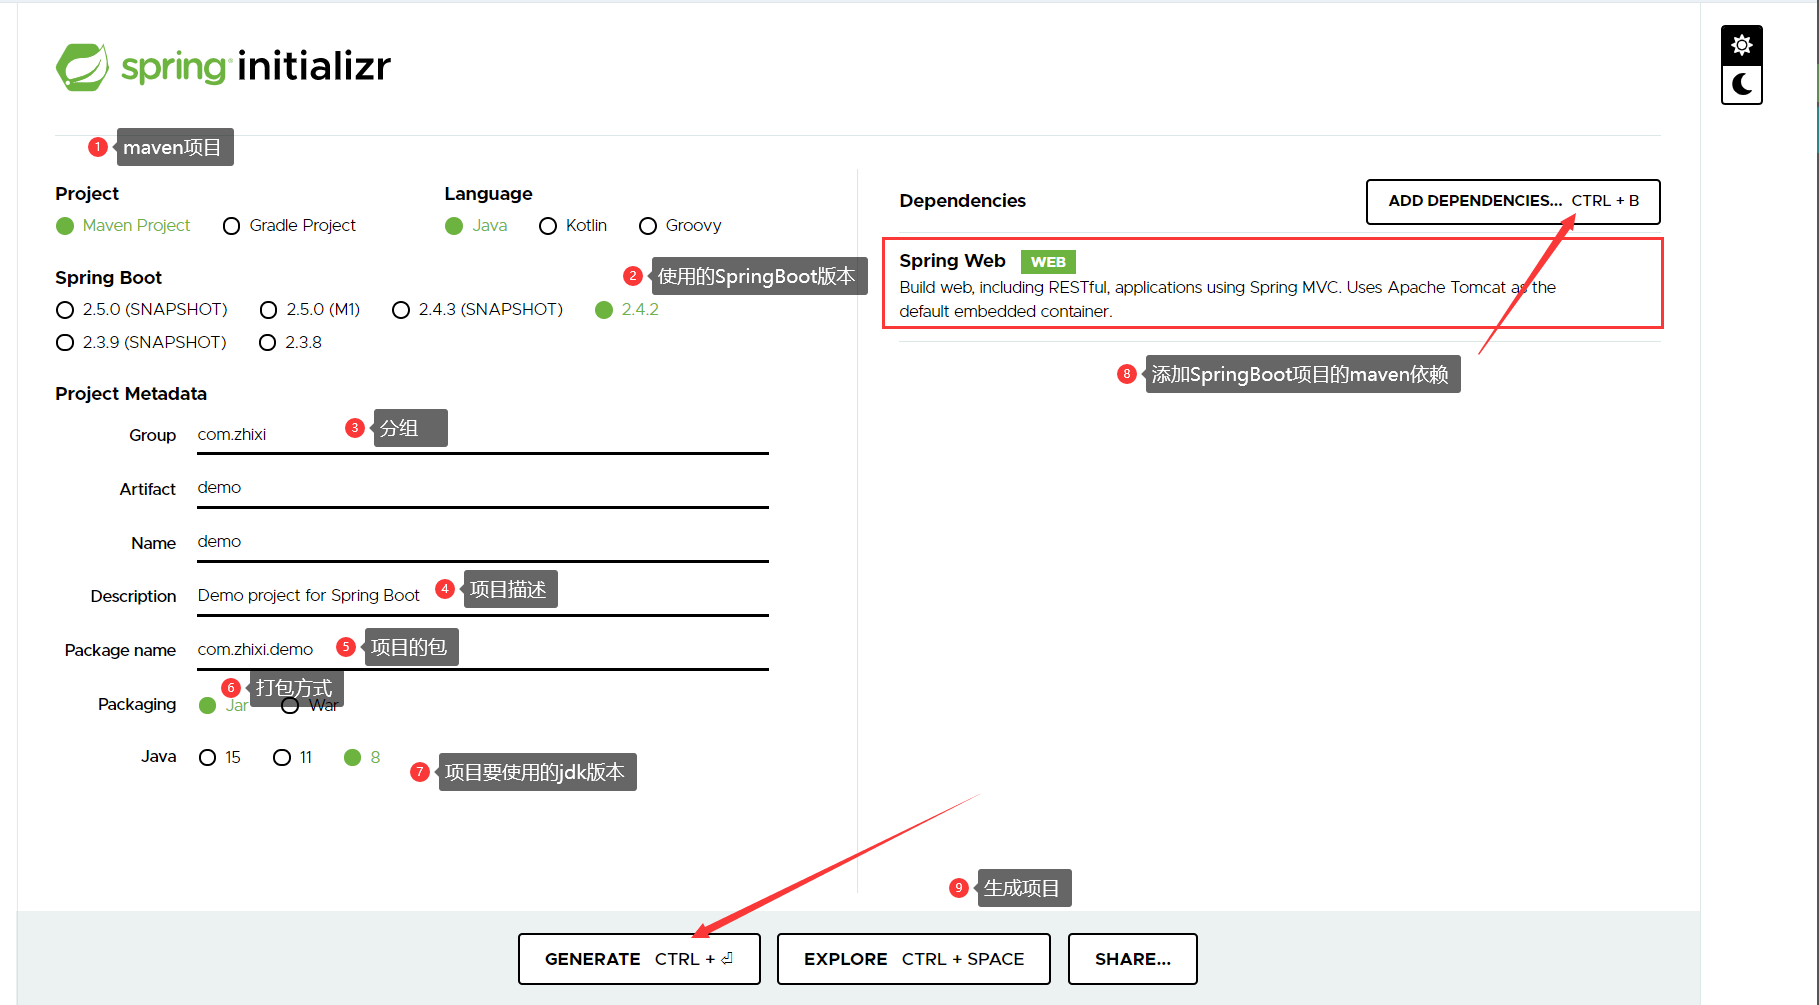
2、使用Spring Initializr 的 Web页面创建项目:
1、打开 https://start.spring.io/
2、填写项目信息
3、点击”Generate Project“按钮生成项目;下载此项目
4、解压项目包,并用IDEA打开这个包,idea就会自动下载项目所需的依赖
5、如果是第一次使用,可能速度会比较慢,包比较多、需要耐心等待一切就绪。
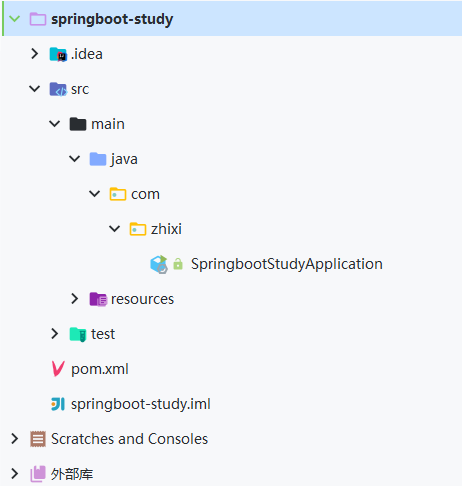
3、运行第一个SpringBoot项目
4、pom.xml 分析
打开pom.xml,看看Spring Boot项目的依赖:
 1 <parent>
 2   <groupId>org.springframework.boot</groupId>
 3   <artifactId>spring-boot-starter-parent</artifactId>
 4   <version>2.3.2.RELEASE</version>
 5   <relativePath/> <!-- lookup parent from repository -->
 6 </parent>
 7 <groupId>com.codekitty</groupId>
 8 <artifactId>springboot-study</artifactId>
 9 <version>0.0.1-SNAPSHOT</version>
10 <name>springboot-study</name>
11 <description>study project for Spring Boot</description>
12
13 <properties>
14   <java.version>1.8</java.version>
15 </properties>
16
17 <dependencies>
18   <!-- 启动器-->
19   <dependency>
20     <groupId>org.springframework.boot</groupId>
21     <artifactId>spring-boot-starter</artifactId>
22   </dependency>
23   <!-- web场景启动器 -->
24   <dependency>
25     <groupId>org.springframework.boot</groupId>
26     <artifactId>spring-boot-starter-web</artifactId>
27   </dependency>
28   <!-- springboot单元测试 -->
29   <dependency>
30     <groupId>org.springframework.boot</groupId>
31     <artifactId>spring-boot-starter-test</artifactId>
32     <scope>test</scope>
33     <!-- 剔除依赖 -->
34     <exclusions>
35       <exclusion>
36         <groupId>org.junit.vintage</groupId>
37         <artifactId>junit-vintage-engine</artifactId>
38       </exclusion>
39     </exclusions>
40   </dependency>
41 </dependencies>
42 <!-- 打包插件 -->
43 <build>
44   <plugins>
45     <plugin>
46       <groupId>org.springframework.boot</groupId>
47       <artifactId>spring-boot-maven-plugin</artifactId>
48     </plugin>
49   </plugins>
50 </build>
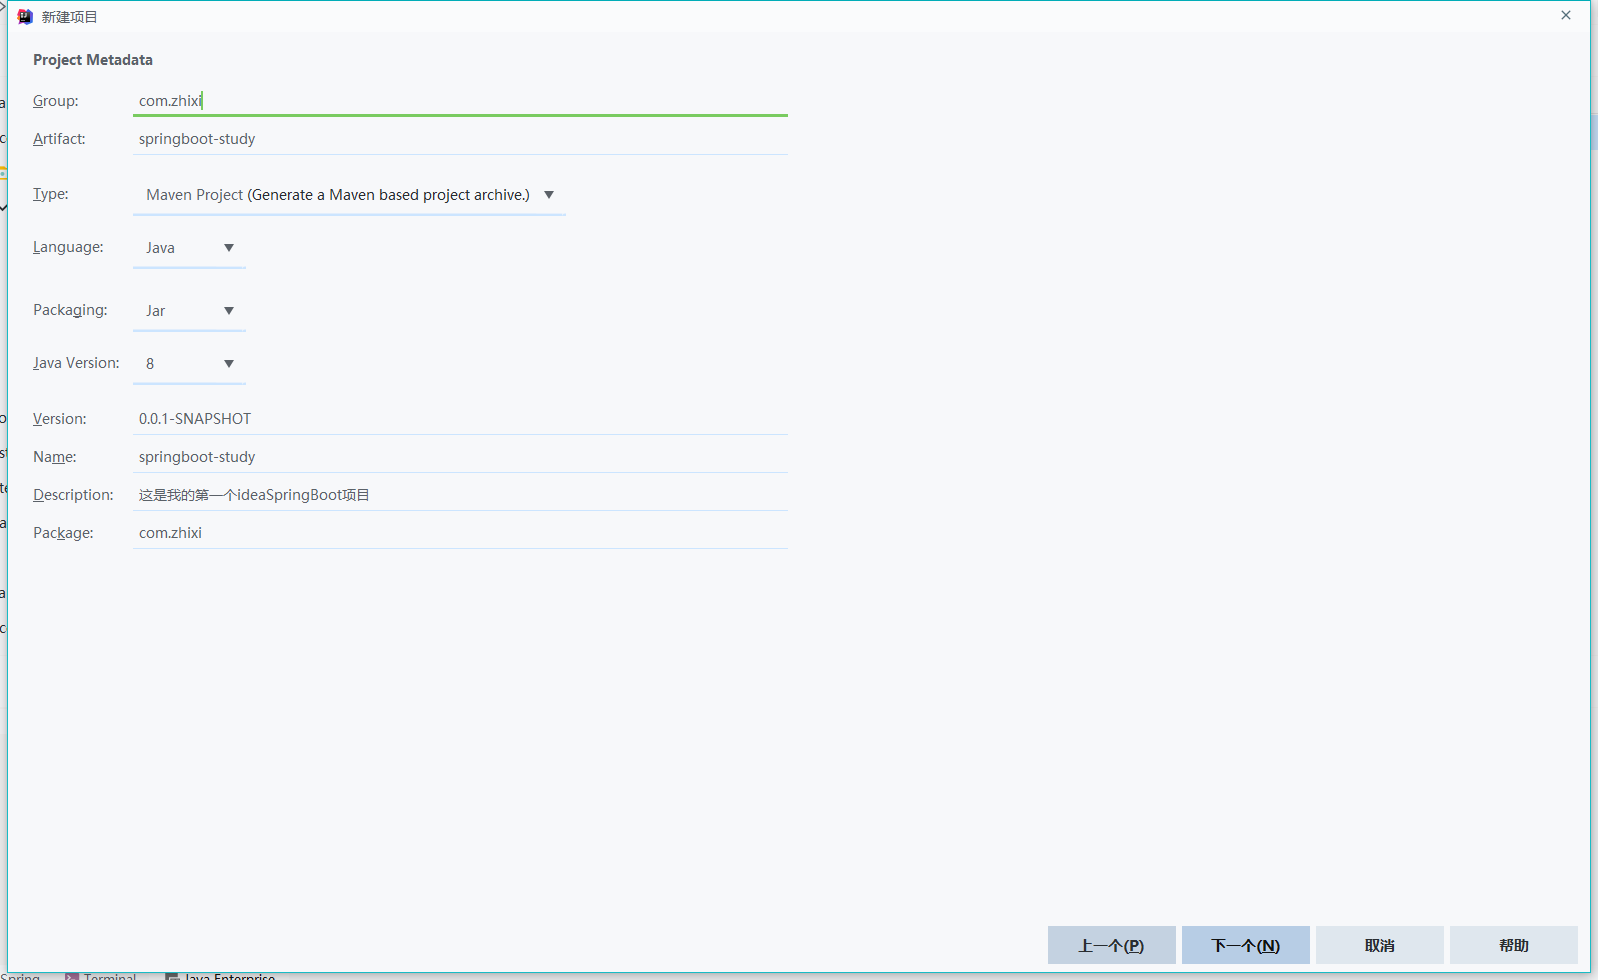
第二种、IDEA新建第一个SpringBoot项目
1、新建项目,选择Spring Initializer
2、选择阿里云站点进行创建项目(官网加载的贼慢)https://start.aliyun.com