1、目录结构
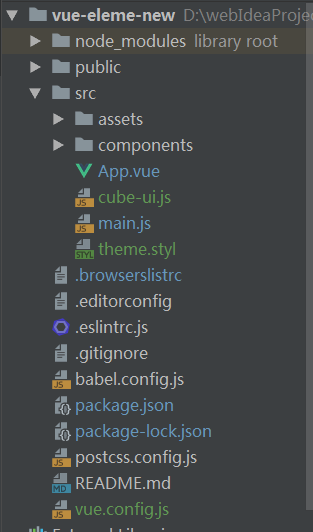
模板文件是public里的index.html,运行项目的时候,会引用src/main.js(入口文件)
详细文档在这里:https://cli.vuejs.org/zh/config/#pwa
public:放着html模板和静态资源,public/index.html 文件是一个会被 html-webpack-plugin 处理的模板。在构建过程中,资源链接会被自动注入。
.browserslistrc 指定浏览器版本。不同的浏览器会有兼容性问题,比如css,我们会给它们加上前缀,这个文件是为postcss.config.js的Autoprefixer 插件使用的,
Autoprefixer 插件依据browserslistrc 来添加前缀
postcss.config.js 里的autoprefixer就是依据.browserslistrc文件加前缀
.eslintrc.js eslint的相关配置

引入的一些vue插件,比如v-for模板没有使用key,就会报错
babel.config.js 预设
package.json 各种依赖
package-lock.json 锁版本 管理版本的文件
cube-ui插件
https://github.com/didi/cube-ui
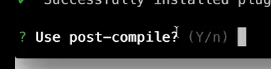
后编译:就是我们做项目的时候使用的是 源代码,只有打包运行后,才会进行编译。好处是节省构建包的体积,做完项目后,可以把不用的引入删掉,这样打包的时候,
就只会打包那些我们使用的模块
在vue-cli3.0的项目里,直接使用vue add cube-ui 就可以安装
是否使用后编译
是用部分引入还是全部引入,上面的选择是部分引入

自定义主题是否需要(选择是,因为我们的项目的颜色一般都与插件的不一样)

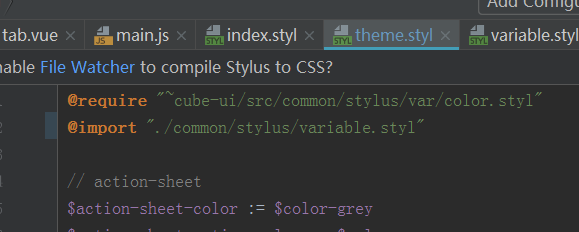
安装完以后,下面是修改和添加的文件
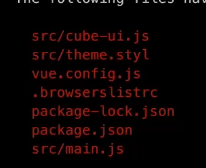
cube-ui.js 管理cube-ui模块的引入
theme.styl 管理cube-ui的颜色(修改颜色可以在这里面进行修改)
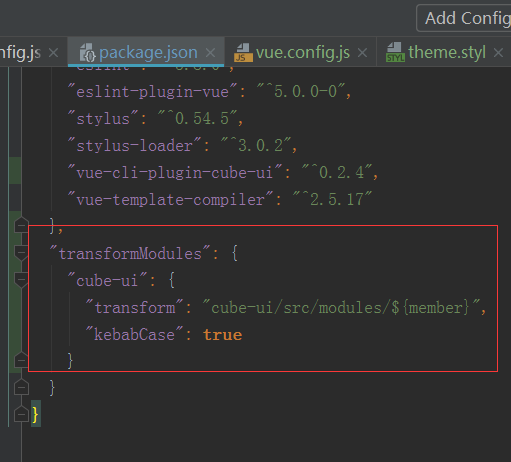
表示可以直接引入cube-ui的源码,把cube-ui的组件直接引入项目中,不是用的编译后的代码
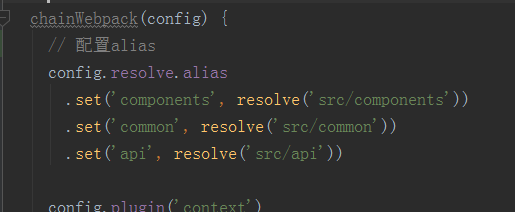
vue.config.js 类似以前的webpack.js文件,进行一些配置
2、2-3 api接口mock
现在的项目都是前后端分离,我们这个项目,现在就进行数据接口模拟
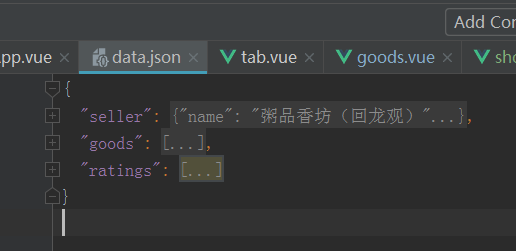
data.json里保存的所有数据,类似于后端的数据库
vue.config.js
// 引入data.json文件,获取对应的数据
const appData = require('./data.json')
const seller = appData.seller
const goods = appData.goods
const ratings = appData.ratings

  devServer: {
    before (app) {
      app.get('/api/seller', function (req, res) {
        res.json({
          errno: 0,
          data: seller
        })
      })
      app.get('/api/goods', function (req, res) {
        res.json({
          errno: 0,
          data: goods
        })
      })
      app.get('/api/ratings', function (req, res) {
        res.json({
          errno: 0,
          data: ratings
        })
      })
    }
  }
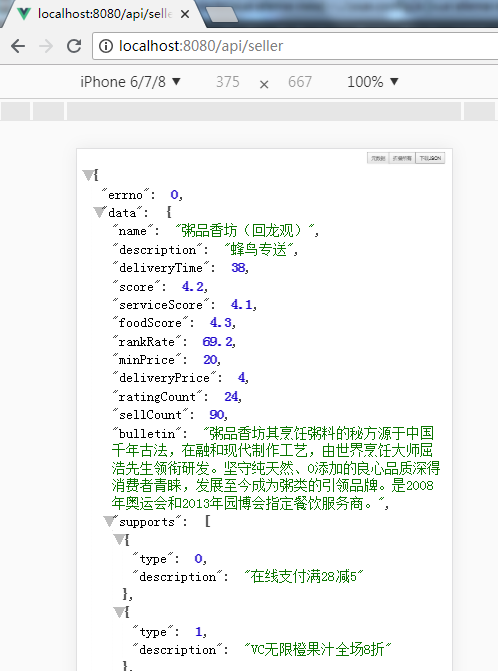
这里有一个devServer,表示本地服务器,里面有个before方法,参数是app,可以在这里面定义接口
例如里面定义的app.get('/api/seller',。启动服务后,在url输入http://localhost:8080/api/seller,可以看到下面的效果
2、
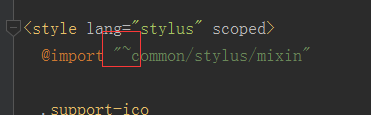
~表示绝对路径,要使用这个,先要在vue.config.js里面进行配置
webpack里的DevServer的before方法
https://webpack.js.org/configuration/dev-server/#devserver-before
发现的一个问题:
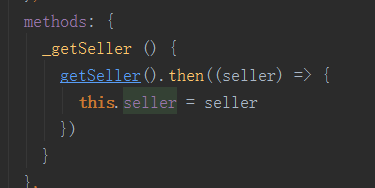
在tab组件的mounted,created,watch里面输出App.vue传入的tabs
  export default {
    name: 'tab',
    props: {
      tabs: {
        type: Array,
        default() {
          return []
        }
      },
      initialIndex: {
        type: Number,
        default: 0
      }
    },
    data () {
      return {
        index: this.initialIndex,
        slideOptions: {
          listenScroll: true, // 是否监控scroll事件
          probeType: 3, // 0 不派发scroll事件,1:非实时;2:滑动过程中;3:不仅在屏幕滑动的过程中,而且momentum 滚动动画运行过程中实时派发
          directionLockThreshold: 0
        }
      }
    },
    created () {
      console.log(this.tabs)
    },
    mounted () {
      console.log(this.tabs)
      this.onChange(this.index)
    },
发现输出的值里面,sellel不是真实的数据
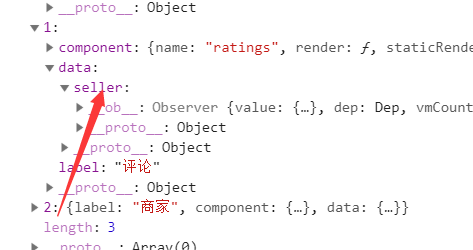
经过研究,是因为selle在App.vue里面,是异步获取的,所以是这个样子
如果我们在App.vue里面写死selle,那在tab组件的mounted,created里面就可以输出我们想要的值
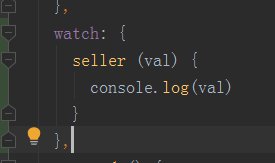
如果在watch里监控,那就正确
综上所述:如果我们把请求到的数据封装到一个对象里面(或者是复杂的数据里面),然后传到子组件,在created和mounted里面输出这个对象的话,请求的这部分会显示的不对
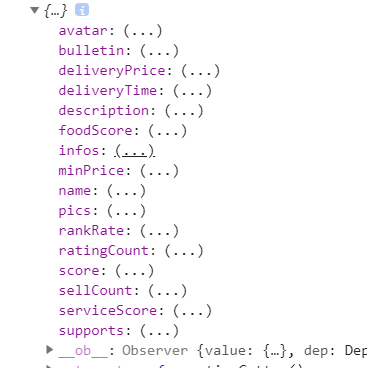
但是在template里面使用或者输出,那就没问题
如果直接把请求的数据传递到子组件,在created和mounted里输出,也有可能不对,最好的方法是在watch监控这个数据,这样就正确
3、
     <!--注意这个写法,先判断seller.supports有没有,如果没有的话,seller.supports[0]会报错-->
        <div v-if="seller.supports" class="support">
        <support-ico :size=1 :type="seller.supports[0].type"></support-ico>
        <span class="text">{{seller.supports[0].description}}</span>
     </div>
4、3-4 headerdetail组件交互
headerDetail组件是fixed,如果放在其他组件内部(有类似transition的样式),会对样式造成影响,所以我们可以直接把这种类型的组件放在body下
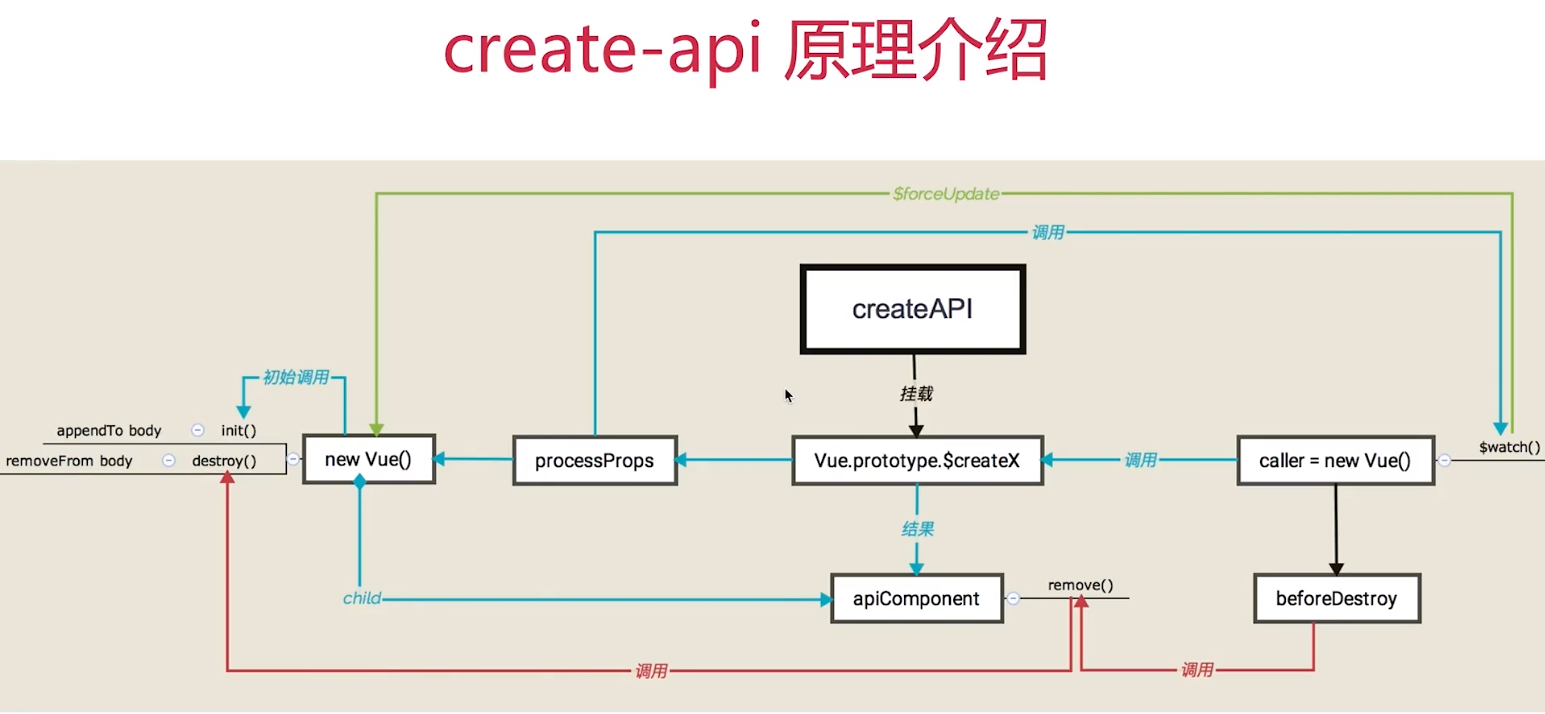
这里可以借助cube-ui的create-api 模块 https://didi.github.io/cube-ui/#/zh-CN/docs/create-api
该模块默认暴露出一个 createAPI 函数,可以实现以 API 的形式调用自定义组件
register.js里面
import { createAPI } from 'cube-ui'
import Vue from 'vue'
import HeaderDetail from 'components/header-detail/header-detail'

createAPI(Vue, HeaderDetail)
main.js
import Vue from 'vue'
import './cube-ui'
import App from './App.vue'
// 引入register.js
import './register'

import 'common/stylus/index.styl'
import router from './router'

Vue.config.productionTip = false

new Vue({
  router,
  render: h => h(App)
}).$mount('#app')
组件里面使用
 showDetail() {
        // cube-ui的create-api把headerdetail组件变成了api实例,所以可以这样当成一个实例调用this.$createHeaderDetail
        this.headerDetailComp = this.headerDetailComp || this.$createHeaderDetail({
          $props: {
            seller: 'seller'
          }
        })
        this.headerDetailComp.show()
}
5、4-1 tab组件基础实现
https://didi.github.io/cube-ui/#/zh-CN/docs/tab-bar
使用了cube-ui的TabBar组件
6、cube-ui的轮播图组件 https://didi.github.io/cube-ui/#/zh-CN/docs/slide
7、4-1 tab组件基础实现
.tab
    display: flex
    flex-direction: column
    height: 100%
    >>> .cube-tab
      padding: 10px 0
    .slide-wrapper
      flex: 1
      overflow: hidden
>>>是什么?
这与vue-loader有关,vue-loader是webpack的一个Loader,专门为了编写vue方便而出现的
参考地址:https://vue-loader.vuejs.org/zh/guide/scoped-css.html#子组件的根元素
深度作用选择器
如果你希望 scoped 样式中的一个选择器能够作用得“更深”,例如影响子组件,你可以使用 >>> 操作符:
<style scoped>
.a >>> .b { /* ... */ }
</style>
在这个项目中

cube-tab是tab子类中的子类,要想修改样式,只能用>>>
8、项目用了cube-ui库,如果要修改里面默认的颜色,可以这样做
我们安装cube-ui的时候,会出现一个文件:theme.styl,可以在这里面修改
项目中的做法是,我们新建common/stylus/variable.styl文件,在里面先定义好颜色
@import "~cube-ui/src/common/stylus/variable.styl"

$color-background = rgba(7, 17, 27, 1)
$color-background-s = rgba(7, 17, 27, 0.8)
$color-background-ss = rgba(7, 17, 27, 0.5)
$color-background-sss = rgba(7, 17, 27, 0.2)
$color-background-ssss = #f3f5f7

$color-red = rgb(240, 20, 20)
$color-blue = rgb(0, 160, 220)
$color-light-blue = rgba(0, 160, 220, 0.2)
$color-green = #00b43c

$color-col-line = #d9dde1
$color-row-line = rgba(7, 17, 27, 0.1)
然后呢,在theme.styl中引入这个文件,然后替换定义好的颜色
引入这个文件
替换颜色
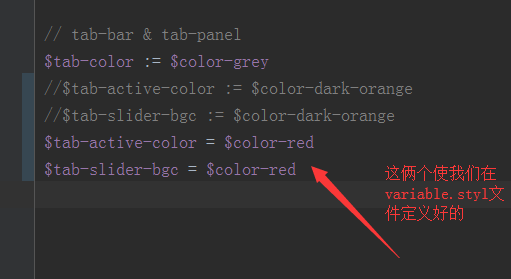
备注:修改的这些样式,要使用=,不要使用:=,不然不起作用
9、4-2 tab组件上下联动
利用cube-tab和cube-slide实现,当滚动slide的时候,对应的tab下划线也滚动
(1)、在cube-slide加入option属性
<cube-slide
        :loop=false
        :auto-play=false
        :show-dots=false
        :initial-index="index"
        ref="slide"
        :options="slideOptions"
        @scroll="onScroll"
        @change="onChange"
      >
slideOptions: {
          listenScroll: true, // 是否监控scroll事件
          probeType: 3, // 0 不派发scroll事件,1:非实时;2:滑动过程中;3:不仅在屏幕滑动的过程中,而且momentum 滚动动画运行过程中实时派发
          directionLockThreshold: 0
        }
directionLockThreshold https://ustbhuangyi.github.io/better-scroll/doc/zh-hans/options.html#directionlockthreshold
- 类型:Number
- 默认值:5(不建议修改)
- 作用:当我们需要锁定只滚动一个方向的时候,我们在初始滚动的时候根据横轴和纵轴滚动的绝对值做差,当差值大于
directionLockThreshold的时候来决定滚动锁定的方向。 - 备注:当设置 eventPassthrough 的时候,
directionLockThreshold设置无效,始终为 0。
如果项目中只是一个方向滚动,那就不用设置,现在这个项目是俩个方向滚动,所以要设置为0
(2)、cube-slide有scroll事件
滚动中实时派发,返回一个对象,包含滚动的坐标值
https://didi.github.io/cube-ui/#/zh-CN/docs/slide
onScroll (pos) {
        // cube-slide的scroll事件,滚动中实时派发,获取到滚动位置的坐标值
        // 滚动slide的时候,tab实时改变
        // 原理是:先获取tabBar和slide的宽度,然后获取到滚动位置的坐标值,坐标值/slideWidth得到滚动的比例,然后乘以tabBarWidth,实时得到
        // tab下划线的滚动位置
        // 调用cube-tab的setSliderTransform方法,参数就是上面得到的值
        const tabBarWidth = this.$refs.tabBar.$el.clientWidth
        const slideWidth = this.$refs.slide.slide.scrollerWidth
        const transform = -pos.x / slideWidth * tabBarWidth
        this.$refs.tabBar.setSliderTransform(transform)
}
(3)、调用cube-tab的setSliderTransform方法,实时改变tab的下划线
备注:tab里有useTransition参数,transition 过渡(默认为true),为了让效果好看,这里我们要把这个值设为false
<cube-tab-bar
      :useTransition=false
      :showSlider="true"
      v-model="selectedLabel"
      :data="tabs"
      ref="tabBar"
      class="border-bottom-1px"
    >
完整代码:
<template>
  <div class="tab">
    <cube-tab-bar
      :useTransition=false
      :showSlider="true"
      v-model="selectedLabel"
      :data="tabs"
      ref="tabBar"
      class="border-bottom-1px"
    >
    </cube-tab-bar>
    <div class="slide-wrapper">
      <cube-slide
        :loop=false
        :auto-play=false
        :show-dots=false
        :initial-index="index"
        ref="slide"
        :options="slideOptions"
        @scroll="onScroll"
        @change="onChange"
      >
        <cube-slide-item>
          <goods></goods>
        </cube-slide-item>
        <cube-slide-item>
          <ratings></ratings>
        </cube-slide-item>
        <cube-slide-item>
          <seller></seller>
        </cube-slide-item>
      </cube-slide>
    </div>
  </div>
</template>

<script>
  import Goods from 'components/goods/goods'
  import Ratings from 'components/ratings/ratings'
  import Seller from 'components/seller/seller'

  export default {
    name: 'tab',
    data () {
      return {
        index: 0,
        tabs: [{
          label: '商品'
        }, {
          label: '评价'
        }, {
          label: '商家'
        }],
        slideOptions: {
          listenScroll: true, // 是否监控scroll事件
          probeType: 3, // 0 不派发scroll事件,1:非实时;2:滑动过程中;3:不仅在屏幕滑动的过程中,而且momentum 滚动动画运行过程中实时派发
          directionLockThreshold: 0
        }
      }
    },
    methods: {
      // silde 页面切换时触发change事件,返回当前的索引值,然后赋值给this.index
      // this.index改变的话,会触发selectedLabel重新计算,然后cube-tab就会进行新的计算,就可以完成切换了
      onChange (current) {
        this.index = current
      },
      onScroll (pos) {
        // cube-slide的scroll事件,滚动中实时派发,获取到滚动位置的坐标值
        // 滚动slide的时候,tab实时改变
        // 原理是:先获取tabBar和slide的宽度,然后获取到滚动位置的坐标值,坐标值/slideWidth得到滚动的比例,然后*tabBarWidth,实时得到
        // tab下划线的滚动位置
        // 调用cube-tab的setSliderTransform方法,参数就是上面得到的值
        const tabBarWidth = this.$refs.tabBar.$el.clientWidth
        const slideWidth = this.$refs.slide.slide.scrollerWidth
        const transform = -pos.x / slideWidth * tabBarWidth
        this.$refs.tabBar.setSliderTransform(transform)
      }
    },
    computed: {
      selectedLabel: {
        get() {
          return this.tabs[this.index].label
        },
        set(newVal) {
          this.index = this.tabs.findIndex((value) => {
            return value.label === newVal
          })
        }
      }
    },
    components: {
      Goods,
      Ratings,
      Seller
    }
  }
</script>

<style lang="stylus" rel="stylesheet/stylus" scoped>
  @import "~common/stylus/variable"

  .tab
    display: flex
    flex-direction: column
    height: 100%
    >>> .cube-tab
      padding: 10px 0
    .slide-wrapper
      flex: 1
      overflow: hidden
</style>
10、4-3、tab组件的抽象和封装
上一节是实现了tab组件的效果,所有的数据都是直接写在了tab组件,写在我们把数据抽离出来,只留下功能代码,这样我们以后新加/减少tabbar,都不用修改tab组件,只要修改
父组件传入的数据就行
在父组件的计算属性里,定义tabs,然后传入到tab中
computed: {
      tabs() {
        return [
          {
            label: '商品',
            component: Goods,
            data: {
              seller: this.seller
            }
          },
          {
            label: '评论',
            component: Ratings,
            data: {
              seller: this.seller
            }
          },
          {
            label: '商家',
            component: Seller,
            data: {
              seller: this.seller
            }
          }
        ]
      }
    },
<tab :tabs="tabs"></tab>
在tba组件里
<cube-slide-item v-for="(tab, index) in tabs" :key="index">
  <component ref="component" :is="tab.component" :data="tabs.data"></component>
</cube-slide-item>
11、5-1 scroll-nav组件
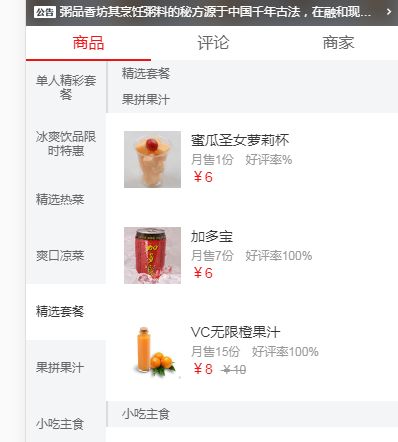
使用cube-ui的scrollNav组件
<template>
  <div class="goods">
    <div class="scroll-nav-wrapper">
      <cube-scroll-nav
        :side=true
        :data="goods"
        :options="scrollOptions"
        v-if="goods.length"
      >
        <cube-scroll-nav-panel
          v-for="good in goods"
          :key="good.name"
          :label="good.name"
          :title="good.name"
        >
          <ul>
            <li
              v-for="food in good.foods"
              :key="food.name"
              class="food-item"
            >
              <div class="icon">
                <img width="57" height="57" :src="food.icon">
              </div>
              <div class="content">
                <h2 class="name">{{food.name}}</h2>
                <p class="desc">{{food.description}}</p>
                <div class="extra">
                  <span class="count">月售{{food.sellCount}}份</span><span>好评率{{food.rating}}%</span>
                </div>
                <div class="price">
                  <span class="now">¥{{food.price}}</span>
                  <span class="old" v-show="food.oldPrice">¥{{food.oldPrice}}</span>
                </div>
                <div class="cart-control-wrapper">
                </div>
              </div>
            </li>
          </ul>
        </cube-scroll-nav-panel>
      </cube-scroll-nav>
    </div>
  </div>
</template>

<script>
  import { getGoods } from 'api'
  export default {
    name: 'goods',
    props: {
      data: {
        type: Object,
        default() {
          return {}
        }
      }
    },
    data() {
      return {
        goods: [],
        selectedFood: {},
        scrollOptions: {
          click: false, // 会点击俩次,底层用的是scroll,所以设置click为false
          directionLockThreshold: 0
        }
      }
    },
    methods: {
      fetch () {
        getGoods().then((goods) => {
          this.goods = goods
        })
      }
    }
  }
</script>

<style lang="stylus" rel="stylesheet/stylus" scoped>
  .goods
    position: relative
    text-align: left
    height: 100%
    .scroll-nav-wrapper
      position: absolute
       100%
      top: 0
      left: 0
      bottom: 48px
    >>> .cube-scroll-nav-bar
       80px
      white-space: normal
      overflow: hidden
    >>> .cube-scroll-nav-bar-item
      padding: 0 10px
      display: flex
      align-items: center
      height: 56px
      line-height: 14px
      font-size: $fontsize-small
      background: $color-background-ssss
      .text
        flex: 1
        position: relative
      .num
        position: absolute
        right: -8px
        top: -10px
      .support-ico
        display: inline-block
        vertical-align: top
        margin-right: 4px
    >>> .cube-scroll-nav-bar-item_active
      background: $color-white
      color: $color-dark-grey
    >>> .cube-scroll-nav-panel-title
      padding-left: 14px
      height: 26px
      line-height: 26px
      border-left: 2px solid $color-col-line
      font-size: $fontsize-small
      color: $color-grey
      background: $color-background-ssss
    .food-item
      display: flex
      margin: 18px
      padding-bottom: 18px
      position: relative
      &:last-child
        border-none()
        margin-bottom: 0
      .icon
        flex: 0 0 57px
        margin-right: 10px
        img
          height: auto
      .content
        flex: 1
        .name
          margin: 2px 0 8px 0
          height: 14px
          line-height: 14px
          font-size: $fontsize-medium
          color: $color-dark-grey
        .desc, .extra
          line-height: 10px
          font-size: $fontsize-small-s
          color: $color-light-grey
        .desc
          line-height: 12px
          margin-bottom: 8px
        .extra
          .count
            margin-right: 12px
        .price
          font-weight: 700
          line-height: 24px
          .now
            margin-right: 8px
            font-size: $fontsize-medium
            color: $color-red
          .old
            text-decoration: line-through
            font-size: $fontsize-small-s
            color: $color-light-grey
      .cart-control-wrapper
        position: absolute
        right: 0
        bottom: 12px
    .shop-cart-wrapper
      position: absolute
      left: 0
      bottom: 0
      z-index: 50
       100%
      height: 48px
</style>
知识点有俩个:
(1)、options参数配置
scrollOptions: {
          click: false, // 会点击俩次,底层用的是scroll,所以设置click为false
          directionLockThreshold: 0
}
(2)、获取数据的方法为fetch
fetch () {
        getGoods().then((goods) => {
          this.goods = goods
        })
      }
什么是调用呢?我们一般是在组件的mounted里面调用,但是在这个项目中,如果我们在评论或者商家页面,商品页面有可能是在mounted,这时就会进行数据加载,这样的话,
会影响当前页面的显示,所以,我们应该在切换组件的时候调用这个方法
可以在Tab组件的onChange方法里调用
 // 切换的时候,调用对应组件里面的fetch
      onChange (current) {
        this.index = current
        const instance = this.$refs.component[current]
        if (instance && instance.fetch) {
          instance.fetch()
        }
12、5-3 cart-control组件
add (event) {
        if (!this.food.count) {
          // food这个数据时由父组件传过来的,最开始里面是没有count属性的,我们要给里面添加,就需要是vue的$set
          this.$set(this.food, 'count', 1)
        } else {
          this.food.count++
        }this.$emit(EVENT_ADD, event.target)
},
这里面的this,food是父组件传到子组件里面的,可以用this.$set(this.food, 'count', 1)添加新的属性,并且赋值
而且可以修改里面值
修改完以后,在父组件里面的值也会随之改变
13、
14、ScrollNav 组件
在使用ScrollNav 组件的时候,不要用v-show,会出现有点地方没有加载进数据,可以使用v-if或者router跳转到新页面
15、https://didi.github.io/cube-ui/#/zh-CN/docs/picker picker选择器

可以自定义传入的内容