重新整理下这篇文章。
这篇文章的主要任务是使用AndroidStudio,通过Openfire,利用XMPP协议完成一个可以即时通讯、拥有好友系统的聊天软件。
一、服务器配置与相关库
理论不多说,只谈怎么操作。下面先说三个工具。
1、mysql服务器(版本5.7.25)
首先电脑要安装好mysql,这里建议不要安装最新版,因为本人之前就是安装的8.0最新版,然后跟Openfire服务器进行对接的时候出现了非常多问题,解决后,用JDBC连接mysql时也出了许多问题,还是无法解决的。但是换成5.7.25版本后就没出过一点问题,一切都很顺利。下面附5.7.25windows的下载地址:
https://dev.mysql.com/downloads/file/?id=482771
2、Openfire服务器(版本:4.2.1)
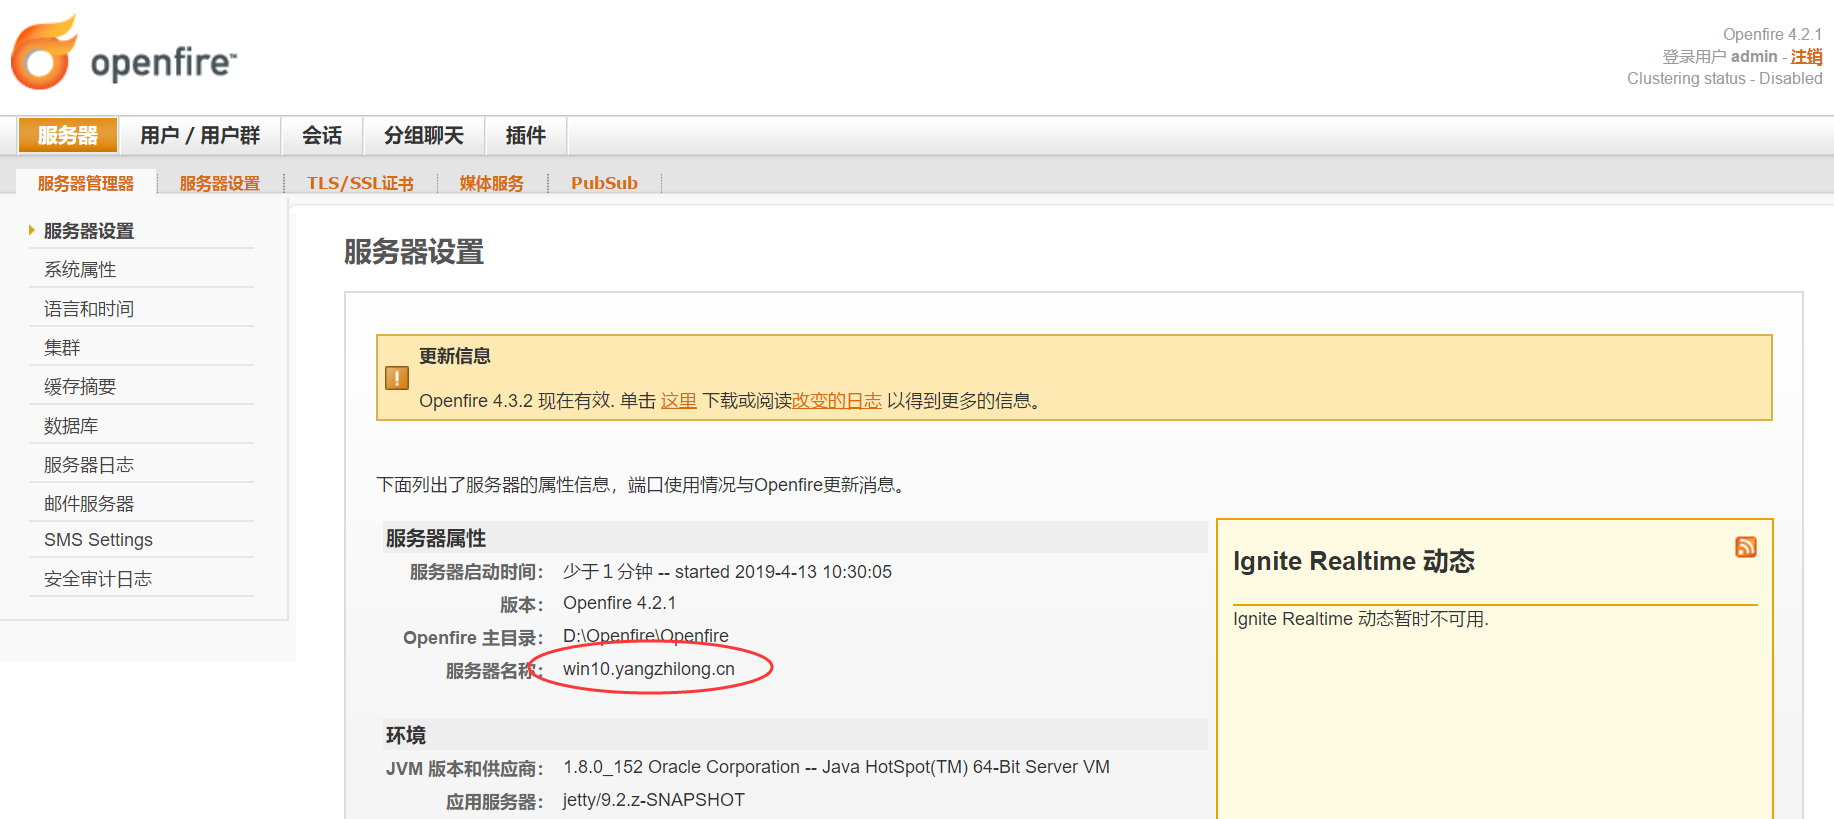
接着就是安装Openfire服务器了,安装好后进行配置,要选择外部数据库,并选择连接mysql服务器。安装请另寻教程,开启服务器后要记住域名和端口,域名是自己设置的,端口通常是5222。

3、Smack4.1.9
Smack是个工具库,客户端可以用其来连接Openfire服务器并进行发送消息、接收消息等操作。
注意:不同版本的各种功能用法很多都是不同的,本人也从网上试过各种版本,很多代码都没法用,只有这个4.1.9是比较顺利的
在项目的gradle中添加依赖:
    compile 'org.igniterealtime.smack:smack-im:4.1.9'
    compile 'org.igniterealtime.smack:smack-tcp:4.1.9'
    compile 'org.igniterealtime.smack:smack-android-extensions:4.1.9'
    compile 'org.igniterealtime.smack:smack-android:4.1.9'
4、Spark
这是一个电脑端的已经实现好的客户端,可以连接Openfire服务器并拥有全部关于聊天软件的功能。
在本项目中可以起到辅助作用,当然,不用该软件也可以。
二、准备好上面这些后就可以编写代码来进行操作了,下面是对各个功能的使用总结。
1、连接Openfire服务器
先设置连接信息,辅助对象等:
    //连接对象
    private AbstractXMPPConnection mConnection;
    private ChatManager chatManager;
    //服务器信息
    final String XMPP_DOMAIN = "win10.yangzhilong.cn";
    final String XMPP_HOST = "192.168.199.228";
    final int XMPP_PORT = 5222;
接着就可以进行连接了:
public boolean connect() {
    //配置一个TCP连接
    XMPPTCPConnectionConfiguration config = XMPPTCPConnectionConfiguration.builder()
            .setServiceName(XMPP_DOMAIN)//设置服务器名称,可以到openfire服务器管理后台查看
            .setHost(XMPP_HOST)//设置主机
            .setPort(5222)//设置端口
            .setConnectTimeout(20000)//设置连接超时时间
            .setSecurityMode(ConnectionConfiguration.SecurityMode.disabled)//设置是否启用安全连接
            .build();
    XMPPTCPConnection connection = new XMPPTCPConnection(config);//根据配置生成一个连接
    this.mConnection = connection;
    mConnection.addConnectionListener(new XMPPConnectionListener());//监听器
    Print("开始连接");
    try {
        connection.connect();//连接到服务器
        chatManager = ChatManager.getInstanceFor(mConnection);
        this.mConnection = connection;
        Print("连接成功");
        return true;
    } catch (SmackException e) {
        e.printStackTrace();
    } catch (IOException e) {
        e.printStackTrace();
    } catch (XMPPException e) {
        e.printStackTrace();
    }
    return false;
}

public class XMPPConnectionListener implements ConnectionListener {

    @Override
    public void connected(XMPPConnection connection) {
        //已连接上服务器
    }

    @Override
    public void authenticated(XMPPConnection connection, boolean resumed) {
        //已认证
    }

    @Override
    public void connectionClosed() {
        //连接已关闭
    }

    @Override
    public void connectionClosedOnError(Exception e) {
        //关闭连接发生错误
    }

    @Override
    public void reconnectionSuccessful() {
        //重连成功
    }

    @Override
    public void reconnectingIn(int seconds) {
        //重连中
    }

    @Override
    public void reconnectionFailed(Exception e) {
        //重连失败
    }
}
2、用户注册
HashMap<String, String> attributes =new HashMap<String, String>();//附加信息
AccountManager.sensitiveOperationOverInsecureConnectionDefault(true);
try{
    AccountManager.getInstance(mConnection).createAccount(str_user_id,str_user_pw, attributes);//创建一个账户,username和password分别为用户名和密码
} catch (SmackException.NoResponseException e) {
    e.printStackTrace();
    myApp.MakeToast("注册失败");
} catch (XMPPException.XMPPErrorException e) {
    e.printStackTrace();
    myApp.MakeToast("注册失败");
} catch (SmackException.NotConnectedException e) {
    e.printStackTrace();
    myApp.MakeToast("注册失败");
}
3、用户登录
public boolean login(String userName, String passWord) {
    Print("正在登录...");
    try {
        if (!mConnection.isAuthenticated()) { // 判断是否登录
            mConnection.login(userName, passWord);
            Print("登录成功!");
            return true;
        }
        Print("已被登录,登录失败...");
        return false;
    } catch (XMPPException | SmackException | IOException e) {
        e.printStackTrace();
        Print("登录出错...");
        return false;
    }
}
4、获取用户的好友列表
void GetFriendFromServer() {
    Roster roster = Roster.getInstanceFor(mConnection);
  //不加下面这句的话,有时会获取不到好友
    if (!roster.isLoaded()){
        try {
            roster.reloadAndWait();
        } catch (SmackException.NotLoggedInException e) {
            e.printStackTrace();
        } catch (SmackException.NotConnectedException e) {
            e.printStackTrace();
        } catch (InterruptedException e) {
            e.printStackTrace();
        }
    }
    Set entries = roster.getEntries();
    for (Object object:entries) {
            RosterEntry entry = (RosterEntry)object;
       //entry中就是一个好友的信息了,可以在下面进行其他功能的代码编写
//        entry.getType();
//        entry.getName();//好友昵称
//        entry.getGroups();//好友所在的组
//        entry.getJid().getDomain();//好友域名
//        entry.getJid().getLocalpartOrNull();//好友名字
//        entry.getUser();//(废弃)好友完整名称(包括域名)
    }
}
5、获取某个用户的头像
public Bitmap getUserHead(String user_id) throws XMPPException.XMPPErrorException{
  Bitmap user_head_bitmap = null;
    System.out.println("获取用户头像信息: " + user_id);
    VCard vcard = new VCard();
    try {
        vcard.load(mConnection, user_id + "@" + XMPP_DOMAIN);
        if (vcard.getAvatar() != null) {
            byte[] b = vcard.getAvatar();
            //取出图形为Bitmap
            user_head_bitmap = BitmapFactory.decodeByteArray(b, 0, b.length);
        }
    } catch (SmackException.NoResponseException e1) {
        e1.printStackTrace();
    }catch (SmackException.NotConnectedException e1) {
        e1.printStackTrace();
    }
    return user_head_bitmap;
}
6、用户修改头像
//向服务器上传头像并保存
public void saveUserHead(String user_id, Bitmap bitmap) {
    if(bitmap == null) return ;
    VCard vcard = new VCard();
    try {
        vcard.load(mConnection, user_id + "@" + XMPP_DOMAIN); //注意要加上域名
        //bitmap转为byte数组
        ByteArrayOutputStream baos = new ByteArrayOutputStream();
        bitmap.compress(Bitmap.CompressFormat.PNG, 100, baos);
        byte[] b = baos.toByteArray();
        vcard.setAvatar(b);
        vcard.save(mConnection);
        System.out.println("保存用户头像成功");
    } catch (SmackException.NoResponseException e) {
        e.printStackTrace();
        MakeToast("头像保存失败");
    } catch (XMPPException.XMPPErrorException e) {
        e.printStackTrace();
        MakeToast("头像保存失败");
    } catch (SmackException.NotConnectedException e) {
        e.printStackTrace();
        MakeToast("头像保存失败");
    }
}
7、向某用户发送消息
注意:这里用到的Message对象并不是android.os.Message,而是Smack中的:
import org.jivesoftware.smack.packet.Message;
所以,若在同份代码中需要同时使用这两种Message,要注意处理这个重名的问题,比如说定义的时候使用全名(android.os.Message)。
Chat也是Smack中的:
import org.jivesoftware.smack.chat.Chat;
public void SendMessage(String friend_id, String chat_content){
    Chat chat= chatManager.createChat(friend_id+"@"+XMPP_DOMAIN);//创建一个聊天,username为对方用户名
    Message msg=new Message();
    msg.setBody(chat_content);//消息主体
    try {
        chat.sendMessage(msg);//发送一个文本消息
        myApp.Print("发送消息成功");
    } catch (SmackException.NotConnectedException e) {
        e.printStackTrace();
        myApp.Print("发送消息失败");
    }
}
8、接收消息
需要设置监听器
public void ReceiveMessage(){
    if (chatManager != null){
        chatManager.addChatListener(new ChatManagerListener() {
            /**
             * @param chat
             * @param b    消息是否来自本地用户
             */
            @Override
            public void chatCreated(Chat chat, boolean b) {
                if (!b) {
                    chat.addMessageListener(new ChatMessageListener() {
                        @Override
                        public void processMessage(Chat chat2, final Message message) {
                            System.out.println("ReceiveMessage");
                            String msg=message.getBody();
                            if (msg != null) {
                                String friend_id = from.getLocalpart().toString();
                                String message_content = msg;
                                //在此处可以处理接收到的消息
                                //………
                                //如果在发送的时候有自定义消息体,比如我们发送的时候添加了一个名为“textColor”的消息体,在这里就可以根据名称取出
//                             String color=message.getBody("textColor");
                            }
                        }
                    });
                }
            }
        });
    }
}
9、搜索用户
搜索结果是可能有多个的,比如搜索“user”,可能出现“user1”、“user2”、“user11”。
public List<String> searchUsers(String userName) throws XMPPException.XMPPErrorException {
    List<String> result = new ArrayList<String>();
    UserSearchManager usm = new UserSearchManager(mConnection);
    try {
        Form searchForm = usm.getSearchForm("search."+XMPP_DOMAIN); //括号内的字符串需要注意
        Form answerForm = searchForm.createAnswerForm();
        answerForm.setAnswer("Username", true);
        answerForm.setAnswer("search", userName);
        ReportedData data = usm.getSearchResults(answerForm, "search."+XMPP_DOMAIN);
        List<ReportedData.Row> it = data.getRows();
        for(ReportedData.Row row:it){
            String temp_userid = row.getValues("Username").get(0);
            result.add(temp_userid);
        }
    } catch (SmackException.NoResponseException e) {
        e.printStackTrace();
    } catch (SmackException.NotConnectedException e) {
        e.printStackTrace();
    }
    return result;
}
10、发送好友订阅请求
进行好友操作时,最好先了解XMPP中的好友订阅系统,了解添加和删除好友时订阅情况变化的整个过程。这里不做解释。
//添加好友
public boolean addFriend(String friend_id){
    Roster roster = Roster.getInstanceFor(mConnection);
    try {
        //发送好友请求,设置组别
        roster.createEntry(friend_id + "@" + XMPP_DOMAIN, friend_id, new String[]{"Friends"});
        System.out.println("成功发送好友请求");
        return true;

    } catch (SmackException.NotLoggedInException e) {
        e.printStackTrace();
    } catch (SmackException.NoResponseException e) {
        e.printStackTrace();
    } catch (XMPPException.XMPPErrorException e) {
        MakeToast("无法连接服务器");
        e.printStackTrace();
    } catch (SmackException.NotConnectedException e) {
        e.printStackTrace();
    }
    return false;
}
11、处理好友请求
首先需要设置监听器,这样才能接收到其他用户发来的好友订阅请求:
private void ReceiveNewFriend(){
    //条件过滤器
    AndFilter filter = new AndFilter(new StanzaTypeFilter(Presence.class));
    //packet监听器
    StanzaListener packetListener = new StanzaListener() {
        @Override
        public void processPacket(Stanza packet) throws SmackException.NotConnectedException {
            if (packet instanceof Presence) {
                Presence presence = (Presence) packet;
                String fromId = presence.getFrom();
                String from = presence.getFrom().split("@")[0];
                String str_toast = "";
                if (presence.getType().equals(Presence.Type.subscribe)) {
                        str_toast = from + "请求添加好友";
                } else if (presence.getType().equals(Presence.Type.subscribed)) {//对方同意订阅
                    str_toast = from + "同意了您的好友请求";
                } else if (presence.getType().equals(Presence.Type.unsubscribe)) {//拒绝订阅
                    str_toast = from + "拒绝了您的好友请求";
                } else if (presence.getType().equals(Presence.Type.unsubscribed)) {//取消订阅
                    str_toast = from + "将你从好友中删除";
                } else if (presence.getType().equals(Presence.Type.unavailable)) {//离线
                    str_toast = from + "下线了";
                } else if (presence.getType().equals(Presence.Type.available)) {//上线
                    str_toast = from + "上线了";
                }
                if(str_toast.length()>0){
                    myApp.MakeToast(str_toast);
                }
            }
        }
    };
    //添加监听
    mConnection.addAsyncStanzaListener(packetListener, filter);
}
接收到了好友请求后,就可以进行“同意”或者“拒绝”操作了;
同意的代码如下:
//同意好友请求
public boolean agreeNewFriend(String friend_id){
    Presence pres = new Presence(Presence.Type.subscribed);
    pres.setTo(friend_id+"@"+XMPP_DOMAIN);
    try {
        mConnection.sendStanza(pres); //同意请求
        return true;
    } catch (SmackException.NotConnectedException e) {
        e.printStackTrace();
    }
    return false;
}
拒绝的代码如下:
//拒绝好友请求
public boolean refuseNewFriend(String friend_id){
    Presence pres = new Presence(Presence.Type.unsubscribed);
    pres.setTo(friend_id+"@"+XMPP_DOMAIN);
    try {
        mConnection.sendStanza(pres);
        return true;
    } catch (SmackException.NotConnectedException e) {
        e.printStackTrace();
    }
    return false;
}
12、删除好友
public void removeFriend(String friend_id){
    Roster roster = Roster.getInstanceFor(mConnection);
    RosterEntry entry = roster.getEntry(friend_id+"@"+XMPP_DOMAIN);
    try {
        roster.removeEntry(entry);
    } catch (SmackException.NotLoggedInException e) {
        e.printStackTrace();
    } catch (SmackException.NoResponseException e) {
        e.printStackTrace();
    } catch (XMPPException.XMPPErrorException e) {
        e.printStackTrace();
    } catch (SmackException.NotConnectedException e) {
        e.printStackTrace();
    }
}
关于XMPP和Smack的使用我就总结到这,都是从网上找的使用方法再解决了一个个坑总结的,在此写这篇文章为他人提供便利。