示例目录:
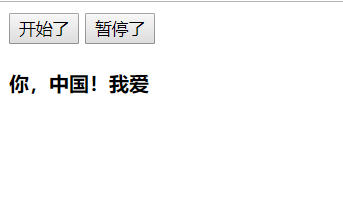
1.跑马灯效果
2.简单计数器
3.品牌案例(添加、删除、搜索)
4.过滤器的基本使用
5.全局过滤器与自定义过滤器
6.自定义按键修饰符和获取焦点
7.结合node手写JSONP服务器
1.跑马灯效果
代码如下:
<!DOCTYPE html>
<html lang="en">
<head>
    <meta charset="UTF-8">
    <title>Title</title>
    <!--1.导入包-->
    <script src="vue.js"></script>
</head>
<body>
    <!--2.创建一个要控制的区域-->
    <div id="app">
        <input type="button" value="开始了" @click="action">
        <input type="button" value="暂停了" @click="stop">

        <h4>{{ msg }}</h4>
    </div>

<script>
    var vm = new Vue({
        el:"#app",
        data:{
            msg:'我爱你,中国!',
            intervalId:null   //在data上定义定时器id
        },
        methods:{

            action(){

                // 定时器方法1
                // var _this  = this
                // setInterval(function () {
                //     var start = _this.msg.substring(0,1)  //获取到头的第一个字符
                //     var end = _this.msg.substring(1)  //获取到后面的所有字符
                //     _this.msg = end + start  //重新拼接得到新的字符串,并赋值给 this.msg
                // },400)

                if (this.intervalId != null) return;   //开始前判断是否为null,是的开始计时,不是就返回
                //定时器方法2
                 this.intervalId = setInterval(()=>{
                    var start = this.msg.substring(0,1)  //获取到头的第一个字符
                    var end = this.msg.substring(1)  //获取到后面的所有字符
                    this.msg = end + start  //重新拼接得到新的字符串,并赋值给 this.msg

                },400)
            },

            stop(){  //停止定时器
                clearInterval(this.intervalId)
                this.intervalId = null;  //结束后重新定义为null
            }
        }

    })

</script>
</body>
</html>
渲染图:

2.简单计数器
<!DOCTYPE html>
<html lang="en">
<head>
    <meta charset="UTF-8">
    <title>Title</title>
    <script src="vue.js"></script>
</head>
<body>
    <div id="app">
        <input type="text" v-model = "n1">
        <select name="" id="" v-model = "opt">
            <option value="+">+</option>
            <option value="-">-</option>
            <option value="*">*</option>
            <option value="/">/</option>
        </select>
        <input type="text" v-model="n2">
        <input type="button" value="=" @click = "calc">
        <input type="text" v-model = "result">
    </div>
<script>
    var vm = new Vue({
        el:"#app",
        data:{
            n1:0,
            n2:0,
            result:0,
            opt:'+',
        },
        methods:{
            calc(){ //计算器计数的方法
                // switch(this.opt){
                //     case '+':
                //         this.result = parseInt(this.n1) + parseInt(this.n2)
                //         break
                //     case '-':
                //         this.result = parseInt(this.n1) - parseInt(this.n2)
                //         break
                //     case '*':
                //         this.result = parseInt(this.n1) * parseInt(this.n2)
                //         break
                //     case '/':
                //         this.result = parseInt(this.n1) / parseInt(this.n2)
                //         break
                // }

                //投机取巧方式:少用
                var codeStr = 'parseInt(this.n1)' + this.opt + 'parseInt(this.n2)'
                this.result = eval(codeStr)
            }
        }
    })
</script>
</body>
</html>
渲染图:

3.品牌案例
<!DOCTYPE html>
<html lang="en">
<head>
    <meta charset="UTF-8">
    <title>Title</title>
    <script src="vue.js"></script>
    <link rel="stylesheet" href="bootstrap-3.3.7-dist/css/bootstrap.min.css">
</head>
<body>
    <div id="app">
        <div class="panel panel-primary">
                <div class="panel-heading">
                    <h3 class="panel-title">添加品牌</h3>
                </div>
                <div class="panel-body form-inline">
                    <label for="">
                        id:
                        <input type="text" class="form-control" v-model="id">
                    </label>

                    <label for="">
                        name:
                        <input type="text" class="form-control" v-model="name">
                    </label>

                    <label for="">
                        搜索关键字:
                        <input type="text" class="form-control" v-model="keywords">
                    </label>
                    <input type="button" value="添加" class="btn btn-primary" @click="add">
                </div>
        </div>

        <table class="table table-bordered table-hover table-striped">
            <thead>
                <tr>
                    <th>id</th>
                    <th>name</th>
                    <th>ctime</th>
                    <th>operation</th>
                </tr>
            </thead>
            <tbody>
            <!--搜索关键词:使用自定义search方法-->
                <tr v-for="item in search(keywords)" :key="item.id">
                     <td>{{item.id}}</td>
                     <td v-text="item.name"></td>
                     <td>{{item.ctime}}</td>
                    <td>
                        <a href="" @click.prevent="del(item.id)">删除</a>
                    </td>
                </tr>
            </tbody>
        </table>
    </div>
</body>
<script>
    var vm = new Vue({
        el:'#app',
        data:{
            id:'',
            name:'',
            keywords:'',
            list:[
                {id:1,name:'奔驰',ctime:new Date()},
                {id:2,name:'宝马',ctime:new Date()},
                {id:3,name:'大众',ctime:new Date()},
            ]
        },
        methods:{
            add(){
            //分析:
            //1.获取到id和name,直接从data上获取
            //2.组织出一个对象
            //3.吧这个对象,调用数组的相关方法,添加到当前data上的list中
            //4.注意:在Vue中,已经实现了双向绑定,每当更新数据都会在页面上渲染更新。
            //5.当我们意识到里面的第四步时,就入门vue了,更多的是在model数据的操作,同时,指定业务逻辑数据操作
            var car ={id:this.id,name:this.name,ctime:new Date()}
            this.list.push(car)
            this.id = this.name = ''
            },
            del(id){
            //分析:
            //1.如何根据id,找到要删除这一项的索引
            //2.找到后,直接调用数组的splice方法

            //通过some方法来查找id并删除
            // this.list.some((item,i)=>{
            //     if(item.id == id){
            //         this.list.splice(i,1)
            //         return true;
            //     }
            // })

            //通过findindex()来查找索引并删除
            var index = this.list.findIndex(item =>{
                if(item.id == id){
                    return true;
                }
            })
                // console.log(index)
                this.list.splice(index,1 )
            },
            search(keywords){
                // var newList=[]
                // this.list.forEach(item=>{
                //     if(item.name.indexOf(keywords)!= -1){
                //         newList.push(item)
                //     }
                // })
                // return newList

                //注意:forEach、some、filter、findindex 都会对数组中的每一项进行遍历
                 return this.list.filter(item=>{
                    if(item.name.includes(keywords)){
                        return item
                    }
                })
            }
         },
    })

    //过滤器的定义语法
    //Vue.filter('过滤器的名称',function(){})
</script>
</html>
实现功能:
添加,删除,查询

4.过滤器的基本使用
<!DOCTYPE html>
<html lang="en">
<head>
    <meta charset="UTF-8">
    <title>Title</title>
    <script src="vue.js"></script>
</head>
<body>
<div id="app">
    <p>{{msg|msgFormat('疯狂','123') |text}}</p>
</div>
<script>
    Vue.filter('msgFormat',function (msg,arg1,arg2) {
        // return msg.replace('单纯',arg)
        return msg.replace(/单纯/g,arg1+arg2)
    })

    Vue.filter('text',function (msg) {
        return msg+ '============='
    })

    var vm = new Vue({
        el:'#app',
        data:{
            msg:'曾经,我也是一个单纯的少年,单纯的我,傻傻的问,谁是世界上最单纯的男人'
        },
        methods:{},
    })
</script>
</body>
</html>
实现如下:

5.全局过滤器和私有过滤器
<!DOCTYPE html>
<html lang="en">
<head>
    <meta charset="UTF-8">
    <title>Title</title>
    <script src="vue.js"></script>
    <link rel="stylesheet" href="bootstrap-3.3.7-dist/css/bootstrap.min.css">
</head>
<body>
    <div id="app">
        <div class="panel panel-primary">
                <div class="panel-heading">
                    <h3 class="panel-title">添加品牌</h3>
                </div>
                <div class="panel-body form-inline">
                    <label for="">
                        id:
                        <input type="text" class="form-control" v-model="id">
                    </label>

                    <label for="">
                        name:
                        <input type="text" class="form-control" v-model="name">
                    </label>

                    <label for="">
                        搜索关键字:
                        <input type="text" class="form-control" v-model="keywords">
                    </label>
                    <input type="button" value="添加" class="btn btn-primary" @click="add">
                </div>
        </div>

        <table class="table table-bordered table-hover table-striped">
            <thead>
                <tr>
                    <th>id</th>
                    <th>name</th>
                    <th>ctime</th>
                    <th>operation</th>
                </tr>
            </thead>
            <tbody>
            <!--搜索关键词:使用自定义search方法-->
                <tr v-for="item in search(keywords)" :key="item.id">
                     <td>{{item.id}}</td>
                     <td v-text="item.name"></td>
                     <td>{{item.ctime | dateFormat('')}}</td>
                    <td>
                        <a href="" @click.prevent="del(item.id)">删除</a>
                    </td>
                </tr>
            </tbody>
        </table>
    </div>

    <div id="app2">
        <h3>{{dt | dateFormat}}</h3>
    </div>

</body>
<script>
    //全局过滤器
    Vue.filter('dateFormat',function (dateStr,pattern="") {
            var dt = new Date(dateStr);
                var y = dt.getFullYear().toString().padStart(2,'0');
                var m = (dt.getMonth() + 1).toString().padStart(2,'0');
                var d = dt.getDate().toString().padStart(2,'0');
            // return y+ '-' + m + '-' +d
            // return `${y}-${m}-${d}`
            if (pattern & pattern.toLowerCase() === 'yyyy-mm-dd'){
                return `${y}-${m}-${d}`
            }else{
                var hh = dt.getHours().toString().padStart(2,'0')
                var mm = dt.getMinutes().toString().padStart(2,'0')
                var ss = dt.getSeconds().toString().padStart(2,'0')
                return `${y}-${m}-${d} ${hh}:${mm}:${ss}`
            }
    })

    var vm = new Vue({
        el:'#app',
        data:{
            id:'',
            name:'',
            keywords:'',
            list:[
                {id:1,name:'奔驰',ctime:new Date()},
                {id:2,name:'宝马',ctime:new Date()},
                {id:3,name:'大众',ctime:new Date()},
            ]
        },
        methods:{
            add(){
            //分析:
            //1.获取到id和name,直接从data上获取
            //2.组织出一个对象
            //3.吧这个对象,调用数组的相关方法,添加到当前data上的list中
            //4.注意:在Vue中,已经实现了双向绑定,每当更新数据都会在页面上渲染更新。
            //5.当我们意识到里面的第四步时,就入门vue了,更多的是在model数据的操作,同时,指定业务逻辑数据操作
            var car ={id:this.id,name:this.name,ctime:new Date()}
            this.list.push(car)
            this.id = this.name = ''
            },
            del(id){
            //分析:
            //1.如何根据id,找到要删除这一项的索引
            //2.找到后,直接调用数组的splice方法

            //通过some方法来查找id并删除
            // this.list.some((item,i)=>{
            //     if(item.id == id){
            //         this.list.splice(i,1)
            //         return true;
            //     }
            // })

            //通过findindex()来查找索引并删除
            var index = this.list.findIndex(item =>{
                if(item.id == id){
                    return true;
                }
            })
                // console.log(index)
                this.list.splice(index,1 )
            },
            search(keywords){
                // var newList=[]
                // this.list.forEach(item=>{
                //     if(item.name.indexOf(keywords)!= -1){
                //         newList.push(item)
                //     }
                // })
                // return newList

                //注意:forEach、some、filter、findindex 都会对数组中的每一项进行遍历
                 return this.list.filter(item=>{
                    if(item.name.includes(keywords)){
                        return item
                    }
                })
            }
         },
    })

    var vm2 = new Vue({
        el:'#app2',
        data:{
            dt:new Date()
        },
        methods:{},
        filters:{//定义私有过滤器,过滤器有两个条件:过滤器名称和处理函数,全局和私有同名,就近原则,先使用私有过滤器
            dateFormat:function (dateStr,pattern = '') {
                var dt = new Date(dateStr);
                var y = dt.getFullYear().toString().padStart(2,'0');
                var m = (dt.getMonth() + 1).toString().padStart(2,'0');
                var d = dt.getDate().toString().padStart(2,'0');
                return y+ '-' + m + '-' +d
            }
        },
    })
</script>
</html>
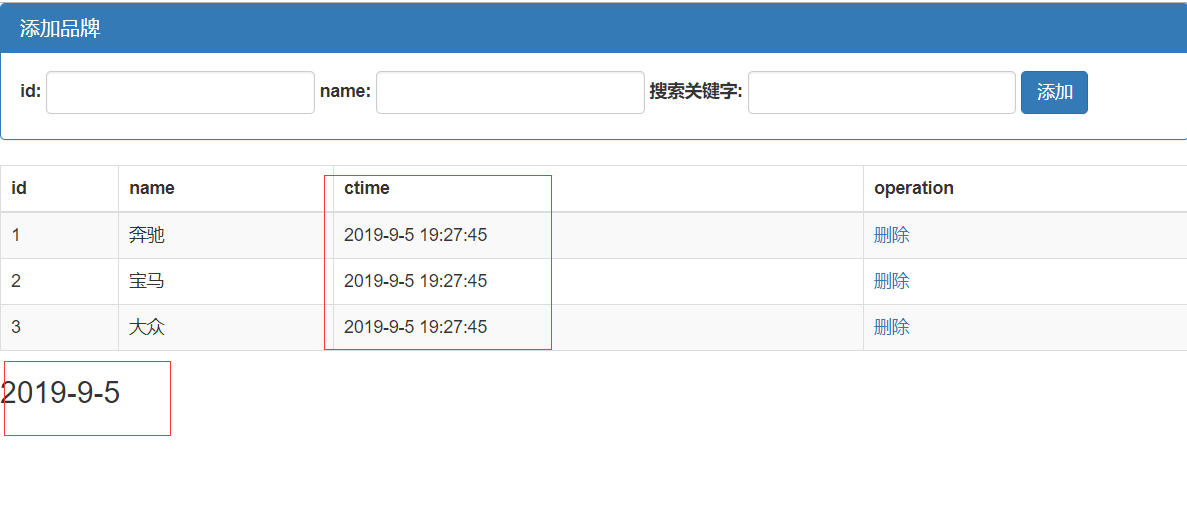
实现效果:

6.自定义按键修饰符和获取焦点
<!DOCTYPE html>
<html lang="en">
<head>
    <meta charset="UTF-8">
    <title>Title</title>
    <script src="vue.js"></script>
    <link rel="stylesheet" href="bootstrap-3.3.7-dist/css/bootstrap.min.css">
</head>
<body>
    <div id="app">
        <div class="panel panel-primary">
                <div class="panel-heading">
                    <h3 class="panel-title">添加品牌</h3>
                </div>
                <div class="panel-body form-inline">
                    <label for="">
                        id:
                        <input type="text" class="form-control" v-model="id">
                    </label>

                    <label for="">
                        name:
                        <input type="text" class="form-control" v-model="name" @keyup.f2="add">
                    </label>

                    <label for="">
                        搜索关键字:
                        <!--注意:vue所有的指令,在调用的时候都以v-开头。。。-->
                        <input type="text" class="form-control" v-model="keywords" id="search" v-focus v-color="'red'">
                    </label>
                    <input type="button" value="添加" class="btn btn-primary" @click="add">
                </div>
        </div>

        <table class="table table-bordered table-hover table-striped">
            <thead>
                <tr>
                    <th>id</th>
                    <th>name</th>
                    <th>ctime</th>
                    <th>operation</th>
                </tr>
            </thead>
            <tbody>
            <!--搜索关键词:使用自定义search方法-->
                <tr v-for="item in search(keywords)" :key="item.id">
                     <td>{{item.id}}</td>
                     <td v-text="item.name"></td>
                     <td>{{item.ctime | dateFormat('')}}</td>
                    <td>
                        <a href="" @click.prevent="del(item.id)">删除</a>
                    </td>
                </tr>
            </tbody>
        </table>
    </div>

    <div id="app2">
        <h3>{{dt | dateFormat}}</h3>
    </div>

</body>
<script>
    //全局过滤器
    Vue.filter('dateFormat',function (dateStr,pattern="") {
            var dt = new Date(dateStr);
                var y = dt.getFullYear().toString().padStart(2,'0');
                var m = (dt.getMonth() + 1).toString().padStart(2,'0');
                var d = dt.getDate().toString().padStart(2,'0');
            // return y+ '-' + m + '-' +d
            // return `${y}-${m}-${d}`
            if (pattern & pattern.toLowerCase() === 'yyyy-mm-dd'){
                return `${y}-${m}-${d}`
            }else{
                var hh = dt.getHours().toString().padStart(2,'0')
                var mm = dt.getMinutes().toString().padStart(2,'0')
                var ss = dt.getSeconds().toString().padStart(2,'0')
                return `${y}-${m}-${d} ${hh}:${mm}:${ss}`
            }
    })

    //自定义全局按键修饰符
    Vue.config.keyCodes.f2 = 113

    // document.getElementById('search').focus()
    //使用Vue.directive() 定义全局指令
    //其中:参数1:指令的名称,注意:在定义的时候指令的名称不需要加v-
    //参数2:是一个钩子函数,可以增加相关的操作
    Vue.directive('focus',{
        bind:function(el){
            //每当指令绑定到元素上的时候,会立即执行这个bind函数只执行一次
            //注意:每个函数中,第一个参数永远是el,el是原生js的对象
            //一个元素只有插入dom之后,才能获取焦点
            // el.focus()
        },
        inserted:function(el){
            //inseted表示元素插入到dom中时候,会执行inserted函数触发1次
            el.focus()
        },
        updated:function(el){
            //当vnode更新的时候,会执行updated,可能会触发多次
        },
    })

    Vue.directive('color',{
        bind:function (el,binding) {
            el.style.color = binding.value
        }
    })

    var vm = new Vue({
        el:'#app',
        data:{
            id:'',
            name:'',
            keywords:'',
            list:[
                {id:1,name:'奔驰',ctime:new Date()},
                {id:2,name:'宝马',ctime:new Date()},
                {id:3,name:'大众',ctime:new Date()},
            ]
        },
        methods:{
            add(){
            //分析:
            //1.获取到id和name,直接从data上获取
            //2.组织出一个对象
            //3.吧这个对象,调用数组的相关方法,添加到当前data上的list中
            //4.注意:在Vue中,已经实现了双向绑定,每当更新数据都会在页面上渲染更新。
            //5.当我们意识到里面的第四步时,就入门vue了,更多的是在model数据的操作,同时,指定业务逻辑数据操作
            var car ={id:this.id,name:this.name,ctime:new Date()}
            this.list.push(car)
            this.id = this.name = ''
            },
            del(id){
            //分析:
            //1.如何根据id,找到要删除这一项的索引
            //2.找到后,直接调用数组的splice方法

            //通过some方法来查找id并删除
            // this.list.some((item,i)=>{
            //     if(item.id == id){
            //         this.list.splice(i,1)
            //         return true;
            //     }
            // })

            //通过findindex()来查找索引并删除
            var index = this.list.findIndex(item =>{
                if(item.id == id){
                    return true;
                }
            })
                // console.log(index)
                this.list.splice(index,1 )
            },
            search(keywords){
                // var newList=[]
                // this.list.forEach(item=>{
                //     if(item.name.indexOf(keywords)!= -1){
                //         newList.push(item)
                //     }
                // })
                // return newList

                //注意:forEach、some、filter、findindex 都会对数组中的每一项进行遍历
                 return this.list.filter(item=>{
                    if(item.name.includes(keywords)){
                        return item
                    }
                })
            }
         },
    })

    var vm2 = new Vue({
        el:'#app2',
        data:{
            dt:new Date()
        },
        methods:{},
        filters:{//定义私有过滤器,过滤器有两个条件:过滤器名称和处理函数,全局和私有同名,就近原则,先使用私有过滤器
            dateFormat:function (dateStr,pattern = '') {
                var dt = new Date(dateStr);
                var y = dt.getFullYear().toString().padStart(2,'0');
                var m = (dt.getMonth() + 1).toString().padStart(2,'0');
                var d = dt.getDate().toString().padStart(2,'0');
                return y+ '-' + m + '-' +d
            }
        },
    })


</script>
</html>
7.结合node手写JSONP服务器
node.js
const http = require('http')   //1.导入http内置模块
const urlModule = require('url')  //2.这个核心模块,可以解析url地址,从而拿到pathname
const server = http.createServer() // 3.创建一个http服务器

server.on('request',function (req,res) {  //4.监听http服务器的request请求
    // const url = req.url
    const{pathname:url,query} = urlModule.parse(req.rul,true)
    if (url === '/getscript'){
        // var scriptStr = 'show()'
        var data = {
            name:'zxc',
            age:18,
            gender:'male'
        }
        var scriptStr = `${query.callback}(${JSON.stringify(data)})`
        res.end(scriptStr)
    }else{
        res.end('404')
    }
})
http客户端:
<!DOCTYPE html>
<html lang="en">
<head>
    <meta charset="UTF-8">
    <title>Title</title>
</head>
<body>
<script>
    function showInfo123(data) {
        console.log(data)
    }
</script>

<script src="http://127.0.0.1:30000/getscript?callback=showInfo123">

</script>
</body>
</html>