以前以为php调试时服务器端和IDE必须在同一台机子上,无意发现xdebug其实是支持远程调试的。
尝试之后发现可以配置成功,还是可以调试代码的感觉爽啊!
php所在Ubuntu服务器 :192.168.10.XXX
Windows开发机(Zend作为IDE) :192.168.40.XXX
PS:PHPStorm也是可以配置成功的,个人更喜欢Zend,所以以zend为例。
1.服务器端安装php的xdebug插件
使用php编译出xdebug,放到php的插件目录
/opt/php/lib/php/extensions/no-debug-non-zts-20121212/xdebug.so
2.配置php.ini
[xdebug]
zend_extension="/opt/php/lib/php/extensions/no-debug-non-zts-20121212/xdebug.so"
xdebug.remote_enable=1
xdebug.remote_handler=dbgp
xdebug.remote_host=192.168.10.XXX ← 此处为服务器IP
xdebug.remote_port=9009 ← 默认9000端口与php-fpm冲突,改成9009
xdebug.remote_connect_back=1
xdebug.remote_autostart=0
※修改完后需要重启web服务器
3.windows开发下安装Zend
4.配置Zend
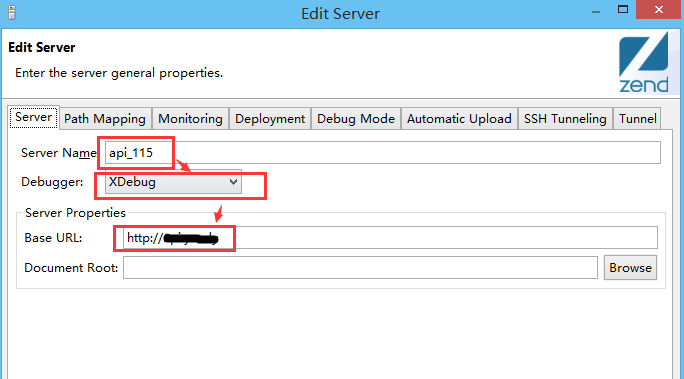
1)配置PHP Servers

起一个Server name,设置Debugger方式为Xdebug,最后设置启动目录
还是这个窗口,切到第二个tab上,配置服务器目录和本地代码目录的对应关系。(关键步骤)
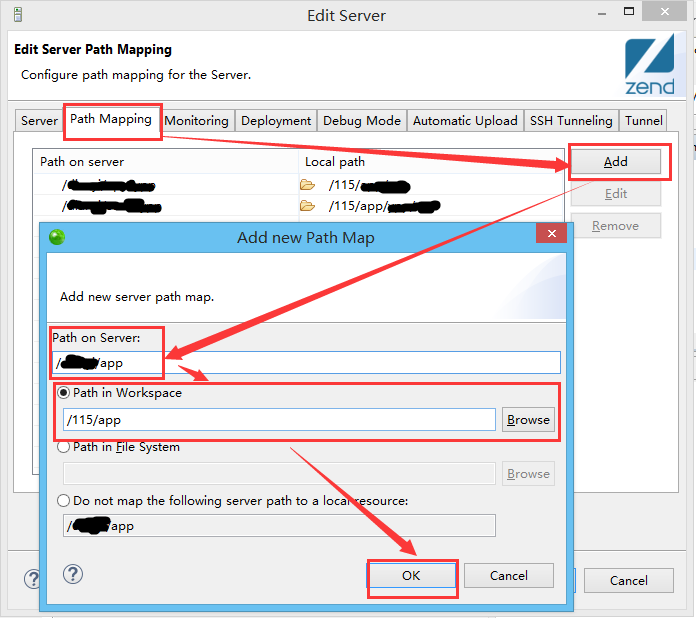
注意:我使用samba使得windows下用的和ubuntu下是同一份代码,如果本地代码和服务器不一致的话,不清楚会发生什么!
2)配置xdebug
由于把xdebug的默认端口号改为了9009,所以这里也需要修改为9009。

3)确认php的debug模式
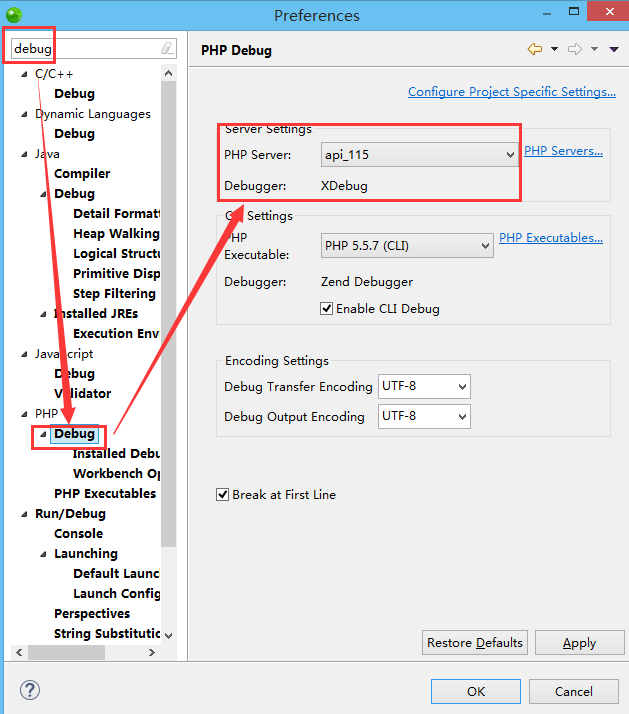
这里的PHP Server应该就是前面配置好的那个Server名
4)修改默认浏览器为chrome。默认的内置浏览器行为怪异,建议使用chrome

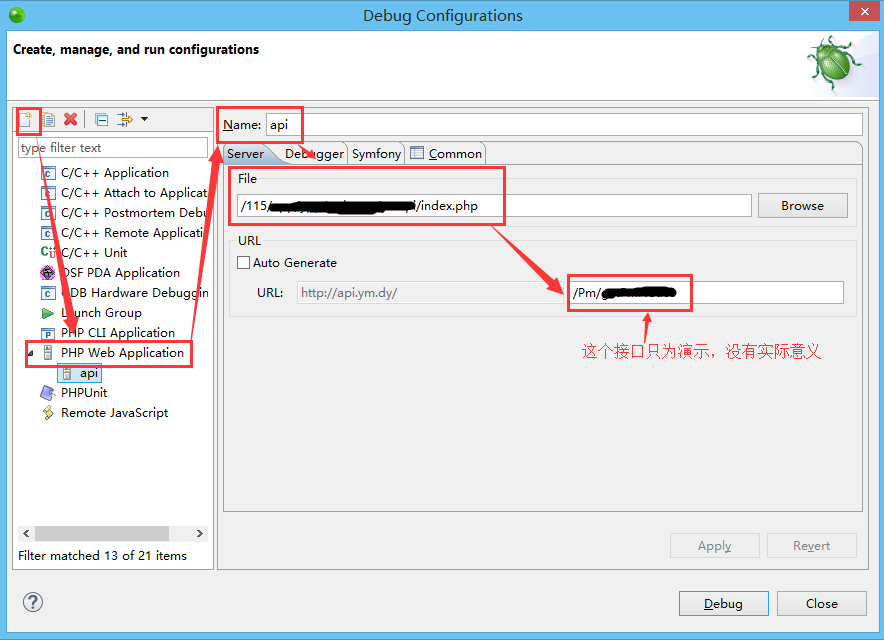
5.配置debug启动项
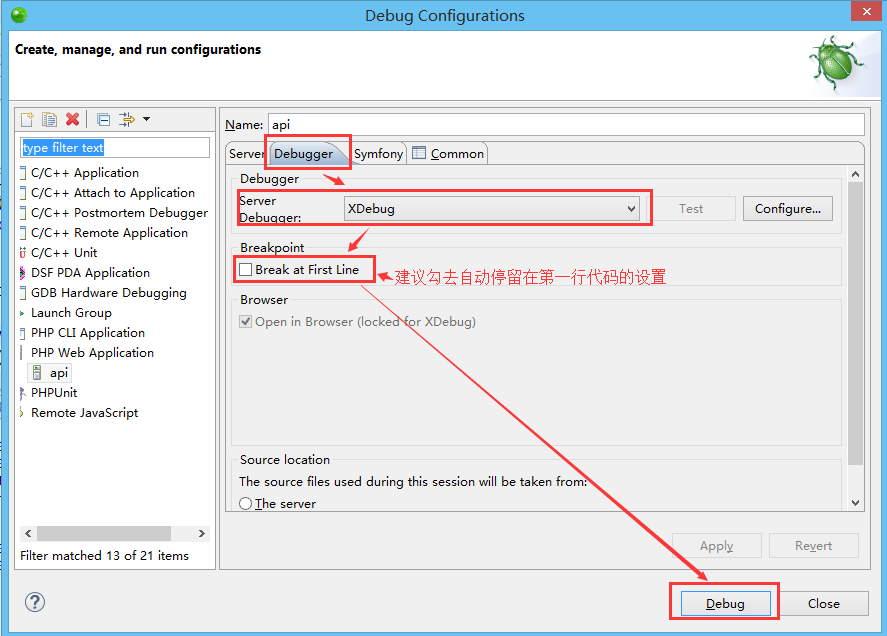
继续确认Debugger是否配置为了xdebug
6.确认结果
想要调试的代码行前面单击,打上断点,然后刷新浏览器,查看断点是否进入。
没有问题的话,将会进入断点
以上