Cesium-01:Vue 中基础使用
Cesium-02:飞机模型基本飞行
在上一篇文章中,对 Cesium 基本初始化有了了解。
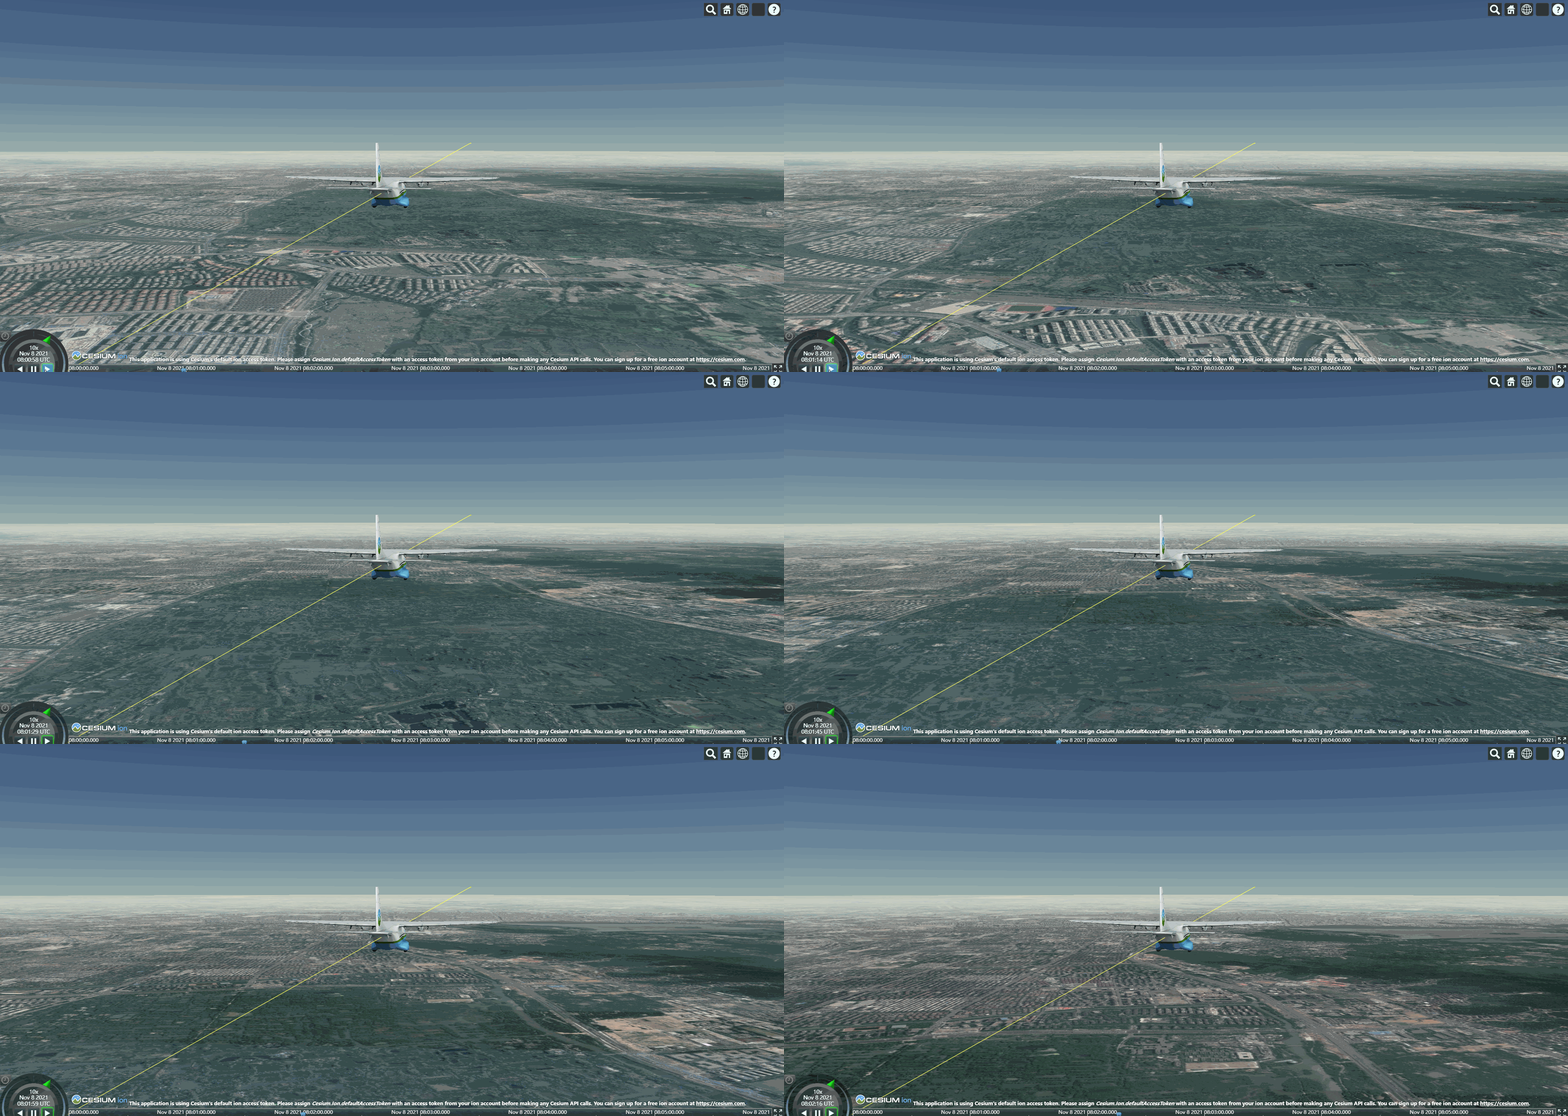
在看了官网一些例子后,做了一个飞机根据指定路线飞行的 Demo。
飞机飞行
对于飞机飞行,主要分为以下几个步骤。
1、模型创建
使用的飞机模型是 Cesium 官网上的,可以自行下载。
创建模型基本代码:
      const entity = this.cesiumViewer.entities.add({
        name: 'air',
        // 放置点
        position: '',
        // 模型的朝向等
        orientation: orientation,
        // 绑定模型文件
        model: {
          uri: './model/Cesium_Air.glb',
          minimumPixelSize: 128,
          maximumScale: 20000
        },
        // 路线样式
        path: {
          resolution: 1,
          material: new Cesium.PolylineGlowMaterialProperty({
            glowPower: 0.1,
            color: Cesium.Color.YELLOW.withAlpha(1)
          }),
           3
        }
      })
2、计算路线和时间
Cesium 里面比较好的一个点就是,可以设置时间轴,设置好对应时间的坐标信息,就可以控制飞行了。
所以这里就是计算路线和时间,并把这两信息做一一对应。
下面是写的一个简单的路径计算函数:
    computeFly() {
      // 位置参考和方向等信息的存储
      const property = new Cesium.SampledPositionProperty()

      // 起点:杭州城西
      const startPoint = [119.966746, 30.270928]
      // 终点:钱江新城
      const endPoint = [120.220684, 30.26294]

      this.height = 500
      const length = 100
      const lonAvg = (endPoint[0] - startPoint[0]) / length
      const latAvg = (endPoint[1] - startPoint[1]) / length
      for (let index = 0; index < length; index++) {
        const time = Cesium.JulianDate.addSeconds(this.startTime, 3.6 * index, new Cesium.JulianDate())
        const position = Cesium.Cartesian3.fromDegrees(startPoint[0] + lonAvg * index, startPoint[1] + latAvg * index, this.height)
        property.addSample(time, position)
      }
      return property
    }
3、调整飞行视角
经过上面两部,基本的工作已经完成了。
把对应的路线、方向信息绑定到模型。
此时虽然可以飞了,但是飞机的视角并不是很好。
主要是设置 entity 的 viewFrom 。
这里又两个点:
a)赋值的是迪卡尔4系坐标(这里可以区路线中的第一个位置向量)
b)这个坐标系是相对的,相对于模型的中心点
4、全部代码
下面是全部的代码:
<template>
  <div id="cesiumContainer" class="cesium-box" />
</template>

<script>
import 'cesium/Build/Cesium/Widgets/widgets.css'
import * as Cesium from 'cesium'

const googleMap = 'https://mt0.google.com/vt/lyrs=s&x={x}&y={y}&z={z}'

export default {
  name: 'App',
  data() {
    return {
      cesiumViewer: null,
      homeView: null,
      startTime: null,
      stopTime: null,
      height: 4000
    }
  },
  created() {
    this.homeView = {
      destination: Cesium.Cartesian3.fromDegrees(119.966746, 30.270528, this.height + 500),
      orientation: {
        // 航向
        heading: Cesium.Math.toRadians(0),
        // 俯仰
        pitch: Cesium.Math.toRadians(-60),
        // 滚转
        roll: 0.0
      },
      // camera 初始化后回调函数
      complete: this.createModel
    }

    this.startTime = Cesium.JulianDate.fromDate(new Date('2021-11-08 16:00:00'))
    this.stopTime = Cesium.JulianDate.addSeconds(this.startTime, 360, new Cesium.JulianDate())
  },
  mounted() {
    this.cesiumViewer = new Cesium.Viewer('cesiumContainer', {
      infoBox: false,
      imageryProvider: new Cesium.UrlTemplateImageryProvider({ url: googleMap })
    })

    // 设置时间轴基本信息
    this.cesiumViewer.clock.startTime = this.startTime.clone()
    this.cesiumViewer.clock.currentTime = this.startTime.clone()
    this.cesiumViewer.clock.stopTime = this.stopTime.clone()
    this.cesiumViewer.clock.multiplier = 10
    this.cesiumViewer.timeline.zoomTo(this.startTime, this.stopTime)
    this.cesiumViewer.clock.clockRange = Cesium.ClockRange.LOOP_STOP

    // 初始化视角(飞行模式)
    this.cesiumViewer.camera.flyTo(this.homeView)

    // 重写 homeButton 事件
    this.cesiumViewer.homeButton.viewModel.command.beforeExecute.addEventListener((e) => {
      // 阻止事件继续传递
      e.cancel = true
      this.cesiumViewer.camera.flyTo(this.homeView)
    })
  },
  methods: {
    createModel() {
      // 计算路线
      const property = this.computeFly()
      // 取出其中的位置向量
      const orientation = new Cesium.VelocityOrientationProperty(property)
      // 取第一个位置向量,并改变相对位置(自己 new 一个也可以)
      const viewFrom = orientation.getValue(this.startTime)
      // 相对 entity 的视角坐标(迪卡尔4系坐标,可根据 entity 大小设置)
      viewFrom.z = 20 // 相对上下
      viewFrom.x = -80 // 相对前后
      const entity = this.cesiumViewer.entities.add({
        name: 'air',
        availability: new Cesium.TimeIntervalCollection([
          new Cesium.TimeInterval({ start: this.startTime, stop: this.stopTime })
        ]),
        position: property,
        orientation: orientation,
        viewFrom: viewFrom,
        model: {
          uri: './model/Cesium_Air.glb',
          minimumPixelSize: 128,
          maximumScale: 20000
        },
        path: {
          resolution: 1,
          material: new Cesium.PolylineGlowMaterialProperty({
            glowPower: 0.1,
            color: Cesium.Color.YELLOW.withAlpha(1)
          }),
           3
        }
      })
      // 设置 viewer 一直跟随 entity
      this.cesiumViewer.trackedEntity = entity
    },

    computeFly() {
      const property = new Cesium.SampledPositionProperty()

      // 起点:杭州城西
      const startPoint = [119.966746, 30.270928]
      // 终点:钱江新城
      const endPoint = [120.220684, 30.26294]

      this.height = 500
      const length = 100
      const lonAvg = (endPoint[0] - startPoint[0]) / length
      const latAvg = (endPoint[1] - startPoint[1]) / length
      for (let index = 0; index < length; index++) {
        const time = Cesium.JulianDate.addSeconds(this.startTime, 3.6 * index, new Cesium.JulianDate())
        const position = Cesium.Cartesian3.fromDegrees(startPoint[0] + lonAvg * index, startPoint[1] + latAvg * index, this.height)
        property.addSample(time, position)
      }
      return property
    }
  }
}
</script>
最后的效果如下:
