如何发布一个包到npm
First
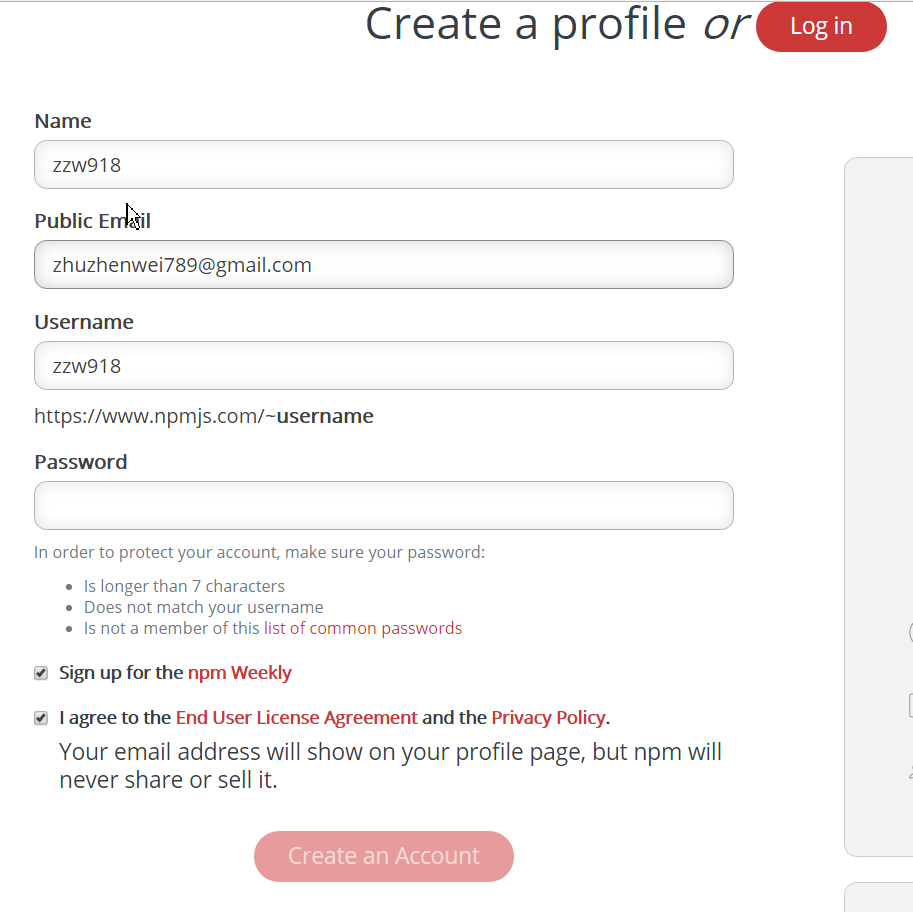
在https://www.npmjs.com注册一个账号。
Second
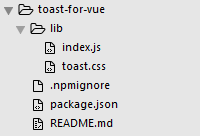
编辑好项目,文件大致如下:

其中,gitignore可以如下:
.DS_Store
node_modules/
dist/
注意:不能包含 npm-debug.log 。
Third:
npm login
Fourth:
npm publish
注意:如果使用了cnpm(默认使用),会报错:no_perms Private mode enable, only admin can publish this module
设置:npm config set registry http://registry.npmjs.org 即可。
这样就发布成功了。

如何使用自己发布的npm包
即第一步: npm install toast-for-vue --save , 然后我们就可以发现根目录下的node_modules文件中多了这个包,而这个包就是我发布的包:

第二步: 在src下的main.js中引入两个文件,如下所示:但是在使用过程中遇到了困难,就是在main.js(我使用的是vue-cli构建的项目)的引入方式如下:
import Toast from 'toast-for-vue'
import 'toast-for-vue/lib/toast.css'
Vue.use(Toast);
但是,多次尝试后台都在报错,提示这个包没有安装,我也是百思不得其解。 最后终于发现了问题所在!
因为我发现我只引入 css 文件的时候是可以引进来的,而引入 Toast 时却引不进来,于是我就尝试了下面两种方式,发现都可以成功引入:
import Toast from 'toast-for-vue/lib'
import Toast from 'toast-for-vue/lib/index.js'
于是,我自然想到了入口文件,我的package.json文件内容如下:
{
  "name": "toast-for-vue",
  "version": "1.0.0",
  "description": "toast used with vue project",
  "main": "index.js",
  "scripts": {
    "test": "echo "Error: no test specified" && exit 1"
  },
  "repository": {
    "type": "git",
    "url": "git+https://github.com/zzw918/toast-for-vue.git"
  },
  "keywords": [
    "toast",
    "vue",
    "plugin"
  ],
  "author": "John Zhu",
  "license": "ISC",
  "bugs": {
    "url": "https://github.com/zzw918/toast-for-vue/issues"
  },
  "homepage": "https://github.com/zzw918/toast-for-vue#readme"
}
可以发现,入口文件是index.js, 那么当我引入 toast-for-vue 时,肯定是不能得到 Toast 的, 因为在根目录下么有index.js ,注意,为什么我想要直接引入的时 Toast 呢? 因为在index.js中我导出了Toast插件,如下所示:

/**
 * toast-for-vue v1.0.0
 * https://github.com/zzw918/toast-for-vue
 * Released under the MIT license
 * Date: 2017-05-22
 * Author: John Zhu , in xjtu
 */

var Toast = {};
Toast.install = function (Vue, options) {
  // set default option
  var defaultOpt = {
    defaultType: 'center',
    defaultDuration: '2000'
  };

  // replace the option if we set params in Vue.use()
  for (var prop in options) {
    defaultOpt[prop] = options[prop];
  }

  // define the core function
  Vue.prototype.$toast = function (message, type) {

    // we think center type the default type
    if (typeof type == "undefined") {
      var curType = defaultOpt.defaultType;
    } else {
      var curType = type;
    }

    // if toast is used, we should delay the defaultDuration
    if (document.querySelector('.toast')) {
      function getTime() {
        return new Date().getTime();
      }
      var startTime = getTime();
      while (getTime() < startTime + defaultOpt.defaultDuration);
    }

    // create the constructor
    var template = Vue.extend({
      template: '<div class="toast toast-' + curType + '">' + message + "</div>"
    });

    // create an instance and mount it on an element
    var temEle = new template().$mount().$el;

    // insert the instance
    document.body.appendChild(temEle);

    // after the duration time, remove it
    setTimeout(function () {
      document.body.removeChild(temEle);
    }, defaultOpt.defaultDuration);
  };

  // set different kinds for call
  ['bottom', 'center', 'top'].forEach(function (type) {
    Vue.prototype.$toast[type] = function (message) {
      return Vue.prototype.$toast(message, type);
    }
  });
}

module.exports = Toast;
这样就不难理解了! 所以当务之急是设置好入口文件。 即"main": "lib/index.js", 欲了解更多,请看下文。。。
如何更新发布到npm的package?
在上面的过程中,由于没有入口文件,所以这是一个bug,我希望添加一个入口文件,所以想要更新 npm 包,并重新引入。 现介绍方法。
我们在package.json中添加入口文件,如下所示:
{
  "name": "toast-for-vue",
  "version": "1.0.0",
  "description": "toast used with vue project",
  "main": "lib/index.js",
  "scripts": {
    "test": "echo "Error: no test specified" && exit 1"
  },
  "repository": {
    "type": "git",
    "url": "git+https://github.com/zzw918/toast-for-vue.git"
  },
  "keywords": [
    "toast",
    "vue",
    "plugin"
  ],
  "author": "John Zhu",
  "license": "ISC",
  "bugs": {
    "url": "https://github.com/zzw918/toast-for-vue/issues"
  },
  "homepage": "https://github.com/zzw918/toast-for-vue#readme"
}
即这时我修改了入口文件。
接着,git add --all、 git commit 、git push 。。。
接下来,因为我们的包已经变了,所以我们就要更换版本, 如下:

即在patch之后,版本自动就成为了 1.0.1。
最后, npm publish 即可。 (注意:不要用git bash,使用管理员方式打开cmd即可。)

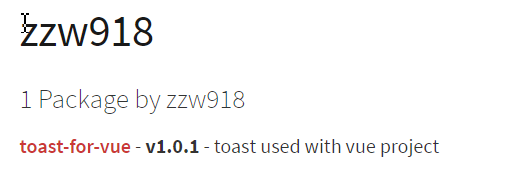
ok! 这样,我们进入npm官网,就会发现版本已经变化了:

好了,在上面的过程中,我们已经把包进行了升级,所以我们的项目中使用的版本也需要迭代, 所以,这时候,我们就需要进行更新包了,更新包非常简单,使用:
npm update toast-for-vue
这样就可以成功更新了!
补充: 其实这里更好的做法是 npm install toast-for-vue --save

import Toast from 'toast-for-vue'
import 'toast-for-vue/lib/toast.css'
Vue.use(Toast);
这样,就可以成功使用了!!!

恩,就是为了这个小效果!!!
