学习linux从实践做起。
实验环境:vmware,cenots 6,xshell
注意:使用vmware 时,网络连接设置成桥接,和宿主机位于同一个网段。
实验需求:模拟实际公司文件服务器。 新建SHARE 文件夹,权限所有人公开
新建IT 文件夹,只对IT部门员工开放
新建DE文件夹,对于DE部门员工开放
实验步骤:
1:由于selinux设置不懂,和iptables 只了解皮毛,为了不必要的麻烦:
关闭selinux :
 1 [root@localhost ~]# vi /etc/selinux/config
 2 # This file controls the state of SELinux on the system.
 3 # SELINUX= can take one of these three values:
 4 #     enforcing - SELinux security policy is enforced.
 5 #     permissive - SELinux prints warnings instead of enforcing.
 6 #     disabled - No SELinux policy is loaded.
 7 SELINUX=disabled
 8 # SELINUXTYPE= can take one of these two values:
 9 #     targeted - Targeted processes are protected,
10 #     mls - Multi Level Security protection.
11 SELINUXTYPE=targeted
关闭iptables:
1 [root@localhost ~]# service iptables stop;chkconfig iptables off;chkconfig --list | grep iptables
2 iptables: Setting chains to policy ACCEPT: filter          [  OK  ]
3 iptables: Flushing firewall rules:                         [  OK  ]
4 iptables: Unloading modules:                               [  OK  ]
5 iptables           0:off    1:off    2:off    3:off    4:off    5:off    6:off
2:reboot,查看并且确保生效
1 [root@localhost ~]# reboot
2 之后,继续查看
3 [root@localhost ~]# chkconfig --list | grep iptables
4 iptables           0:off    1:off    2:off    3:off    4:off    5:off    6:off
3:新建SHARE,IT,DE文件夹并设置权限
1 [root@localhost ~]# mkdir -m 770 /home/SHARE /home/IT /home/DE
2 [root@localhost ~]# ls -l /home/
3 total 16
4 drwxrwx---. 2 root root 4096 Dec 24 22:51 DE
5 drwxrwx---. 2 root root 4096 Dec 24 22:51 IT
6 drwxrwx---. 2 root root 4096 Dec 24 22:51 SHARE
4:新建用户组SHARE,IT,DE,新建IT1,IT2用户,新建DE1,DE2用户(IT1,IT2,DE1,DE2属于SHARE组,IT1,IT2属于IT组,DE1,DE2属于IT组)
1 [root@localhost ~]#  groupadd SHARE;groupadd IT;groupadd DE
2 [root@localhost ~]# cat /etc/group
3 ...
4 SHARE:x:501:
5 IT:x:502:
6 DE:x:503:
[root@localhost ~]# useradd IT1;usermod -s /sbin/nologin IT1 ;gpasswd -a IT1 IT; useradd IT2;usermod-s /sbin/nologin IT2 ;gpasswd -a IT2 IT; useradd DE1;usermod  -s /sbin/nologin DE1 ;gpasswd -a DE1 DE;useradd DE2 ;usermod -s /sbin/nologin DE2 ;gpasswd -a DE2 DE; gpasswd -a IT1 SHARE ;gpasswd -a IT2 SHARE;gpasswd -a DE1 SHARE; gpasswd -a DE2 SHARE

[root@localhost ~]# cat /etc/group
...
public:x:506:IT1,IT2,DE1,DE2
IT:x:507:IT1,IT2
DE:x:508:DE1,DE2
IT1:x:504:
IT2:x:509:
DE1:x:510:
DE2:x:511:
5:安装samba
1 [root@localhost ~]# yum -y install samba samba-client samba-swat
1 [root@localhost ~]# rpm -qa | grep samba
2 samba-winbind-clients-3.6.23-21.el6_7.x86_64
3 samba-swat-3.6.23-21.el6_7.x86_64
4 samba-client-3.6.23-21.el6_7.x86_64
5 samba-3.6.23-21.el6_7.x86_64
6 samba-winbind-3.6.23-21.el6_7.x86_64
7 samba-common-3.6.23-21.el6_7.x86_64
6:备份smb.conf
1 [root@localhost ~]# cp /etc/samba/smb.conf /etc/samba/smb.conf.bk
7:将用户账户添加到samba账户
 1 [root@localhost ~]# smbpasswd -a IT1
 2 New SMB password:
 3 Retype new SMB password:
 4 Added user IT1.
 5 [root@localhost ~]# smbpasswd -a IT2
 6 New SMB password:
 7 Retype new SMB password:
 8 Added user IT2.
 9 [root@localhost ~]# smbpasswd -a DE1
10 New SMB password:
11 Retype new SMB password:
12 Added user DE1.
13 [root@localhost ~]# smbpasswd -a DE2
14 New SMB password:
15 Retype new SMB password:
16 Added user DE2.
查看samba服务中,注册了哪些用户
1 [root@localhost ~]# pdbedit -L
2 IT1:501:
3 DE1:503:
4 IT2:502:
5 DE2:504:
8:修改smb.conf配置文件
 1  1 [SHARE]
 2  2     comment = share
 3  3     path = /home/SHARE
 4  4     valid users = @SHARE
 5  5     read only = No
 6  6     create mask = 0770
 7  7     directory mask = 0770
 8  8
 9  9 [IT]
10 10     comment = IT
11 11     path = /home/IT
12 12     valid users = @IT
13 13     read only = No
14 14     create mask = 0770
15 15
16 16 [DE]
17 17     comment = DE
18 18     path = /home/DE
19 19     valid users = @DE
20 20     read only = No
21 21     create mask = 0770
22 22     directory mask = 0770
9:重启samba服务:
1 [root@supker ~]# service smb restart
2 Shutting down SMB services:                                [  OK  ]
3 Starting SMB services:                                     [  OK  ]
4 [root@supker ~]# service nmb restart
5 Shutting down NMB services:                                [  OK  ]
6 Starting NMB services:                                     [  OK  ]
《此处,请允许我感慨一声,真是日了狗了,测试半天,都是没有权限新建文件,然而reboot一下,就可以了!》
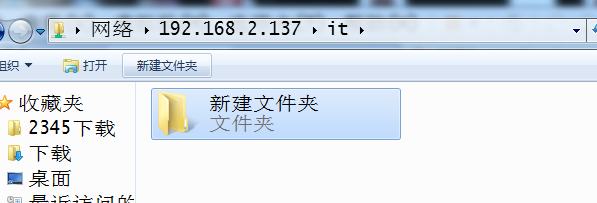
10:测试结果展示:
提示:断开共享盘连接的windows CMD命令:net use * /del /y