步骤一:切换需求
有时候在本地测试是使用8080端口(默认端口),可是上线时使用的比如是9090端口(不常用的,以防被黑)。 此时就可以通过多配置文件实现多配置支持与灵活切换。
步骤二:多配置文件
3个配置文件:
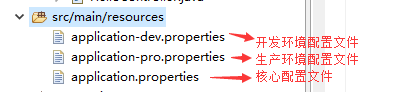
核心配置文件:application.properties
spring.mvc.view.prefix=/WEB-INF/jsp/
spring.mvc.view.suffix=.jsp
spring.profiles.active=dev
开发环境用的配置文件:application-dev.properties
server.port=8080
server.context-path=/test
生产环境用的配置文件:application-pro.properties
server.port=9090
server.context-path=/
这样就可以通过application.properties里的spring.profiles.active 灵活地来切换使用哪个环境了
步骤三:测试访问
当spring.profiles.active=dev时,访问路径:http://127.0.0.1:8080/test/hello
当spring.profiles.active=pro时,访问路径:http://127.0.0.1:9090/hello
步骤四:部署
不仅可以通过修改application.properties文件进行切换,还可以在部署环境下,指定不同的参数来确保生产环境总是使用的希望的那套配置。
E:PROJECT3springbootTest
mvn install
java -jar target/springbootTest-0.0.1-SNAPSHOT.jar --spring.profiles.active=pro
或者
java -jar target/springbootTest-0.0.1-SNAPSHOT.jar --spring.profiles.active=dev
这样就可以保证在开发环境总是用的8080端口,而到了生产环境总是用的9090端口,免去了每次上线还要修改端口号的麻烦。