一个数据绑定可以通过 Binding 对象来描述,其中包含数据源,要绑定的属性路径(Path),目标,目标属性等。 其中目标属性必须是依赖属性(DependencyProperty)。 为了说明方便,首先定义一个数据类:
    public class Person
    {
        public int Age { get; set; }
        public string Name { get; set; }
    }
例子1:
        <ListBox x:Name="list1">

        </ListBox>
    public partial class Page : UserControl
    {
        public Page()
        {
            InitializeComponent();

            var persons = new List<Person>();
            for(var i=0; i< 5; i++)
            {
                persons.Add(new Person {Name = "Person " + i.ToString(), Age = 20 + i});
            }
            list1.DataContext = persons;
        }
    }
这里仅指定了 list1 的 DataContext 属性,运行后发现页面没有显示。
如果在页面里改一改:
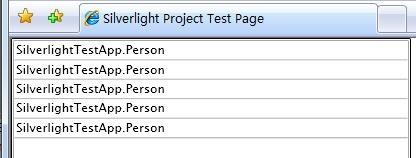
        <ListBox x:Name="list1" ItemsSource="{Binding}">

        </ListBox>
会发现绑定成功。但是数据项显示为默认的 Person 对象 ToString() 后的表示,不太友好。如下图:
或者,也可以将后台代码改成:
list1.ItemsSource = persons;
而页面 markup 仍然是:
        <ListBox x:Name="list1">

        </ListBox>
这样也能绑定成功。 这里的原因在于:ListBox 通过 ItemsSource 里的数据去填充数据项,所以直接给这个属性赋值是可以的。 或者,通过空绑定语法 {Binding},指定 ItemsSource 属性绑定为数据源的对象本身(未指定绑定路径)。而数据源就是通过 DataContext 获得的,并且这个属性的数据可以从父对象继承下来。 下面给 ListBox 指定列表项的数据模板,让它显示的好看一点:
        <ListBox x:Name="list1">
            <ListBox.ItemTemplate>
                <DataTemplate>
                    <StackPanel Orientation="Horizontal">
                        <TextBlock Text="{Binding Age}" Margin="20,0" />
                        <TextBlock Text="{Binding Name}" />
                    </StackPanel>
                </DataTemplate>
            </ListBox.ItemTemplate>
        </ListBox>
显示如下: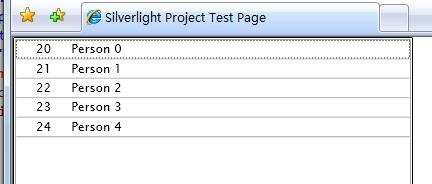
还可以将 DataTemplate 定义到 App 的 Resource 里去,以便于重用。
App.xaml:
<Application xmlns="http://schemas.microsoft.com/winfx/2006/xaml/presentation"
             xmlns:x="http://schemas.microsoft.com/winfx/2006/xaml"
             x:Class="SilverlightTestApp.App"
             >
    <Application.Resources>
		<DataTemplate x:Key="ListBoxDataTemplate">
			<StackPanel Orientation="Horizontal">
				<TextBlock Text="{Binding Age}" Margin="20,0" />
				<TextBlock Text="{Binding Name}" />
			</StackPanel>
		</DataTemplate>
	</Application.Resources>
</Application>
Page.xaml:
<UserControl x:Class="SilverlightTestApp.Page"
    xmlns="http://schemas.microsoft.com/winfx/2006/xaml/presentation"
    xmlns:x="http://schemas.microsoft.com/winfx/2006/xaml"
    Width="400" Height="300">
    <Grid x:Name="LayoutRoot" Background="White">
		<ListBox x:Name="list1" ItemTemplate="{StaticResource ListBoxDataTemplate}">
		</ListBox>
	</Grid>
</UserControl>
运行后效果一样。
=====================
接着上一篇,在 Silverlight 中支持3种绑定:OneWay, TwoWay, OneTime. 默认是 OneWay.
其中 OneWay 表示仅仅从数据源绑定到目标(通常是 UI 对象),单向的;
TwoWay 表示既可以从数据源绑定到目标,目标的更改也可以反馈给数据源,使其发生更新。
而 OneTime 是 OneWay 的一种特例,仅加载一次数据。随后数据的变更不会通知绑定目标对象。这样,可以带来更好的性能。
绑定的语法可以用大括号表示,下面是几个例子:
<TextBlock Text="{Binding Age}" />
等同于:
<TextBlock Text="{Binding Path=Age}" />
或者显式写出绑定方向:
<TextBlock Text="{Binding Path=Age, Mode=OneWay}" />
按照数据绑定的语义,默认是 OneWay 的,也就是说如果后台的数据发生变化,前台建立了绑定关系的相关控件也应该发生更新。
比如我们可以将文章 (1) 中提到的数据源改为当前页面的一个私有成员,然后在某个 Button 点击事件中更改其中的值。代码如下:
public partial class Page : UserControl
{
private List<Person> persons;
public Page()
{
InitializeComponent();
persons = new List<Person>();
for(var i=0; i< 5; i++)
{
persons.Add(new Person {Name = "Person " + i.ToString(), Age = 20 + i});
}
list1.DataContext = persons;
}
private void Button_Click(object sender, RoutedEventArgs e)
{
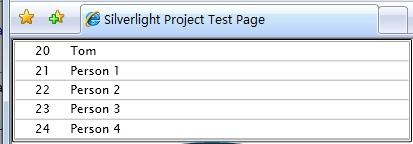
persons[0].Name = "Tom";
}
}
但是我们点击 Button 发现 ListBox 里的数据并没有发生变化。这是因为在数据源更新时,并没有发出任何通知。
我们可以让数据源中的对象实现 INotifyPropertyChanged 接口,在绑定的源属性值发生变化时,发出相关的通知信息。
代码如下:
	public class Person: INotifyPropertyChanged
	{
		private int age;
		public int Age
		{
			get
			{
				return age;
			}
			set
			{
				age = value;
				NotifyPropertyChange("Age");
			}
		}

		private string name;
		public string Name
		{
			get
			{
				return name;
			}
			set
			{
				name = value;
				NotifyPropertyChange("Name");
			}
		}
		public event PropertyChangedEventHandler PropertyChanged;

		private void NotifyPropertyChange(string propertyName)
		{
			if(PropertyChanged != null)
			{
				PropertyChanged(this, new PropertyChangedEventArgs(propertyName));
			}
		}
	}
这个代码的原理很简单,这里就不解释了。这样以后,点击按钮,前台的 ListBox 中第一条数据的人名就变成了 Tom:
俗话说,要知其然,知其所以然。上面的代码说明了在数据源对象中可以设计一个事件通知属性值的变化,并在适当的时候触发之。但是我们并不知道有谁监听了这个事件,并且把这个通知传达到绑定目标对象 (binding target),也就是 UI.
我们用 Reflector 看看 Silverlight 2 beta 2 的源代码,会发现下列两个关键的类:
internal class BindingExpression : BindingExpressionBase
{
	// ...

	// 连接到数据源
	private void ConnectToSource(int index)
	{
		this._binding._isSealed = true;
		if (this._binding.Path.PathParts == null)
		{
			this._cachedValue = this._source;
		}
		else if ((this._sourceListeners == null) || (index != this._sourceListeners.Length))
		{
			bool flag = false;
			try
			{
				object source;
				if ((this._sourceListeners == null) && (this._binding.Mode != BindingMode.OneTime))
				{
					this._sourceListeners = new WeakPropertyChangedListener[this._binding.Path.PathParts.Length];
				}
				if (index == 0)
				{
					source = this._source;
				}
				else
				{
					source = this._sourceListeners[--index].Source;
				}
				for (int i = index; i < this._binding.Path.PathParts.Length; i++)
				{
					if (source == null)
					{
						flag = true;
						return;
					}
					if ((this._binding.Mode != BindingMode.OneTime) && (this._sourceListeners[i] == null))
					{
						// 这里尝试创建源对象的属性变更监听器 (A)
						this._sourceListeners[i] = WeakPropertyChangedListener.CreateIfNecessary(source, this);
					}
					this._sourcePropertyInfo = source.GetType().GetProperty(this._binding.Path.PathParts[i]);
					this._leafSourceObject = source;
					if (this._sourcePropertyInfo == null)
					{
						TraceBindingError("The path '" + this._binding._path.Path + "' is invalid");
						this._leafSourceObject = null;
						flag = true;
						return;
					}
					try
					{
						source = this._sourcePropertyInfo.GetValue(source, null);
					}
					catch (TargetInvocationException)
					{
						TraceBindingError("Could not connect to '" + this._binding._path.Path + "'");
						this._leafSourceObject = null;
						return;
					}
				}
				if ((this._binding.Mode == BindingMode.OneTime) || (this._sourceListeners[this._sourceListeners.Length - 1] == null))
				{
					this._cachedValue = source;
				}
				flag = true;
			}
			finally
			{
				if (!flag)
				{
					this.DisconnectFromSource(index);
					this._sourcePropertyInfo = null;
					this._leafSourceObject = null;
				}
			}
		}
	}
}


internal class WeakPropertyChangedListener
{
	// ...

	// 被 (A) 处代码调用 (B)
	internal static WeakPropertyChangedListener CreateIfNecessary(object source, BindingExpression bindingExpression)
	{
		// 查看数据源是否实现了 INotifyPropertyChanged 接口
		INotifyPropertyChanged notify = source as INotifyPropertyChanged;
		if (notify != null)
		{
			// 如果有,创建一个监听器,调用 (C)
			return new WeakPropertyChangedListener(notify, bindingExpression);
		}
		return null;
	}

	// 构造函数 (C)
	 private WeakPropertyChangedListener(INotifyPropertyChanged notify, BindingExpression bindingExpression)
	{
		this._notifyPropertyChanged = notify;
		// 这里注册事件的回调函数,以便在属性变化时获得通知(调用 D)
		notify.PropertyChanged += new PropertyChangedEventHandler(this.PropertyChangedCallback);
		this._weakBindingExpression = new WeakReference(bindingExpression);
	}

	// 回调函数 (D)
	private void PropertyChangedCallback(object sender, PropertyChangedEventArgs args)
	{
		BindingExpression target = this._weakBindingExpression.Target as BindingExpression;
		// 这里触发绑定目标对象的更新 (E)
		if (target != null)
		{
			target.SourcePropertyChanged(sender, args);
		}
		else
		{
			this.Disconnect();
		}
	}

}
由上述代码跟踪可以看到整个调用流程(A -> B -> C -> D):
BindingExpression.ConnectToSource()
-> WeakPropertyChangedListener.ctor()
-> WeakPropertyChangedListener.PropertyChangedCallback()
-> BindingExpression.SourcePropertyChanged()
在 BindingExpression 中连接数据源时,就判断其是否实现了 INotifyPropertyChanged 接口,如果实现了,则注册一个回调函数。
在数据源发生变化时,将触发这个回调函数,在这个函数中调用到 BindingExpression 的 SourcePropertyChanged() 函数去更新目标对象。
这样就实现了一个 source -> target 绑定的数据更新触发机制。
说明:本章出处:http://www.cnblogs.com/RChen/archive/2008/07/04/1235816.html