1.首先在Windows下下载安装Redis
下载地址:https://github.com/MicrosoftArchive/redis/releases

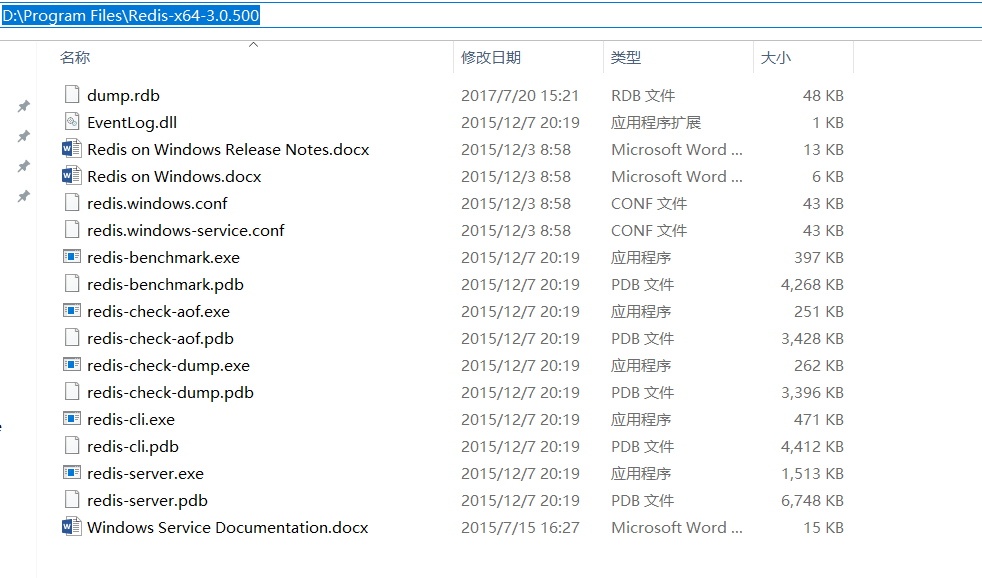
根据你电脑系统的实际情况选择32位还是64位,在这里我下载了的是Redis-x64-3.0.500.zip压缩包,压缩后得到解压文件.

2.测试运行
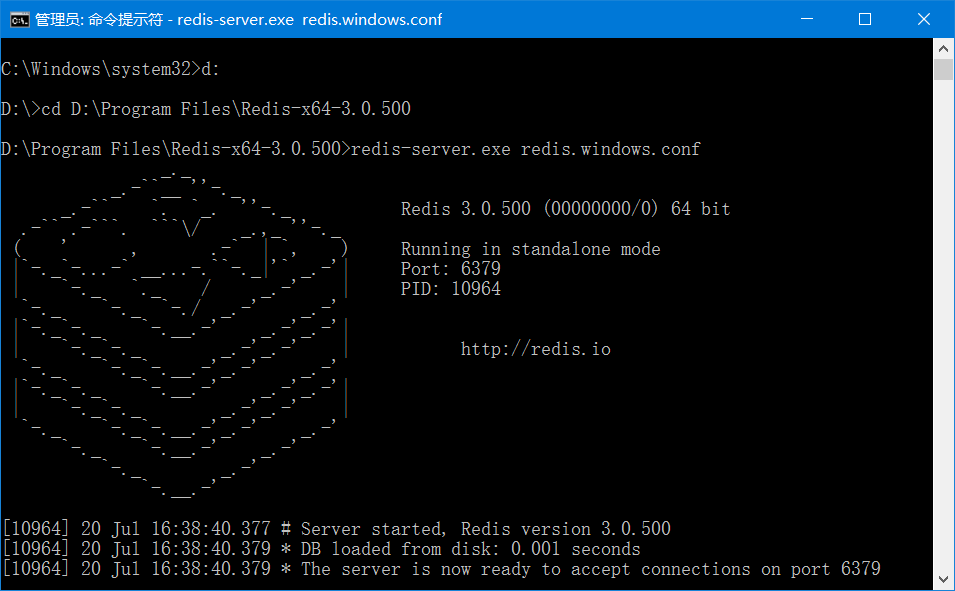
打开一个cmd 窗口(管理员身份运行),使用cd命令切换目录到自己解压后文件夹的目录中(如:我的是D:Program FilesRedis-x64-3.0.500),运行 redis-server.exe redis.windows.conf,出现下图.
这时候另启一个cmd窗口,原来的cmd窗口不可关闭,不然Redis服务端就关闭了,就无法访问了。
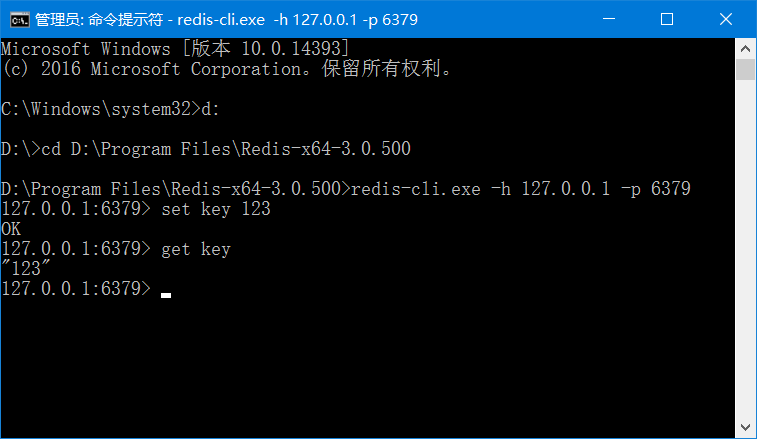
还是一样切换到redis目录下(我的是D:Program FilesRedis-x64-3.0.500),
运行redis-cli.exe -h 127.0.0.1 -p 6379 .
设置键值对 set key 123
取出键值对 get key
出现下图说明测试运行成功.
问题:但这样执行redis-server.exe redis.windows.conf命令开启Redis服务不切合实际,应该设置在服务中启动。
解决方案:
3.安装成Windows服务—开机自启
打开一个cmd 窗口(管理员身份运行),使用cd命令切换目录到自己解压后文件夹的目录中(如:我的是D:Program FilesRedis-x64-3.0.500),运行redis-server --service-install redis.windows.conf
出现成功安装,则表明已经作为windows服务了.

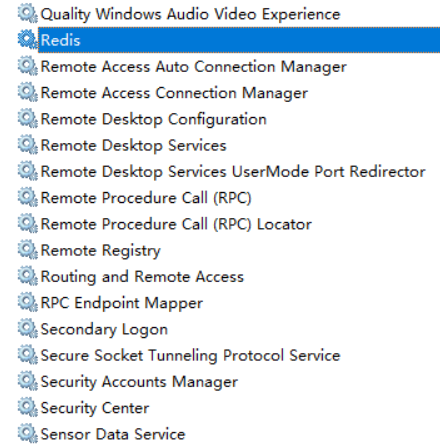
打开cmd窗口输入services.msc,Redis出现在服务中,自行启动该服务.
3.1 Redis密码
1、初始化Redis密码:(Ps:需重启Redis才能生效)
在配置文件中有个参数:redis.windows.conf文件中 requirepass 这个就是配置redis访问密码的参数;
比如 requirepass test123;
2、退出客户端连接
127.0.0.1:6379> quit
3、关闭Redis服务
192.168.246.154:6379> shutdown
4.引入依赖
 <!-- springboot整合redis -->
        <dependency>
            <groupId>org.springframework.boot</groupId>
            <artifactId>spring-boot-starter-data-redis</artifactId>
        </dependency>
这里只需引入这一个redis的依赖即可,其他3个自动进行了依赖:

5.在application.yml中配置redis

#redis
spring.redis.hostName=127.0.0.1
spring.redis.port=6379
spring.redis.pool.maxActive=8
spring.redis.pool.maxWait=-1
spring.redis.pool.maxIdle=8
spring.redis.pool.minIdle=0
spring.redis.timeout=0
// yml中改为yml的写法:
# redis配置,以下有默认配置的也可以使用默认配置
  redis:
    host: 127.0.0.1
    port: 6379
    pool:
      max-active: 8
      max-wait: 1
      max-idle: 8
      min-idle: 0
    timeout: 0
// 有许多的默认配置,可以直接使用默
如果换成了集群方式,配置修改入如下所示:
spring:
    application:
        name: spring-boot-redis
    redis:
        host: 192.168.145.132
        port: 6379
        timeout: 20000
        cluster:
            nodes: 192.168.211.134:7000,192.168.211.134:7001,192.168.211.134:7002
            maxRedirects: 6
        pool:
            max-active: 8
            min-idle: 0
            max-idle: 8
            max-wait: -1
// 对应的配置类:org.springframework.boot.autoconfigure.data.redis.RedisProperties
4.建立redis配置类
package com.example.demo.config;

import com.fasterxml.jackson.annotation.JsonAutoDetect;
import com.fasterxml.jackson.annotation.PropertyAccessor;
import com.fasterxml.jackson.databind.ObjectMapper;
import org.springframework.cache.CacheManager;
import org.springframework.cache.annotation.EnableCaching;
import org.springframework.context.annotation.Bean;
import org.springframework.context.annotation.Configuration;
import org.springframework.data.redis.cache.RedisCacheManager;
import org.springframework.data.redis.connection.RedisConnectionFactory;
import org.springframework.data.redis.core.RedisTemplate;
import org.springframework.data.redis.core.StringRedisTemplate;
import org.springframework.data.redis.serializer.Jackson2JsonRedisSerializer;
import org.springframework.data.redis.serializer.StringRedisSerializer;

/**
 * redis配置类
 *
 * @author zcc ON 2018/3/19
 **/
@Configuration
@EnableCaching//开启注解
public class RedisConfig {
    @Bean
    public CacheManager cacheManager(RedisTemplate<?, ?> redisTemplate) {
        CacheManager cacheManager = new RedisCacheManager(redisTemplate);
        return cacheManager;
        /*RedisCacheManager rcm = new RedisCacheManager(redisTemplate);
        // 多个缓存的名称,目前只定义了一个
        rcm.setCacheNames(Arrays.asList("thisredis"));
        //设置缓存默认过期时间(秒)
        rcm.setDefaultExpiration(600);
        return rcm;*/
    }
    // 以下两种redisTemplate自由根据场景选择
    @Bean
    public RedisTemplate<Object, Object> redisTemplate(RedisConnectionFactory connectionFactory) {
        RedisTemplate<Object, Object> template = new RedisTemplate<>();
        template.setConnectionFactory(connectionFactory);

        //使用Jackson2JsonRedisSerializer来序列化和反序列化redis的value值(默认使用JDK的序列化方式)
        Jackson2JsonRedisSerializer serializer = new Jackson2JsonRedisSerializer(Object.class);

        ObjectMapper mapper = new ObjectMapper();
        mapper.setVisibility(PropertyAccessor.ALL, JsonAutoDetect.Visibility.ANY);
        mapper.enableDefaultTyping(ObjectMapper.DefaultTyping.NON_FINAL);
        serializer.setObjectMapper(mapper);

        template.setValueSerializer(serializer);
        //使用StringRedisSerializer来序列化和反序列化redis的key值
        template.setKeySerializer(new StringRedisSerializer());
        template.afterPropertiesSet();
        return template;
    }
    @Bean
    public StringRedisTemplate stringRedisTemplate(RedisConnectionFactory factory) {
        StringRedisTemplate stringRedisTemplate = new StringRedisTemplate();
        stringRedisTemplate.setConnectionFactory(factory);
        return stringRedisTemplate;
    }
}
5.编写相关的实体类
这里注意一定要实现序列化接口用于序列化!
public class Girl implements Serializable{

    private static final long serialVersionUID = -3946734305303957850L;
// IDEA开启Java的检查即可自动生成!
6.相关的service
处理缓存相关的前缀的常量类:
public class RedisKeyPrefix {
    private RedisKeyPrefix() {
    }

    public static final String GIRL = "girl:";

}
  /**
     * 通过id查询,如果查询到则进行缓存
     * @param id 实体类id
     * @return 查询到的实现类
     */
    public Girl findOne(Integer id) {
        String key = RedisKeyPrefix.GIRL + id;
        // 缓存存在
        boolean hasKey = redisTemplate.hasKey(key);
        if (hasKey) { // 从缓存中取
            Girl girl = redisTemplate.opsForValue().get(key);
            log.info("从缓存中获取了用户!");
            return girl;
        }
        // 从数据库取,并存回缓存
        Girl girl = girlRepository.findOne(id);
        // 放入缓存,并设置缓存时间
        redisTemplate.opsForValue().set(key, girl, 600, TimeUnit.SECONDS);
        return girl;
    }
特别注意的是这里的注入,由于之前配置了redisTemplate及其子类,故需要使用@Resource注解进行!
@Resource
    private RedisTemplate<String, Girl> redisTemplate;
    // private RedisTemplate<String, Object> redisTemplate;根据实际情况取泛型
剩下的删除和更新也是对应的操作缓存,参考网友的写法:
/**
     * 更新用户
     * 如果缓存存在,删除
     * 如果缓存不存在,不操作
     *
     * @param user 用户
     */
    public void updateUser(User user) {
        logger.info("更新用户start...");
        userMapper.updateById(user);
        int userId = user.getId();
        // 缓存存在,删除缓存
        String key = "user_" + userId;
        boolean hasKey = redisTemplate.hasKey(key);
        if (hasKey) {
            redisTemplate.delete(key);
            logger.info("更新用户时候,从缓存中删除用户 >> " + userId);
        }
    }

    /**
     * 删除用户
     * 如果缓存中存在,删除
     */
    public void deleteById(int id) {
        logger.info("删除用户start...");
        userMapper.deleteById(id);

        // 缓存存在,删除缓存
        String key = "user_" + id;
        boolean hasKey = redisTemplate.hasKey(key);
        if (hasKey) {
            redisTemplate.delete(key);
            logger.info("删除用户时候,从缓存中删除用户 >> " + id);
        }
    }
更多基本用法,参考:http://blog.csdn.net/ruby_one/article/details/79141940
参考文章地址:https://blog.csdn.net/baidu_33465676/article/details/75530477