Spring Security Oauth2
OAuth是一个关于授权的开放网络标准,在全世界得到的广泛的应用,目前是2.0的版本。OAuth2在“客户端”与“服务提供商”之间,设置了一个授权层(authorization layer)。“客户端”不能直接登录“服务提供商”,只能登录授权层,以此将用户与客户端分离。“客户端”登录需要获取OAuth提供的令牌,否则将提示认证失败而导致客户端无法访问服务。关于OAuth2这里就不多作介绍了,网上资料详尽。下面我们实现一个 整合 SpringBoot 、Spring Security OAuth2 来实现单点登录功能的案例并对执行流程进行详细的剖析。
案例实现
项目介绍
这个单点登录系统包括下面几个模块:
spring-oauth-parent : 父模块,管理打包
spring-oauth-server : 认证服务端、资源服务端(端口:8881)
spring-oauth-client : 单点登录客户端示例(端口:8882)
spring-oauth-client2: 单点登录客户端示例(端口:8883)
当通过任意客户端访问资源服务器受保护的接口时,会跳转到认证服务器的统一登录界面,要求登录,登录之后,在登录有效时间内任意客户端都无需再登录。
认证服务端
添加依赖
主要是添加 spring-security-oauth2 依赖。
pom.xml

<project xmlns="http://maven.apache.org/POM/4.0.0" xmlns:xsi="http://www.w3.org/2001/XMLSchema-instance"
    xsi:schemaLocation="http://maven.apache.org/POM/4.0.0 http://maven.apache.org/xsd/maven-4.0.0.xsd">
    <modelVersion>4.0.0</modelVersion>

    <artifactId>spring-oauth-server</artifactId>
    <name>spring-oauth-server</name>
    <packaging>war</packaging>

    <parent>
        <groupId>com.louis</groupId>
        <artifactId>spring-oauth-parent</artifactId>
        <version>1.0.0-SNAPSHOT</version>
    </parent>

    <dependencies>
        <dependency>
            <groupId>org.springframework.boot</groupId>
            <artifactId>spring-boot-starter-web</artifactId>
        </dependency>
        <dependency>
            <groupId>org.springframework.security.oauth</groupId>
            <artifactId>spring-security-oauth2</artifactId>
            <version>${oauth.version}</version>
        </dependency>
        <dependency>
            <groupId>org.springframework.boot</groupId>
            <artifactId>spring-boot-starter-freemarker</artifactId>
        </dependency>
    </dependencies>

</project>
配置文件
配置文件内容如下。
application.yml
server:
  port: 8881
  servlet:
    context-path: /auth
启动类
启动类添加 @EnableResourceServer 注解,表示作为资源服务器。
OAuthServerApplication.java
package com.louis.spring.oauth.server;

import org.springframework.boot.SpringApplication;
import org.springframework.boot.autoconfigure.SpringBootApplication;
import org.springframework.boot.web.servlet.support.SpringBootServletInitializer;
import org.springframework.security.oauth2.config.annotation.web.configuration.EnableResourceServer;

@SpringBootApplication
@EnableResourceServer
public class OAuthServerApplication extends SpringBootServletInitializer {

    public static void main(String[] args) {
        SpringApplication.run(OAuthServerApplication.class, args);
    }

}
认证服务配置
添加认证服务器配置,这里采用内存方式获取,其他方式获取在这里定制即可。
OAuthServerConfig.java
package com.louis.spring.oauth.server.config;

import org.springframework.beans.factory.annotation.Autowired;
import org.springframework.context.annotation.Configuration;
import org.springframework.security.crypto.bcrypt.BCryptPasswordEncoder;
import org.springframework.security.oauth2.config.annotation.configurers.ClientDetailsServiceConfigurer;
import org.springframework.security.oauth2.config.annotation.web.configuration.AuthorizationServerConfigurerAdapter;
import org.springframework.security.oauth2.config.annotation.web.configuration.EnableAuthorizationServer;
import org.springframework.security.oauth2.config.annotation.web.configurers.AuthorizationServerSecurityConfigurer;

@Configuration
@EnableAuthorizationServer
public class OAuthServerConfig extends AuthorizationServerConfigurerAdapter {

    @Autowired
    private BCryptPasswordEncoder passwordEncoder;

    @Override
    public void configure(final AuthorizationServerSecurityConfigurer oauthServer) throws Exception {
        oauthServer.tokenKeyAccess("permitAll()").checkTokenAccess("isAuthenticated()");
    }

    @Override
    public void configure(final ClientDetailsServiceConfigurer clients) throws Exception {
        clients.inMemory()
            .withClient("SampleClientId") // clientId, 可以类比为用户名
            .secret(passwordEncoder.encode("secret")) // secret, 可以类比为密码
            .authorizedGrantTypes("authorization_code")    // 授权类型,这里选择授权码
            .scopes("user_info") // 授权范围
            .autoApprove(true) // 自动认证
            .redirectUris("http://localhost:8882/login","http://localhost:8883/login")    // 认证成功重定向URL
            .accessTokenValiditySeconds(10); // 超时时间,10s
    }

}
安全配置
Spring Security 安全配置。在安全配置类里我们配置了:
1. 配置请求URL的访问策略。
2. 自定义了同一认证登录页面URL。
3. 配置用户名密码信息从内存中创建并获取。
SecurityConfig.java
package com.louis.spring.oauth.server.config;

import org.springframework.context.annotation.Bean;
import org.springframework.context.annotation.Configuration;
import org.springframework.core.annotation.Order;
import org.springframework.security.config.annotation.authentication.builders.AuthenticationManagerBuilder;
import org.springframework.security.config.annotation.web.builders.HttpSecurity;
import org.springframework.security.config.annotation.web.configuration.WebSecurityConfigurerAdapter;
import org.springframework.security.crypto.bcrypt.BCryptPasswordEncoder;

@Configuration
@Order(1)
public class SecurityConfig extends WebSecurityConfigurerAdapter {

    @Override
    protected void configure(HttpSecurity http) throws Exception {
        http.requestMatchers()
            .antMatchers("/login")
            .antMatchers("/oauth/authorize")
            .and()
            .authorizeRequests()
            .anyRequest().authenticated()
            .and()
            .formLogin().loginPage("/login").permitAll()    // 自定义登录页面,这里配置了 loginPage, 就会通过 LoginController 的 login 接口加载登录页面
            .and().csrf().disable();

    }

    @Override
    protected void configure(AuthenticationManagerBuilder auth) throws Exception {
        // 配置用户名密码,这里采用内存方式,生产环境需要从数据库获取
        auth.inMemoryAuthentication()
            .withUser("admin")
            .password(passwordEncoder().encode("123"))
            .roles("USER");
    }

    @Bean
    public BCryptPasswordEncoder passwordEncoder(){
        return new BCryptPasswordEncoder();
    }
}
接口提供
这里提供了一个自定义的登录接口,用于跳转到自定义的同一认证登录页面。
LoginController.java
package com.louis.spring.oauth.server.controller;

import org.springframework.stereotype.Controller;
import org.springframework.web.bind.annotation.GetMapping;

@Controller
public class LoginController {

    /**
     * 自定义登录页面
     * @return
     */
    @GetMapping("/login")
    public String login() {
        return "login";
    }

}
登录页面放置在 resources/templates 下,需要在登录时提交 pos t表单到 auth/login。
login.ftl
<!DOCTYPE html>
<html>
<head>
    <meta charset="UTF-8">
    <title>Insert title here</title>
    <link rel="stylesheet" href="https://unpkg.com/element-ui/lib/theme-chalk/index.css">
    <script src="https://cdn.bootcss.com/vue/2.5.17/vue.min.js"></script>
    <script src="https://unpkg.com/element-ui/lib/index.js"></script>
    <script src="https://cdn.bootcss.com/jquery/3.3.1/jquery.js"></script>
</head>

<body>
<div class="login-box" id="app" >
   <el-form action="/auth/login" method="post" label-position="left" label-width="0px" class="demo-ruleForm login-container">
    <h2 class="title" >统一认证登录平台</h2>
    <el-form-item>
      <el-input type="text"  name="username" v-model="username" auto-complete="off" placeholder="账号"></el-input>
    </el-form-item>
    <el-form-item>
      <el-input type="password" name="password" v-model="password" auto-complete="off" placeholder="密码"></el-input>
    </el-form-item>
    <el-form-item style="100%; text-align:center;">
      <el-button type="primary" style="47%;" @click.native.prevent="reset">重 置</el-button>
      <el-button type="primary" style="47%;" native-type="submit" :loading="loading">登 录</el-button>
    </el-form-item>
  <el-form>
</div>
</body>

<script type="text/javascript">
    new Vue({
        el : '#app',
        data : {
            loading: false,
            username: 'admin',
            password: '123'
        },
        methods : {
        }
    })

</script>

<style lang="scss" scoped>
  .login-container {
    -webkit-border-radius: 5px;
    border-radius: 5px;
    -moz-border-radius: 5px;
    background-clip: padding-box;
    margin: 100px auto;
     320px;
    padding: 35px 35px 15px 35px;
    background: #fff;
    border: 1px solid #eaeaea;
    box-shadow: 0 0 25px #cac6c6;
  }
  .title {
      margin: 0px auto 20px auto;
      text-align: center;
      color: #505458;
    }
</style>

</html>
这里提供了一个受保护的接口,用于获取用户信息,客户端访问这个接口的时候要求登录认证。
UserController.java
package com.louis.spring.oauth.server.controller;

import java.security.Principal;

import org.springframework.web.bind.annotation.RequestMapping;
import org.springframework.web.bind.annotation.RestController;

@RestController
public class UserController {

    /**
     * 资源服务器提供的受保护接口
     * @param principal
     * @return
     */
    @RequestMapping("/user")
    public Principal user(Principal principal) {
        System.out.println(principal);
        return principal;
    }

}
客户端实现
添加依赖
主要添加 Spring Security 依赖,另外因为 Spring Boot 2.0 之后代码的合并, 需要添加 spring-security-oauth2-autoconfigure ,才能使用 @EnableOAuth2Sso 注解。
pom.xml
<project xmlns="http://maven.apache.org/POM/4.0.0" xmlns:xsi="http://www.w3.org/2001/XMLSchema-instance"
    xsi:schemaLocation="http://maven.apache.org/POM/4.0.0 http://maven.apache.org/xsd/maven-4.0.0.xsd">
    <modelVersion>4.0.0</modelVersion>

    <artifactId>spring-oauth-client</artifactId>
    <name>spring-oauth-client</name>
    <packaging>war</packaging>

    <parent>
        <groupId>com.louis</groupId>
        <artifactId>spring-oauth-parent</artifactId>
        <version>1.0.0-SNAPSHOT</version>
    </parent>

    <dependencies>
        <dependency>
            <groupId>org.springframework.boot</groupId>
            <artifactId>spring-boot-starter-web</artifactId>
        </dependency>
        <dependency>
            <groupId>org.springframework.boot</groupId>
            <artifactId>spring-boot-starter-security</artifactId>
        </dependency>
        <dependency>
            <groupId>org.springframework.security.oauth.boot</groupId>
            <artifactId>spring-security-oauth2-autoconfigure</artifactId>
            <version>${oauth-auto.version}</version>
        </dependency>
        <dependency>
            <groupId>org.springframework.boot</groupId>
            <artifactId>spring-boot-starter-thymeleaf</artifactId>
        </dependency>
        <dependency>
            <groupId>org.thymeleaf.extras</groupId>
            <artifactId>thymeleaf-extras-springsecurity4</artifactId>
        </dependency>
    </dependencies>

</project>
启动类
启动类需要添加 RequestContextListener,用于监听HTTP请求事件。
OAuthClientApplication.java
package com.louis.spring.oauth.client;

import org.springframework.boot.SpringApplication;
import org.springframework.boot.autoconfigure.SpringBootApplication;
import org.springframework.boot.web.servlet.support.SpringBootServletInitializer;
import org.springframework.context.annotation.Bean;
import org.springframework.web.context.request.RequestContextListener;

@SpringBootApplication
public class OAuthClientApplication extends SpringBootServletInitializer {

    @Bean
    public RequestContextListener requestContextListener() {
        return new RequestContextListener();
    }

    public static void main(String[] args) {
        SpringApplication.run(OAuthClientApplication.class, args);
    }
}
安全配置
添加安全配置类,添加 @EnableOAuth2Sso 注解支持单点登录。
OAuthClientSecurityConfig.java
package com.louis.spring.oauth.client.config;

import org.springframework.boot.autoconfigure.security.oauth2.client.EnableOAuth2Sso;
import org.springframework.context.annotation.Configuration;
import org.springframework.security.config.annotation.web.builders.HttpSecurity;
import org.springframework.security.config.annotation.web.configuration.WebSecurityConfigurerAdapter;

@EnableOAuth2Sso
@Configuration
public class OAuthClientSecurityConfig extends WebSecurityConfigurerAdapter {

    @Override
    public void configure(HttpSecurity http) throws Exception {
        http.csrf().disable()
            .antMatcher("/**")
            .authorizeRequests()
            .antMatchers("/", "/login**")
            .permitAll()
            .anyRequest()
            .authenticated();
    }

}
页面配置
添加 Spring MVC 配置,主要是添加 index 和 securedPage 页面对应的访问配置。
OAuthClientWebConfig.java
package com.louis.spring.oauth.client.config;

import org.springframework.context.annotation.Bean;
import org.springframework.context.annotation.Configuration;
import org.springframework.context.support.PropertySourcesPlaceholderConfigurer;
import org.springframework.web.servlet.config.annotation.*;

@Configuration
@EnableWebMvc
public class OAuthClientWebConfig implements WebMvcConfigurer {

    @Bean
    public static PropertySourcesPlaceholderConfigurer propertySourcesPlaceholderConfigurer() {
        return new PropertySourcesPlaceholderConfigurer();
    }

    @Override
    public void configureDefaultServletHandling(final DefaultServletHandlerConfigurer configurer) {
        configurer.enable();
    }

    @Override
    public void addViewControllers(final ViewControllerRegistry registry) {
        registry.addViewController("/")
            .setViewName("forward:/index");
        registry.addViewController("/index");
        registry.addViewController("/securedPage");
    }

    @Override
    public void addResourceHandlers(final ResourceHandlerRegistry registry) {
        registry.addResourceHandler("/resources/**")
            .addResourceLocations("/resources/");
    }

}
配置文件
主要配置 oauth2 认证相关的配置。
application.yml
auth-server: http://localhost:8881/auth
server:
  port: 8882
  servlet:
    context-path: /
  session:
    cookie:
      name: SESSION1
security:
  basic:
    enabled: false
  oauth2:
    client:
      clientId: SampleClientId
      clientSecret: secret
      accessTokenUri: ${auth-server}/oauth/token
      userAuthorizationUri: ${auth-server}/oauth/authorize
    resource:
      userInfoUri: ${auth-server}/user
spring:
  thymeleaf:
    cache: false
页面文件
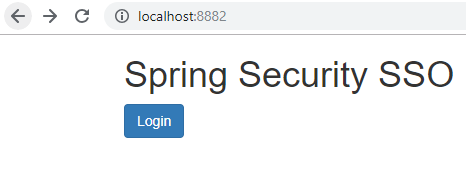
页面文件只有两个,index 是首页,无须登录即可访问,在首页通过添加 login 按钮访问 securedPage 页面,securedPage 访问资源服务器的 /user 接口获取用户信息。
/resources/templates/index.html
<!DOCTYPE html>
<html lang="en">
<head>
<meta http-equiv="Content-Type" content="text/html; charset=utf-8" />
<title>Spring Security SSO</title>
<link rel="stylesheet"
    href="https://maxcdn.bootstrapcdn.com/bootstrap/3.3.2/css/bootstrap.min.css" />
</head>

<body>
<div class="container">
    <div class="col-sm-12">
        <h1>Spring Security SSO</h1>
        <a class="btn btn-primary" href="securedPage">Login</a>
    </div>
</div>
</body>
</html>
/resources/templates/securedPage.html
<!DOCTYPE html>
<html lang="en">
<head>
<meta http-equiv="Content-Type" content="text/html; charset=utf-8" />
<title>Spring Security SSO</title>
<link rel="stylesheet"
    href="https://maxcdn.bootstrapcdn.com/bootstrap/3.3.2/css/bootstrap.min.css" />
</head>

<body>
<div class="container">
    <div class="col-sm-12">
        <h1>Secured Page</h1>
        Welcome, <span th:text="${#authentication.name}">Name</span>
    </div>
</div>
</body>
</html>
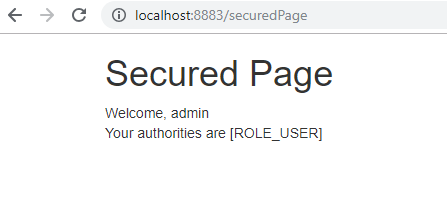
spring-oauth-client2 内容跟 spring-oauth-client 基本一样,除了端口为 8883 外,securedPage 显示的内容稍微有点不一样用于区分。
测试效果
启动认证服务端和客户端。
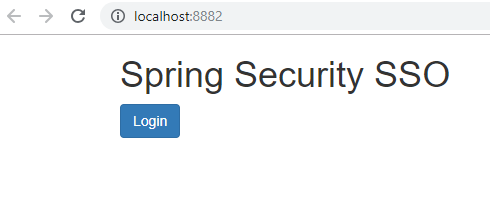
访问 http://localhost:8882/,返回结果如下。
点击 login,跳转到 securedPage 页面,页面调用资源服务器的受保护接口 /user ,会跳转到认证服务器的登录界面,要求进行登录认证。
同理,访问 http://localhost:8883/,返回结果如下。

点击 login,同样跳转到认证服务器的登录界面,要求进行登录认证。

输入用户名密码,默认是后台配置的用户信息,用户名:admin, 密码:123 ,点击登录。
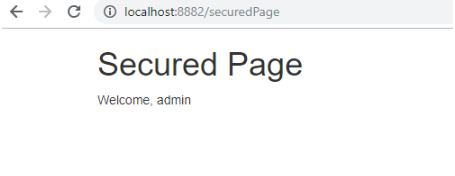
从 http://localhost:8882/ 发出的请求登录成功之后返回8882的安全保护页面。
如果是从 http://localhost:8883/ 发出的登录请求,则会跳转到8883的安全保护页面。
从 8882 发出登录请求,登录成功之后,访问 http://localhost:8883/ ,点击登录。
结果不需要再进行登录,直接跳转到了 8883 的安全保护页面,因为在访问 8882 的时候已经登录过了。
同理,假如先访问 8883 资源进行登录之后,访问 8882 也无需重复登录,到此,单点登录的案例实现就完成了。
执行流程剖析
接下来,针对上面的单点登录案例,我们对整个体系的执行流程进行详细的剖析。
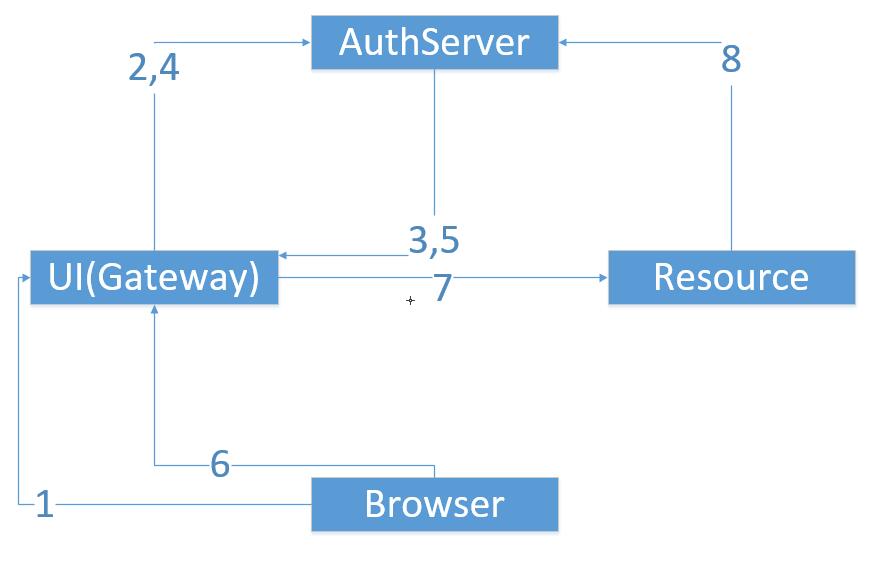
在此之前,我们先描述一下OAuth2授权码模式的整个大致流程。
1. 浏览器向UI服务器点击触发要求安全认证
2. 跳转到授权服务器获取授权许可码
3. 从授权服务器带授权许可码跳回来
4. UI服务器向授权服务器获取AccessToken
5. 返回AccessToken到UI服务器
6. 发出/resource请求到UI服务器
7. UI服务器将/resource请求转发到Resource服务器
8. Resource服务器要求安全验证,于是直接从授权服务器获取认证授权信息进行判断后(最后会响应给UI服务器,UI服务器再响应给浏览中器)
结合我们的案例,首先,我们通过 http://localhost:8882/,访问 8882 的首页,8883 同理。
然后点击 Login,重定向到了 http://localhost:8882/securedPage,而 securedPage 是受保护的页面。所以就重定向到了 8882 的登录URL: http://localhost:8882/login, 要求首先进行登录认证。
因为客户端配置了单点登录(@EnableOAuth2Sso),所以单点登录拦截器会读取授权服务器的配置,发起形如: http://localhost:8881/auth/oauth/authorize?client_id=SampleClientId&redirect_uri=http://localhost:8882/ui/login&response_type=code&state=xtDCY2 的授权请求获取授权码。
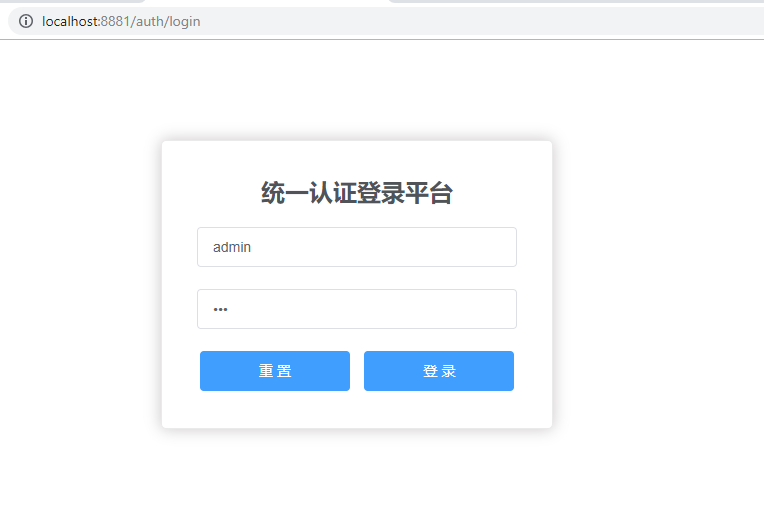
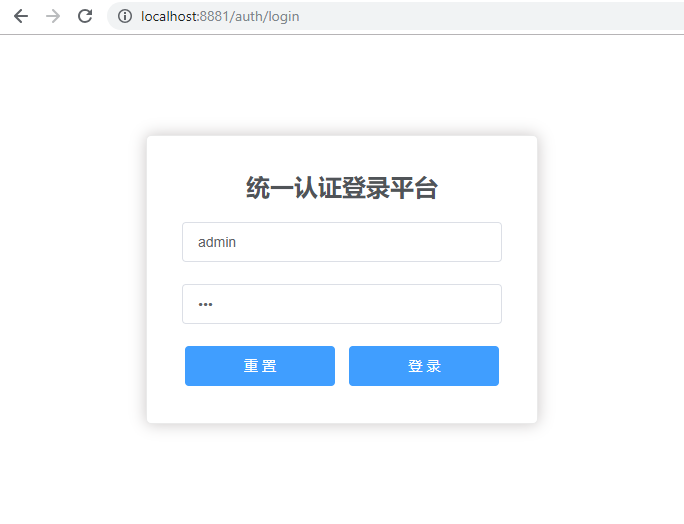
然后因为上面访问的是认证服务器的资源,所以又重定向到了认证服务器的登录URL: http://localhost:8881/auth/login,也就是我们自定义的统一认证登录平台页面,要求先进行登录认证,然后才能继续发送获取授权码的请求。
我们输入用户名和密码,点击登录按钮进行登录认证。
登录认证的大致流程如下:
AbstractAuthenticationProcessingFilter.doFilter()
默认的登录过滤器 UsernamePasswordAuthenticationFilter 拦截到登录请求,调用父类的 doFilter 的方法。
    public void doFilter(ServletRequest req, ServletResponse res, FilterChain chain)
            throws IOException, ServletException {
     ...

        Authentication authResult;
        try {
            authResult = attemptAuthentication(request, response);
            if (authResult == null) {
                // return immediately as subclass has indicated that it hasn't completed
                // authentication
                return;
            }
            sessionStrategy.onAuthentication(authResult, request, response);
        }
        ...

        successfulAuthentication(request, response, chain, authResult);
    }
UsernamePasswordAuthenticationFilter.attemptAuthentication()
doFilter 方法调用 UsernamePasswordAuthenticationFilter 自身的 attemptAuthentication 方法进行登录认证。
    public Authentication attemptAuthentication(HttpServletRequest request,
            HttpServletResponse response) throws AuthenticationException {
     ...

        String username = obtainUsername(request);
        String password = obtainPassword(request);
        UsernamePasswordAuthenticationToken authRequest = new UsernamePasswordAuthenticationToken(username, password);
        // Allow subclasses to set the "details" property
        setDetails(request, authRequest);

        return this.getAuthenticationManager().authenticate(authRequest);
    }
ProviderManager.authenticate()
attemptAuthentication 继续调用认证管理器 ProviderManager 的 authenticate 方法。
    public Authentication authenticate(Authentication authentication) throws AuthenticationException {
        Class<? extends Authentication> toTest = authentication.getClass();
        AuthenticationException lastException = null;
        Authentication result = null;
        boolean debug = logger.isDebugEnabled();

        for (AuthenticationProvider provider : getProviders()) {
            if (!provider.supports(toTest)) {
                continue;
            }try {
                result = provider.authenticate(authentication);

                if (result != null) {
                    copyDetails(authentication, result);
                    break;
                }
            }
      ...
        }
    }
AbstractUserDetailsAuthenticationProvider.authenticate()
而 ProviderManager 又是通过一组 AuthenticationProvider 来完成登录认证的,其中的默认实现是 DaoAuthenticationProvider,继承自 AbstractUserDetailsAuthenticationProvider, 所以 AbstractUserDetailsAuthenticationProvider 的 authenticate 方法被调用。
    public Authentication authenticate(Authentication authentication) throws AuthenticationException {// Determine username
        String username = (authentication.getPrincipal() == null) ? "NONE_PROVIDED" : authentication.getName();
        boolean cacheWasUsed = true;
        UserDetails user = this.userCache.getUserFromCache(username);
        if (user == null) {
            cacheWasUsed = false;
            try {
                user = retrieveUser(username, (UsernamePasswordAuthenticationToken) authentication);
            }
            ...
        }

        try {
            preAuthenticationChecks.check(user);
            additionalAuthenticationChecks(user, (UsernamePasswordAuthenticationToken) authentication);
        }
        ...return createSuccessAuthentication(principalToReturn, authentication, user);
    }
DaoAuthenticationProvider.retrieveUser()
AbstractUserDetailsAuthenticationProvider 的 authenticate 在认证过程中又调用 DaoAuthenticationProvider 的 retrieveUser 方法获取登录认证所需的用户信息。
    protected final UserDetails retrieveUser(String username, UsernamePasswordAuthenticationToken authentication)
            throws AuthenticationException {
        prepareTimingAttackProtection();
        try {
            UserDetails loadedUser = this.getUserDetailsService().loadUserByUsername(username);return loadedUser;
        }
        ...
    }
UserDetailsManager.loadUserByUsername()
DaoAuthenticationProvider 的 retrieveUser 方法 通过 UserDetailsService 来进一步获取登录认证所需的用户信息。UserDetailsManager 接口继承了 UserDetailsService 接口,框架默认提供了 InMemoryUserDetailsManager 和 JdbcUserDetailsManager 两种用户信息的获取方式,当然 InMemoryUserDetailsManager 主要用于非正式环境,正式环境大多都是采用 JdbcUserDetailsManager,从数据库获取用户信息,当然你也可以根据需要扩展其他的获取方式。
DaoAuthenticationProvider 的大致实现:
    @Override
    public UserDetails loadUserByUsername(String username)
            throws UsernameNotFoundException {
        List<UserDetails> users = loadUsersByUsername(username);

        UserDetails user = users.get(0); // contains no GrantedAuthority[]

        Set<GrantedAuthority> dbAuthsSet = new HashSet<>();
        ...

        List<GrantedAuthority> dbAuths = new ArrayList<>(dbAuthsSet);

        addCustomAuthorities(user.getUsername(), dbAuths);return createUserDetails(username, user, dbAuths);
    }
InMemoryUserDetailsManager 的大致实现:
    public UserDetails loadUserByUsername(String username)
            throws UsernameNotFoundException {
        UserDetails user = users.get(username.toLowerCase());

        if (user == null) {
            throw new UsernameNotFoundException(username);
        }

        return new User(user.getUsername(), user.getPassword(), user.isEnabled(),
                user.isAccountNonExpired(), user.isCredentialsNonExpired(),
                user.isAccountNonLocked(), user.getAuthorities());
    }
DaoAuthenticationProvider.additionalAuthenticationChecks()
获取到用户认证所需的信息之后,认证器会进行一些检查譬如 preAuthenticationChecks 进行账号状态之类的前置检查,然后调用 DaoAuthenticationProvider 的 additionalAuthenticationChecks 方法验证密码合法性。
    public Authentication authenticate(Authentication authentication) throws AuthenticationException {
        // Determine username
        String username = (authentication.getPrincipal() == null) ? "NONE_PROVIDED" : authentication.getName();
        boolean cacheWasUsed = true;
        UserDetails user = this.userCache.getUserFromCache(username);
        if (user == null) {
            cacheWasUsed = false;
            try {
                user = retrieveUser(username, (UsernamePasswordAuthenticationToken) authentication);
            }
            ...
        }

        try {
            preAuthenticationChecks.check(user);
            additionalAuthenticationChecks(user, (UsernamePasswordAuthenticationToken) authentication);
        }
        ...

        return createSuccessAuthentication(principalToReturn, authentication, user);
    }
AbstractUserDetailsAuthenticationProvider.createSuccessAuthentication()
登录认证成功之后, AbstractUserDetailsAuthenticationProvider 的 createSuccessAuthentication 方法被调用, 返回一个 UsernamePasswordAuthenticationToken 对象。
    public Authentication authenticate(Authentication authentication) throws AuthenticationException {
        // Determine username
        String username = (authentication.getPrincipal() == null) ? "NONE_PROVIDED" : authentication.getName();
        boolean cacheWasUsed = true;
        UserDetails user = this.userCache.getUserFromCache(username);
        if (user == null) {
            cacheWasUsed = false;
            try {
                user = retrieveUser(username, (UsernamePasswordAuthenticationToken) authentication);
            }
            ...
        }

        try {
            preAuthenticationChecks.check(user);
            additionalAuthenticationChecks(user, (UsernamePasswordAuthenticationToken) authentication);
        }
        ...

        return createSuccessAuthentication(principalToReturn, authentication, user);
    }
AbstractAuthenticationProcessingFilter.successfulAuthentication()
认证成功之后,继续回到 AbstractAuthenticationProcessingFilter,执行 successfulAuthentication 方法,存放认证信息到上下文,最终决定登录认证成功之后的操作。
    protected void successfulAuthentication(HttpServletRequest request,
            HttpServletResponse response, FilterChain chain, Authentication authResult)
            throws IOException, ServletException {

     // 将登录认证信息放置到上下文,在授权阶段从上下文获取
        SecurityContextHolder.getContext().setAuthentication(authResult);

        rememberMeServices.loginSuccess(request, response, authResult);

        // Fire event
        if (this.eventPublisher != null) {
            eventPublisher.publishEvent(new InteractiveAuthenticationSuccessEvent(
                    authResult, this.getClass()));
        }

        successHandler.onAuthenticationSuccess(request, response, authResult);
    }
SavedRequestAwareAuthenticationSuccessHandler.onAuthenticationSuccess()
登录成功之后,调用 SavedRequestAwareAuthenticationSuccessHandler 的 onAuthenticationSuccess 方法,最后根据配置再次发送授权请求 :
http://localhost:8881/auth/oauth/authorize?client_id=SampleClientId&redirect_uri=http://localhost:8882/login&response_type=code&state=xtDCY2

AuthorizationEndpoint.authorize()
根据路径匹配 /oauth/authorize,AuthorizationEndpoint 的 authorize 接口被调用。
    @RequestMapping(value = "/oauth/authorize")
    public ModelAndView authorize(Map<String, Object> model, @RequestParam Map<String, String> parameters,
            SessionStatus sessionStatus, Principal principal) {

        AuthorizationRequest authorizationRequest = getOAuth2RequestFactory().createAuthorizationRequest(parameters);

        Set<String> responseTypes = authorizationRequest.getResponseTypes();try {

            ClientDetails client = getClientDetailsService().loadClientByClientId(authorizationRequest.getClientId());

            // The resolved redirect URI is either the redirect_uri from the parameters or the one from
            // clientDetails. Either way we need to store it on the AuthorizationRequest.
            String redirectUriParameter = authorizationRequest.getRequestParameters().get(OAuth2Utils.REDIRECT_URI);
            String resolvedRedirect = redirectResolver.resolveRedirect(redirectUriParameter, client);
            authorizationRequest.setRedirectUri(resolvedRedirect);

            // We intentionally only validate the parameters requested by the client (ignoring any data that may have
            // been added to the request by the manager).
            oauth2RequestValidator.validateScope(authorizationRequest, client);

            // Some systems may allow for approval decisions to be remembered or approved by default. Check for
            // such logic here, and set the approved flag on the authorization request accordingly.
            authorizationRequest = userApprovalHandler.checkForPreApproval(authorizationRequest, (Authentication) principal);
            // TODO: is this call necessary?
            boolean approved = userApprovalHandler.isApproved(authorizationRequest, (Authentication) principal);
            authorizationRequest.setApproved(approved);

            // Validation is all done, so we can check for auto approval...
            if (authorizationRequest.isApproved()) {
                if (responseTypes.contains("token")) {
                    return getImplicitGrantResponse(authorizationRequest);
                }
                if (responseTypes.contains("code")) {
                    return new ModelAndView(getAuthorizationCodeResponse(authorizationRequest,
                            (Authentication) principal));
                }
            }

            // Store authorizationRequest AND an immutable Map of authorizationRequest in session
            // which will be used to validate against in approveOrDeny()
            model.put(AUTHORIZATION_REQUEST_ATTR_NAME, authorizationRequest);
            model.put(ORIGINAL_AUTHORIZATION_REQUEST_ATTR_NAME, unmodifiableMap(authorizationRequest));

            return getUserApprovalPageResponse(model, authorizationRequest, (Authentication) principal);

        }
    }
DefaultOAuth2RequestFactory.createAuthorizationRequest()
DefaultOAuth2RequestFactory 的 createAuthorizationRequest 方法被调用,用来创建 AuthorizationRequest。
    public AuthorizationRequest createAuthorizationRequest(Map<String, String> authorizationParameters) {
     // 构造 AuthorizationRequest
        String clientId = authorizationParameters.get(OAuth2Utils.CLIENT_ID);
        String state = authorizationParameters.get(OAuth2Utils.STATE);
        String redirectUri = authorizationParameters.get(OAuth2Utils.REDIRECT_URI);
        Set<String> responseTypes = OAuth2Utils.parseParameterList(authorizationParameters.get(OAuth2Utils.RESPONSE_TYPE));
        Set<String> scopes = extractScopes(authorizationParameters, clientId);
        AuthorizationRequest request = new AuthorizationRequest(authorizationParameters,
                Collections.<String, String> emptyMap(), clientId, scopes, null, null, false, state, redirectUri, responseTypes);
     // 通过 ClientDetailsService 加载 ClientDetails
        ClientDetails clientDetails = clientDetailsService.loadClientByClientId(clientId);
        request.setResourceIdsAndAuthoritiesFromClientDetails(clientDetails);
        return request;

    }
ClientDetailsService.loadClientByClientId()
ClientDetailsService 的 loadClientByClientId 方法被调用,框架提供了 ClientDetailsService 的两种实现 InMemoryClientDetailsService 和 JdbcClientDetailsService,分别对应从内存获取和从数据库获取,当然你也可以根据需要定制其他获取方式。
JdbcClientDetailsService 的大致实现,主要是通过 JdbcTemplate 获取,需要设置一个 datasource。
    public ClientDetails loadClientByClientId(String clientId) throws InvalidClientException {
        ClientDetails details;
        try {
            details = jdbcTemplate.queryForObject(selectClientDetailsSql, new ClientDetailsRowMapper(), clientId);
        }
        catch (EmptyResultDataAccessException e) {
            throw new NoSuchClientException("No client with requested id: " + clientId);
        }

        return details;
    }
InMemoryClientDetailsService 的大致实现,主要是从内存Store里面取出信息。
  public ClientDetails loadClientByClientId(String clientId) throws ClientRegistrationException {
    ClientDetails details = clientDetailsStore.get(clientId);
    if (details == null) {
      throw new NoSuchClientException("No client with requested id: " + clientId);
    }
    return details;
  }
AuthorizationEndpoint.authorize()
继续回到 AuthorizationEndpoint 的 authorize 方法
    @RequestMapping(value = "/oauth/authorize")
    public ModelAndView authorize(Map<String, Object> model, @RequestParam Map<String, String> parameters,
            SessionStatus sessionStatus, Principal principal) {
        AuthorizationRequest authorizationRequest = getOAuth2RequestFactory().createAuthorizationRequest(parameters);
        Set<String> responseTypes = authorizationRequest.getResponseTypes();try {
        // 创建ClientDtails
            ClientDetails client = getClientDetailsService().loadClientByClientId(authorizationRequest.getClientId());
            // The resolved redirect URI is either the redirect_uri from the parameters or the one from
            // 设置跳转URL
            String redirectUriParameter = authorizationRequest.getRequestParameters().get(OAuth2Utils.REDIRECT_URI);
            String resolvedRedirect = redirectResolver.resolveRedirect(redirectUriParameter, client);
            authorizationRequest.setRedirectUri(resolvedRedirect);
            // 验证授权范围
            oauth2RequestValidator.validateScope(authorizationRequest, client);
            // 检查是否是自动完成授权还是转到授权页面让用户手动确认
            authorizationRequest = userApprovalHandler.checkForPreApproval(authorizationRequest, (Authentication) principal);
            // TODO: is this call necessary?
            boolean approved = userApprovalHandler.isApproved(authorizationRequest, (Authentication) principal);
            authorizationRequest.setApproved(approved);
            // Validation is all done, so we can check for auto approval...
            if (authorizationRequest.isApproved()) {
           if (responseTypes.contains("token")) {
                    return getImplicitGrantResponse(authorizationRequest);
                }
                if (responseTypes.contains("code")) {
            // 如果是授权码模式,且为自动授权或已完成授权,直接返回授权结果
                    return new ModelAndView(getAuthorizationCodeResponse(authorizationRequest, (Authentication) principal));
                }
            }
            // Store authorizationRequest AND an immutable Map of authorizationRequest in session
            // which will be used to validate against in approveOrDeny()
            model.put(AUTHORIZATION_REQUEST_ATTR_NAME, authorizationRequest);
            model.put(ORIGINAL_AUTHORIZATION_REQUEST_ATTR_NAME, unmodifiableMap(authorizationRequest));
            return getUserApprovalPageResponse(model, authorizationRequest, (Authentication) principal);

        }
    }
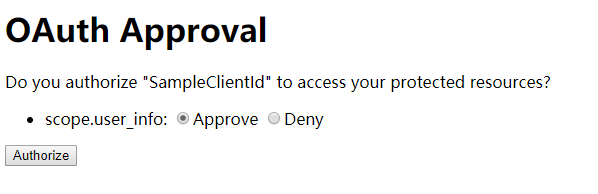
如果是需要手动授权,转到授权页面URL: /oauth/confirm_access 。
    private ModelAndView getUserApprovalPageResponse(Map<String, Object> model,
            AuthorizationRequest authorizationRequest, Authentication principal) {
        if (logger.isDebugEnabled()) {
            logger.debug("Loading user approval page: " + userApprovalPage);
        }
        model.putAll(userApprovalHandler.getUserApprovalRequest(authorizationRequest, principal));
     // 转到授权页面, URL /oauth/confirm_access
        return new ModelAndView(userApprovalPage, model);
    }
用户手动授权页面
AuthorizationEndpoint.approveOrDeny()
AuthorizationEndpoint 中 POST 请求的接口 /oauth/authorize 对应的 approveOrDeny 方法被调用 。
    @RequestMapping(value = "/oauth/authorize", method = RequestMethod.POST, params = OAuth2Utils.USER_OAUTH_APPROVAL)
    public View approveOrDeny(@RequestParam Map<String, String> approvalParameters, Map<String, ?> model,
            SessionStatus sessionStatus, Principal principal) {

        AuthorizationRequest authorizationRequest = (AuthorizationRequest) model.get(AUTHORIZATION_REQUEST_ATTR_NAME);
     try {
            Set<String> responseTypes = authorizationRequest.getResponseTypes();

            authorizationRequest.setApprovalParameters(approvalParameters);
            authorizationRequest = userApprovalHandler.updateAfterApproval(authorizationRequest, (Authentication) principal);
            boolean approved = userApprovalHandler.isApproved(authorizationRequest, (Authentication) principal);
            authorizationRequest.setApproved(approved);
        if (!authorizationRequest.isApproved()) {
          // 用户不许授权,拒绝访问
                return new RedirectView(getUnsuccessfulRedirect(authorizationRequest,
                        new UserDeniedAuthorizationException("User denied access"), responseTypes.contains("token")),
                        false, true, false);
            }
        // 用户授权完成,跳转到客户端设定的重定向URL
            return getAuthorizationCodeResponse(authorizationRequest, (Authentication) principal);
        }

    }
用户授权完成,跳转到客户端设定的重定向URL。

BasicAuthenticationFilter.doFilterInternal()
转到客户端重定向URL之后,BasicAuthenticationFilter 拦截到请求, doFilterInternal 方法被调用,携带信息在客户端执行登录认证。
  @Override
    protected void doFilterInternal(HttpServletRequest request, HttpServletResponse response, FilterChain chain)
                    throws IOException, ServletException {
        String header = request.getHeader("Authorization");
     try {
            String[] tokens = extractAndDecodeHeader(header, request);
            assert tokens.length == 2;
            String username = tokens[0];
      if (authenticationIsRequired(username)) {
                UsernamePasswordAuthenticationToken authRequest = new UsernamePasswordAuthenticationToken(username, tokens[1]);
                authRequest.setDetails(this.authenticationDetailsSource.buildDetails(request));
          Authentication authResult = this.authenticationManager.authenticate(authRequest);
                SecurityContextHolder.getContext().setAuthentication(authResult);
                this.rememberMeServices.loginSuccess(request, response, authResult);
                onSuccessfulAuthentication(request, response, authResult);
            }
        }
        chain.doFilter(request, response);
    }
如上面代码显示,doFilterInternal 方法中客户端登录认证逻辑也走了一遍,详细过程跟上面授权服务端的认证过程一般无二,这里就不贴重复代码,大致流程如下链接流所示:
ProviderManager.authenticate() -- > AbstractUserDetailsAuthenticationProvider.authenticate() --> DaoAuthenticationProvider.retrieveUser() --> ClientDetailsUserDetailsService.loadUserByUsername() --> AbstractUserDetailsAuthenticationProvider.createSuccessAuthentication()
TokenEndpoint.postAccessToken()
认证成功之后,客户端获取了权限凭证,返回客户端URL,被 OAuth2ClientAuthenticationProcessingFilter 拦截,然后携带授权凭证向授权服务器发起形如: http://localhost:8881/auth/oauth/token 的 Post 请求换取访问 token,对应的是授权服务器的 TokenEndpoint 类的 postAccessToken 方法。
    @RequestMapping(value = "/oauth/token", method=RequestMethod.POST)
    public ResponseEntity<OAuth2AccessToken> postAccessToken(Principal principal, @RequestParam
    Map<String, String> parameters) throws HttpRequestMethodNotSupportedException {
     // 获取之前的请求信息,并对token获取请求信息进行校验
        String clientId = getClientId(principal);
        ClientDetails authenticatedClient = getClientDetailsService().loadClientByClientId(clientId);
        TokenRequest tokenRequest = getOAuth2RequestFactory().createTokenRequest(parameters, authenticatedClient);if (authenticatedClient != null) {
            oAuth2RequestValidator.validateScope(tokenRequest, authenticatedClient);
        }
        if (!StringUtils.hasText(tokenRequest.getGrantType())) {
            throw new InvalidRequestException("Missing grant type");
        }
        if (tokenRequest.getGrantType().equals("implicit")) {
            throw new InvalidGrantException("Implicit grant type not supported from token endpoint");
        }

        ...

     // 生成 token 并返回给客户端,客户端就可携带此 token 向资源服务器获取信息了
        OAuth2AccessToken token = getTokenGranter().grant(tokenRequest.getGrantType(), tokenRequest);return getResponse(token);

    }
TokenGranter.grant()
令牌的生成通过 TokenGranter 的 grant 方法来完成。根据授权方式的类型,分别有对应的 TokenGranter 实现,如我们使用的授权码模式,对应的是 AuthorizationCodeTokenGranter。

AbstractTokenGranter.grant()
AuthorizationCodeTokenGranter 的父类 AbstractTokenGranter 的 grant 方法被调用。
    public OAuth2AccessToken grant(String grantType, TokenRequest tokenRequest) {

        if (!this.grantType.equals(grantType)) {
            return null;
        }

        String clientId = tokenRequest.getClientId();
        ClientDetails client = clientDetailsService.loadClientByClientId(clientId);
        validateGrantType(grantType, client);

        if (logger.isDebugEnabled()) {
            logger.debug("Getting access token for: " + clientId);
        }

        return getAccessToken(client, tokenRequest);

    }

    protected OAuth2AccessToken getAccessToken(ClientDetails client, TokenRequest tokenRequest) {
        return tokenServices.createAccessToken(getOAuth2Authentication(client, tokenRequest));
    }
DefaultTokenServices.createAccessToken()
DefaultTokenServices 的 createAccessToken 被调用,用来生成 token。
  @Transactional
    public OAuth2AccessToken createAccessToken(OAuth2Authentication authentication) throws AuthenticationException {
     // 先从 Store 获取,Sotre 类型有 InMemoryTokenStore、JdbcTokenStore、JwtTokenStore、RedisTokenStore 等
        OAuth2AccessToken existingAccessToken = tokenStore.getAccessToken(authentication);
        OAuth2RefreshToken refreshToken = null;
        if (existingAccessToken != null) {
            if (existingAccessToken.isExpired()) {
                if (existingAccessToken.getRefreshToken() != null) {
                    refreshToken = existingAccessToken.getRefreshToken();
                    // The token store could remove the refresh token when the
                    // access token is removed, but we want to be sure...
                    tokenStore.removeRefreshToken(refreshToken);
                }
                tokenStore.removeAccessToken(existingAccessToken);
            }
            else {
                // Re-store the access token in case the authentication has changed
                tokenStore.storeAccessToken(existingAccessToken, authentication);
                return existingAccessToken;
            }
        }
        // Only create a new refresh token if there wasn't an existing one associated with an expired access token.
        // Clients might be holding existing refresh tokens, so we re-use it in the case that the old access token expired.
        if (refreshToken == null) {
            refreshToken = createRefreshToken(authentication);
        }
        // But the refresh token itself might need to be re-issued if it has expired.
        else if (refreshToken instanceof ExpiringOAuth2RefreshToken) {
            ExpiringOAuth2RefreshToken expiring = (ExpiringOAuth2RefreshToken) refreshToken;
            if (System.currentTimeMillis() > expiring.getExpiration().getTime()) {
                refreshToken = createRefreshToken(authentication);
            }
        }
        OAuth2AccessToken accessToken = createAccessToken(authentication, refreshToken);
        tokenStore.storeAccessToken(accessToken, authentication);
        // In case it was modified
        refreshToken = accessToken.getRefreshToken();
        if (refreshToken != null) {
            tokenStore.storeRefreshToken(refreshToken, authentication);
        }
        return accessToken;

    }

    private OAuth2AccessToken createAccessToken(OAuth2Authentication authentication, OAuth2RefreshToken refreshToken) {
        DefaultOAuth2AccessToken token = new DefaultOAuth2AccessToken(UUID.randomUUID().toString());
        int validitySeconds = getAccessTokenValiditySeconds(authentication.getOAuth2Request());
        if (validitySeconds > 0) {
            token.setExpiration(new Date(System.currentTimeMillis() + (validitySeconds * 1000L)));
        }
        token.setRefreshToken(refreshToken);
        token.setScope(authentication.getOAuth2Request().getScope());

        return accessTokenEnhancer != null ? accessTokenEnhancer.enhance(token, authentication) : token;
    }
客户端携带Token访问资源
token 被生成后返回给了客户端,客户端携带此 token 发起形如: http://localhost:8881/auth/user 的请求获取用户信息。
OAuth2AuthenticationProcessingFilter 过滤器拦截请求,然后调用 OAuth2AuthenticationManager 的 authenticate 方法执行登录流程。
OAuth2AuthenticationProcessingFilter.doFilter()
public void doFilter(ServletRequest req, ServletResponse res, FilterChain chain) throws IOException,
            ServletException {

        final boolean debug = logger.isDebugEnabled();
        final HttpServletRequest request = (HttpServletRequest) req;
        final HttpServletResponse response = (HttpServletResponse) res;

        try {
       // 获取并校验 token 之后,然后携带 token 进行登录
            Authentication authentication = tokenExtractor.extract(request);

            ...
      else {
                request.setAttribute(OAuth2AuthenticationDetails.ACCESS_TOKEN_VALUE, authentication.getPrincipal());
                if (authentication instanceof AbstractAuthenticationToken) {
                    AbstractAuthenticationToken needsDetails = (AbstractAuthenticationToken) authentication;
                    needsDetails.setDetails(authenticationDetailsSource.buildDetails(request));
                }

                Authentication authResult = authenticationManager.authenticate(authentication);

                if (debug) {
                    logger.debug("Authentication success: " + authResult);
                }

                eventPublisher.publishAuthenticationSuccess(authResult);
                SecurityContextHolder.getContext().setAuthentication(authResult);

            }
        }

        chain.doFilter(request, response);
    }
OAuth2AuthenticationManager.authenticate()
OAuth2AuthenticationManager 的 authenticate 方法被调用,利用 token 执行登录认证。
    public Authentication authenticate(Authentication authentication) throws AuthenticationException {

        if (authentication == null) {
            throw new InvalidTokenException("Invalid token (token not found)");
        }
        String token = (String) authentication.getPrincipal();
        OAuth2Authentication auth = tokenServices.loadAuthentication(token);
        if (auth == null) {
            throw new InvalidTokenException("Invalid token: " + token);
        }

        Collection<String> resourceIds = auth.getOAuth2Request().getResourceIds();
        if (resourceId != null && resourceIds != null && !resourceIds.isEmpty() && !resourceIds.contains(resourceId)) {
            throw new OAuth2AccessDeniedException("Invalid token does not contain resource id (" + resourceId + ")");
        }

        checkClientDetails(auth);

        if (authentication.getDetails() instanceof OAuth2AuthenticationDetails) {
            OAuth2AuthenticationDetails details = (OAuth2AuthenticationDetails) authentication.getDetails();
            // Guard against a cached copy of the same details
            if (!details.equals(auth.getDetails())) {
                // Preserve the authentication details from the one loaded by token services
                details.setDecodedDetails(auth.getDetails());
            }
        }
        auth.setDetails(authentication.getDetails());
        auth.setAuthenticated(true);
        return auth;

    }
认证成功之后,获取目标接口数据,然后重定向了真正的访问目标URL http://localhost:8882/securedPage,并信息获取的数据信息。
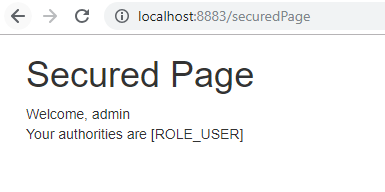
访问 http://localhost:8882/securedPage,返回结果如下:

访问 http://localhost:8883/securedPage,返回结果如下:
另外,在客户端访问受保护的资源的时候,会被 OAuth2ClientAuthenticationProcessingFilter 过滤器拦截。
OAuth2ClientAuthenticationProcessingFilter 的主要作用是获取 token 进行登录认证。
此时可能会出现以下几种情况:
1. 获取不到之前保存的 token,或者 token 已经过期,此时会继续判断请求中是否携带从认证服务器获取的授权码。
2. 如果请求中也没有认证服务器提供的授权码,则会重定向到认证服务器的 /oauth/authorize,要求获取授权码。
3. 访问认证服务器的授权请求URL /oauth/authorize 时,会重定向到认证服务器的统一认证登录页面,要求进行登录。
4. 如果步骤2中,请求已经携带授权码,则携带授权码向认证服务器发起 /oauth/token 请求,申请分配访问 token。
5. 使用之前保存的或者通过上面步骤重新获取的 token 进行登录认证,登录成功返回一个 OAuth2Authentication 对象。
OAuth2ClientAuthenticationProcessingFilter.attemptAuthentication()
访问请求被过滤器 OAuth2ClientAuthenticationProcessingFilter 拦截,它继承了 AbstractAuthenticationProcessingFilter,过滤器 AbstractAuthenticationProcessingFilter 的doFilter 方法被调用,其中OAuth2ClientAuthenticationProcessingFilter 的 attemptAuthentication 被调用进行登录认证。
    @Override
    public Authentication attemptAuthentication(HttpServletRequest request, HttpServletResponse response)
            throws AuthenticationException, IOException, ServletException {

        OAuth2AccessToken accessToken;
        try {
            accessToken = restTemplate.getAccessToken();
        } catch (OAuth2Exception e) {
            BadCredentialsException bad = new BadCredentialsException("Could not obtain access token", e);
            publish(new OAuth2AuthenticationFailureEvent(bad));
            throw bad;
        }
        try {
            OAuth2Authentication result = tokenServices.loadAuthentication(accessToken.getValue());
            if (authenticationDetailsSource!=null) {
                request.setAttribute(OAuth2AuthenticationDetails.ACCESS_TOKEN_VALUE, accessToken.getValue());
                request.setAttribute(OAuth2AuthenticationDetails.ACCESS_TOKEN_TYPE, accessToken.getTokenType());
                result.setDetails(authenticationDetailsSource.buildDetails(request));
            }
            publish(new AuthenticationSuccessEvent(result));
            return result;
        }
        catch (InvalidTokenException e) {
            BadCredentialsException bad = new BadCredentialsException("Could not obtain user details from token", e);
            publish(new OAuth2AuthenticationFailureEvent(bad));
            throw bad;
        }

    }
OAuth2RestTemplate.getAccessToken()
OAuth2RestTemplate 的 getAccessToken 方法被调用,用来获取访问 token.
    public OAuth2AccessToken getAccessToken() throws UserRedirectRequiredException {

        OAuth2AccessToken accessToken = context.getAccessToken();

        if (accessToken == null || accessToken.isExpired()) {
            try {
                accessToken = acquireAccessToken(context);
            }
            catch (UserRedirectRequiredException e) {
                ...
            }
        }
        return accessToken;
    }
AuthorizationCodeAccessTokenProvider.obtainAccessToken()
接下来 AuthorizationCodeAccessTokenProvider 的 obtainAccessToken 方法被调用。
public OAuth2AccessToken obtainAccessToken(OAuth2ProtectedResourceDetails details, AccessTokenRequest request)
throws UserRedirectRequiredException, UserApprovalRequiredException, AccessDeniedException,
OAuth2AccessDeniedException {
AuthorizationCodeResourceDetails resource = (AuthorizationCodeResourceDetails) details;
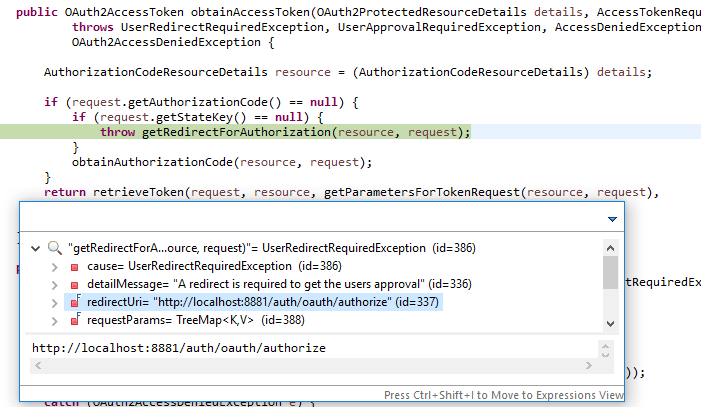
if (request.getAuthorizationCode() == null) {
if (request.getStateKey() == null) {
// 如果没有携带权限凭证,则转到授权URL,又因为未登录,所以转到授权服务器登录界面
throw getRedirectForAuthorization(resource, request);
}
obtainAuthorizationCode(resource, request);
}
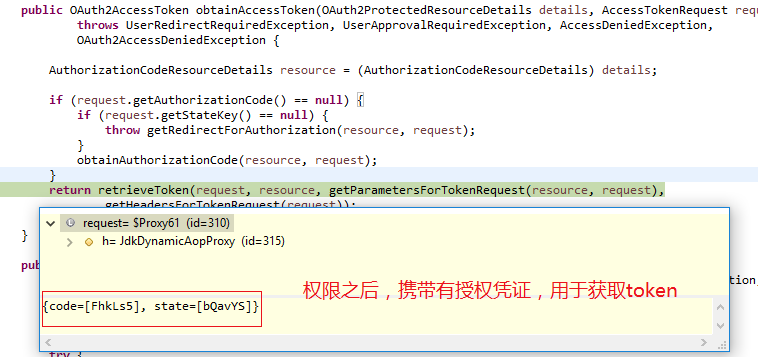
// 继续调用父类的方法获取 token
return retrieveToken(request, resource, getParametersForTokenRequest(resource, request),
getHeadersForTokenRequest(request));
}
授权前流程
如果还没有进行授权,就没有携带权限凭证,则转到授权URL,又因为未登录,所以转到授权服务器登录界面。
授权后流程
如果是授权成功之后,就可以使用携带的授权凭证换取访问 token 了。
OAuth2AccessTokenSupport.retrieveToken()
AuthorizationCodeAccessTokenProvider 通过调用父类 OAuth2AccessTokenSupport 的 retrieveToken 方法进一步获取。
    protected OAuth2AccessToken retrieveToken(AccessTokenRequest request, OAuth2ProtectedResourceDetails resource,
            MultiValueMap<String, String> form, HttpHeaders headers) throws OAuth2AccessDeniedException {

        try {
            // Prepare headers and form before going into rest template call in case the URI is affected by the result
            authenticationHandler.authenticateTokenRequest(resource, form, headers);
            // Opportunity to customize form and headers
            tokenRequestEnhancer.enhance(request, resource, form, headers);
            final AccessTokenRequest copy = request;

            final ResponseExtractor<OAuth2AccessToken> delegate = getResponseExtractor();
            ResponseExtractor<OAuth2AccessToken> extractor = new ResponseExtractor<OAuth2AccessToken>() {
                @Override
                public OAuth2AccessToken extractData(ClientHttpResponse response) throws IOException {
                    if (response.getHeaders().containsKey("Set-Cookie")) {
                        copy.setCookie(response.getHeaders().getFirst("Set-Cookie"));
                    }
                    return delegate.extractData(response);
                }
            };
            return getRestTemplate().execute(getAccessTokenUri(resource, form), getHttpMethod(),
                    getRequestCallback(resource, form, headers), extractor , form.toSingleValueMap());

        }

    }
携带授权凭证访问授权服务器的授权连接 http://localhost:8881/auth/oauth/token,以换取资源访问 token,后续客户端携带 token 访问资源服务器。

TokenEndpoint.postAccessToken()
TokenEndpoint 中授权服务器的 token 获取接口定义。

获取到 token 返回给客户端之后,客户就可以使用 token 向资源服务器获取资源了。