0. 引言
利用 Dlib 官方训练好的模型 “shape_predictor_68_face_landmarks.dat” 进行 68 个点标定;
利用 OpenCv 进行图像化处理,在人脸上画出 68 个特征点,并标明特征点的序号;
实现的 68 个特征点标定功能如下图所示:
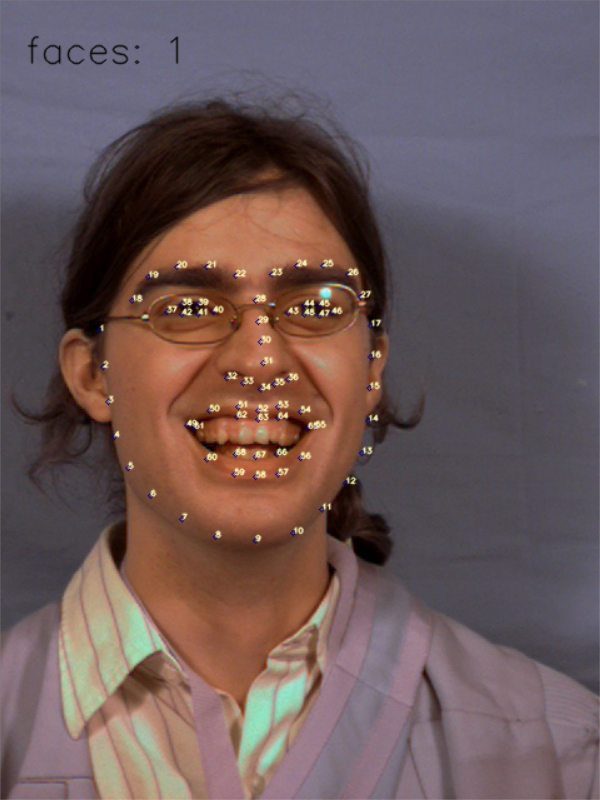
图 1 人脸 68 个特征点的标定
1. 开发环境
Python: 3.6.3
Dlib: 19.7
Opencv, NumPy
需要调用的库:
import dlib                     # 人脸检测的库 Dlib
import numpy as np      # 数据处理的库 Numpy
import cv2                      # 图像处理的库 OpenCv
2. 设计流程
两部分:68 个特征点提取 和 OpenCv 绘图
68 点提取:
借助 Dlib 官方的 Demo: face_landmark_detection.py,可以得到脸部 68 个特征点的坐标;
OpenCv 绘图:
使用 opencv 中 画圆函数 cv2.circle() 和 画字符函数 cv2.putText() ;
流程:
1. 调用 Dlib 库来进行人脸识别,调用预测器 “shape_predictor_68_face_landmarks.dat” 进行 68 点标定;
2. 存入 68 个点坐标;
3. 利用 cv2.circle 来画 68 个点;
4. 利用 cv2.putText() 函数来画数字 1-68 ;
3. 源码
# 对静态人脸图像文件进行68个特征点的标定

# Author:   coneypo
# Blog:     http://www.cnblogs.com/AdaminXie
# GitHub:   https://github.com/coneypo/Dlib_face_detection_from_camera

import dlib         # 人脸识别的库 Dlib
import numpy as np  # 数据处理的库 numpy
import cv2          # 图像处理的库 OpenCv

# Dlib 检测器和预测器
detector = dlib.get_frontal_face_detector()
predictor = dlib.shape_predictor('data/dlib/shape_predictor_68_face_landmarks.dat')

# 读取图像文件
img_rd = cv2.imread("test.jpg")
img_gray = cv2.cvtColor(img_rd, cv2.COLOR_RGB2GRAY)

# 人脸数
faces = detector(img_gray, 0)

# 待会要写的字体
font = cv2.FONT_HERSHEY_SIMPLEX

# 标 68 个点
if len(faces) != 0:
    # 检测到人脸
    for i in range(len(faces)):
        # 取特征点坐标
        landmarks = np.matrix([[p.x, p.y] for p in predictor(img_rd, faces[i]).parts()])
        for idx, point in enumerate(landmarks):
            # 68 点的坐标
            pos = (point[0, 0], point[0, 1])

            # 利用 cv2.circle 给每个特征点画一个圈,共 68 个
            cv2.circle(img_rd, pos, 2, color=(139, 0, 0))
            # 利用 cv2.putText 写数字 1-68
            cv2.putText(img_rd, str(idx + 1), pos, font, 0.2, (187, 255, 255), 1, cv2.LINE_AA)

    cv2.putText(img_rd, "faces: " + str(len(faces)), (20, 50), font, 1, (0, 0, 0), 1, cv2.LINE_AA)
else:
    # 没有检测到人脸
    cv2.putText(img_rd, "no face", (20, 50), font, 1, (0, 0, 0), 1, cv2.LINE_AA)

# 窗口显示
# 参数取 0 可以拖动缩放窗口,为 1 不可以
# cv2.namedWindow("image", 0)
cv2.namedWindow("image", 1)

cv2.imshow("image", img_rd)
cv2.waitKey(0)
OpenCv 的画图函数
1. 画圆 cv2.circle( img, (p1,p2), r, (255,255,255) )
cv2.circle(img=img, center=(50,30), radius=4, color=(255,0,255))
参数 1: img- 图片对象 img;
参数 2: (p1,p2)- 圆心坐标 center;
参数 3: r- 半径 radius;
参数 4: (255,255,255)- 颜色数组;
2. 写字符 cv2.putText( img,"test", (p1,p2), font, 4, (255,255,255), 2, cv2, LINE_AA )
cv2.putText(img=img, text="hello world", org=(10,30), fontFace=font, fontScale=0.6, color=(187, 255, 255), thickness=1, lineType=cv2.LINE_AA)
参数 1: img- 图像对象 img;
参数 2: "test"- 需要打印的字符 text(数字的话可以利用 str() 转成字符);
参数 3: (p1,p2)- 坐标 textOrg;
参数 4: font- 字体 fontFace( 注意这里 font = cv2.FONT_HERSHEY_SIMPLEX );
参数 5: 4- 字号 fontScale;
参数 6: (255,255,255)- 颜色数组 color;
参数 7: 2- 线宽 thickness;
参数 8: LINE_AA- 线条种类 line_type;
* 关于 颜色数组:
(255,255,255), (蓝色,绿色,红色),每个值都是 0-255;
比如:蓝色 (255,0,0),紫色 (255,0,255)
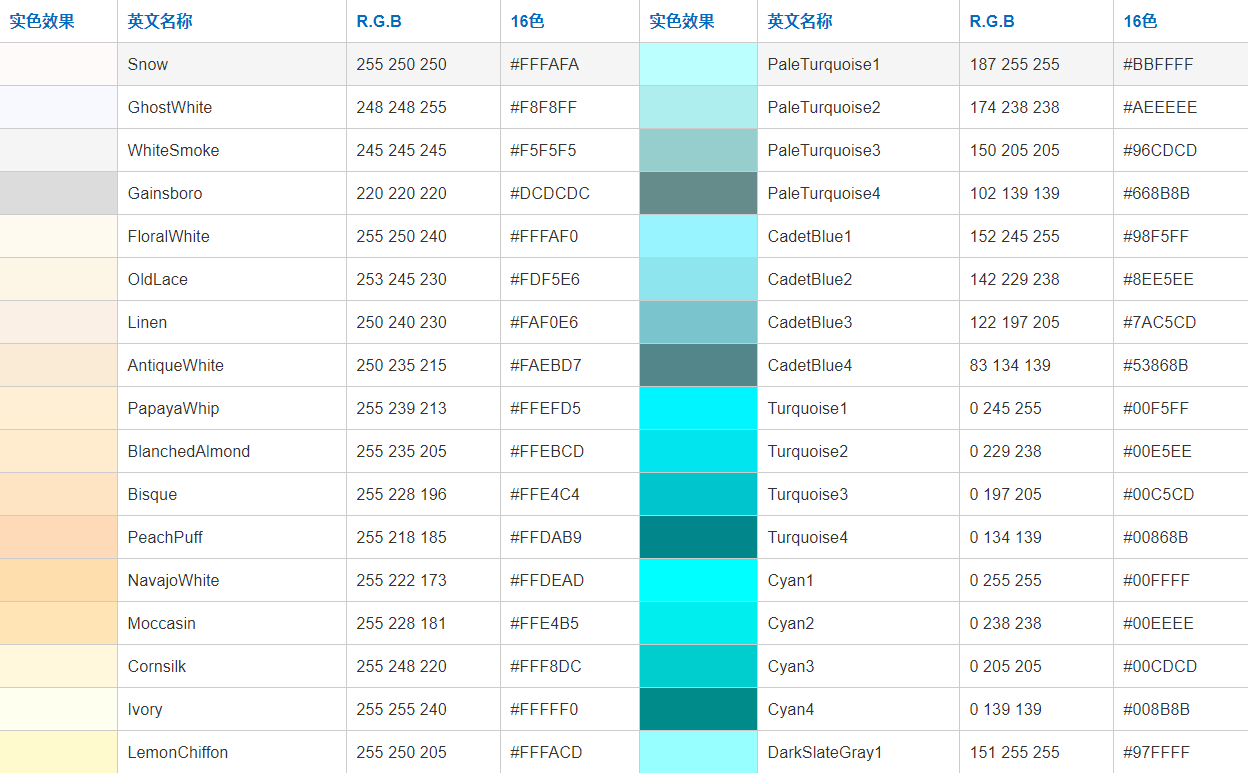
图 2 部分颜色数组示意(具体可以参考 http://tool.oschina.net/commons?type=3 )
# 请尊重他人劳动成果,转载或者使用源码请注明出处 http://cnblogs.com/AdaminXie/
# 如有问题可以留言或者联系邮箱 coneypo@foxmail.com