填坑记录
------------------------2021-05-17:-----------------------------------
坑1:放到服务器(vmware虚拟机)后,报:
pyautogui.FailSafeException: PyAutoGUI fail-safe triggered from mouse moving to a corner of the screen. To disable this fail-safe, set pyautogui.FAILSAFE to False. DISABLING FAIL-SAFE IS NOT RECOMMENDED.原因:
因为通过mstsc启动远程桌面连接时,被连接的Windows会启动一个会话(Session)。此时你对远程桌面窗口里面的所有操作(鼠标,键盘)将会‘翻译’成TCP包传输过去,被连接的Windows接收到这些包之后,‘还原’命令并且在当前的活动会话上面执行。而当你断开连接时(点X关闭),会话变成断开状态,Windows会自动关闭会话(事实上会话还是在的,只是状态变成断开的),也就导致了所有基于GUI的操作‘失效’了。
解决方案:
新建一个批处理文件,添加以下下代码,断开远程的时候不要直接断开,运行上面的bat断开。就会保持交互状态
for /f "skip=1 tokens=3" %%s in ('query user %USERNAME%') do (
%windir%System32 scon.exe %%s /dest:console
)
参考:https://www.cnblogs.com/sophia201552/p/13344320.html
坑2:还是在服务器上(虚拟机win server2008),解决了上面的问题后,报:找不到元素
原因:
分析日志发现远程连接上去看到的分辨率(1536*904)和断开连接的分辨率(800*600)不一样,然后使用全屏截图来分析,发现页面产生了滚动条。
解决方案:
尝试方案:开始时希望通过修改屏幕分辨率(QRes.exe)使不产生滚动条(无法执行,报错:没有****模式)
尝试方案:调整坐标,增加计算滚动条(计算太复杂了,调不好,主要是验证码是弹窗到页面中间的,浮动到最上层)
最终方案:在开始计算位置和拖曳前,先滚动到最左边和最上边(这里能这样做的原因是因为滑动验证码是弹窗,滚动时,该弹窗仍然显示在屏幕最中间)
执行代码:
self.browser.execute_script('window.scrollTo(0, 0);')
------------------------ end 填坑记录 -----------------------------------
遇到过淘宝的滑块验证(只有一个从头到底的滑动),还有类似京东的登录滑块(有缺口的)
1、淘宝的滑块比较简单,直接用selenium的ActionChain(但后来发现淘宝做了模拟浏览器的检测机制,解决要点在怎么扰乱他的检查,这个可以看另一篇文章解决:https://www.cnblogs.com/Denny_Yang/p/14764326.html)
类似这种
2、类似京东的这种缺口验证码,有两种,一种是前端有暴露原图,另一种是没有暴露原图。暴露原图的要简单一些,没有暴露原图的要引入cv2库来解决
第一种:(实现代码参考:https://www.cnblogs.com/ohahastudy/p/11493971.html)(因为我需要的不是这种所以没有测,但应该比较简单)
(图一)完整初始图

(图二)缺失的块图

(图三)滑块

(图四)原图(没有暴露下面这张原图的,要稍微麻烦点)

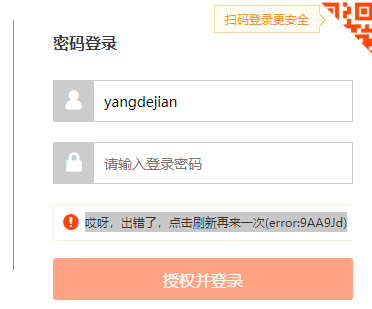
注意:稍微好点儿的站点都做了滑动时的速度检测机制,会被判定为机器人行为(如京东)。淘宝做的是直接检测是否是模拟浏览器(你完成拖动后,会报:
哎呀,出错了,点击刷新再来一次(error:9AA9Jd)
这里只贴了没有原图的自动验证代码:
  1 #!/usr/bin/python
  2 # -*- coding:utf-8 -*-
  3
  4 import requests
  5 import cv2
  6 from PIL import Image
  7 from selenium import webdriver
  8 import pyautogui
  9 from numpy import random
 10 import time
 11
 12
 13 class SliderVerificationCode:
 14
 15     def __init__(self):
 16         url = 'https://console.ecapi.cn/user/login'
 17         self.driver = self.get_url(url, '11111', '222222')
 18
 19     def get_url(self, url, user, password):
 20         browser = webdriver.Chrome(executable_path=r'E:pythonGeckoDriverchromedriver.exe')
 21         browser.get(url)
 22         browser.maximize_window()
 23         time.sleep(3)
 24         user_input = browser.find_element_by_xpath('//*[@id="username"]')
 25         pwd_input = browser.find_element_by_xpath('//*[@id="password"]')
 26         btn = browser.find_element_by_xpath('//*[@id="formLogin"]/div[4]/div/div/span/button')
 27         user_input.send_keys(user)
 28         pwd_input.send_keys(password)
 29         btn.click()
 30         time.sleep(0.5)
 31         return browser
 32
 33     def get_image(self):
 34         time.sleep(3)
 35         print('frame location:', self.driver.find_element_by_id('tcaptcha_iframe').location)
 36         self.driver.switch_to.frame('tcaptcha_iframe')
 37         self.target = self.driver.find_element_by_xpath('//*[@id="slideBg"]')
 38         self.template = self.driver.find_element_by_xpath('//*[@id="slideBlock"]')
 39         self.download_img(self.target.get_attribute('src'), 'target.png')
 40         self.download_img(self.template.get_attribute('src'), 'temlate.png')
 41
 42         # 下载下来的原图网页的css有调整尺寸,这样就需要按照网页的尺寸来计算偏移
 43         self.resize_image('target.png', 'target.png', 341, 195, 'png')
 44         self.resize_image('temlate.png', 'temlate.png', 68, 68, 'png')
 45
 46     def resize_image(self, filein, fileout, width, height, type):
 47         img = Image.open(filein)
 48         out = img.resize((width, height), Image.ANTIALIAS)
 49         # resize image with high-quality
 50         out.save(fileout, type)
 51
 52     def download_img(self, img_url, save_name):
 53         host_referer = {
 54             'User-Agent': 'Mozilla/5.0 (Windows NT 6.1; Win64; x64) AppleWebKit/537.36 (KHTML, like Gecko) Chrome/68.0.3440.106 Safari/537.36'
 55         }
 56         print('download:' + img_url)
 57         html = requests.get(img_url, headers=host_referer)
 58         # 图片不是文本文件,以二进制格式写入,所以是html.content
 59         f = open(save_name, 'wb')
 60         f.write(html.content)
 61         f.close()
 62
 63     def find_pic(self, target='target.png', template='temlate.png'):
 64         target_rgb = cv2.imread(target)
 65         target_gray = cv2.cvtColor(target_rgb, cv2.COLOR_RGB2GRAY)
 66         template_rgb = cv2.imread(template, 0)
 67         res = cv2.matchTemplate(target_gray, template_rgb, cv2.TM_CCOEFF_NORMED)
 68         value = cv2.minMaxLoc(res)
 69         # print(value)
 70         return value[2][0]
 71
 72     def size(self):
 73         x = self.find_pic()
 74         img = cv2.imread('target.png')
 75         w1 = img.shape[1]
 76         w2 = self.target.size['width']
 77         self.offset = int(x * w2 / w1 + 25)  # 这个25没搞清楚为什么是25...
 78         print(self.offset)
 79
 80     def drag(self):
 81         time.sleep(3)
 82         The_slider = self.driver.find_element_by_xpath('//*[@id="tcaptcha_drag_button"]')
 83         # 780:是验证码弹窗距离浏览器最左边的x轴距离(因为在整个验证码弹窗是个iframe,所以这个元素的x定位是以iframe的来计算的)
 84         # 284:是y轴的
 85         x = The_slider.location.get('x') + 780  # 滑块的初始x位置
 86         y = The_slider.location.get('y') + 284
 87         print(The_slider.location, ',kw_x = ', x, ',kw_y = ', y)
 88         xx = self.offset + 780 - 11  # offset=缺口到iframe边框的距离
 89
 90         pyautogui.moveTo(x, y + 127, duration=0.1)
 91
 92         pyautogui.mouseDown()
 93
 94         y += random.randint(9, 19)
 95         pyautogui.moveTo(x + int(self.offset * random.randint(15, 23) / 20), y, duration=0.28)
 96
 97         y += random.randint(-9, 0)
 98         pyautogui.moveTo(x + int(self.offset * random.randint(17, 21) / 20), y, duration=(random.randint(20, 31)) / 100)
 99
100         y += random.randint(0, 8)
101         pyautogui.moveTo(xx, y, duration=0.3)
102
103         # self.driver.save_screenshot('fullscreen.png')
104         print('finally x:{},y:{}'.format(xx, y))
105
106         pyautogui.mouseUp()
107
108
109 if __name__ == '__main__':
110     p = SliderVerificationCode()
111     p.get_image()
112     p.find_pic()
113     p.size()
114     p.drag()
115     print('end')
PPS:用到的额外的插件包括:cv2(仓库名是opencv-python)、numpy
pip install时,如果非常慢,可以通过镜像来安装:pip install -i https://pypi.tuna.tsinghua.edu.cn/simple numpy
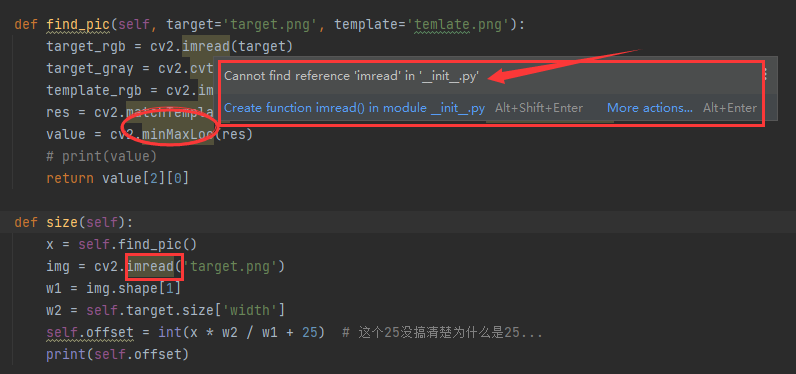
安装完后,代码里面有警告,提示找不到引用,这里搞了半天没解决,但代码能正确执行,暂时就没解决了,有解决掉的,烦请告知!
本文源码大部分摘自:https://blog.csdn.net/qq_42899854/article/details/110671815(python实现滑动京东滑块验证码)