运行环境
HttpRunner 是一个基于 Python 开发的测试框架,可以运行在 macOS、Linux、Windows 系统平台上。
HttpRunner 的开发环境为 macOS + Python 3.6;实际上,HttpRunner 支持 Python 2.7 和 Python 3.3 以上的所有版本,并使用 Travis-CI 进行了持续集成测试,测试覆盖的版本包括 2.7/3.4/3.5/3.6。
推荐使用 macOS/Linux + Python 3.6 的运行环境组合。
小七这边安装的是Windows+Python 3.7
安装方式
HttpRunner 的稳定版本托管在 PyPI 上,可以使用pip或者easy_install进行安装。
$ pip install httprunner
或者
$ easy_install httprunner
如果你需要使用最新的开发版本,那么可以采用项目的 GitHub 仓库地址进行安装:
$ pip install git+https://github.com/HttpRunner/HttpRunner.git#egg=HttpRunner

版本升级
假如你之前已经安装过了 HttpRunner,现在需要升级到最新版本,那么你可以使用-U参数。该参数对以上三种安装方式均生效。
$ pip install -U HttpRunner
$ easy_install -U HttpRunner
$ pip install -U git+https://github.com/HttpRunner/HttpRunner.git#egg=HttpRunner
安装校验
在 HttpRunner 安装成功后,系统中会新增如下 5 个命令:
httprunner: 核心命令ate: 曾经用过的命令(当时框架名称为 ApiTestEngine),功能与 httprunner 完全相同hrun: httprunner 的缩写,功能与 httprunner 完全相同locusts: 基于 Locust 实现性能测试har2case: 辅助工具,可将标准通用的 HAR 格式(HTTP Archive)转换为YAML/JSON格式的测试用例
httprunner、hrun、ate 三个命令完全等价,功能特性完全相同,个人推荐使用hrun命令。
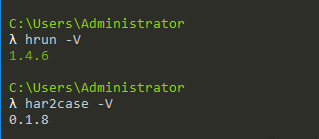
运行如下命令,若正常显示版本号,则说明 HttpRunner 安装成功。
$ hrun -V
1.4.6

$ har2case -V
0.1.8
- 帮助命令
- hrun -h
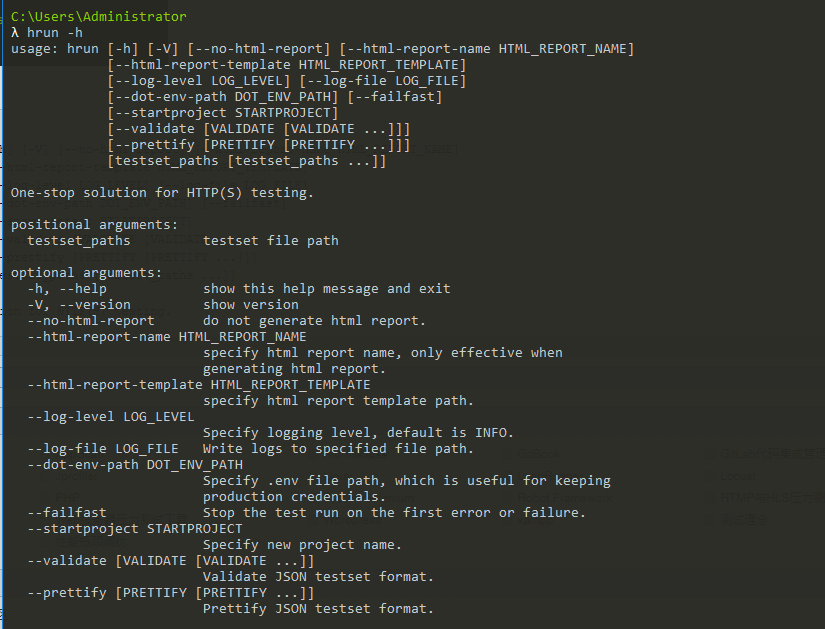
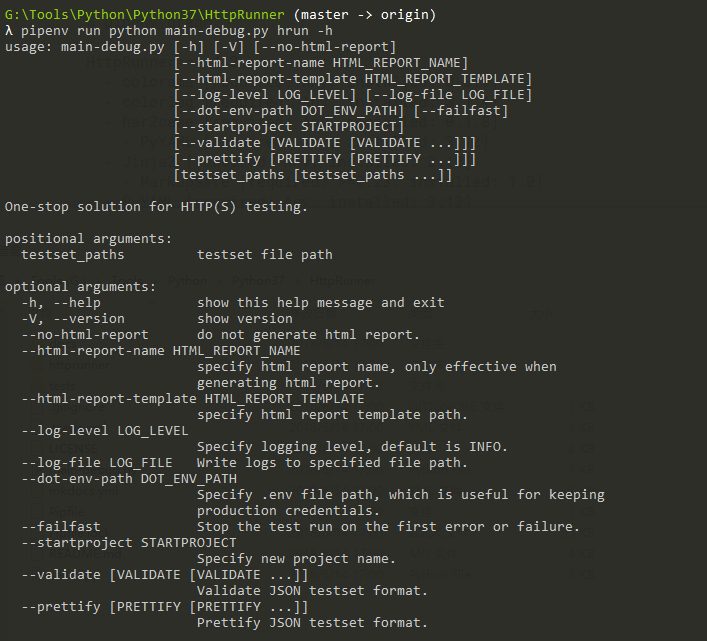
 hrun -h
usage: hrun [-h] [-V] [--no-html-report] [--html-report-name HTML_REPORT_NAME]
            [--html-report-template HTML_REPORT_TEMPLATE]
            [--log-level LOG_LEVEL] [--log-file LOG_FILE]
            [--dot-env-path DOT_ENV_PATH] [--failfast]
            [--startproject STARTPROJECT]
            [--validate [VALIDATE [VALIDATE ...]]]
            [--prettify [PRETTIFY [PRETTIFY ...]]]
            [testset_paths [testset_paths ...]]

One-stop solution for HTTP(S) testing.

positional arguments:
  testset_paths         testset file path

optional arguments:
  -h, --help            show this help message and exit
  -V, --version         show version
  --no-html-report      do not generate html report.
  --html-report-name HTML_REPORT_NAME
                        specify html report name, only effective when
                        generating html report.
  --html-report-template HTML_REPORT_TEMPLATE
                        specify html report template path.
  --log-level LOG_LEVEL
                        Specify logging level, default is INFO.
  --log-file LOG_FILE   Write logs to specified file path.
  --dot-env-path DOT_ENV_PATH
                        Specify .env file path, which is useful for keeping
                        production credentials.
  --failfast            Stop the test run on the first error or failure.
  --startproject STARTPROJECT
                        Specify new project name.
  --validate [VALIDATE [VALIDATE ...]]
                        Validate JSON testset format.
  --prettify [PRETTIFY [PRETTIFY ...]]
                        Prettify JSON testset format.
开发者模式
默认情况下,安装 HttpRunner 的时候只会安装运行 HttpRunner 的必要依赖库。
如果你不仅仅是使用 HttpRunner,还需要对 HttpRunner 进行开发调试(debug),那么就需要进行如下操作。
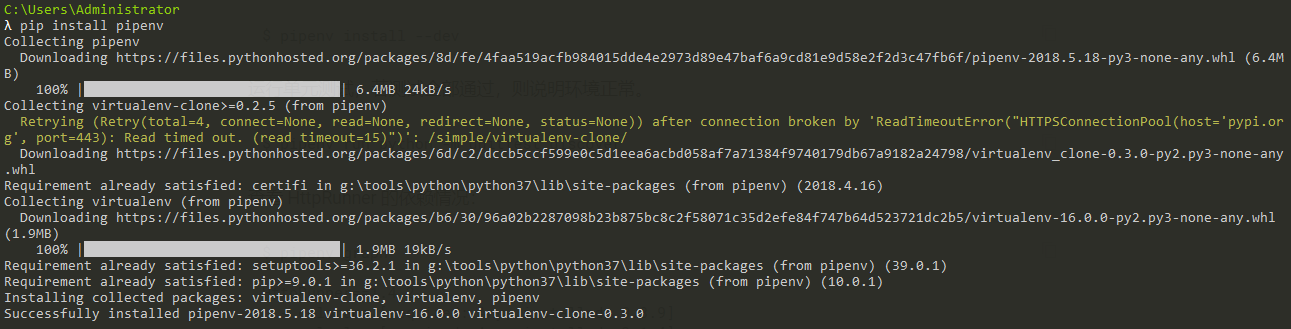
HttpRunner 使用 pipenv 对依赖包进行管理,若你还没有安装 pipenv,需要先执行如下命令进行安装:
$ pip install pipenv
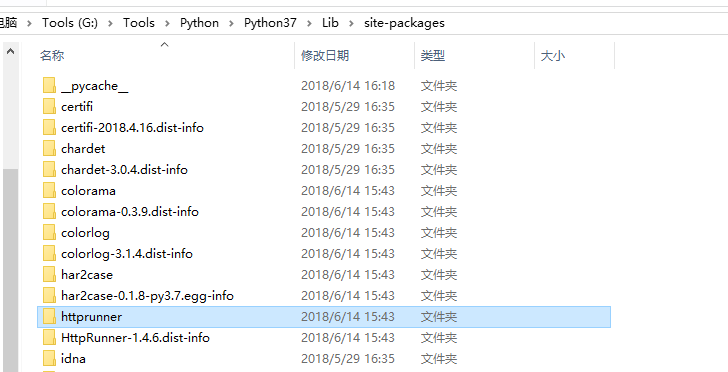
安装的依赖包都会放在python目录site-packages中
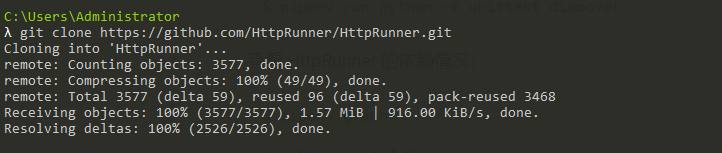
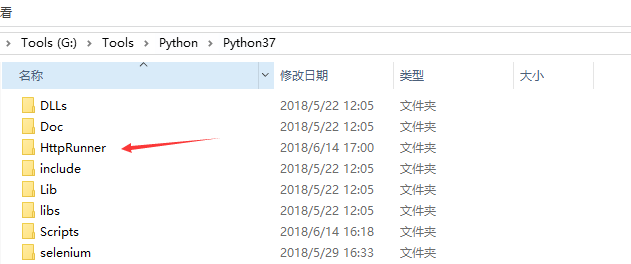
获取 HttpRunner 源码(自定义找到一个存放httprunner的路径,比如需要将仓库下载到G:ToolsPythonPython37下的目录 那么需要进入到此路径下执行 下面的命令):
$ git clone https://github.com/HttpRunner/HttpRunner.git
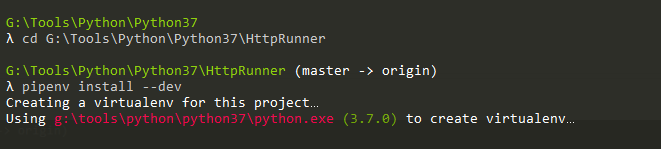
进入仓库目录,安装所有依赖:
$ pipenv install --dev
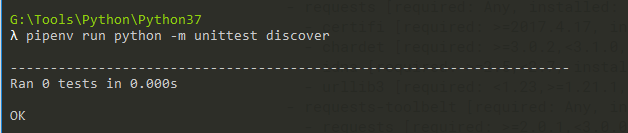
运行单元测试,若测试全部通过,则说明环境正常。
$ pipenv run python -m unittest discover
查看 HttpRunner 的依赖情况:
$ pipenv graph

HttpRunner==1.4.2
  - colorama [required: Any, installed: 0.3.9]
  - colorlog [required: Any, installed: 3.1.4]
  - har2case [required: Any, installed: 0.1.8]
    - PyYAML [required: Any, installed: 3.12]
  - Jinja2 [required: Any, installed: 2.10]
    - MarkupSafe [required: >=0.23, installed: 1.0]
  - PyYAML [required: Any, installed: 3.12]
  - requests [required: Any, installed: 2.18.4]
    - certifi [required: >=2017.4.17, installed: 2018.4.16]
    - chardet [required: >=3.0.2,<3.1.0, installed: 3.0.4]
    - idna [required: >=2.5,<2.7, installed: 2.6]
    - urllib3 [required: <1.23,>=1.21.1, installed: 1.22]
  - requests-toolbelt [required: Any, installed: 0.8.0]
    - requests [required: >=2.0.1,<3.0.0, installed: 2.18.4]
      - certifi [required: >=2017.4.17, installed: 2018.4.16]
      - chardet [required: >=3.0.2,<3.1.0, installed: 3.0.4]
      - idna [required: >=2.5,<2.7, installed: 2.6]
      - urllib3 [required: <1.23,>=1.21.1, installed: 1.22]
调试运行方式:
# 调试运行 hrun
$ pipenv run python main-debug.py hrun -h+
# 调试运行 locusts
$ pipenv run python main-debug.py locusts -h
没装locust可以安装下
pip install locustio
